How to Add New Fingerprint for Sign-In in Windows 11?
2 Unique ways to add new fingerprints for signin in windows 11 pc!
Windows 11 provides a convenient and secure way to sign in using Windows Hello, a feature that allows biometric authentication methods such as fingerprints. If you want to add another fingerprint or add new fingerprint to your device for quick and secure access, this guide will walk you through each step. Whether you’re adding a second fingerprint for yourself or setting up access for another trusted user, these methods make it easy to customize your Windows 11 sign-in options.
Why Add Another Fingerprint?
Adding multiple fingerprints offers flexibility and convenience, allowing users to sign in using either hand or different fingers. This can be especially useful if you frequently switch hands or if you want to provide access to a trusted family member or colleague without needing to share passwords.
Method 1: Using the Settings App
The Settings app in Windows 11 provides a straightforward way to manage your fingerprints. Here’s how to add another fingerprint:
- Open Settings by pressing Winkey + I.
- Navigate to Accounts on the left sidebar.
- Click on Sign-in options.
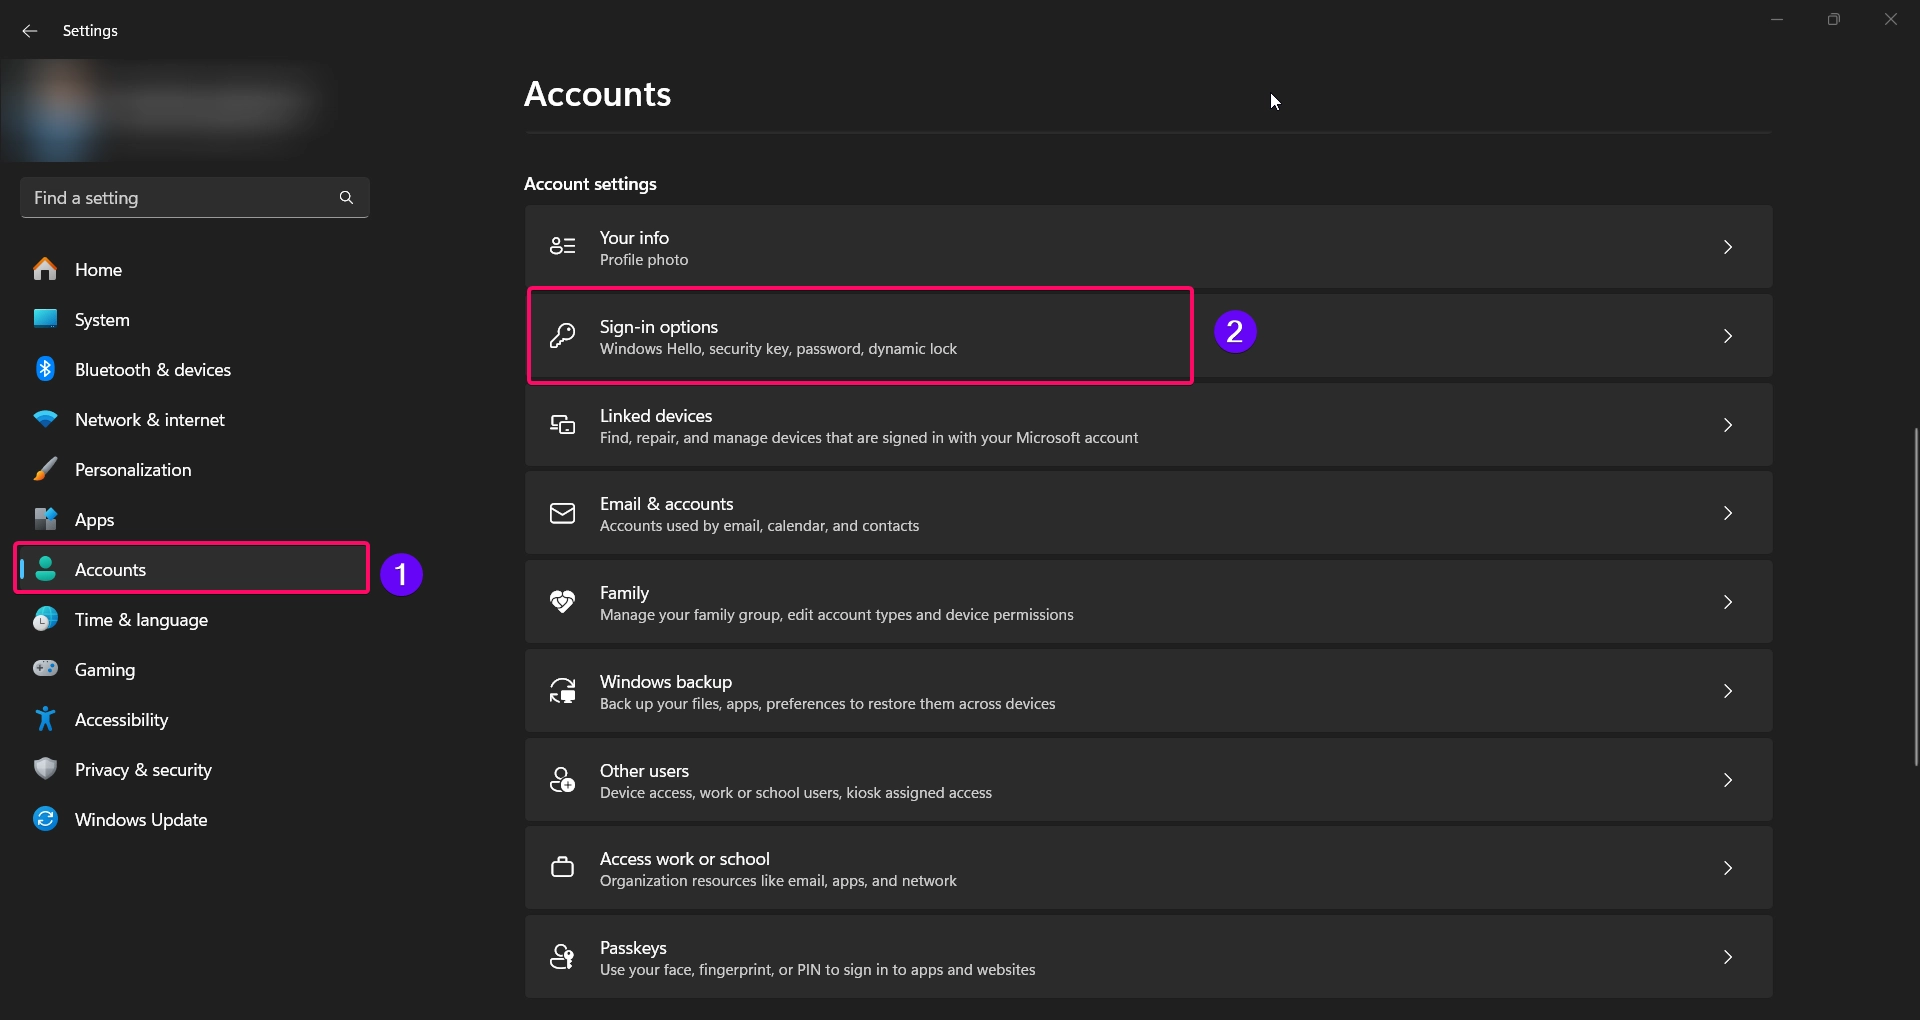
- Under Fingerprint recognition (Windows Hello), click on Add another to begin the setup.
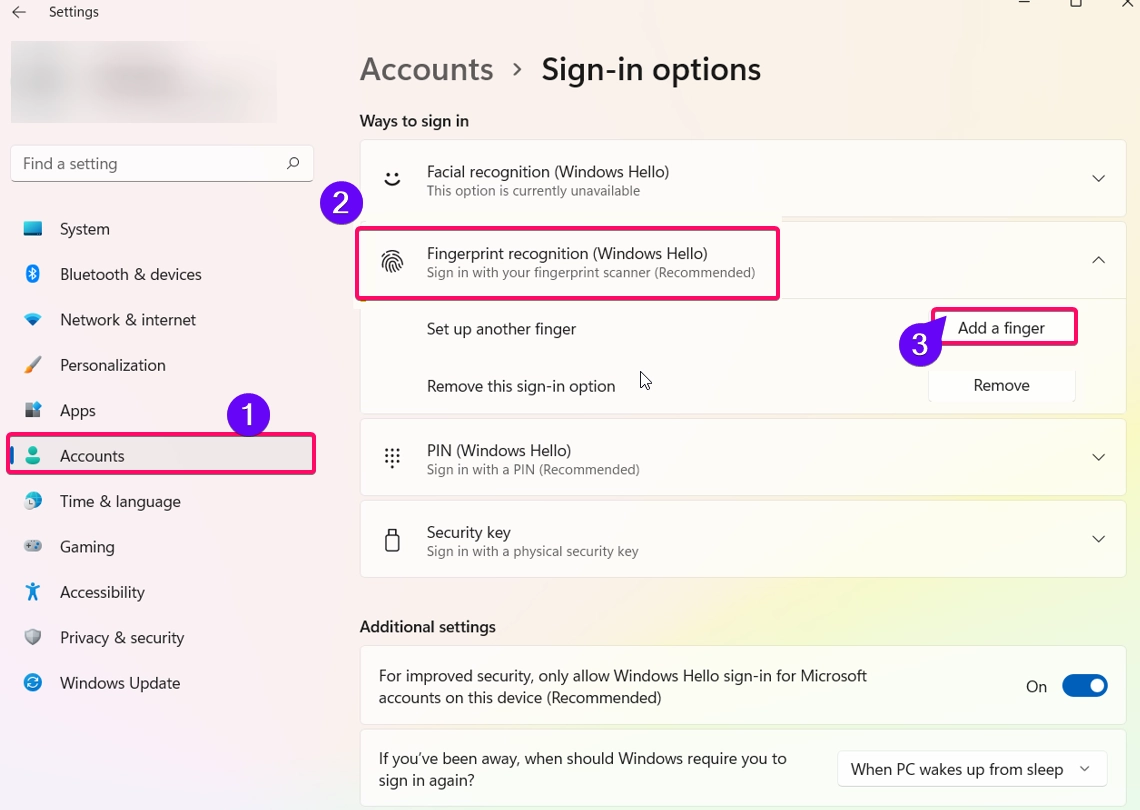
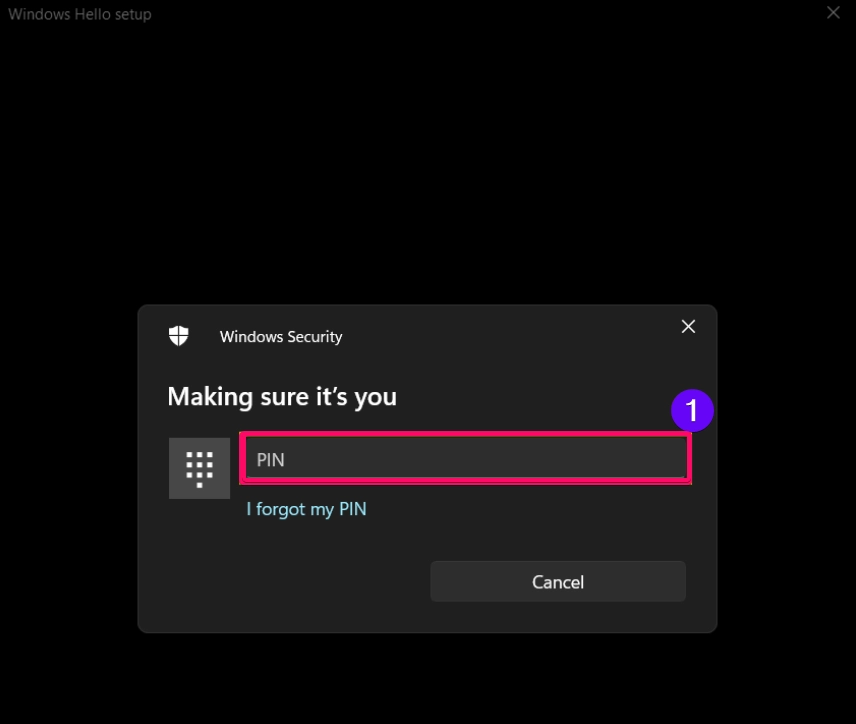
- Enter your PIN if prompted for security verification.
- Follow the on-screen instructions to scan your new fingerprint. You may need to touch the fingerprint sensor multiple times to ensure a complete scan.
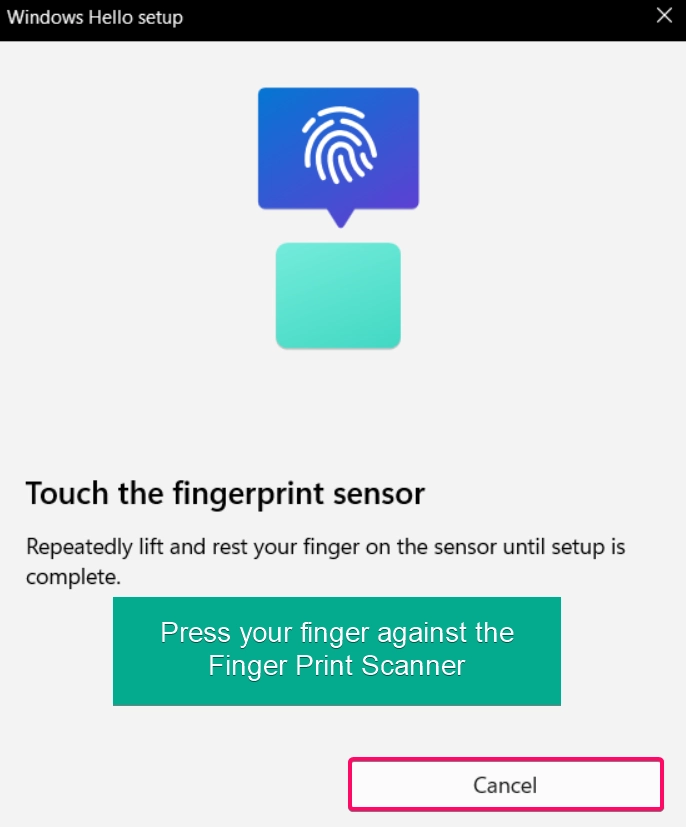
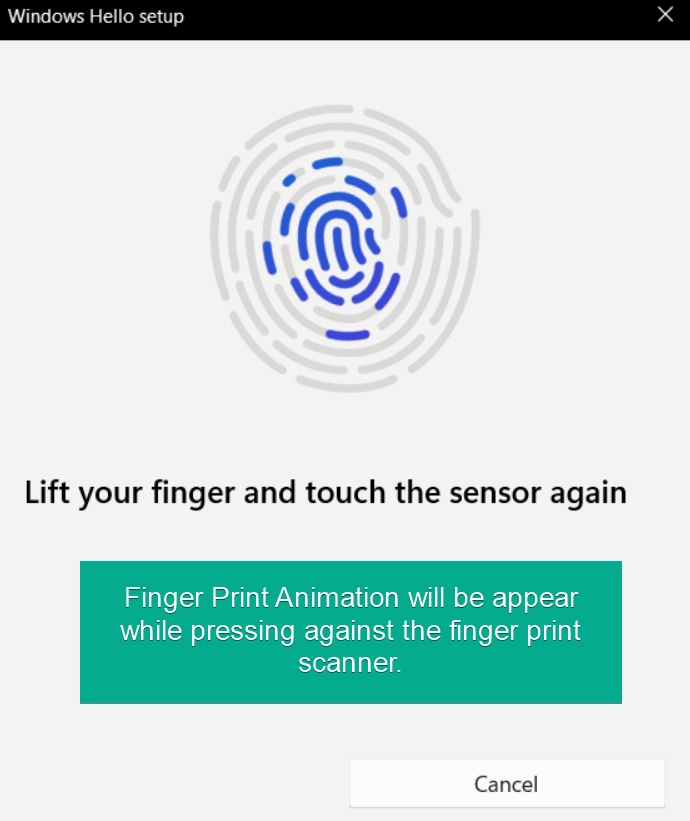
- Once completed, your new fingerprint will be saved, allowing you to use it for sign-in.
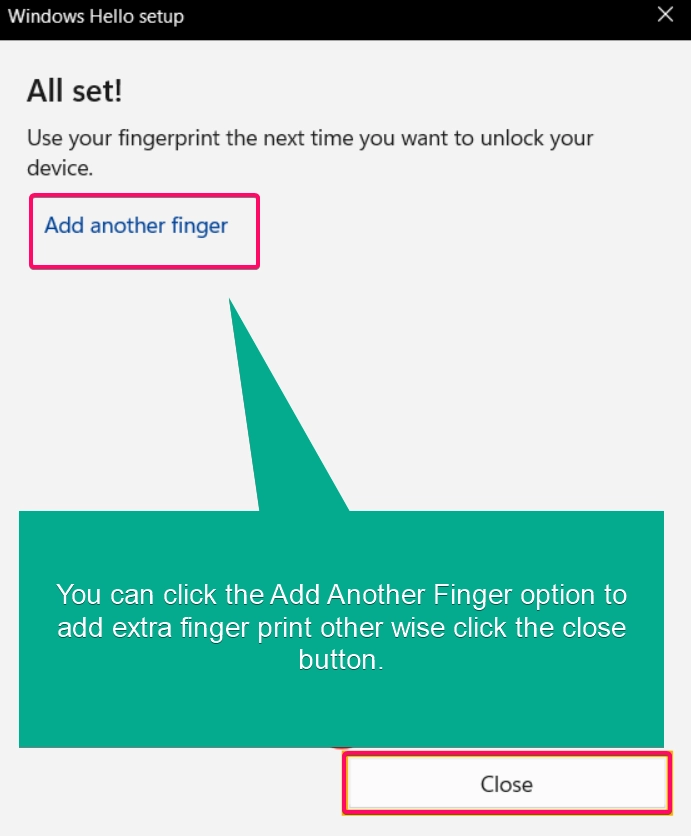
Tip: If your device supports multiple fingerprints, you can add fingerprints for different fingers or even for other users on the same device.
Method 2: Using Windows Hello Setup during User Account Creation
If you’re adding a new account and want to set up a fingerprint for that user, Windows Hello allows for a fingerprint setup during the account creation process:
- Go to Settings > Accounts > Other users.
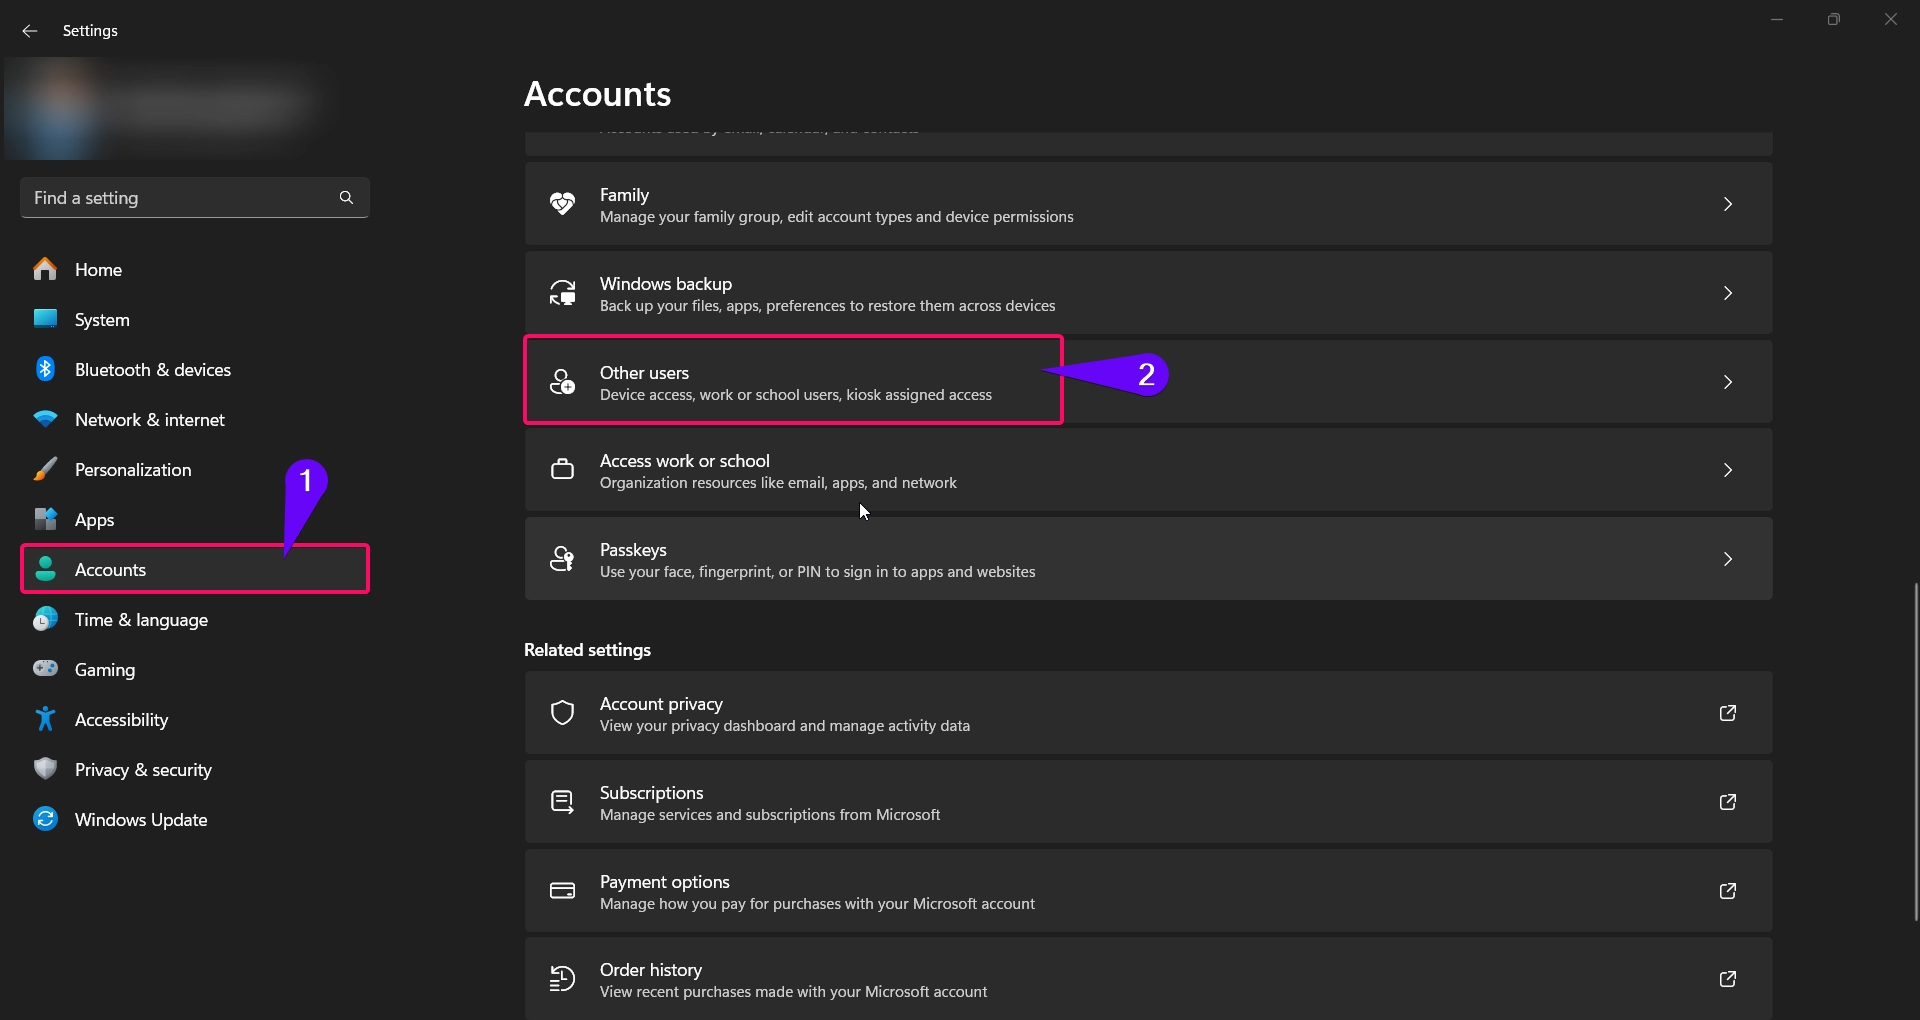
- Under Other users, click Add account to create a new user.

- After creating the account, log in with the new user’s credentials.
- Go to Settings > Accounts > Sign-in options and select Fingerprint recognition (Windows Hello).
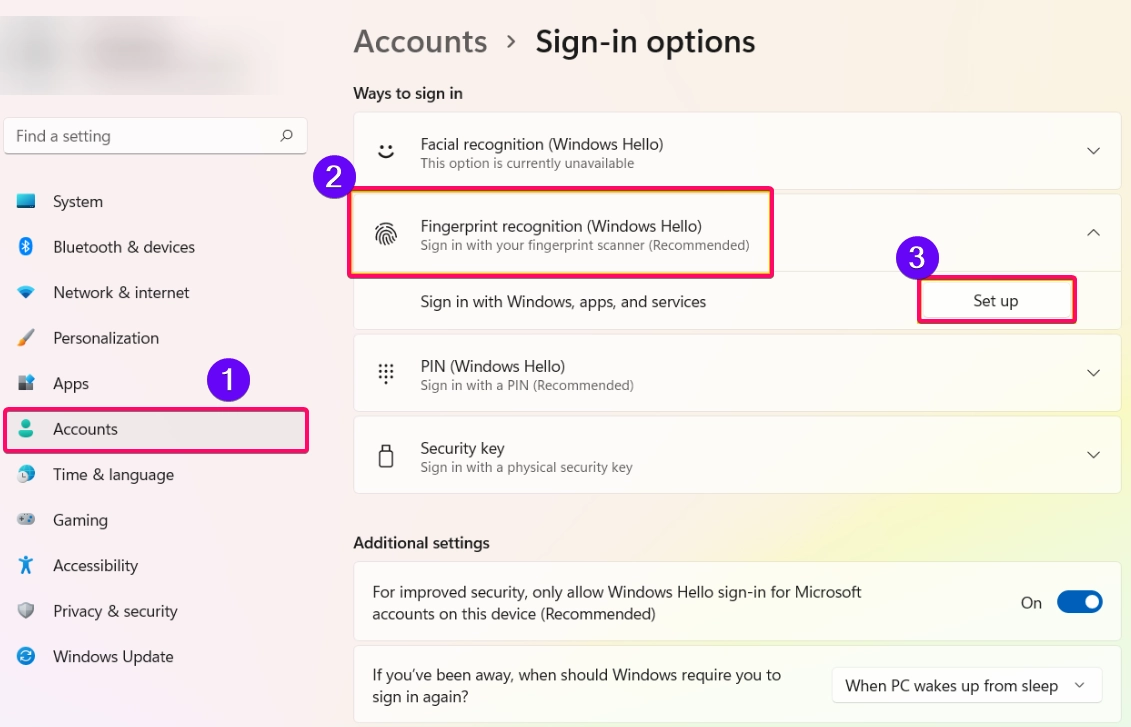
- Follow the prompts to set up the fingerprint for the new user, just as you would for the main account.
This approach allows each user to have unique fingerprints for personalized access, ideal for shared devices.
Method 3: Using Device Manager (Advanced Method)
For those who encounter issues with the fingerprint sensor or want to troubleshoot the device, you can use Device Manager to verify that your fingerprint sensor is enabled:
- Open Device Manager by right-clicking the Start menu and selecting Device Manager.
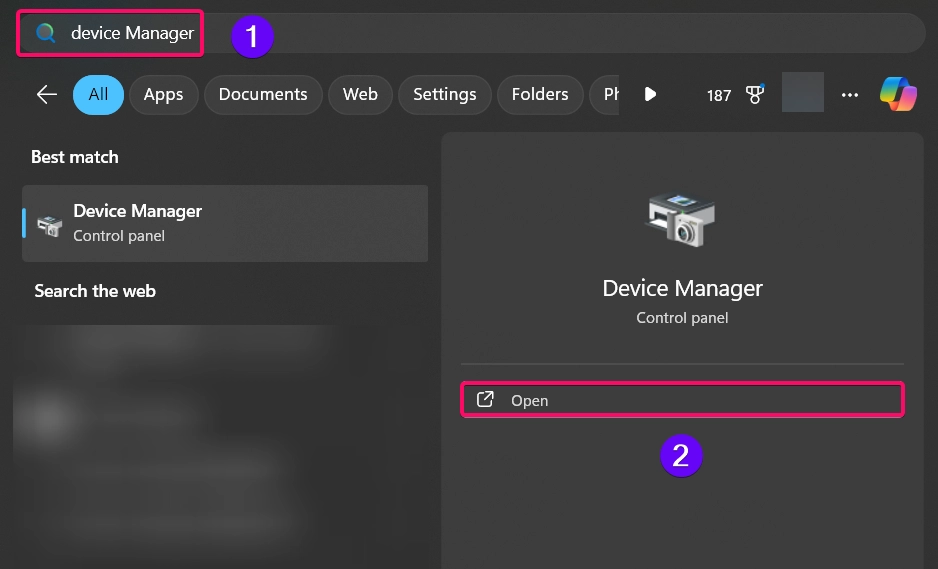
- Locate the Biometric devices section and expand it.
- Right-click on your fingerprint sensor (often labeled as Fingerprint Sensor or by manufacturer name).
- Ensure that the device is enabled. If it’s disabled, select Enable device to reactivate it.
- After confirming the sensor is active, return to Settings > Accounts > Sign-in options and follow the steps in Method 1 to add a fingerprint.
This method is helpful for advanced users who need to ensure that their fingerprint sensor is functioning correctly.
Troubleshooting Tips
If you experience issues while adding another fingerprint, here are some common solutions:
- Restart Your Device: A simple restart can resolve temporary glitches with the fingerprint sensor.
- Update Drivers: In Device Manager, right-click on the fingerprint sensor and select Update driver to ensure you have the latest updates.
- Re-enroll Fingerprints: If the issue persists, remove any saved fingerprints and re-enroll them through Settings > Accounts > Sign-in options.
Conclusion
Adding another fingerprint in Windows 11 can enhance security and convenience, especially for multi-user devices or for users who want flexibility in their sign-in options. By following the steps above, you can quickly and easily set up an additional fingerprint using the Settings app or while creating new user accounts. Windows Hello’s fingerprint recognition provides a secure, personalized way to access your device, ensuring that your system is both protected and easy to use.
Questions Asked by Most of the Users:
How many fingerprints can I add on Windows 11?
The number of fingerprints you can add varies by device, but most support up to 10 fingerprints per account.
Why isn’t my fingerprint sensor working?
Ensure the sensor is enabled in Device Manager, or try updating the fingerprint driver. If issues persist, restart your device and check Windows updates.
Can I add fingerprints for multiple users on the same device?
Yes, each user can add their own fingerprints in Sign-in options under their account settings.
Will adding multiple fingerprints affect device performance?
No, adding multiple fingerprints does not impact the performance of your Windows 11 device.
Can I remove a fingerprint if I no longer want it?
Yes, go to Settings > Accounts > Sign-in options and select Remove next to the fingerprint you want to delete.
