How to View Account Details in Windows 11?
What are the Multiple Methods to View Account Details in Windows 11?
Knowing how to view account details in Windows 11 is helpful for managing your user profile, checking permissions, and ensuring you have the correct account type. Windows 11 provides multiple ways to access account details, including your account type, permissions, email, and security information. This guide covers all the methods to view your account details in Windows 11, allowing you to manage and review your profile as needed.
Why View Account Details?
Viewing your account details allows you to confirm if you’re using an administrator or standard account, check your Microsoft account information, and verify security settings. This information is essential for troubleshooting, installing apps, and customizing permissions.
Method 1: Using the Settings App
The Settings app in Windows 11 provides a straightforward way to view your account details:
- Open Settings by pressing Winkey + I.
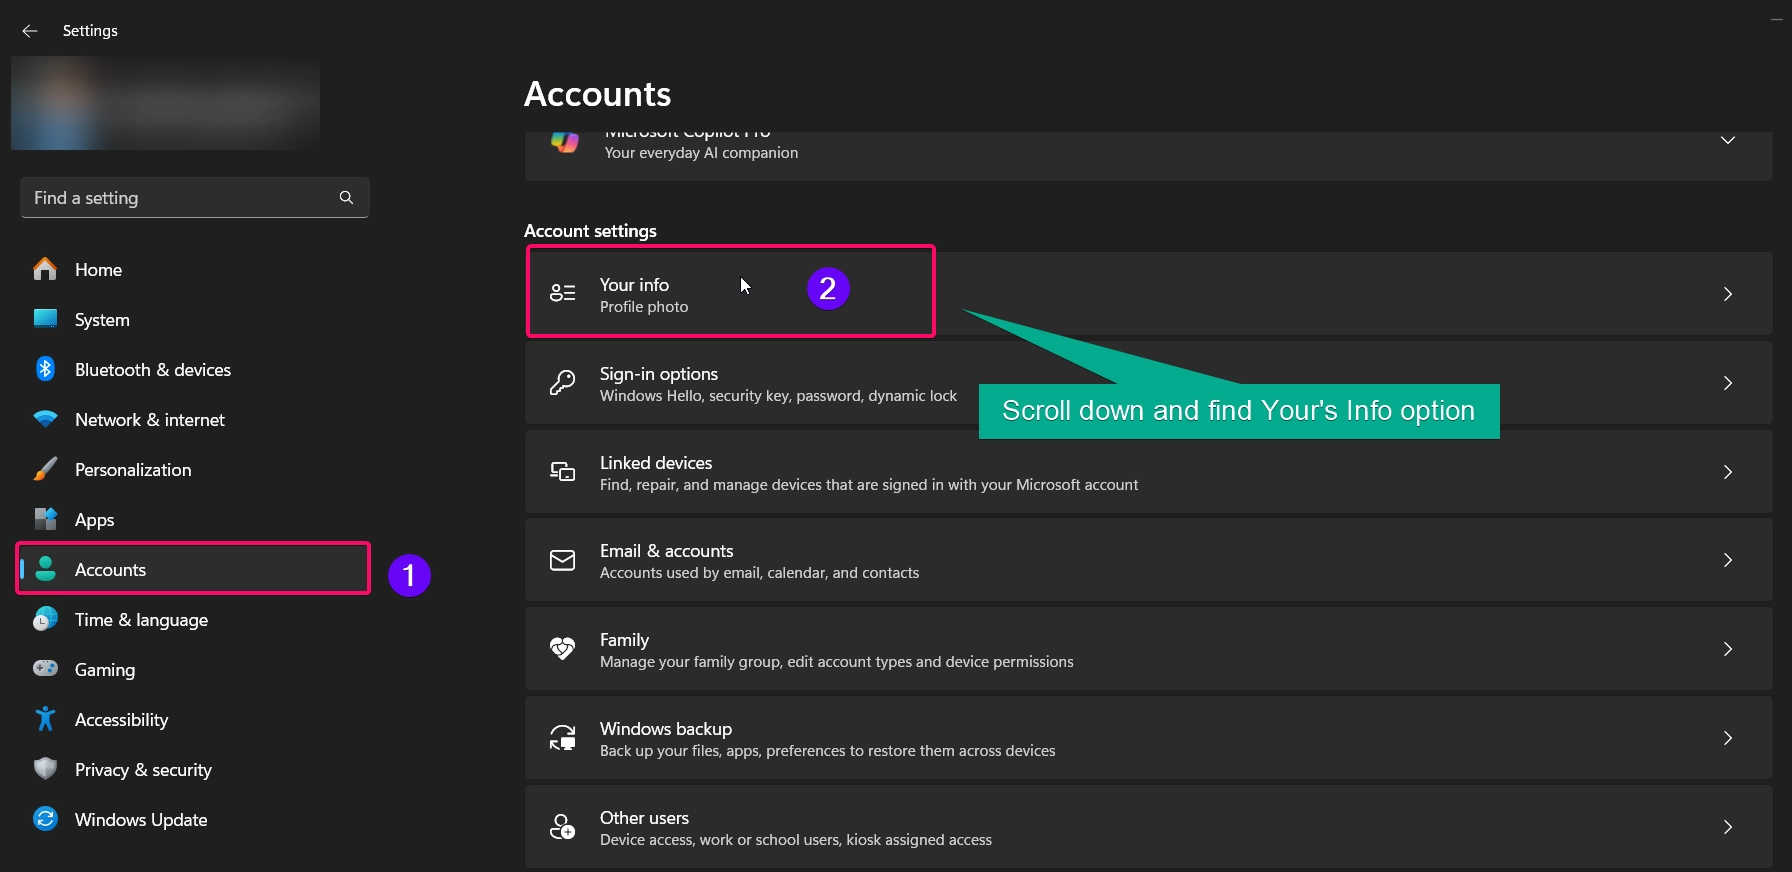
- Click on Accounts in the left sidebar.
- Under Your info, you’ll see your account name, profile picture, and account type.
- If you’re using a Microsoft account, you’ll see details such as your email address, sync status, and other connected devices.
- For more detailed information, select Email & accounts to view any linked accounts associated with your Microsoft account.
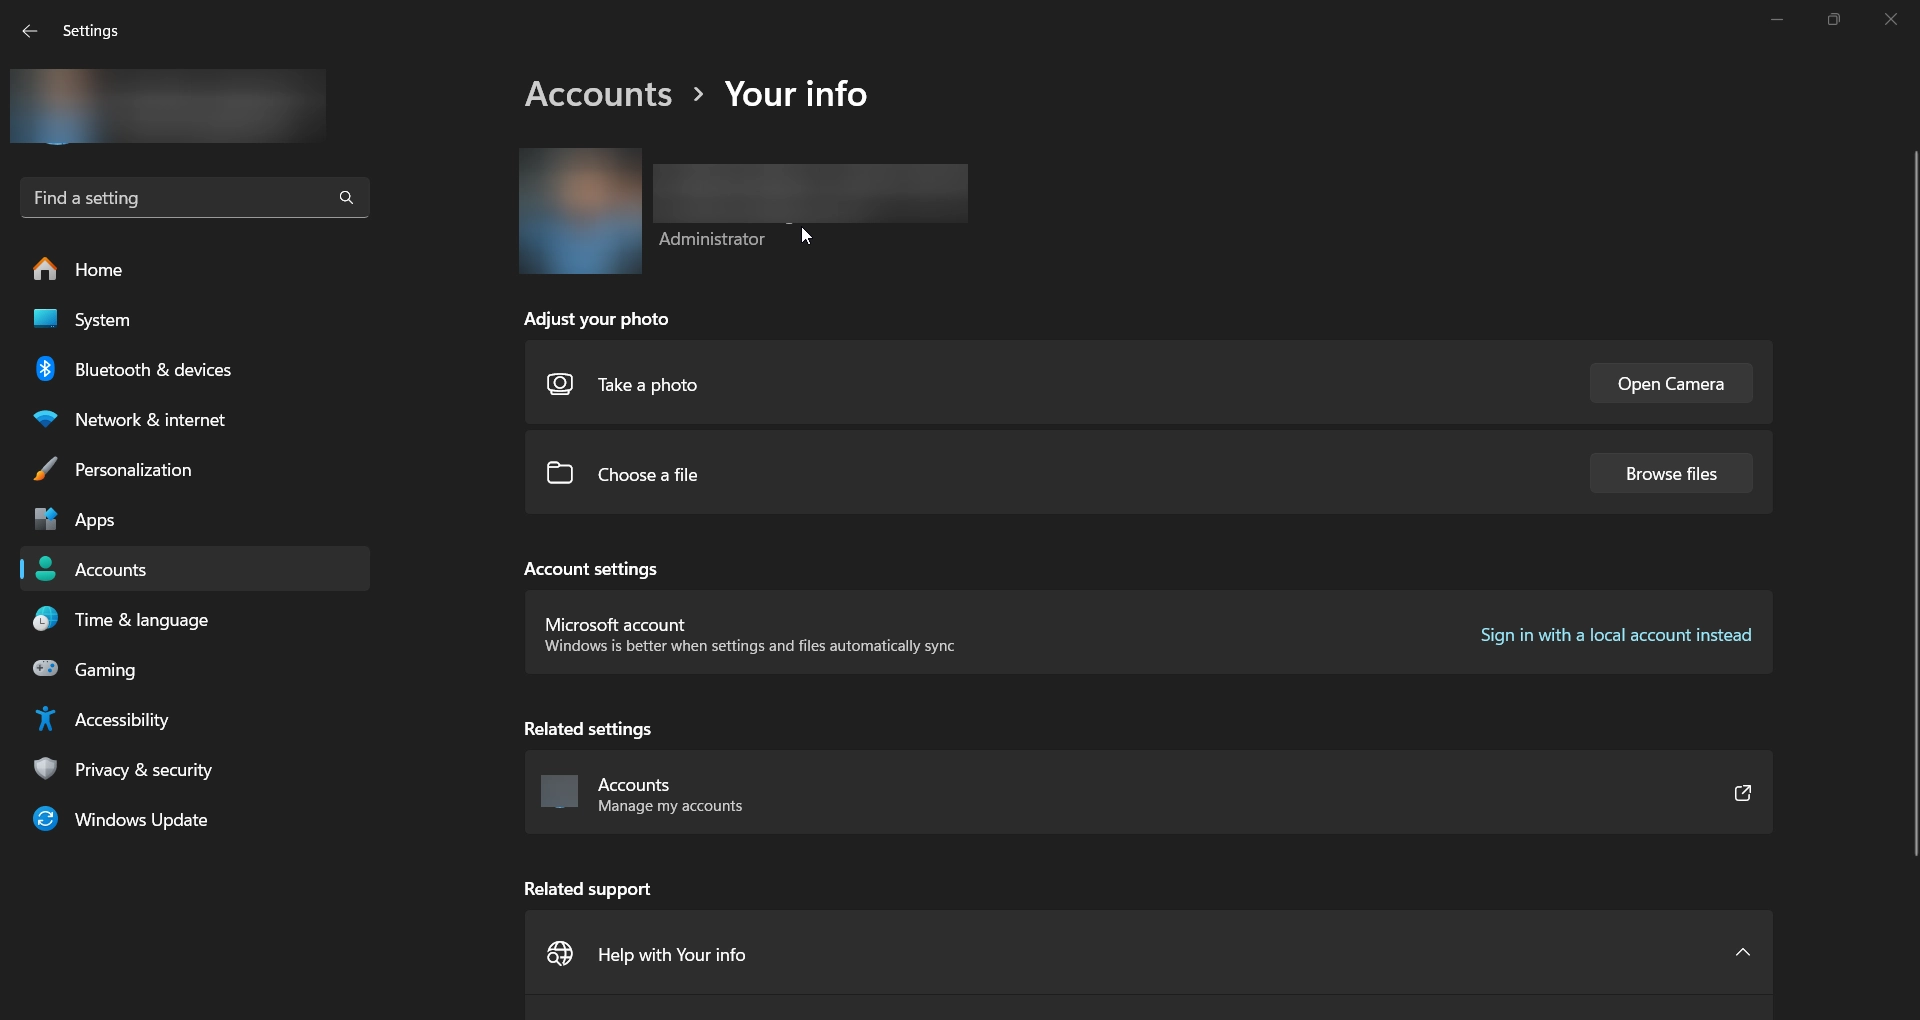
The Your info section in Settings provides a comprehensive overview of your account details and permissions, making it the quickest way to access this information.
Method 2: Using Control Panel
If you prefer the Control Panel for viewing account details, this method offers an alternative approach:
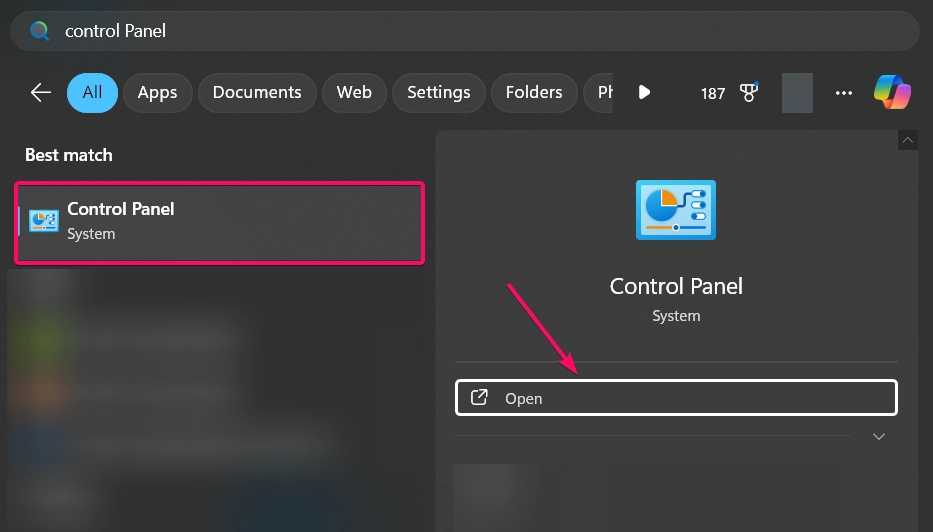
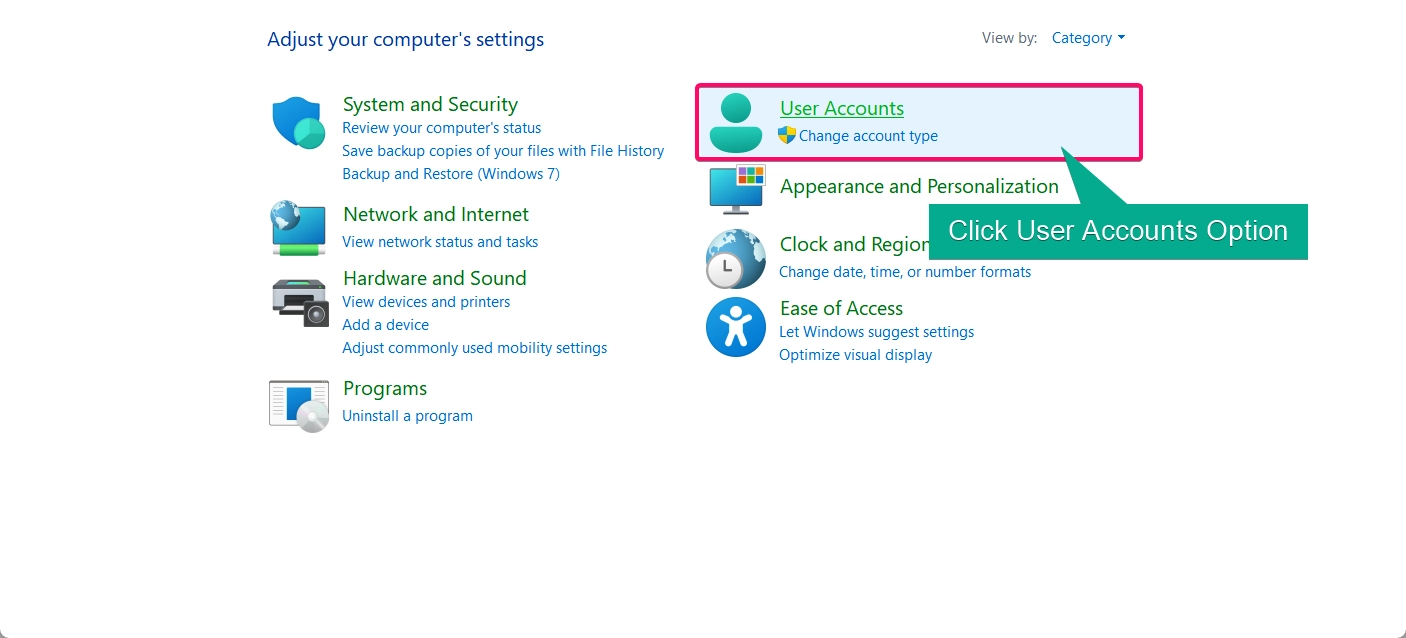
- Open Control Panel by typing “Control Panel” in the search bar and selecting it.
- Go to User Accounts.
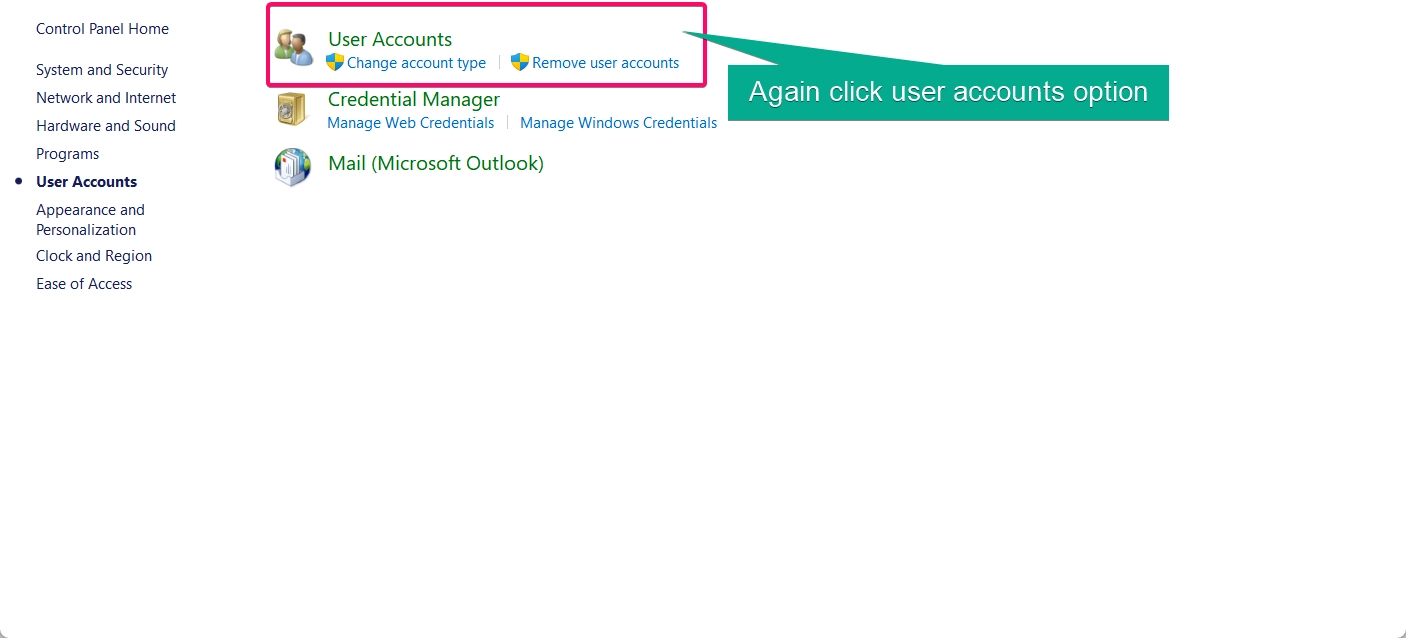
- Click on User Accounts again to see your account name, account type (Administrator or Standard), and any Microsoft account details if linked.
- For additional details, select Manage another account to see information about other accounts on your device.
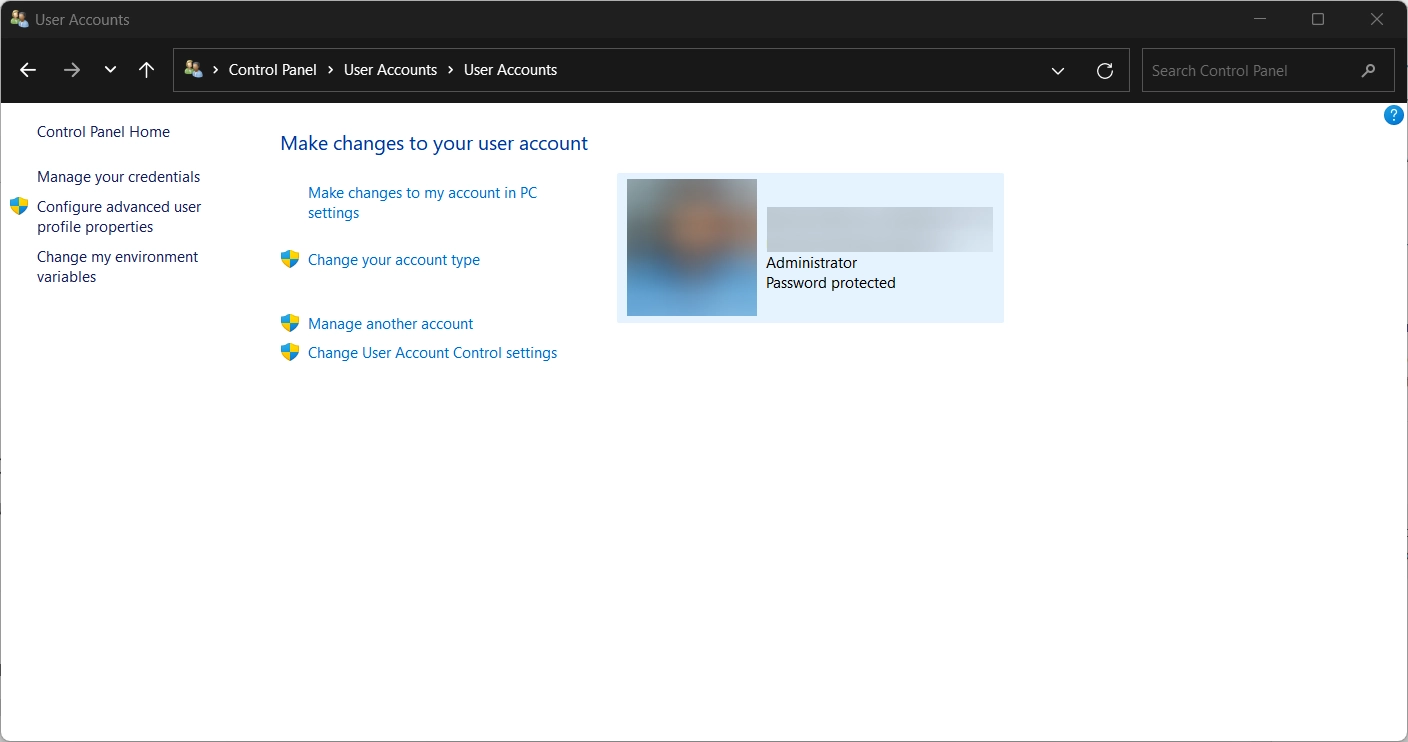
The Control Panel offers basic account information and is especially useful if you’re managing multiple accounts on one device.
Method 3: Using Command Prompt
For users who prefer command-line tools, Command Prompt allows you to retrieve account details with simple commands:
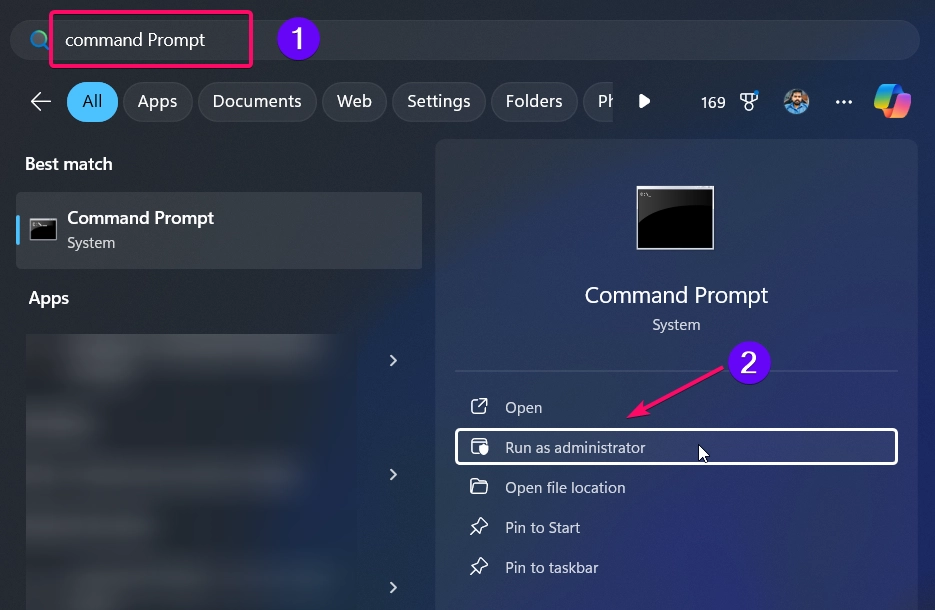
- Open Command Prompt as Administrator by typing “cmd” in the search bar, right-clicking it, and selecting Run as administrator.
- Type the following command to view account information:
whoami /user
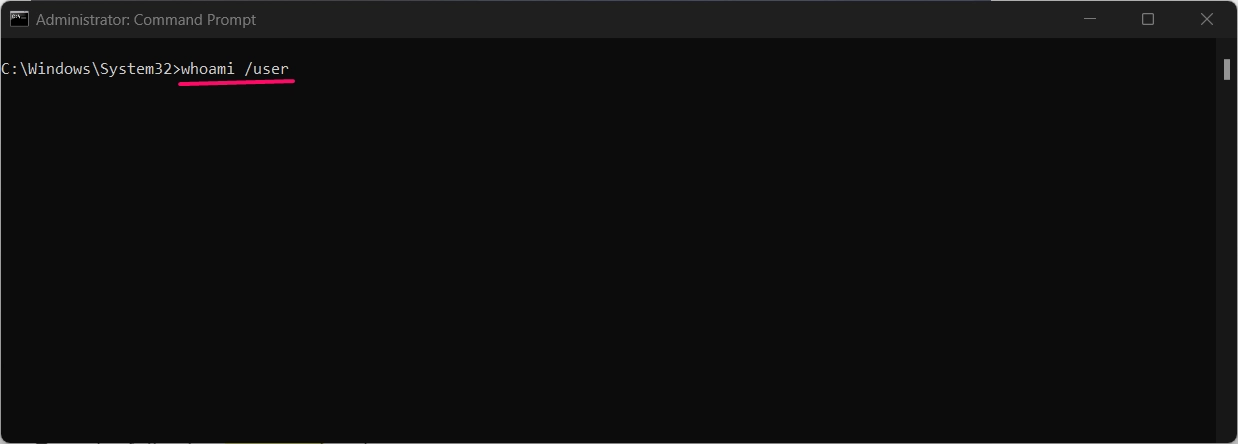
- This command displays your user name and user security identifier (SID).
- For additional details, you can use:
net user YourUsername

- Replace
YourUsernamewith the name of your account. This command will display details such as full name, account type, last logon time, and account settings.
Command Prompt is ideal for users comfortable with commands, offering a quick way to access both basic and advanced account information.
Method 4: Using PowerShell
PowerShell provides another efficient way to access detailed account information:
- Open PowerShell as Administrator by right-clicking the Start button and selecting Windows Terminal (Admin).
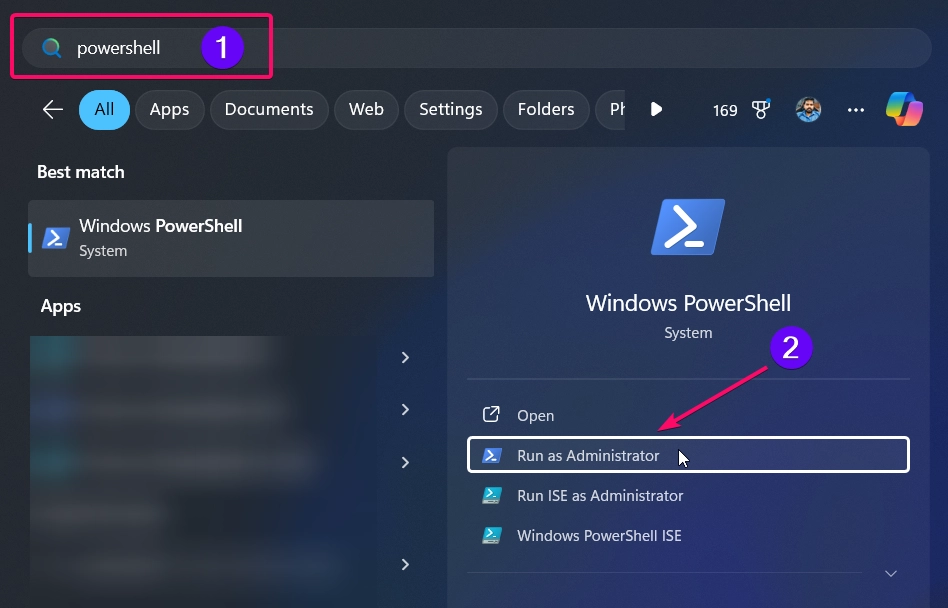
- To view your account details, type:
Get-LocalUser | Select-Object Name, Enabled, LastLogon
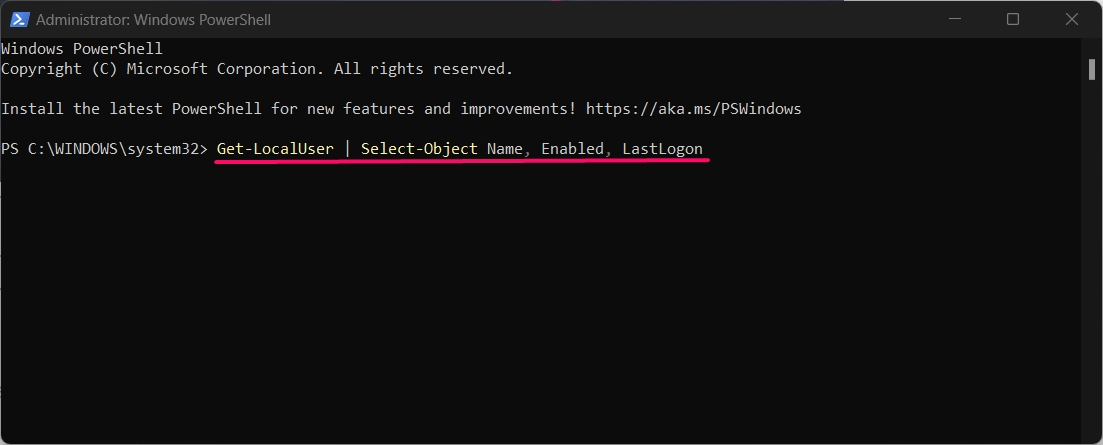
- This command displays account names, whether they’re enabled or disabled, and the last logon time.
- For Microsoft account details, use the command:
Get-LocalUser -Name "YourUsername" | Format-List *
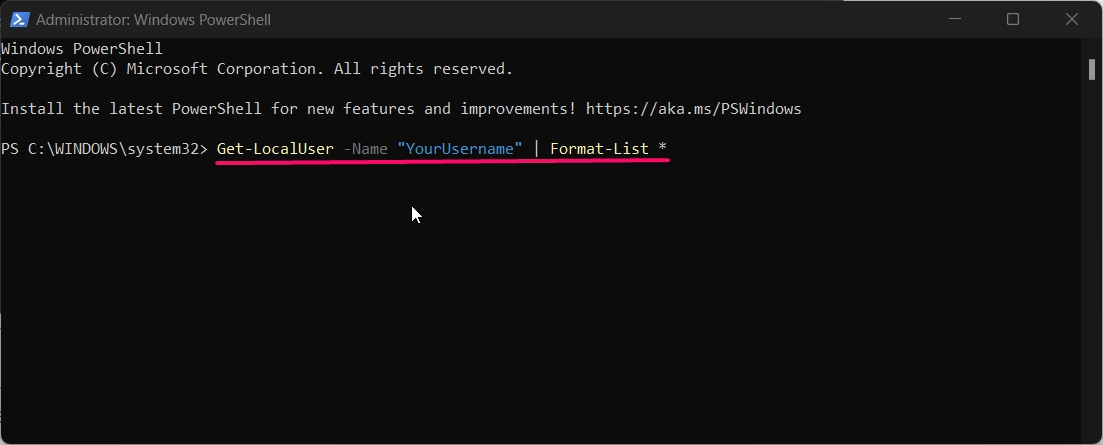
- Replace “YourUsername” with your actual account name to see detailed information like password settings, account type, and more.
PowerShell provides an in-depth look at your account properties, making it useful for advanced users who need comprehensive account details.
Method 5: Using Task Manager
The Task Manager in Windows 11 can also show account details, including your user name and session status:
- Open Task Manager by pressing Ctrl + Shift + Esc.
- Go to the Users tab.
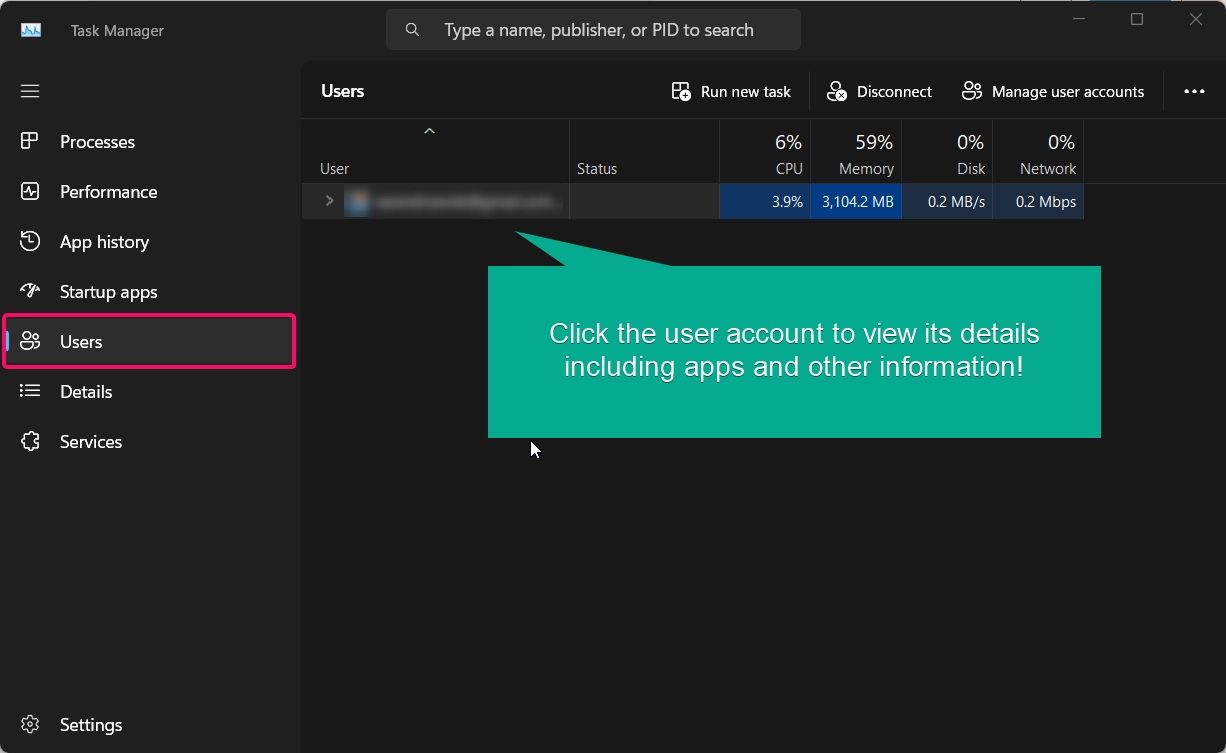
- Here, you’ll see the current account username, session status, and resource usage.
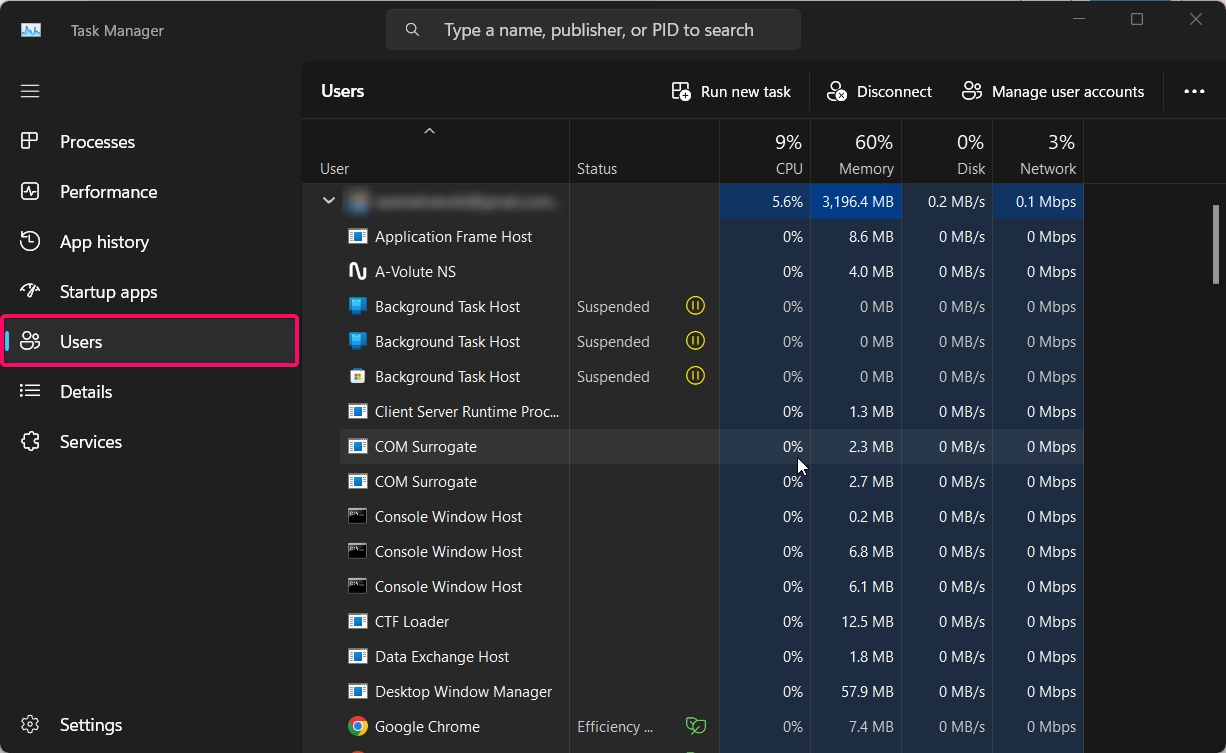
- Right click on your account name and select Properties to see additional details like full name and session type.
Task Manager is a convenient option for quickly viewing session related account information without navigating away from active tasks.
Conclusion
Viewing your account details in Windows 11 is essential for managing permissions, ensuring account security, and troubleshooting access issues. By using one of the above methods Settings, Control Panel, Command Prompt, PowerShell, or Task Manager you can find your account details!.
Frequently Asked Questions:
-
Can I view account details for all users on my PC?
Yes, if you have an administrator account, you can view details for all users through Control Panel or by using PowerShell commands.
-
How do I know if I’m an administrator?
In Settings > Accounts > Your info, you’ll see “Administrator” under your name if you have administrative permissions.
-
Can I see Microsoft account settings in Command Prompt?
No, Command Prompt doesn’t display Microsoft account details directly. Use the Settings app for comprehensive information.
-
What’s the difference between Command Prompt and PowerShell for viewing account details?
PowerShell offers more detailed account information, whereas Command Prompt provides basic information quickly.
-
How can I find out when my account was last logged in?
Use the PowerShell command
Get-LocalUser | Select-Object Name, LastLogonto view the last logon time for your account.
Read More:
- How to Add/Remove Common Program Groups from Start Menu in Windows 11?
- How to Add/Remove Android Apps from Your Phone to Start on Windows 11 PC?
- How to Turn On/Off Airplane Mode in Windows 11?
