How to Unlock a Locked Out Account in Windows 11?
Different Methods to Unlock a Locked Out Account in Windows 11!
Getting locked out of your account in Windows 11 can be frustrating, especially if you rely on your device for daily tasks. Fortunately, Windows offers several methods to unlock a locked-out account. This guide provides step by step solutions to regain access, whether caused by forgotten passwords, account lockout policies, or other security restrictions.
Read This: Add A Pin To Your Account In Windows 11
Why Accounts Get Locked Out in Windows 11
Windows 11 includes security policies that help protect your device, such as account lockout policies that temporarily disable an account after multiple failed login attempts. This feature prevents unauthorized access but can also lock you out if you accidentally enter incorrect passwords multiple times.
Method 1: Using the Settings App
The Settings app in Windows 11 provides a straightforward way to manage user accounts and unlock them if lockout policies are applied. Here’s how:
- Open Settings by pressing Winkey + I.
- Go to Accounts and select Sign-in options.
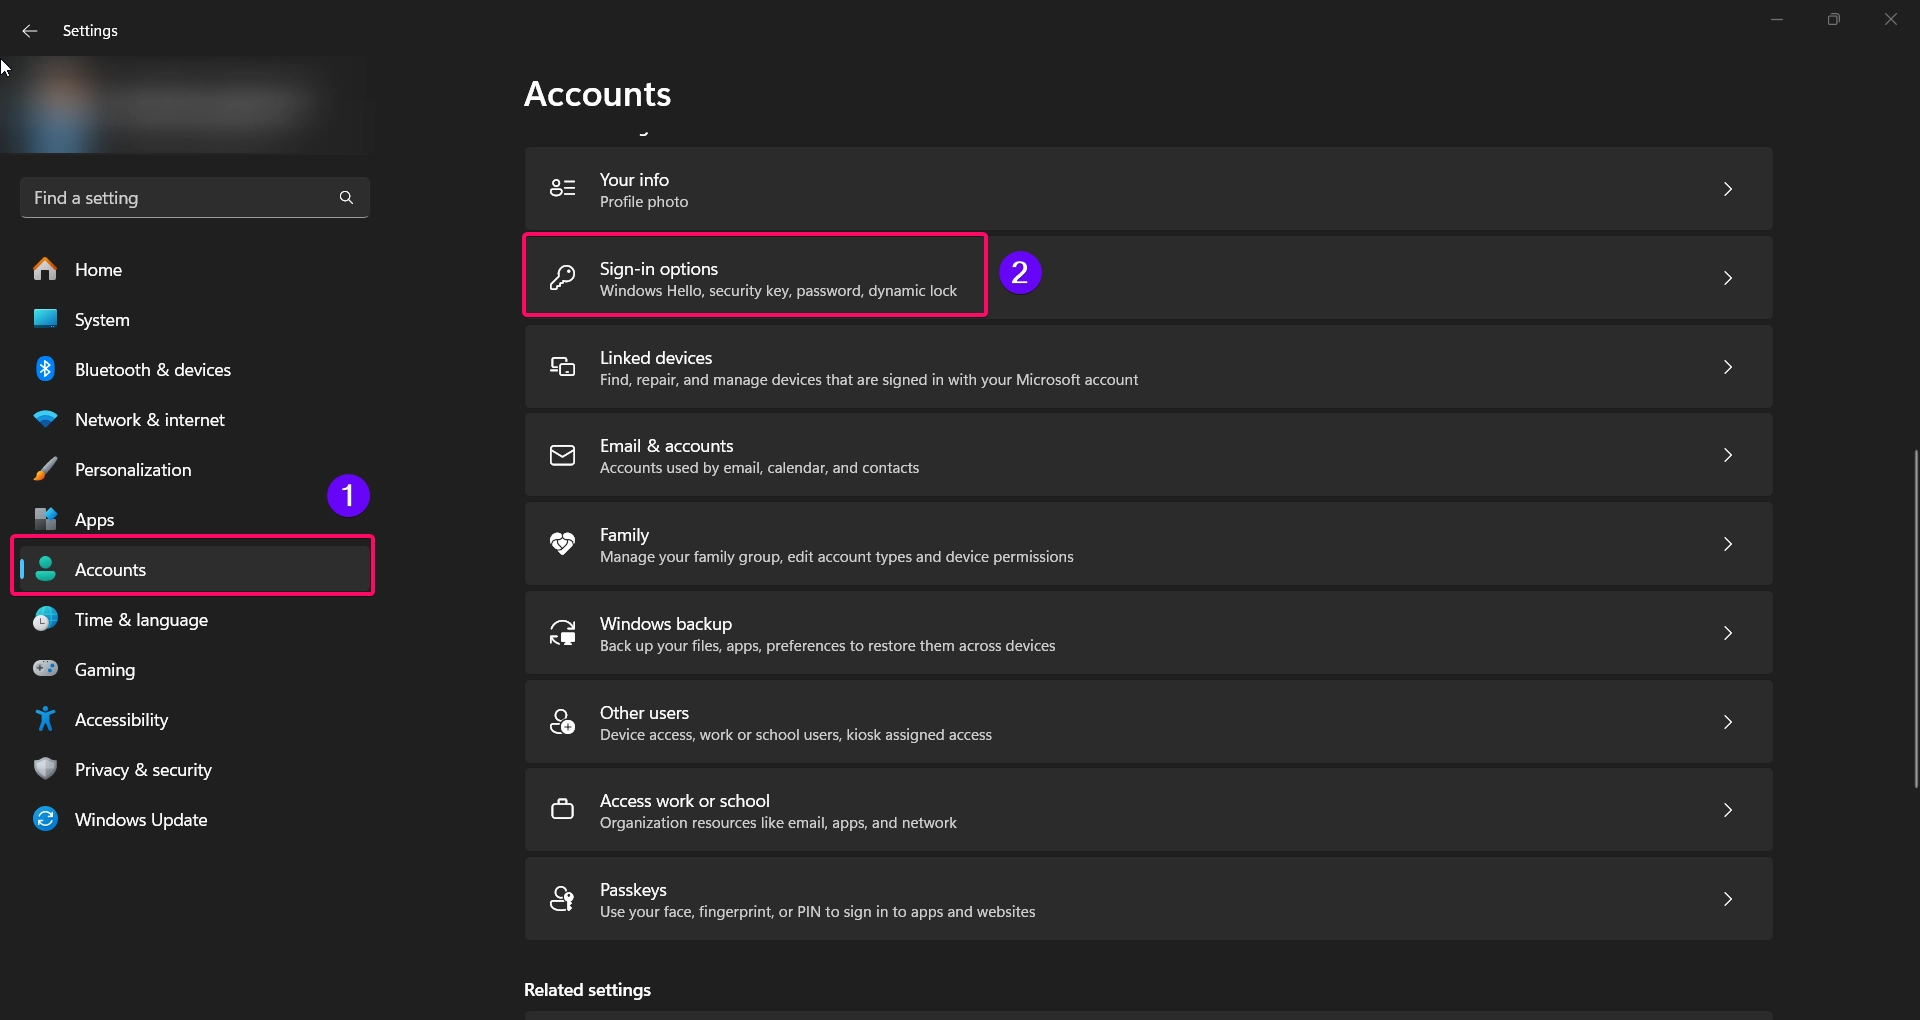
- Under Additional settings, find the section labeled Lockout threshold.
- If this is set to a certain number, such as “5 failed attempts,” wait for the lockout period to pass, or increase the threshold to reduce future lockouts.
- Attempt to sign in again once the lockout timer has ended.
Note: If you don’t see options to adjust account lockout settings, try using Command Prompt or Local Users and Groups as described below.
Method 2: Using Command Prompt
For users familiar with the Command Prompt, this method allows you to unlock the account by resetting the lockout settings:
- Open Command Prompt as Administrator by typing “cmd” in the search bar, right-clicking it, and selecting Run as administrator.
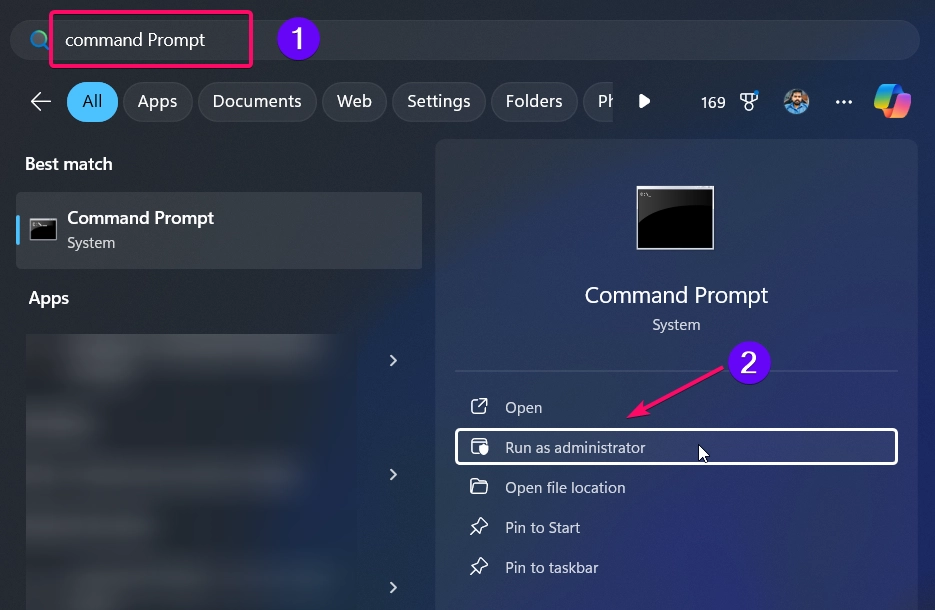
- Enter the following command to reset the lockout counter:
net accounts /lockoutthreshold:0
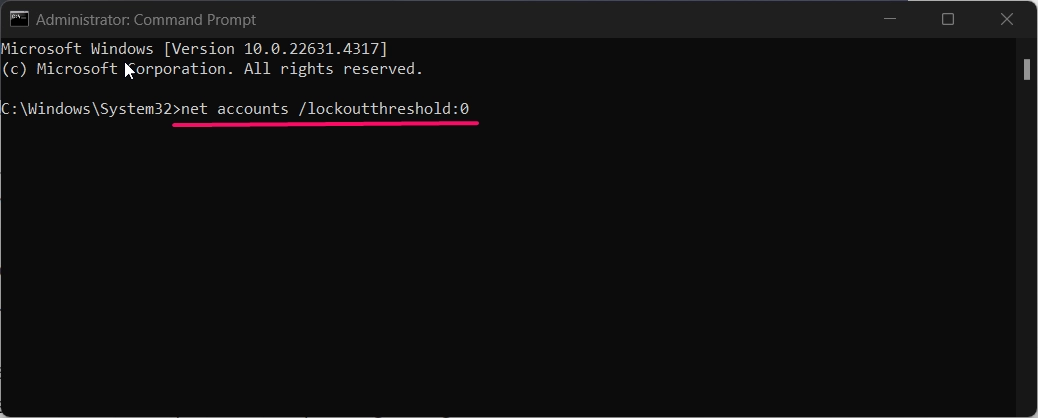
- This command sets the lockout threshold to zero, effectively disabling account lockouts.
- If you need to unlock a specific user, type:
net user username /active:yes
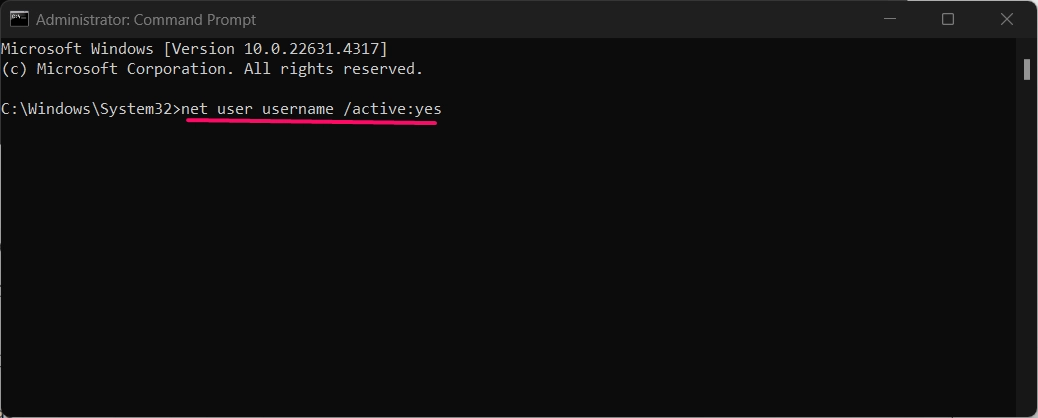
- Replace “username” with the name of the locked account.
- Close Command Prompt and attempt to sign in again.
This method removes lockout restrictions, allowing you to access the account immediately.
Method 3: Using Local Users and Groups
Note: This method is available only in Windows 11 Pro, Enterprise, and Education editions.
The Local Users and Groups tool allows you to unlock specific user accounts and adjust lockout policies:
- Press Winkey + R to open the Run dialog, type
lusrmgr.msc, and press Enter.
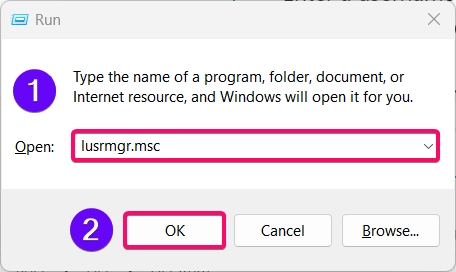
- In the Local Users and Groups window, select Users.
- Locate the locked account, right-click on it, and select Properties.
- In the Properties window, uncheck Account is locked out if available.
- Click Apply and then OK to unlock the account.
This method gives you direct control over account properties, making it a quick solution for unlocking accounts.
Recommended: Add Or Remove Sign Out In Account Picture Menu On Start Menu In Windows 11
Method 4: Using Safe Mode
If your account is locked due to system issues or conflicting settings, Safe Mode can help you access the system and adjust lockout policies:
- Restart your computer and press F8 or Shift + F8 (depending on your device) as it boots to access the Advanced Startup options.
- Select Troubleshoot > Advanced options > Startup Settings and choose Restart.
- After restarting, press 4 or F4 to enable Safe Mode.
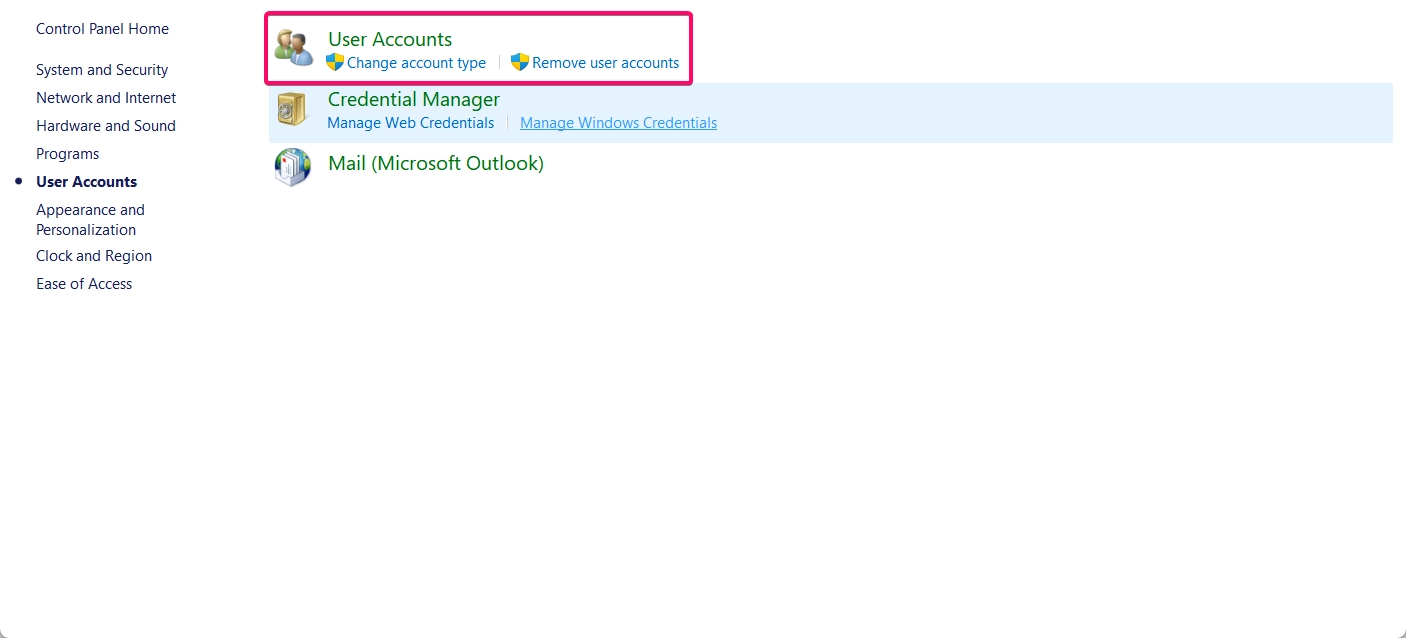
- Once in Safe Mode, go to Control Panel > User Accounts and reset any settings affecting your account lockout.
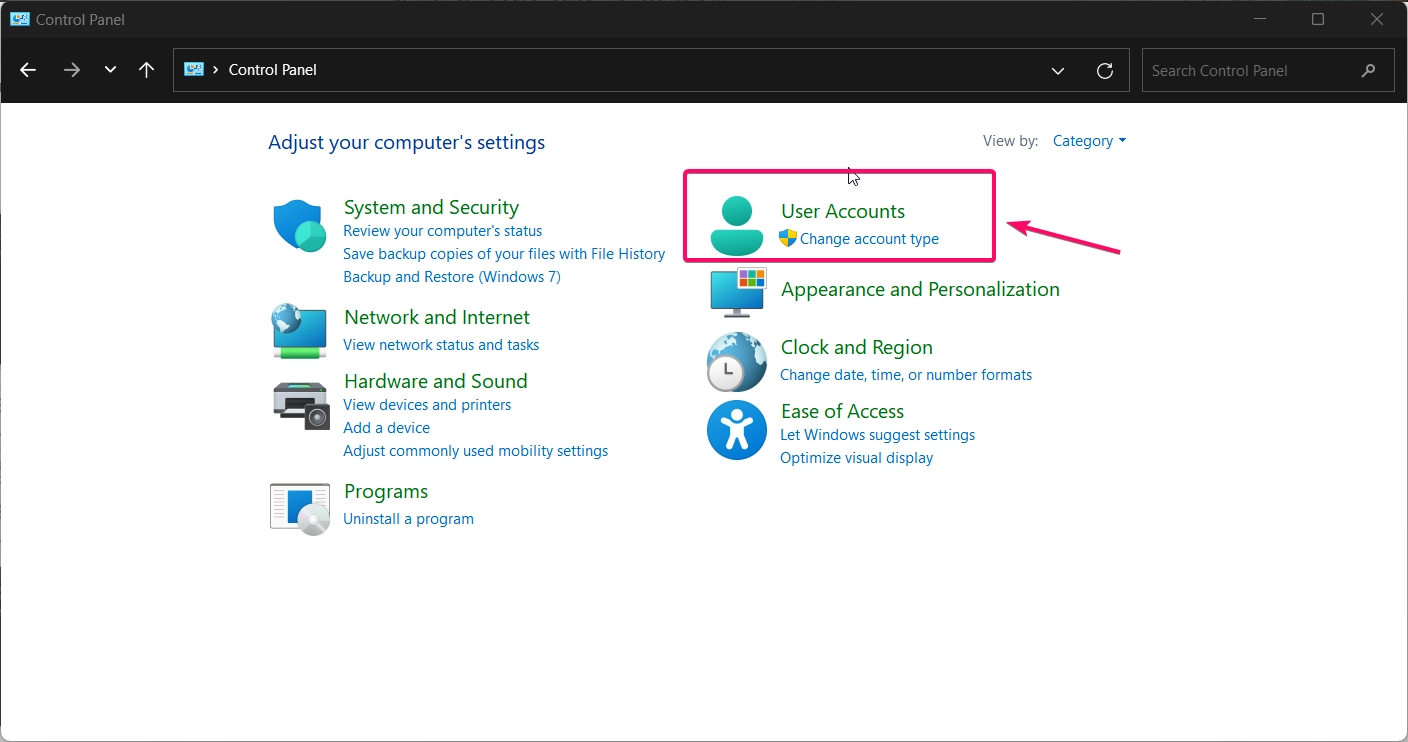
- Restart your device normally and try signing in again.
This method is useful if the lockout is caused by software conflicts or system errors, as Safe Mode limits startup processes.
Method 5: Using a Password Reset Disk
If your account is locked due to a forgotten password and you’ve previously created a password reset disk, you can use it to regain access:
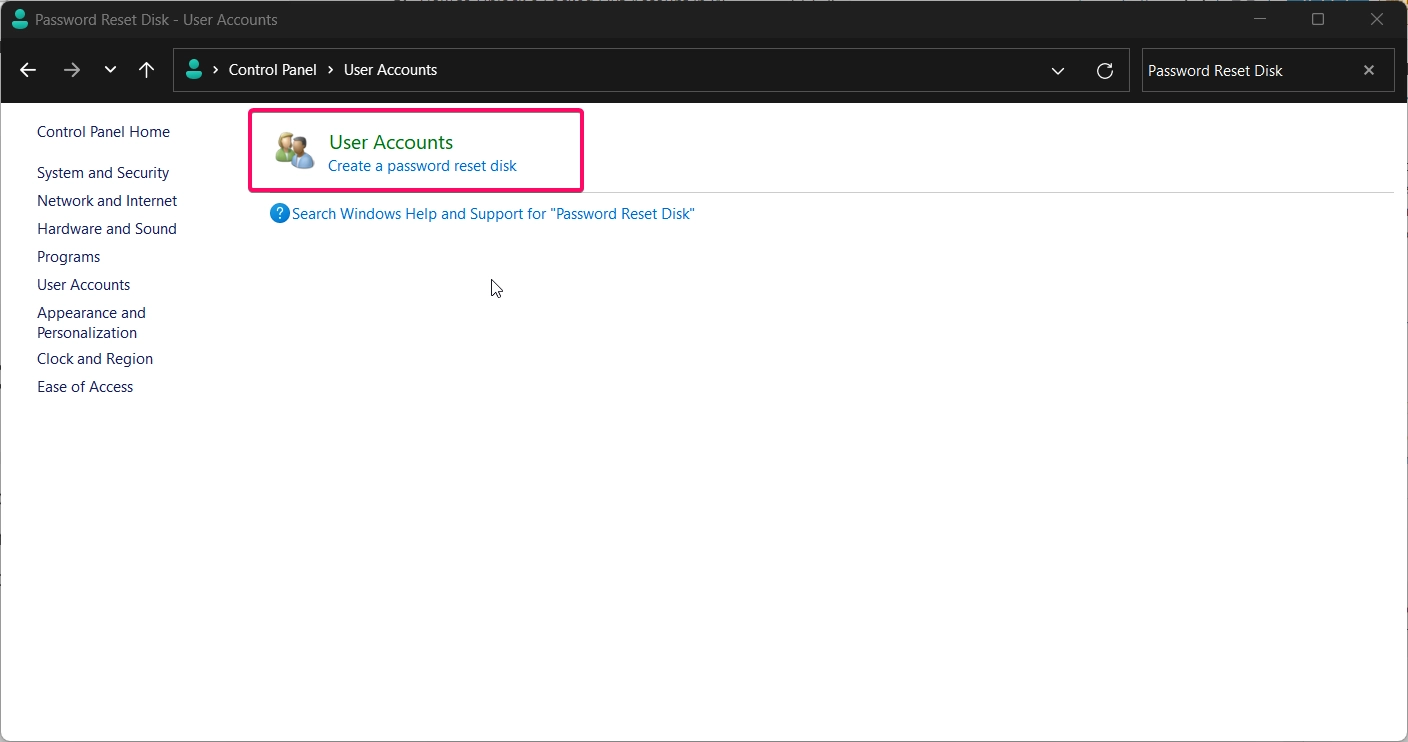
- Insert your password reset disk into the computer.
- On the login screen, enter your password incorrectly. When prompted, select Reset password.
- Follow the on-screen instructions to reset your password using the disk.
- Once the password is reset, sign in with the new password.
Important: A password reset disk only works if it was created before the account was locked out.
See Also: Get A List Of User Profiles And Account Names In Windows 11
Conclusion
Unlocking a locked-out account in Windows 11 is possible through various methods, from using built-in tools like Settings and Command Prompt to Safe Mode and password reset disks. Each of these methods provides a solution for different lockout scenarios, allowing you to quickly regain access to your account and continue working securely.
Frequently ASked Queries:
Can I create a password reset disk after being locked out?
No, a password reset disk must be created before the account is locked out to be usable.
Does Safe Mode unlock all accounts?
Safe Mode doesn’t directly unlock accounts but allows you to modify settings that may be causing the lockout.
What if I forget my password without a password reset disk?
You can use Microsoft’s online account recovery if it’s a Microsoft account. For local accounts, you may need to reset the password through an administrator account.
See Also: Add A Microsoft Account In Windows 11
How long does a lockout last in Windows 11?
The lockout period depends on your system’s account lockout policies, typically lasting a few minutes. You can adjust or disable these policies using Local Users and Groups or Command Prompt.
Can I prevent account lockouts in the future?
Yes, by adjusting the lockout threshold in Settings or disabling lockouts with the net accounts /lockoutthreshold:0 command.
Read More:
- How to Add/Remove Common Program Groups from Start Menu in Windows 11?
- How to Add/Remove Android Apps from Your Phone to Start on Windows 11 PC?
- How to Turn On/Off Airplane Mode in Windows 11?
