How to Get a List of User Profiles and Account Names in Windows 11?
4 Unique methods to get a list of user profiles and account enabled or disbaled in windows 11 pc!
Windows 11 allows you to manage and view all user profiles and account names on your computer. This can be helpful for administrative purposes or simply for managing users on shared devices. In this tutorial, we’ll cover several ways to retrieve a list of user profiles and account names, ensuring you can find the method that suits you best.
Check Out: Change The Name Of The User Profile Folder In Windows 11
Why View User Profiles and Account Names?
Knowing the user profiles and account names on your computer provides clarity on who has access to the system. This is especially useful in shared or family environments, where different users may have their own settings and preferences.
Method 1: Using Command Prompt
The Command Prompt provides a quick and straightforward way to view all user accounts on your system. Here’s how:
- Open Command Prompt as Administrator by typing “cmd” in the search bar, right-clicking it, and selecting Run as administrator.
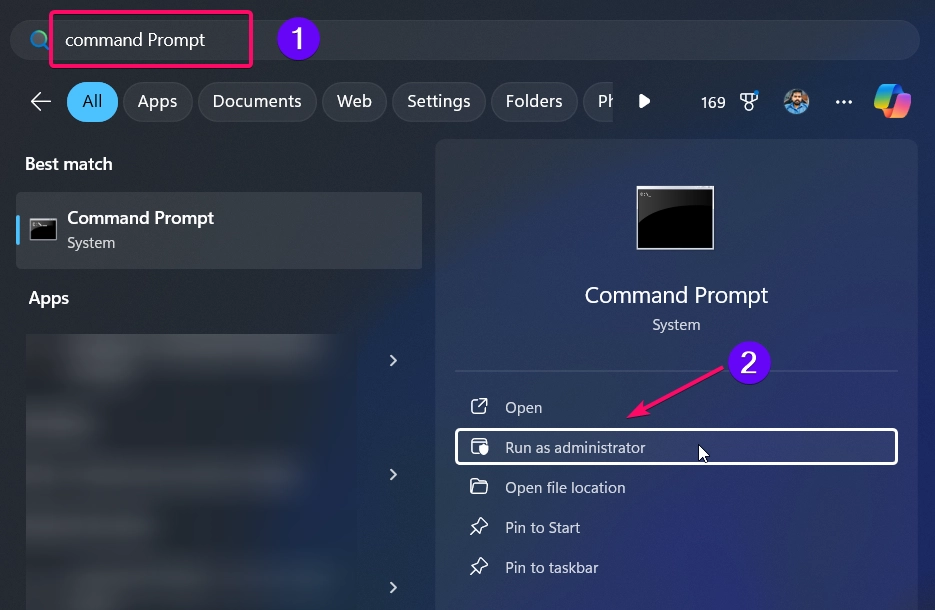
- To list all user accounts, type the following command:
net user
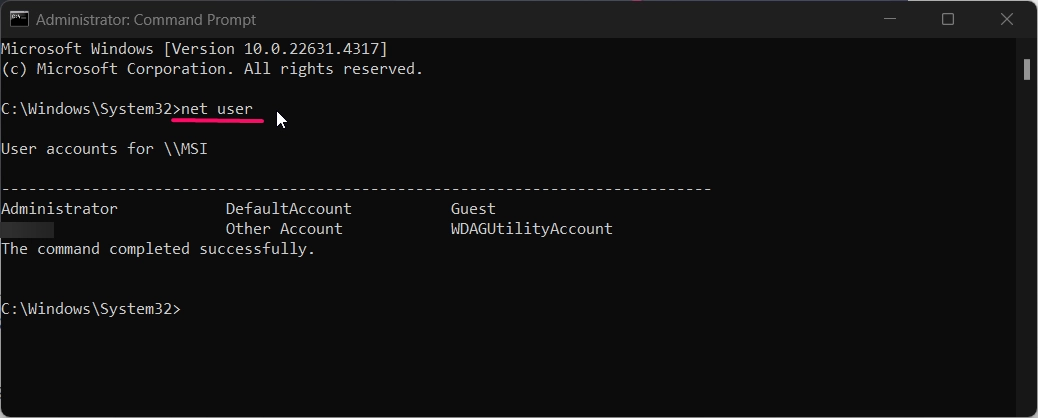
- Press Enter, and you’ll see a list of all user accounts on your device.
This method provides a basic overview of account names without extra details about each profile.
Method 2: Using PowerShell
For more detailed information about user profiles, PowerShell is a powerful alternative:
- Open PowerShell as Administrator by right-clicking the Start menu and selecting Windows Terminal (Admin).
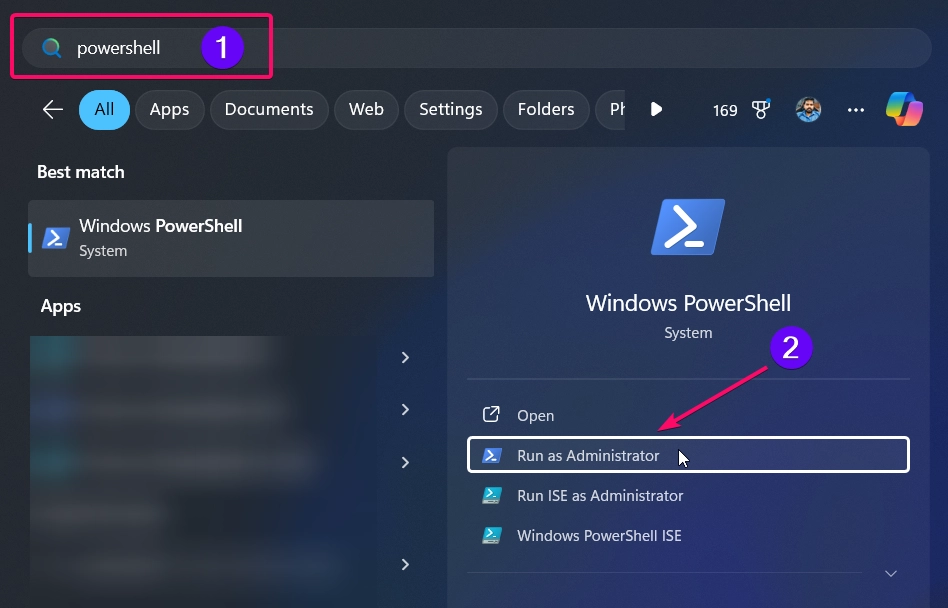
- Enter the following command to list all user profiles:
Get-WmiObject -Class Win32_UserProfile | Select-Object LocalPath
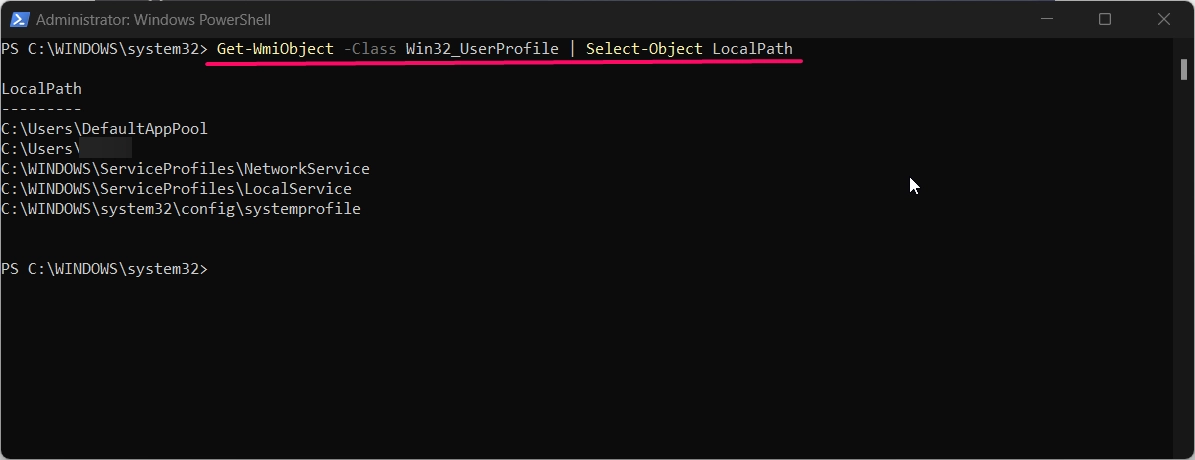
- Press Enter, and PowerShell will display a list of user profile paths, showing where each user profile is stored on your computer.
Tip: For additional details, use the following command:
Get-LocalUser
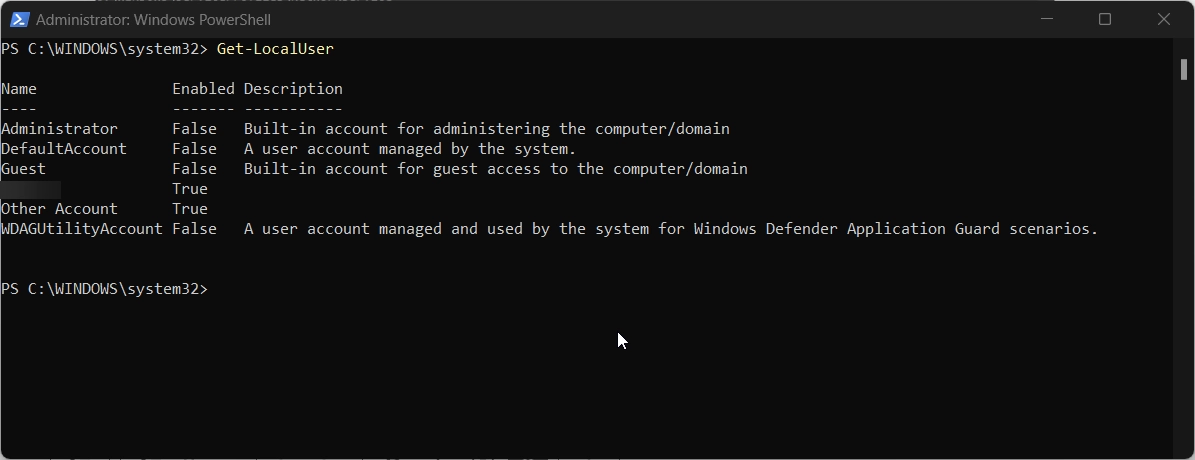
This command will show usernames along with account properties like Enabled or Disabled status.
Method 3: Using Local Users and Groups
Note: This method is available only on Windows 11 Pro, Enterprise, and Education editions.
The Local Users and Groups tool is a graphical interface for viewing and managing user accounts. Here’s how to access it:
See Also: Delete User Profile Of An Account In Windows 11
- Press Winkey + R to open the Run dialog, type
lusrmgr.msc, and press Enter.
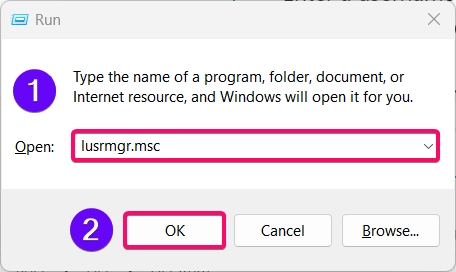
- In the Local Users and Groups window, select Users in the left panel.
- You’ll see a list of all user accounts on your device, including built-in and guest accounts.
This method is useful if you prefer a visual approach, allowing you to view account details and manage user properties directly.
Method 4: Using the Settings App
The Settings app in Windows 11 also provides information about user profiles:
- Open Settings by pressing Winkey + I.
- Go to Accounts on the left sidebar.
- Select Other Users to see a list of accounts, including guest and family member accounts.
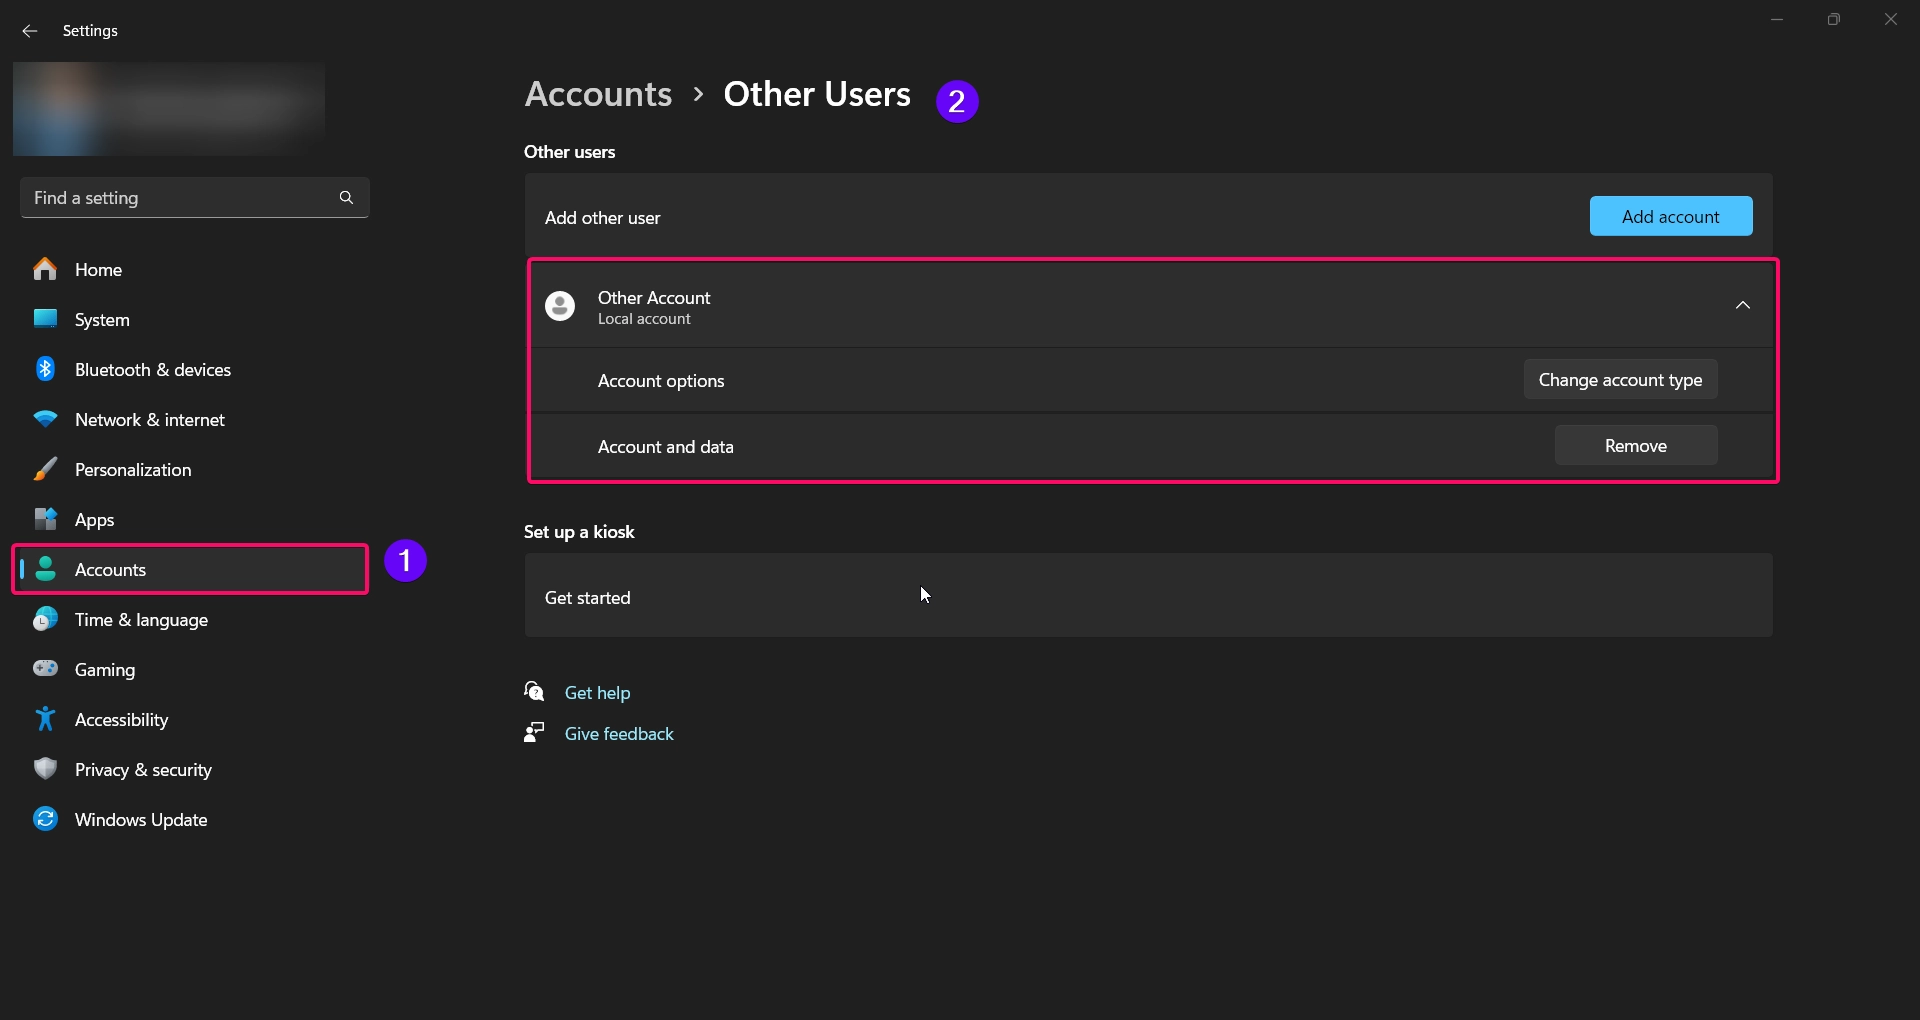
This method is straightforward but may not show all user profiles, especially if they’re hidden or system accounts.
Method 5: Viewing User Profile Folders in File Explorer
If you’re interested in locating user profiles directly, you can view profile folders in File Explorer:
Check Out: Check If An Account Is Administrator Or Standard User In Windows 11
- Open File Explorer by pressing Winkey + E.
- Go to the
C:\Usersdirectory. Here, you’ll see folders for each user profile on your system.
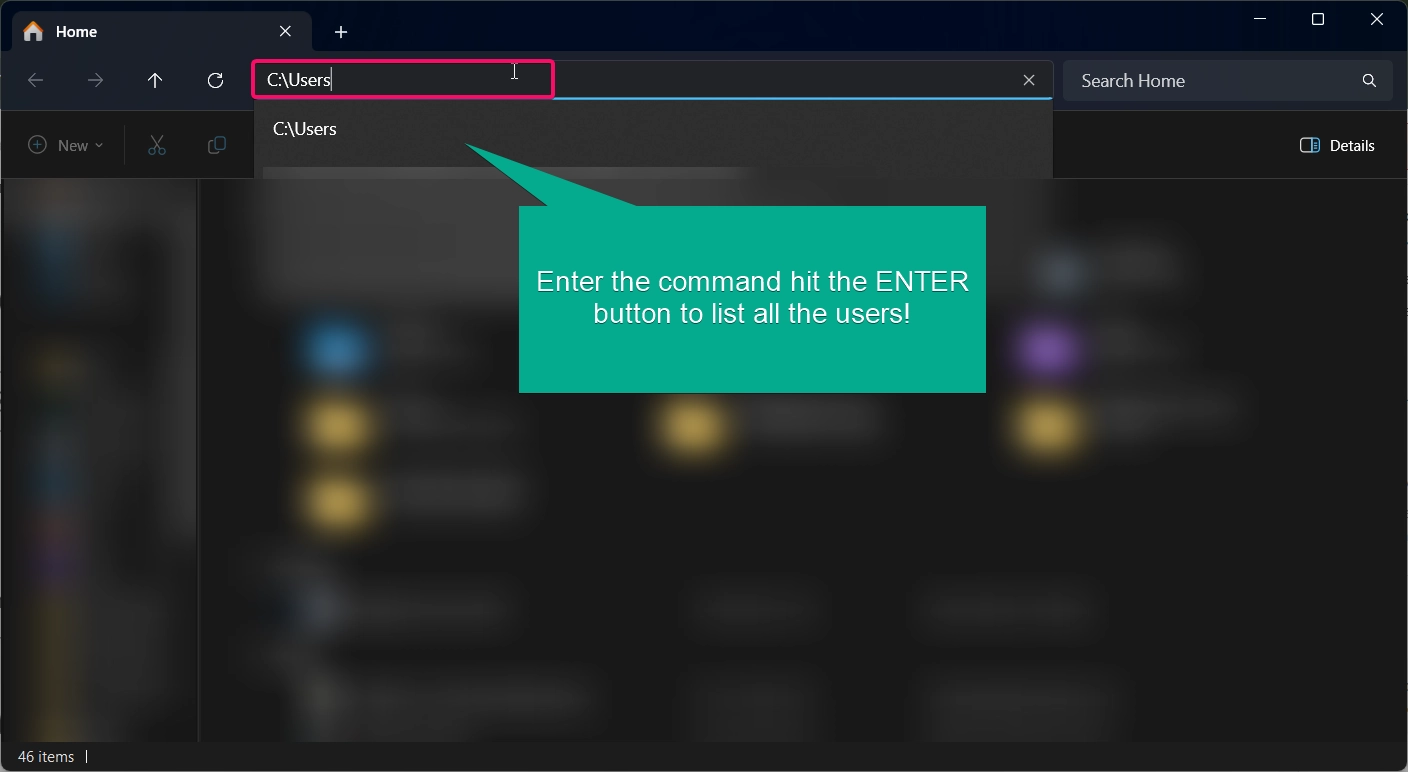
- Each folder represents a user profile, labeled with the account name.
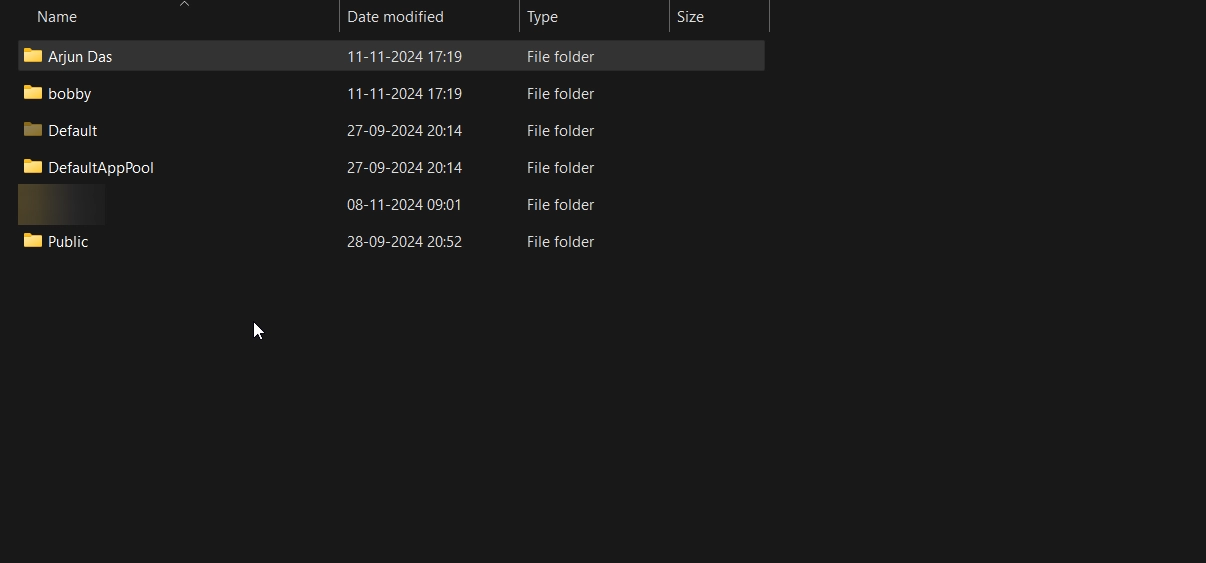
This method is helpful for finding profile folders directly, especially if you need to access user files or settings.
Why Use These Methods?
By using any of these methods, you can efficiently view all user profiles and account names on your Windows 11 device. This is particularly useful for system administrators or users who need to manage multiple accounts on one machine. Each method provides varying levels of information, allowing you to pick the one that best suits your needs.
Conclusion
Getting a list of user profiles and account names in Windows 11 is easy with the right method. From Command Prompt to PowerShell and Settings, these methods offer flexibility for different user preferences. By following this tutorial, you’ll be able to quickly retrieve user information for better management of your system.
Most Questions asked by Users:
Can I delete user profiles from these lists?
Yes, you can delete profiles using Settings or Local Users and Groups (Windows 11 Pro, Enterprise, and Education). Use caution, as deleting a profile also removes associated files.
What’s the difference between user accounts and user profiles?
A user account includes login credentials, while a user profile stores personal settings, files, and configurations for that account.
Can I view the profile details of other users on my system?
Yes, tools like PowerShell can provide details about other profiles, but administrative privileges may be required.
Why don’t I see some accounts listed?
Certain accounts, like system accounts, may be hidden by default. Use PowerShell or Command Prompt for a complete list.
How can I tell if an account is disabled?
PowerShell’s Get-LocalUser command shows account status, including whether accounts are enabled or disabled.
Read More:
- How to Add/Remove Common Program Groups from Start Menu in Windows 11?
- How to Add/Remove Android Apps from Your Phone to Start on Windows 11 PC?
- How to Turn On/Off Airplane Mode in Windows 11?
