How to Enable/Disable Built-in Administrator Account Lockout in Windows 11?
What are the different methods to enable or disable built in administrator account lockout in windows 11 pc?
The built-in Administrator account in Windows 11 is a powerful tool with unrestricted access to system settings and files. By default, this account is protected from lockouts, but there are scenarios where enabling or disabling the Administrator account lockout can be beneficial for security or troubleshooting purposes. This guide provides comprehensive instructions on how to enable or disable the Administrator account lockout in Windows 11 using various methods.
See Also: Enable/disable Administrator Protection For Admin Approval Mode In Windows 11
Why Enable or Disable Administrator Account Lockout?
Enabling the Administrator account lockout can enhance security by preventing unauthorized access after multiple failed login attempts. Disabling it, on the other hand, can be useful for administrators who need uninterrupted access to system settings without the risk of accidental lockouts.
Method 1: Using Local Security Policy
Note: The Local Security Policy is only available in Windows 11 Pro, Enterprise, and Education editions.
The Local Security Policy tool allows administrators to manage security settings for accounts, including lockout policies. Here’s how:
- Open the Run dialog by pressing Winkey + R, type
secpol.msc, and press Enter.
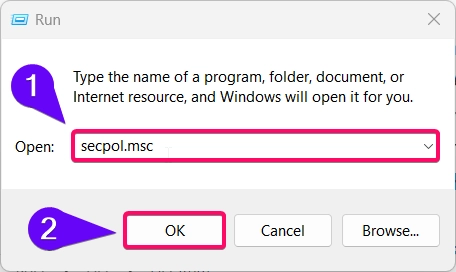
- In the Local Security Policy window, navigate to:
- Account Policies > Account Lockout Policy
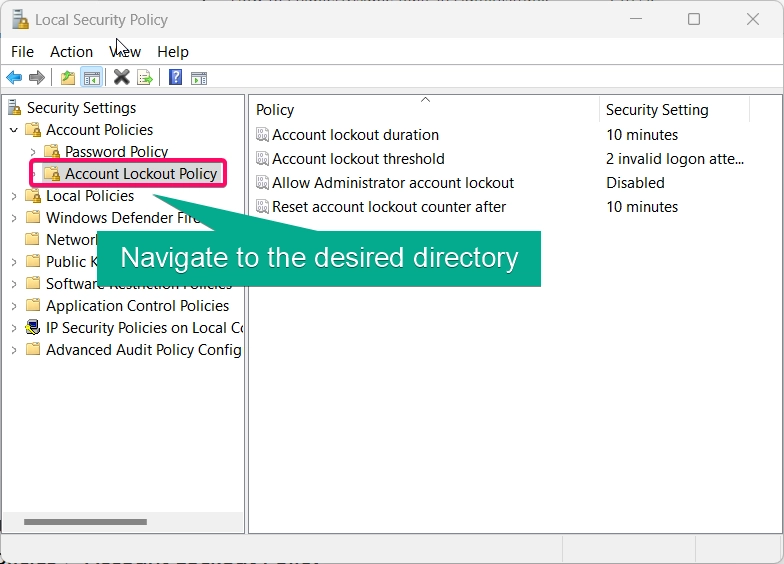
- Locate the Account lockout threshold policy and double-click it.
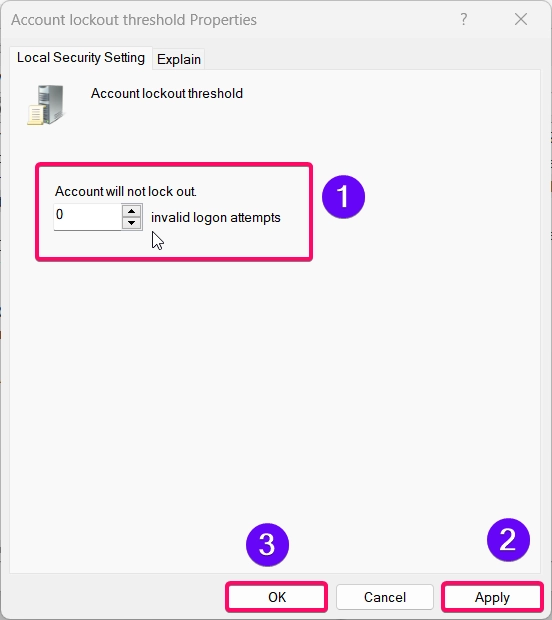
- Set the number of invalid login attempts allowed before the Administrator account is locked out, or set it to 0 to disable account lockouts entirely.
- Click Apply and OK to save your settings.
Note: Setting the lockout threshold to
0disables the lockout feature, while any positive value enables it and specifies the number of failed attempts allowed.
Method 2: Using Group Policy Editor
The Group Policy Editor provides another method to control the Administrator account lockout policy.
- Open the Run dialog by pressing Winkey + R, type
gpedit.msc, and hit Enter.
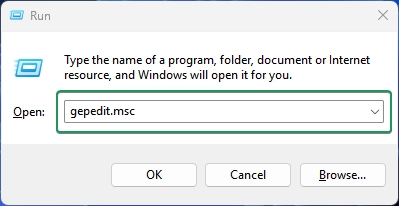
- Navigate to the following path:
Computer Configuration > Windows Settings > Security Settings > Account Policies > Account Lockout Policy
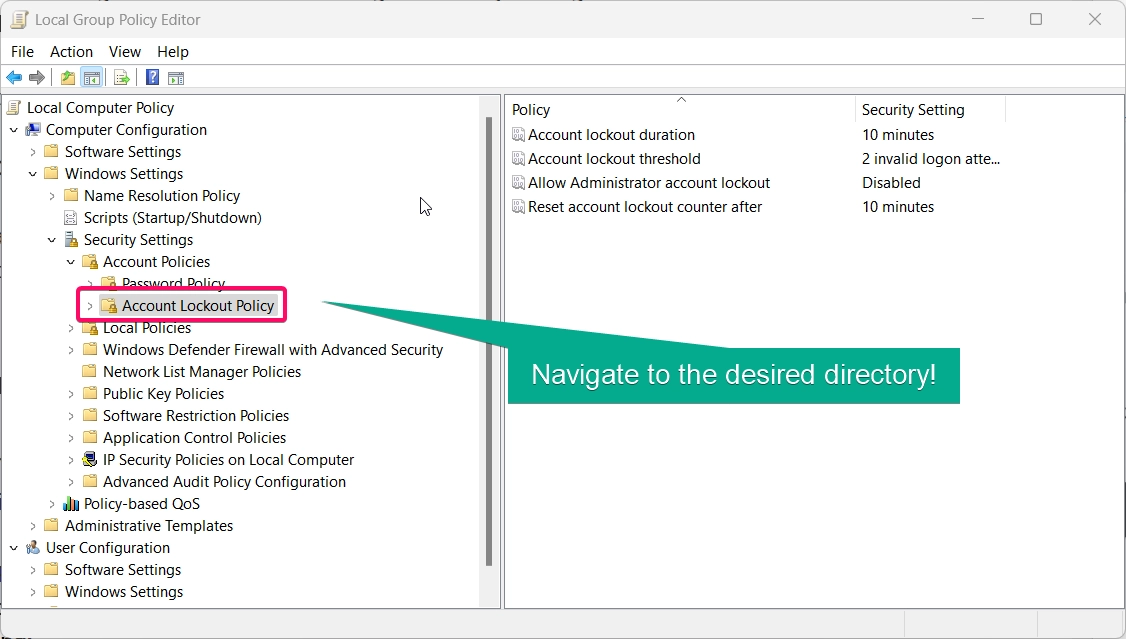
- Double-click Account lockout threshold.
- Set the threshold to a specific number to enable lockout after that many failed attempts, or set it to 0 to disable the lockout feature.

- Click Apply and OK to save changes.
This method is ideal for administrators who need to set consistent policies across multiple devices.
Method 3: Using Command Prompt
For users comfortable with command-line tools, Command Prompt provides a fast way to enable or disable the Administrator account lockout:
- Open Command Prompt as Administrator by typing “cmd” in the search bar, right-clicking it, and selecting Run as administrator.
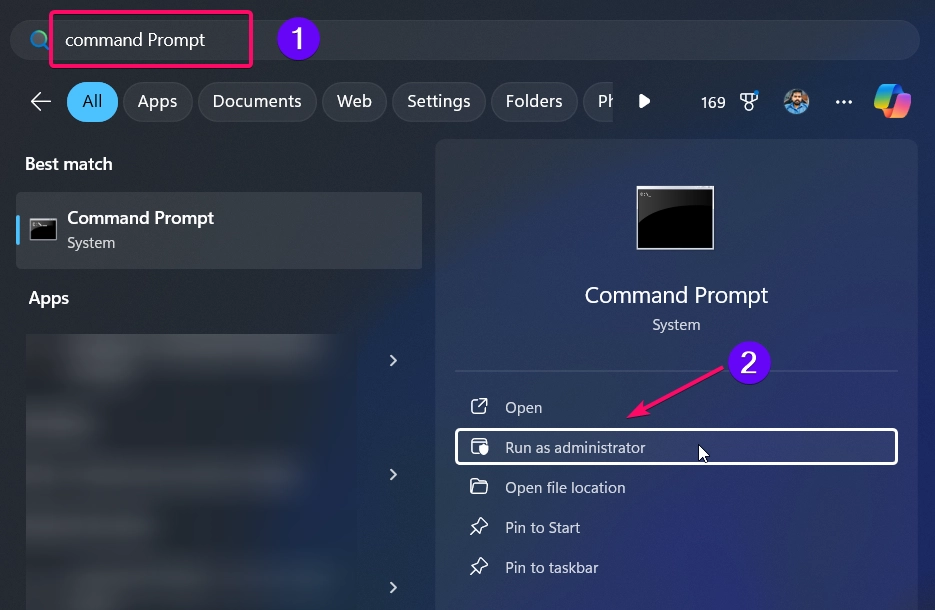
- To set a lockout threshold, enter the following command:
net accounts /lockoutthreshold:<number>
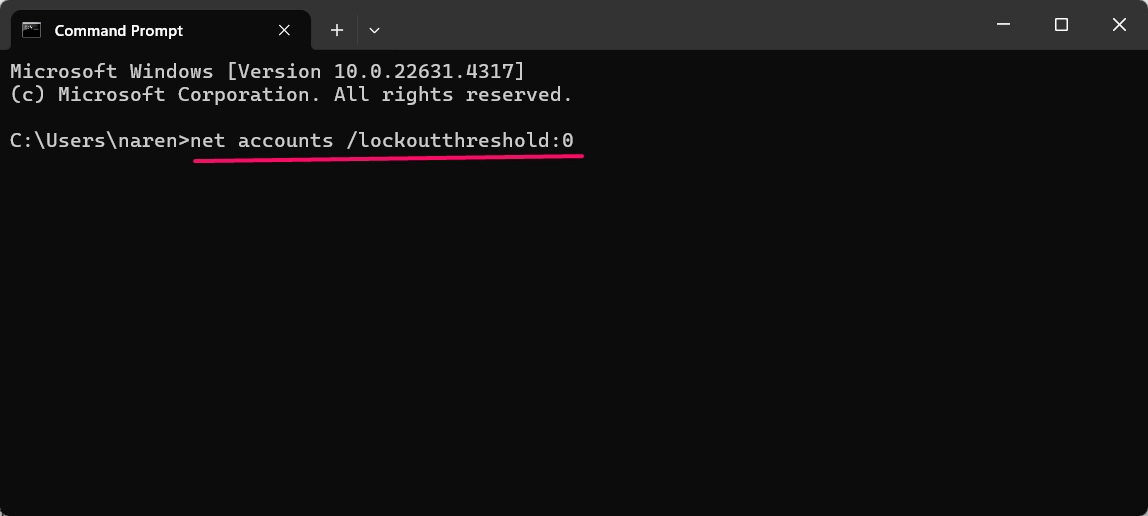
- Replace
<number>with the desired number of failed attempts. Setting this to0disables the lockout feature. - Press Enter, and the changes will take effect immediately.
This method is quick and efficient, especially for administrators who prefer command-line controls.
See Also: Enable/disable Uac For Built-in Administrator In Windows 11
Method 4: Using PowerShell
PowerShell also offers a straightforward way to manage the Administrator account lockout settings:
- Open PowerShell as Administrator by right-clicking the Start button and selecting Windows Terminal (Admin).
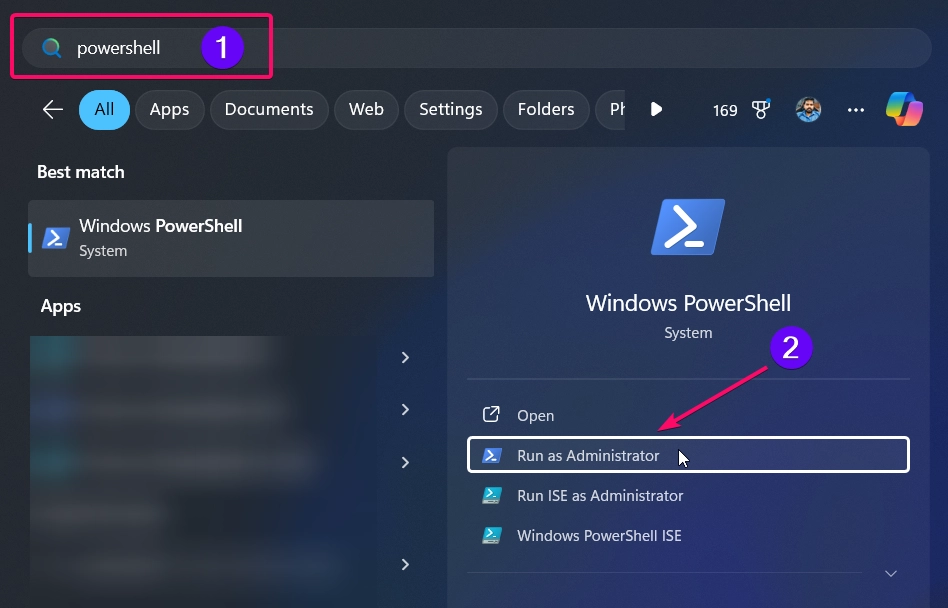
- To enable the lockout threshold, use the following command:
net accounts /lockoutthreshold:<number>
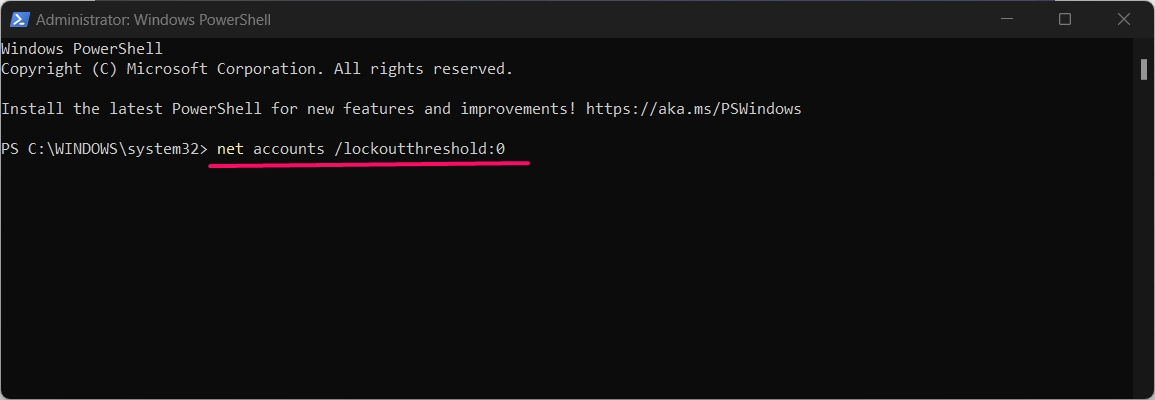
- Replace
<number>with the number of failed attempts before lockout. Set it to0to disable lockouts. - Press Enter to apply the setting.
PowerShell provides a powerful way to adjust lockout settings, particularly useful for automating or scripting security configurations.
Method 5: Using Registry Editor
Important: Modifying the registry can be risky if not done correctly. Always back up your registry before making changes.
For users who prefer a more advanced method, the Registry Editor allows you to adjust account lockout settings manually:
See Also: Enable/disable Built-in Administrator Account Lockout In Windows 11
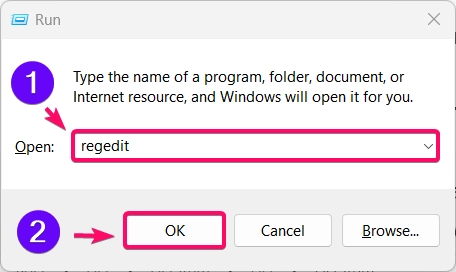
- Press Winkey + R, type
regedit, and press Enter to open the Registry Editor.
- Navigate to the following key:
HKEY_LOCAL_MACHINE\SOFTWARE\Microsoft\Windows NT\CurrentVersion\Winlogon
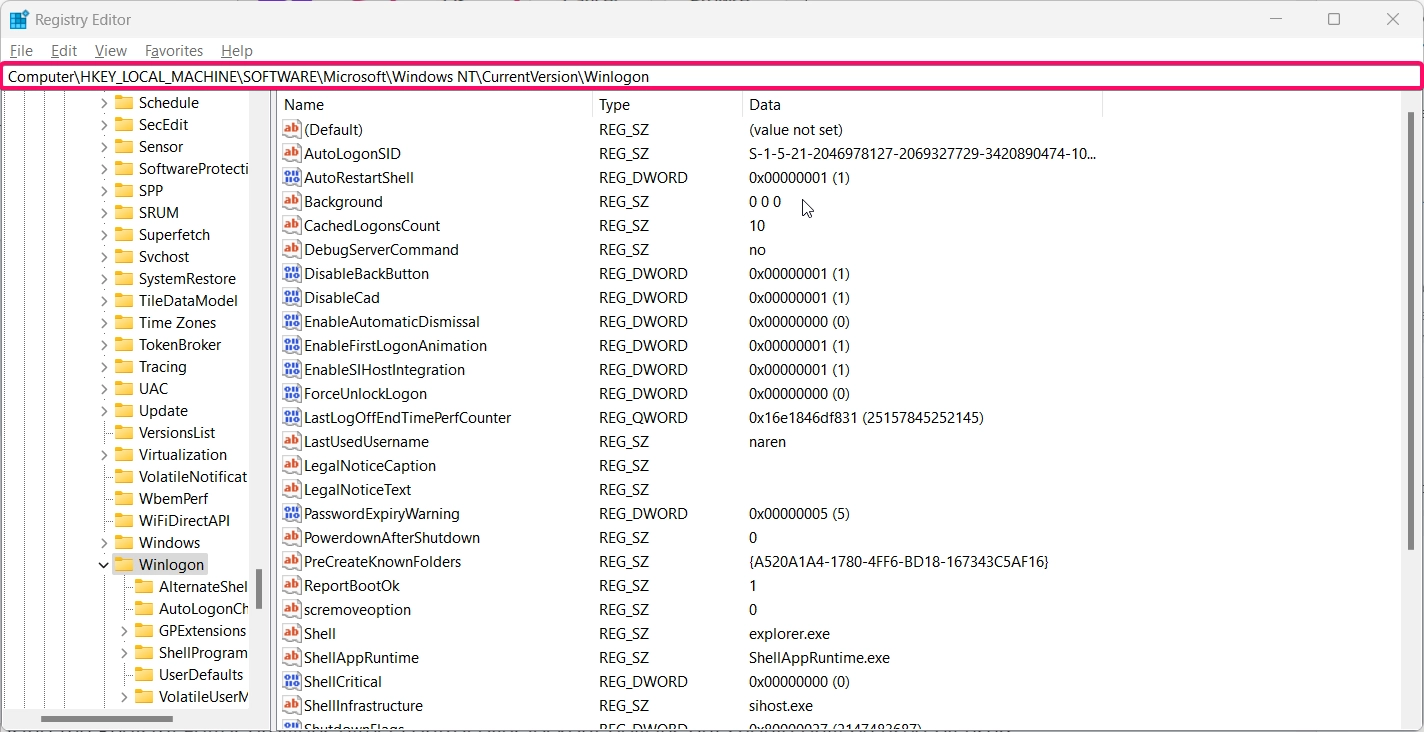
- Locate the AccountLockoutThreshold entry. If it doesn’t exist, right-click, select New > DWORD (32-bit) Value, and name it AccountLockoutThreshold.
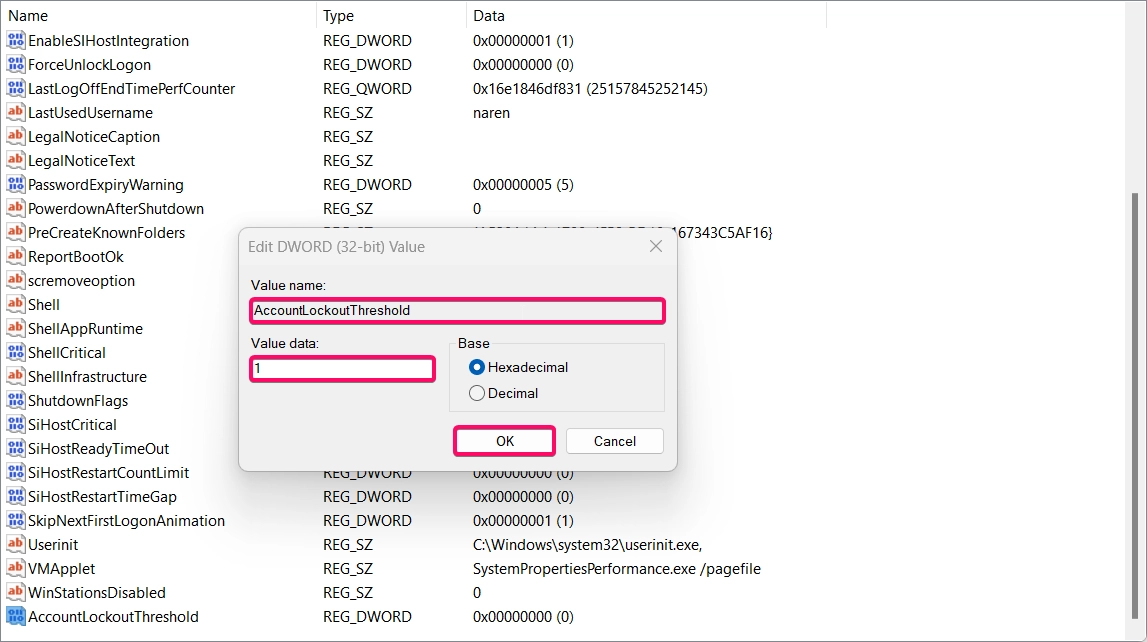
- Set the value to:
0to disable lockouts.- Any positive number to enable lockouts after that many failed attempts.
- Click OK and restart your computer to apply the changes.
Using the Registry Editor provides direct control over lockout policies but should only be used by users comfortable with registry modifications.
Conclusion
Controlling the Administrator account lockout settings in Windows 11 allows you to improve security or prevent lockouts depending on your needs. By following the methods above, you can easily enable or disable the lockout feature through Local Security Policy, Group Policy Editor, Command Prompt, PowerShell, or Registry Editor. Choose the method that best fits your security requirements and technical comfort level.
Queries asked by Users:
Will these changes affect all user accounts?
These settings apply specifically to the built-in Administrator account. Standard user accounts follow separate lockout policies.
Is it safe to modify the registry for account lockout settings?
Yes, but always back up the registry before making changes to prevent unintended consequences.
Recommended: Enable/disable The Built-in Administrator Account In Windows 11
How can I reset a locked Administrator account?
If the Administrator account becomes locked, use another admin account to adjust the lockout settings or unlock it through Local Security Policy or Group Policy Editor.
Can I change the lockout threshold without enabling it?
No, the threshold determines the number of attempts before lockout. Setting it to 0 disables the lockout entirely.
What happens if I disable the Administrator account lockout?
Disabling the lockout prevents the Administrator account from being locked after multiple failed login attempts, allowing for uninterrupted access.
Read More:
- How to Add/Remove Common Program Groups from Start Menu in Windows 11?
- How to Add/Remove Android Apps from Your Phone to Start on Windows 11 PC?
- How to Turn On/Off Airplane Mode in Windows 11?
