How to Enable/Disable Built-in Administrator Account Lockout in Windows 11?
4 Unique ways to Enable/Disable Built-in Administrator Account Lockout in Windows 11 PC!
The built-in Administrator account in Windows 11 is a powerful account with elevated privileges, allowing unrestricted access to the system. For security reasons, account lockout policies can be applied to prevent unauthorized access attempts. This write up explains how to enable or disable the lockout policy for the built-in Administrator account, ensuring your system remains secure while maintaining administrative control.
See Also: Enable/disable Administrator Protection For Admin Approval Mode In Windows 11
Enabling account lockout policies protects your system against brute-force attacks by locking an account after a specified number of failed login attempts. Disabling this feature for the built-in Administrator account may be necessary if you frequently manage system settings and don’t want the account to lock accidentally.
Method 3: Using Command Prompt
For users who prefer command-line tools, Command Prompt offers an efficient way to modify account lockout policies.
- Open Command Prompt as Administrator by searching for “cmd,” right-clicking it, and selecting Run as administrator.
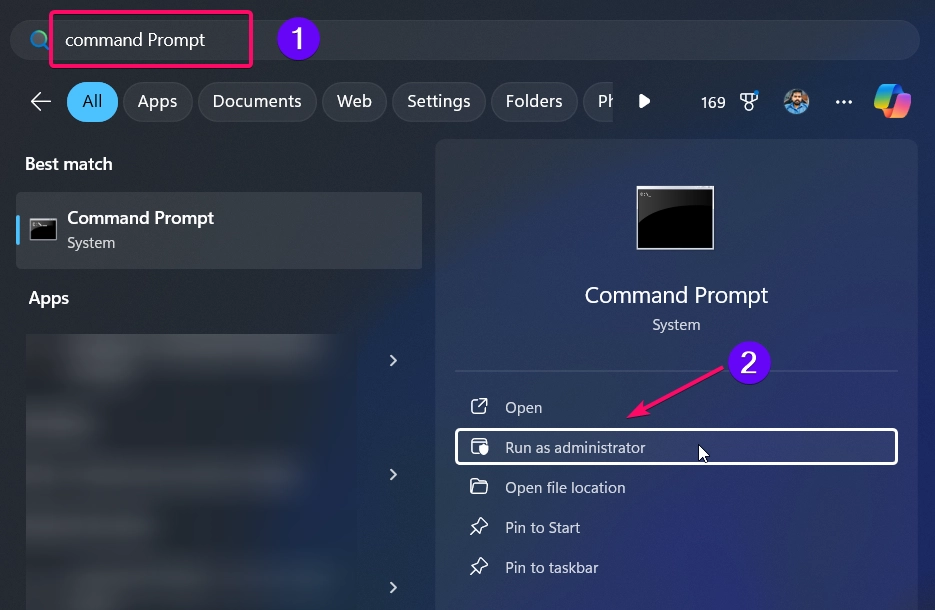
- To enable account lockout, enter the following command:
net accounts /lockoutthreshold:5

- Replace
5with the desired number of failed attempts. - To disable account lockout, enter:
net accounts /lockoutthreshold:0

- Set the lockout duration by entering:
net accounts /lockoutduration:30

- Replace
30with the number of minutes the account remains locked. - Adjust the reset counter time using:
net accounts /lockoutwindow:15

- Replace
15with the desired reset time in minutes.
This method is quick and effective for advanced users who prefer command-line solutions.
Method 2: Using PowerShell
PowerShell is another powerful tool for configuring the built-in Administrator account lockout policy.
- Open PowerShell as Administrator by right-clicking the Start button and selecting Windows Terminal (Admin).
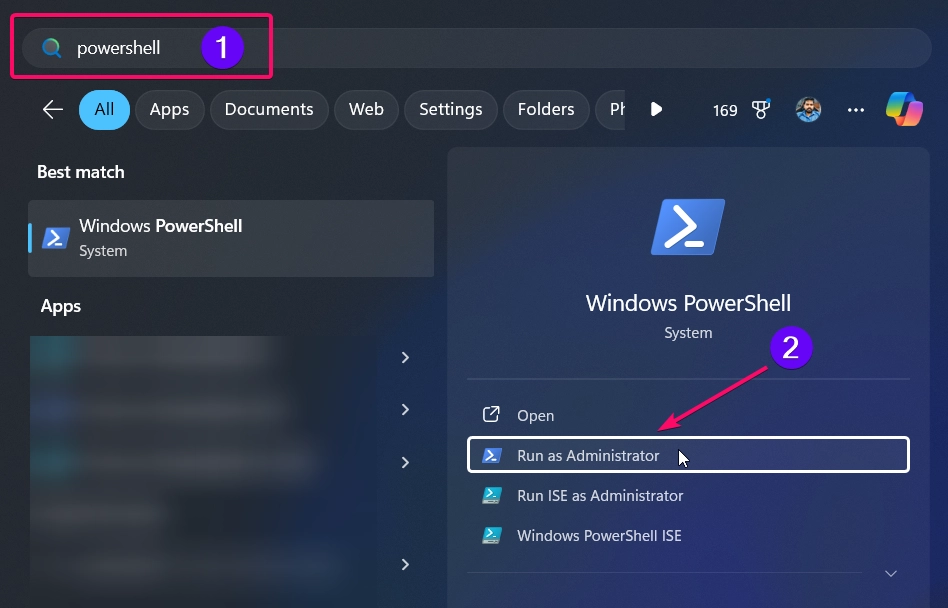
- To enable account lockout, use the following command:
Set-LocalUser -Name "Administrator" -AccountLockoutThreshold 5

- Replace
5with the desired number of failed attempts. - To disable account lockout, use:
Set-LocalUser -Name "Administrator" -AccountLockoutThreshold 0

- Configure the lockout duration using:
Set-LocalUser -Name "Administrator" -AccountLockoutDuration (New-TimeSpan -Minutes 30)

- Replace
30with your preferred duration.
This method is ideal for users who prefer scripting and automation.
Method 3: Using the Local Security Policy
The Local Security Policy tool provides a straightforward way to configure account lockout settings for the built-in Administrator account. This method is available in Windows 11 Pro, Enterprise, and Education editions.
Check Out: Enable/disable Uac For Built-in Administrator In Windows 11
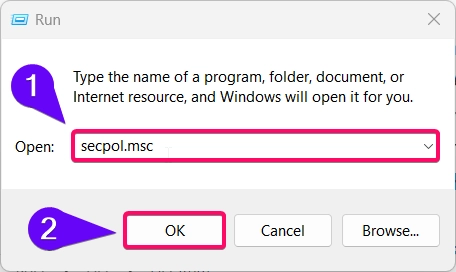
- Open Local Security Policy by pressing Winkey + R, typing
secpol.msc, and pressing Enter.
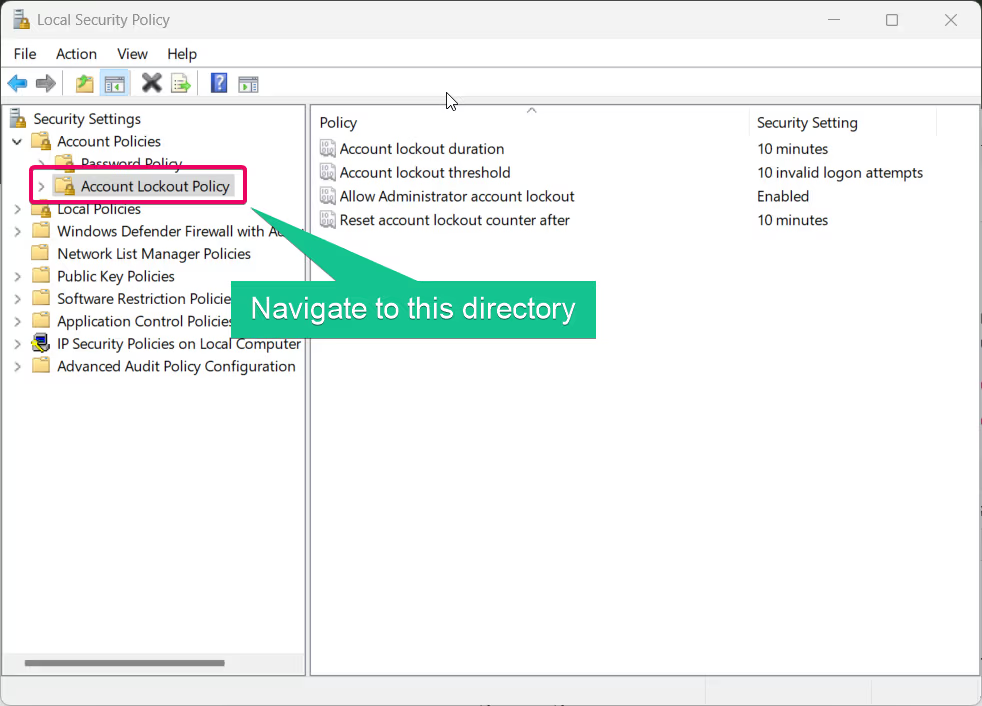
- Navigate to Account Policies > Account Lockout Policy in the left pane.
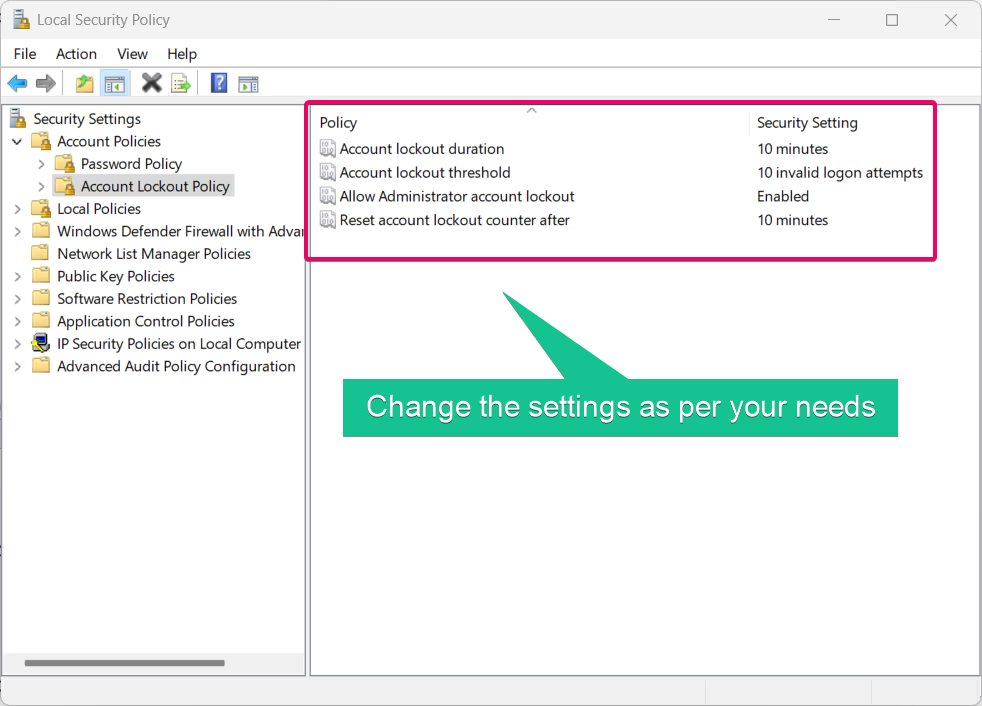
- Locate the following settings:
- Account lockout threshold: Sets the number of failed login attempts before the account locks.
- Account lockout duration: Determines how long the account remains locked.
- Reset account lockout counter after: Specifies the time in minutes to reset the counter.
- Double-click Account lockout threshold, and set it to a value greater than 0 to enable lockout or 0 to disable it.
- Configure the Account lockout duration and Reset account lockout counter as desired.
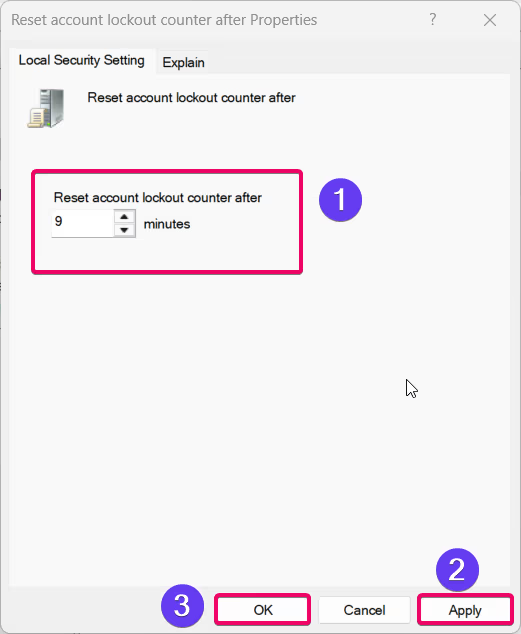
- Click Apply and OK to save the settings.
This method ensures the built-in Administrator account adheres to the configured lockout policies.
Method 4: Using Group Policy Editor
The Group Policy Editor allows you to manage account lockout policies centrally, including the built-in Administrator account.
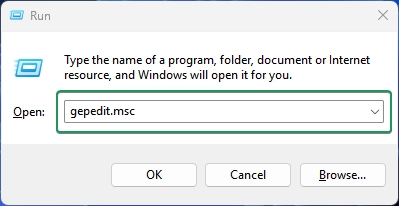
- Open the Group Policy Editor by pressing Winkey + R, typing
gpedit.msc, and pressing Enter.
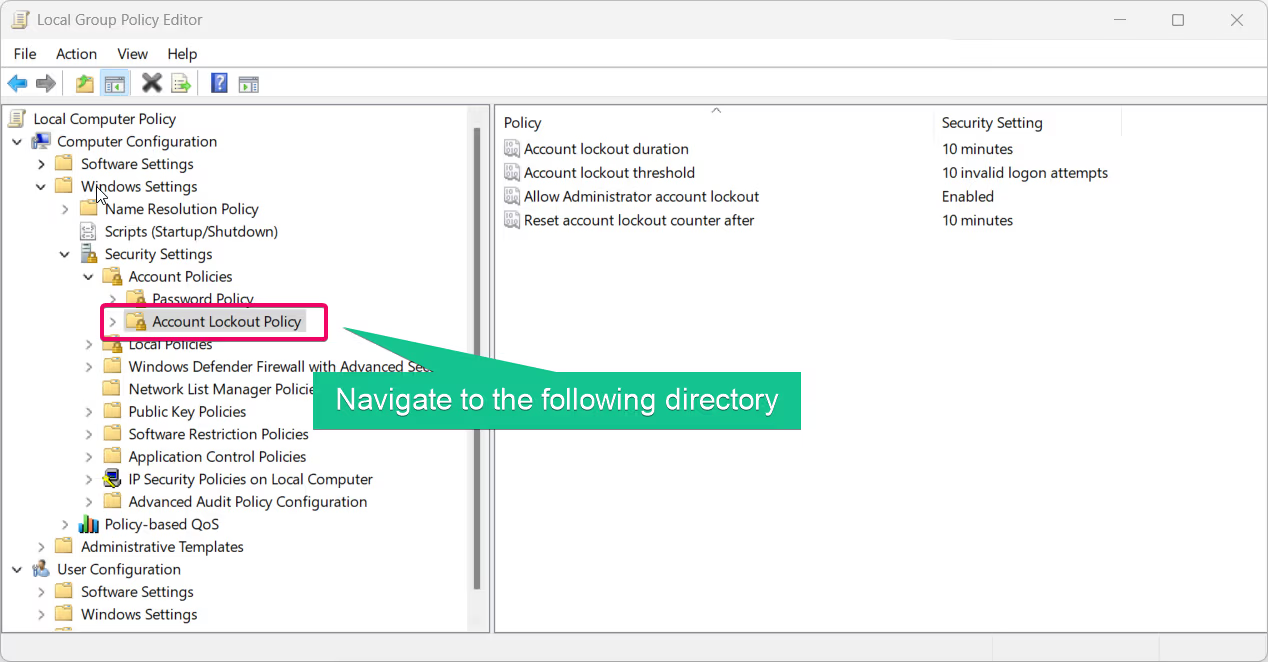
- Navigate to Computer Configuration > Windows Settings > Security Settings > Account Policies > Account Lockout Policy.
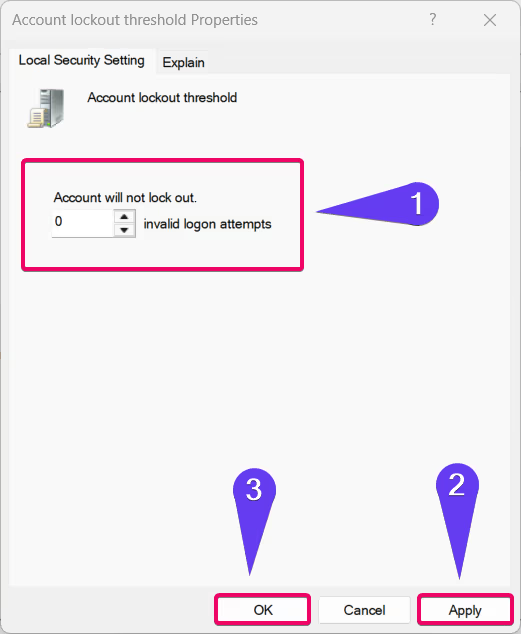
- Double-click Account lockout threshold and set it to a value:
- 0 to disable lockout for the Administrator account.
- Any number greater than 0 to enable lockout after a specified number of failed attempts.
- Adjust the Account lockout duration and Reset account lockout counter settings as needed.
- Click Apply and OK to save your changes.
These settings will apply globally to all accounts, including the built-in Administrator account, unless exceptions are specified.
Read This: Enable/disable The Built-in Administrator Account In Windows 11
Conclusion
Configuring the built-in Administrator account lockout in Windows 11 is an essential step for enhancing security. Whether you choose the Local Security Policy, Group Policy Editor, Command Prompt, or PowerShell, each method provides a clear path to enabling or disabling account lockout policies. Choose the method that suits your preferences and security needs to ensure your system remains protected.
FAQ:
What happens if the built-in Administrator account gets locked out?
If the account lockout policy is enabled, the Administrator account will be temporarily inaccessible until the lockout duration ends or an admin resets the account.
Can I apply different lockout policies for the built-in Administrator account?
No, account lockout policies apply universally to all accounts unless you create custom policies for specific users.
Recommended: Enable/disable Administrator Protection For Admin Approval Mode In Windows 11
Do account lockout settings affect remote logins?
Yes, the lockout settings apply to both local and remote login attempts.
How do I unlock the Administrator account if it gets locked?
You can use another administrator account to reset the lockout or wait for the lockout duration to expire.
Is it safe to disable account lockout for the Administrator account?
Disabling account lockout may reduce security, but it can be convenient for systems managed by trusted administrators.
Read More:
- How to Add/Remove Common Program Groups from Start Menu in Windows 11?
- How to Add/Remove Android Apps from Your Phone to Start on Windows 11 PC?
- How to Turn On/Off Airplane Mode in Windows 11?
