How to Change Account Lockout Duration in Windows 11?
What are the different methods to change account lockout duration in windows 11 pc?
Windows 11 provides various security features to protect your device, one of which is the Account Lockout Duration setting. This feature temporarily locks an account after multiple unsuccessful login attempts, deterring unauthorized access. In this tutorial, we’ll cover all methods available to change the Account Lockout Duration in Windows 11, ensuring you can fine-tune your device’s security settings.
Read This: Enable/disable Built-in Administrator Account Lockout In Windows 11
What is Account Lockout Duration?
The Account Lockout Duration determines how long an account remains locked after too many incorrect password attempts. Configuring this setting can protect your device from brute force attacks while allowing legitimate users to regain access after a designated period.
Method 1: Using Local Group Policy Editor
The Local Group Policy Editor is one of the most straightforward ways to modify the lockout duration. Note that this feature is only available in Windows 11 Pro, Enterprise, and Education editions.
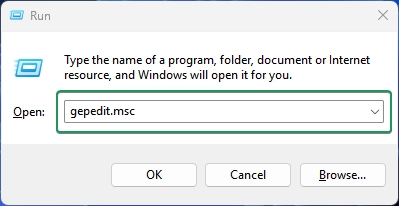
- Open Local Group Policy Editor: Press Winkey + R to open the Run dialog, type
gpedit.msc, and press Enter.
- Navigate to Security Settings:
- Go to Computer Configuration > Windows Settings > Security Settings > Account Policies > Account Lockout Policy.
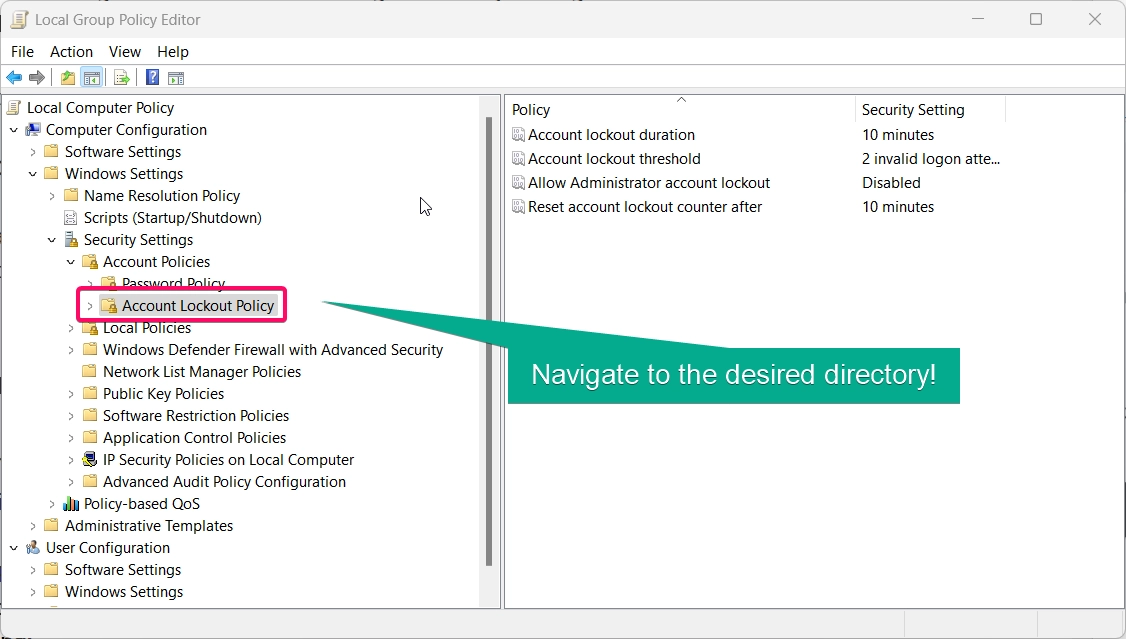
- Modify Lockout Duration:
- Double-click on Account lockout duration and enter your desired lockout time in minutes.
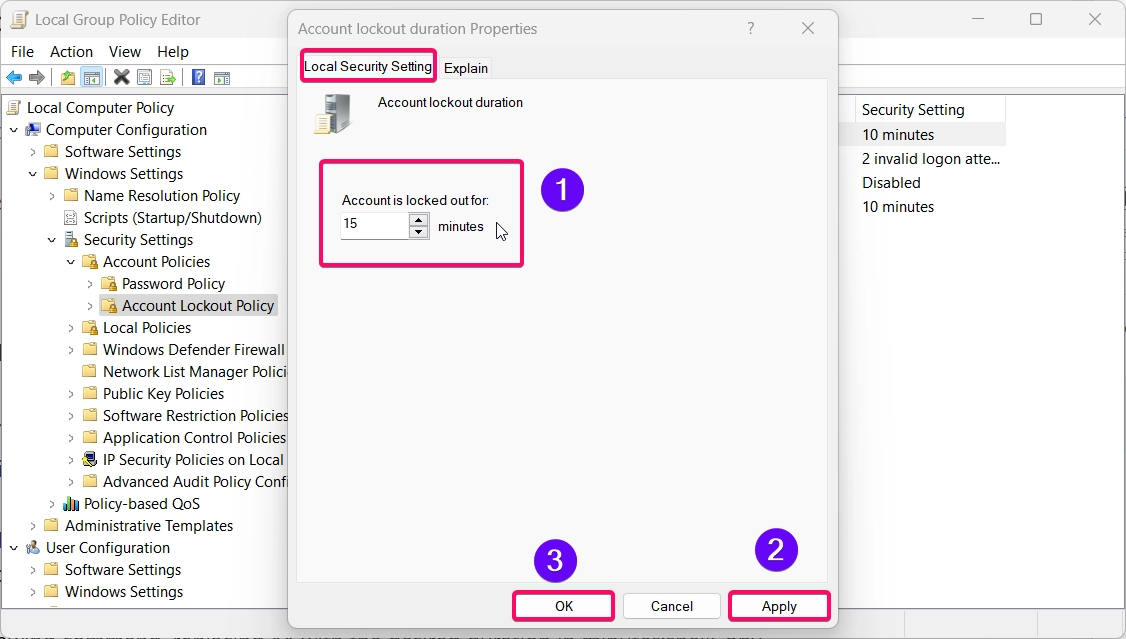
- Tip: The duration should be long enough to prevent repeated unauthorized access attempts but short enough to avoid inconveniencing legitimate users.
- Apply and Save Changes: Click Apply and OK to confirm your changes.
Method 2: Using Command Prompt
If you prefer a command-line method, Command Prompt provides a quick way to configure the lockout duration. This method is ideal for experienced users comfortable with commands.
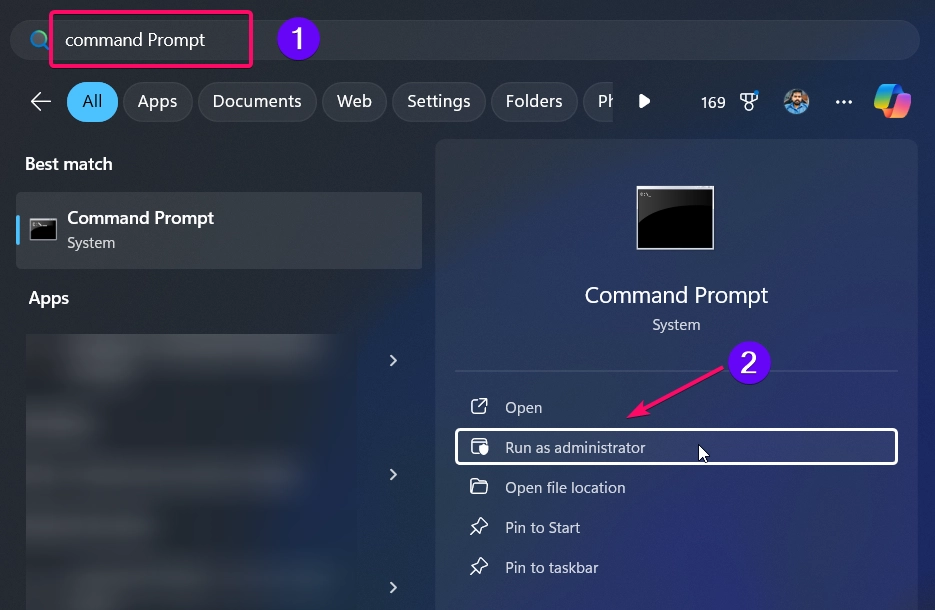
- Search for Command Prompt in the Start menu, right-click, and select Run as administrator.
- Type the following command, replacing
XXwith the desired duration in minutes:net accounts /lockoutduration:XX
- For example, to set the lockout duration to 15 minutes, you would enter:
net accounts /lockoutduration:15
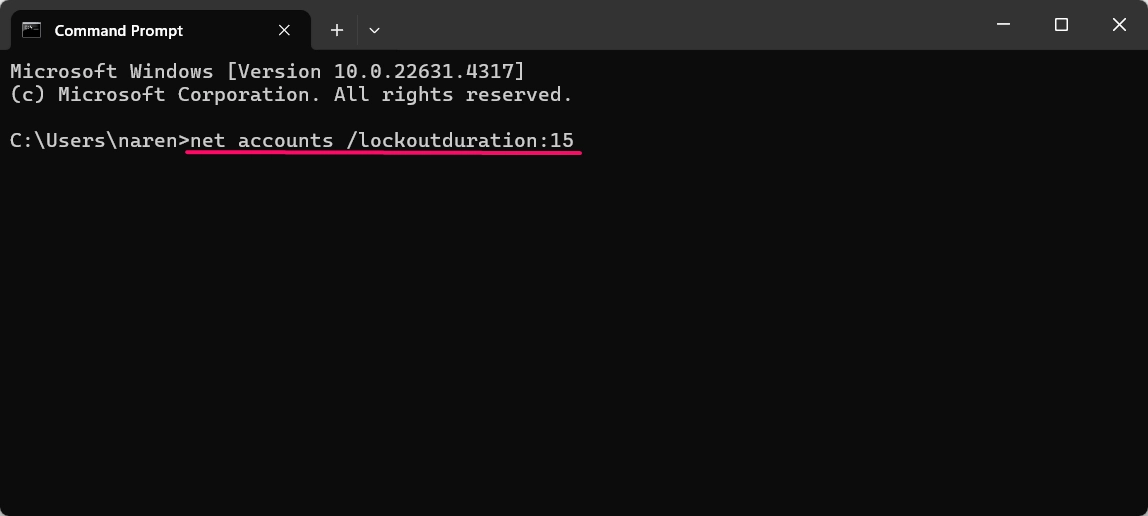
- Press Enter to execute the command.
Method 3: Using PowerShell
PowerShell offers another command-based approach to modifying the lockout duration. This method is similar to Command Prompt but uses PowerShell-specific commands.
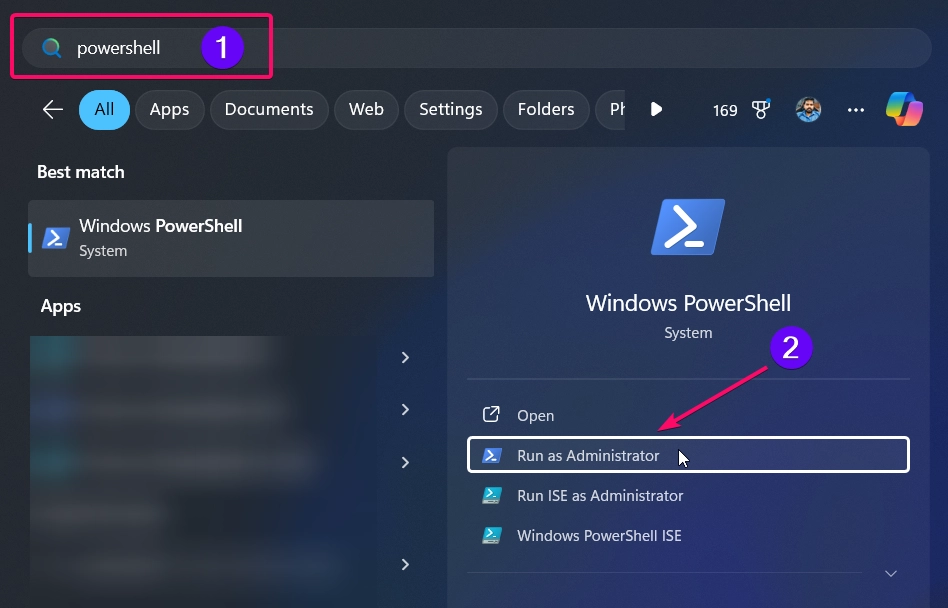
- Search for PowerShell in the Start menu, right-click, and select Run as administrator.
- Type the following command, replacing
XXwith your desired duration:Set-LocalUser -AccountExpirationDate "XX"
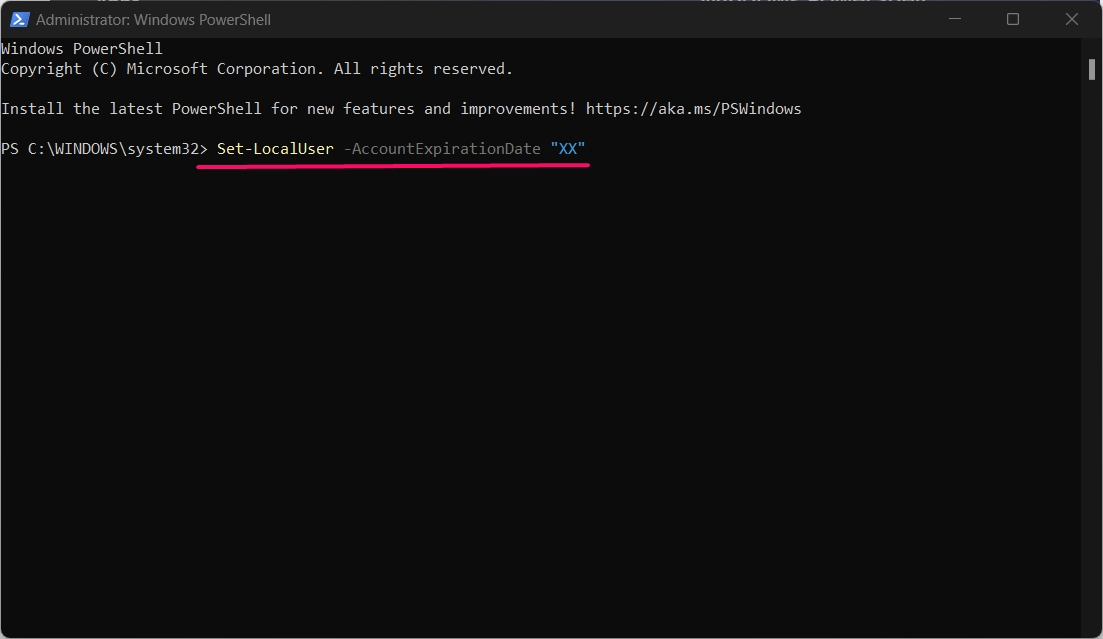
- Execute and Confirm Changes: Press Enter to apply the changes.
Method 4: Using Registry Editor
Important: Modifying the Windows Registry can affect your system if not done correctly. Always back up your registry before making any changes.
This method allows you to change the lockout duration via the Registry Editor, though it requires caution.
See Also: Change Account Type In Windows 11
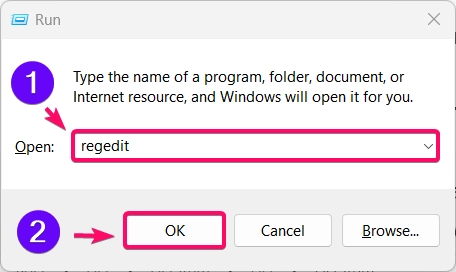
- Press Winkey + R, type
regedit, and hit Enter.
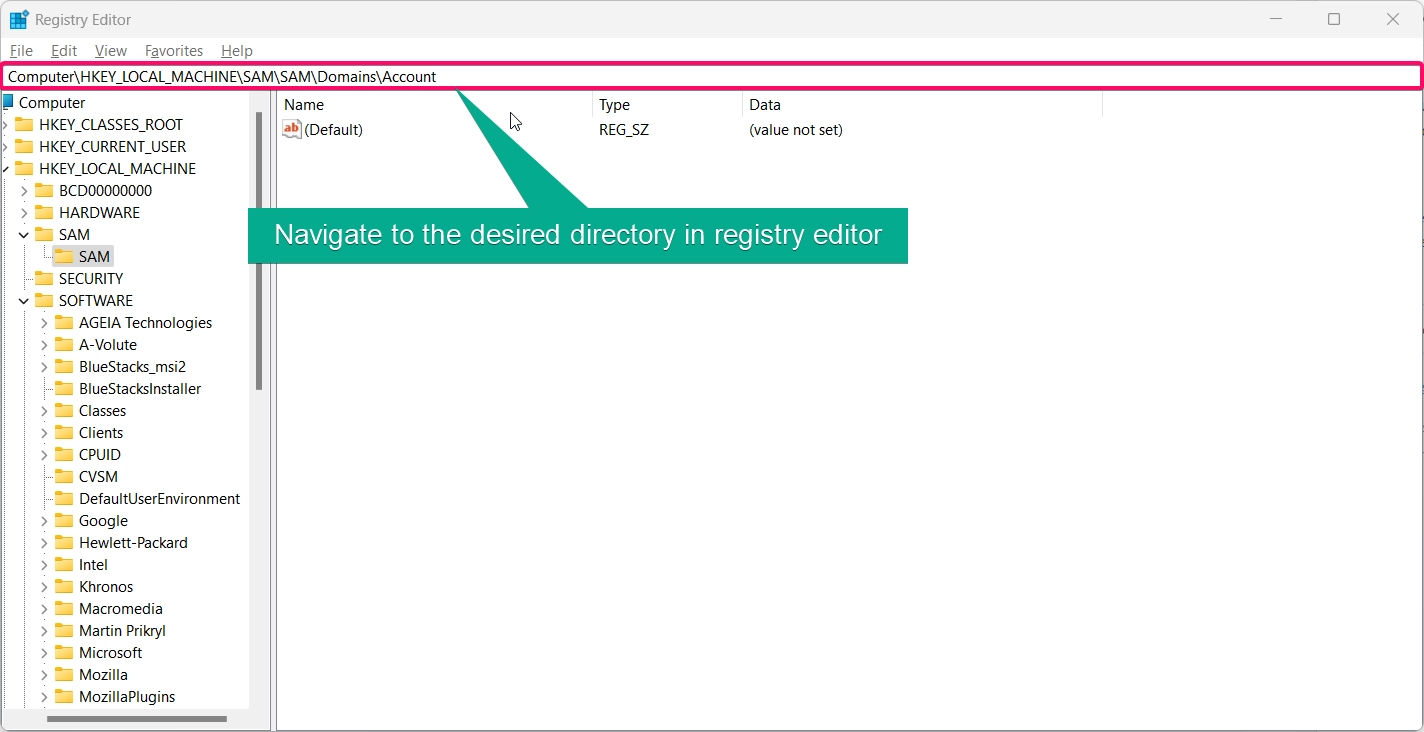
- Navigate to the Key:
- Go to
HKEY_LOCAL_MACHINE\SAM\SAM\Domains\Account.
- Go to
- Find or Create Lockout Value:
- Locate the LockoutDuration entry or create a new
DWORD (32-bit) Valueand name it LockoutDuration.
- Locate the LockoutDuration entry or create a new
- Edit the Lockout Value:
- Right-click the entry, select Modify, and enter the lockout duration in minutes.
- Apply Changes and Restart: Save your settings and restart your computer to activate the changes.
Method 5: Using Account Policies in Local Security Policy
For users on Windows 11 Pro or higher, the Local Security Policy provides an intuitive way to manage account lockout settings.
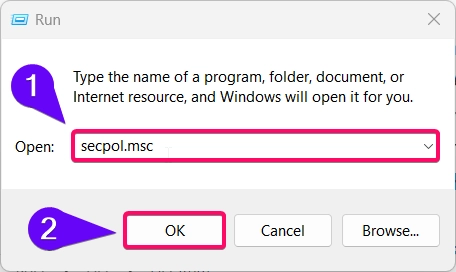
- Press Winkey + R, type
secpol.msc, and press Enter.
- Go to Account Policies > Account Lockout Policy.
- Double-click Account lockout duration and set the desired time in minutes.
- Click Apply and OK to finalize your changes.
Conclusion
Modifying the Account Lockout Duration in Windows 11 can improve the security of your device by preventing unauthorized login attempts while ensuring legitimate users can regain access. Each method provided here whether via Group Policy Editor, Command Prompt, PowerShell, Registry Editor, or Local Security Policy, allows you to customize this setting according to your comfort and expertise level.
Frequently ASked Questions:
What is a good Account Lockout Duration?
A duration of 15 to 30 minutes is often recommended to deter repeated unauthorized attempts without significantly inconveniencing users.
What happens if I set the lockout duration to zero?
A zero value means the account remains locked until an administrator manually unlocks it.
Does changing the lockout duration affect all accounts?
Yes, this setting applies to all user accounts on the device.
Is it safe to change these settings?
Yes, but ensure you set a reasonable duration to avoid frustration if legitimate users accidentally trigger the lockout.
See Also: Change Account Picture In Windows 11
Can I set a different lockout duration for specific users?
Unfortunately, the Account Lockout Policy applies globally and cannot be set for individual users.
Read More:
- How to Add/Remove Common Program Groups from Start Menu in Windows 11?
- How to Add/Remove Android Apps from Your Phone to Start on Windows 11 PC?
- How to Turn On/Off Airplane Mode in Windows 11?
