How to Set Up Facial Recognition Sign-in in Windows 11?
3 Unique ways to Setup Facial Recognition Sign in in windows 11 pc!
Windows 11 introduces a secure, convenient way to sign in using facial recognition through its Windows Hello feature. By setting up facial recognition, you can unlock your device with a glance, making it a fast and hands-free way to access your account. This guide walks you through the steps to set up facial recognition sign-in, with tips on optimizing it for a smooth experience.
Read This: Remove Fingerprint Recognition Sign-in In Windows 11
Why Use Facial Recognition for Sign-in?
Facial recognition provides a high level of security and convenience. With Windows Hello, you can sign in quickly without needing to type a password or PIN. This is particularly useful in busy environments where you want fast and secure access to your device.
Requirements for Facial Recognition in Windows 11
Before setting up facial recognition sign-in, ensure that:
- Your device has a compatible camera (typically an infrared or IR camera).
- Windows Hello is supported on your device (most modern laptops and some desktops include this feature).
If your device lacks a compatible camera, consider purchasing an external Windows Hello camera.
Method 1: Setting Up Facial Recognition via Windows Settings
The Settings app in Windows 11 provides the easiest way to configure facial recognition for sign-in. Here’s how:
- Open Settings by pressing Winkey + I on your keyboard.
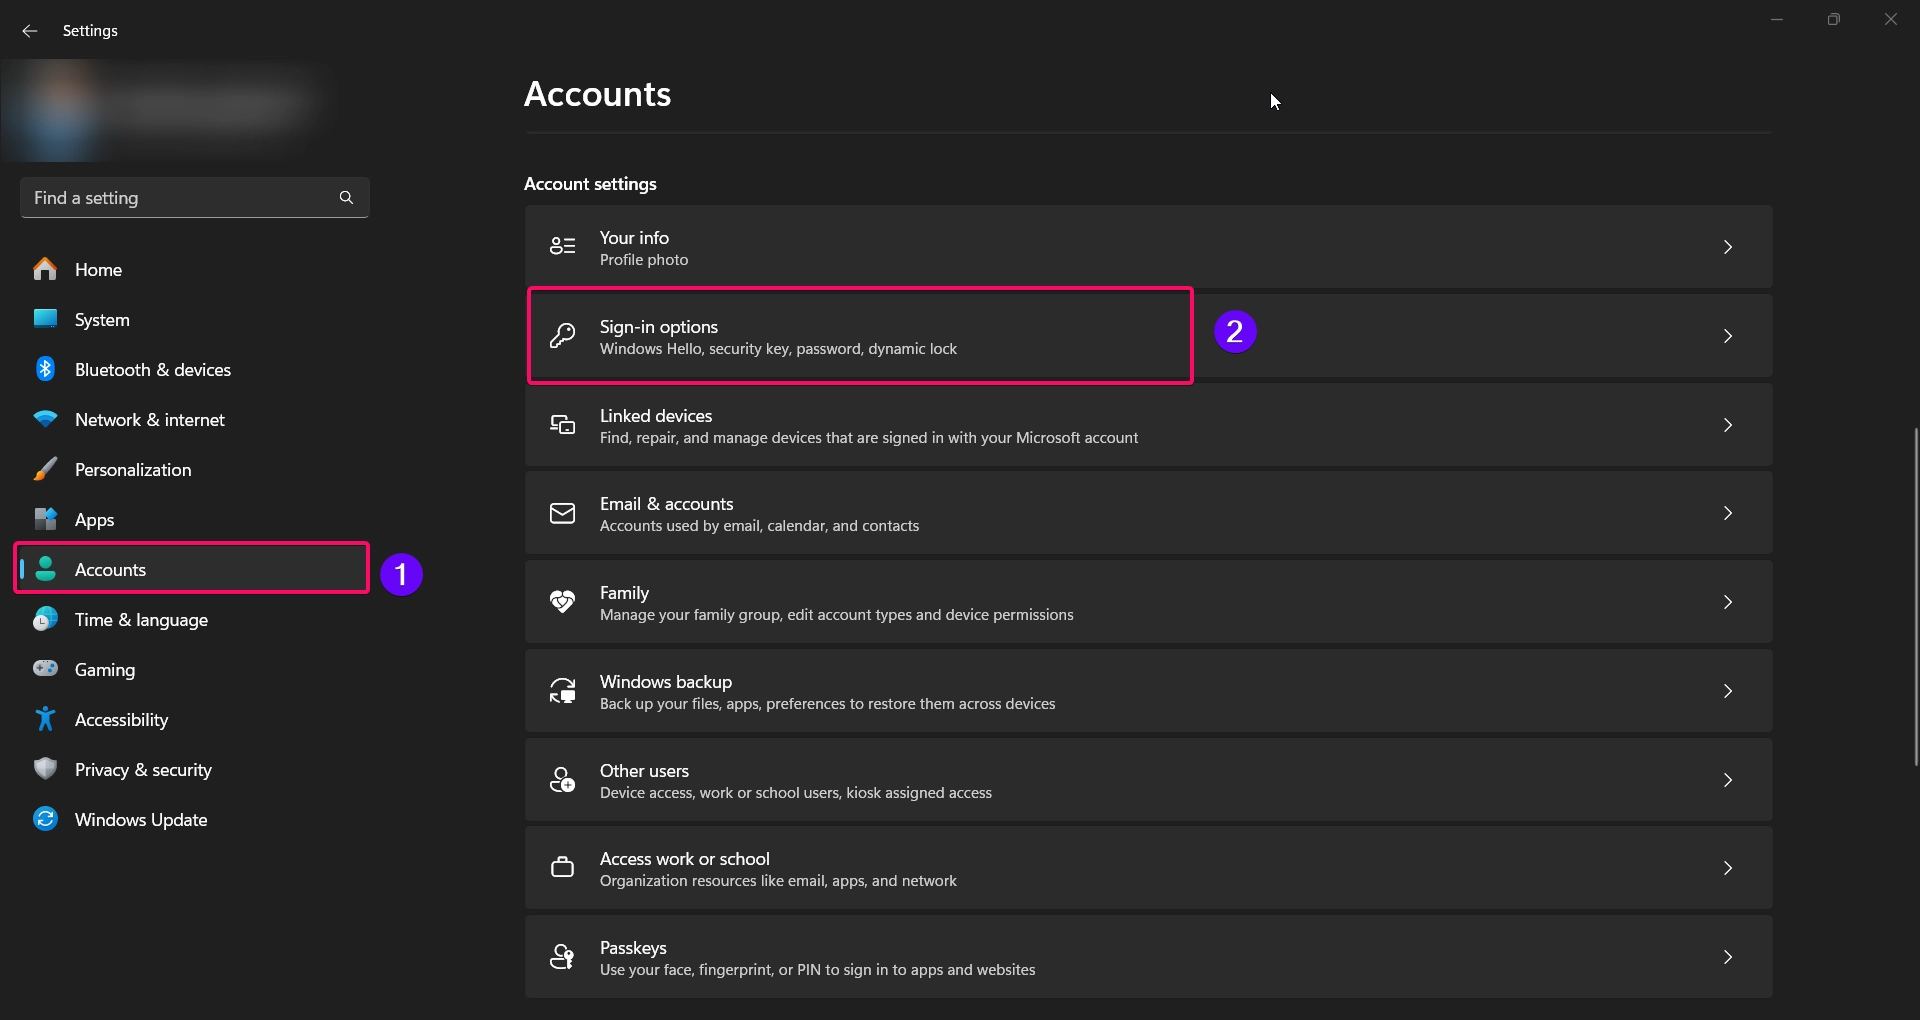
- Go to Accounts in the left sidebar.
- Select Sign-in options.
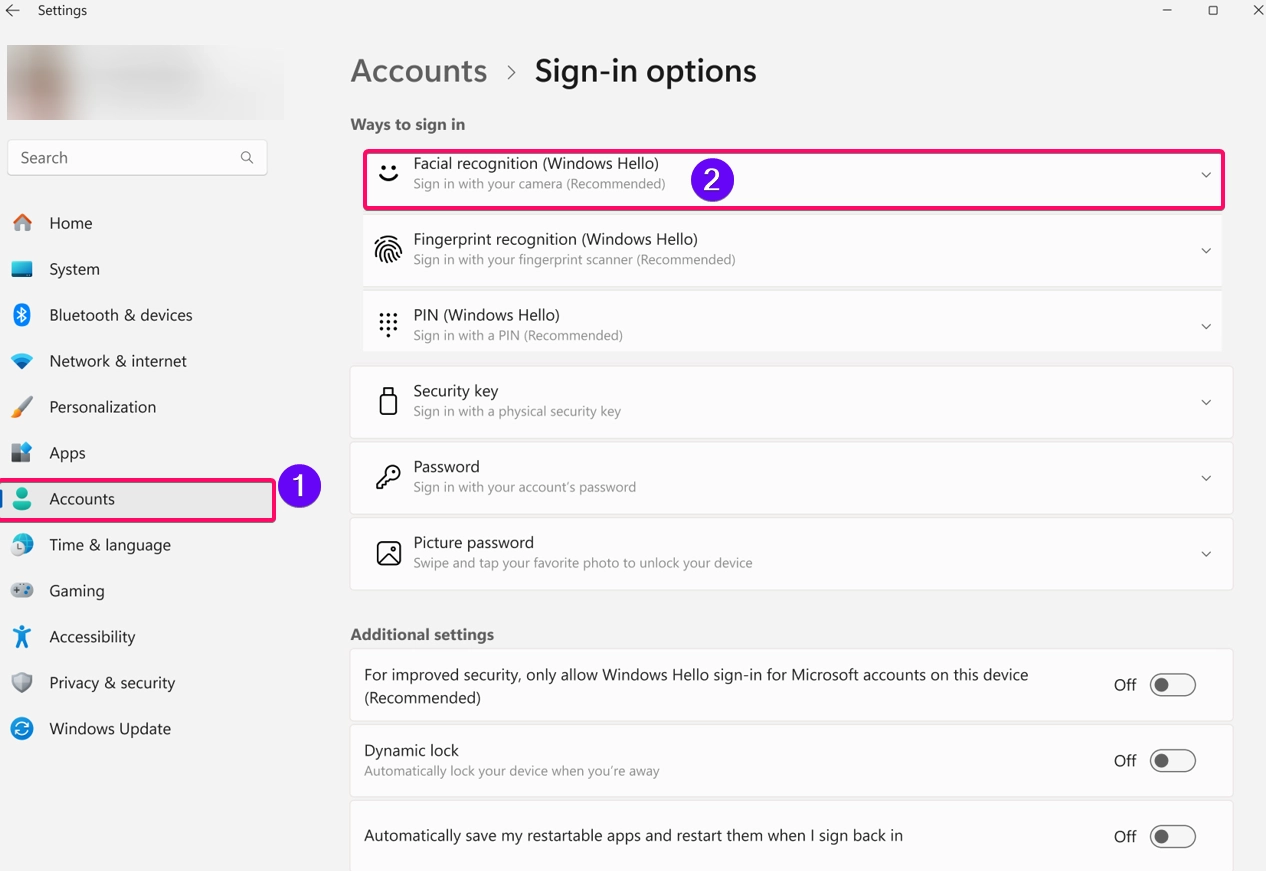
- Under Windows Hello, click on Facial recognition (Windows Hello).
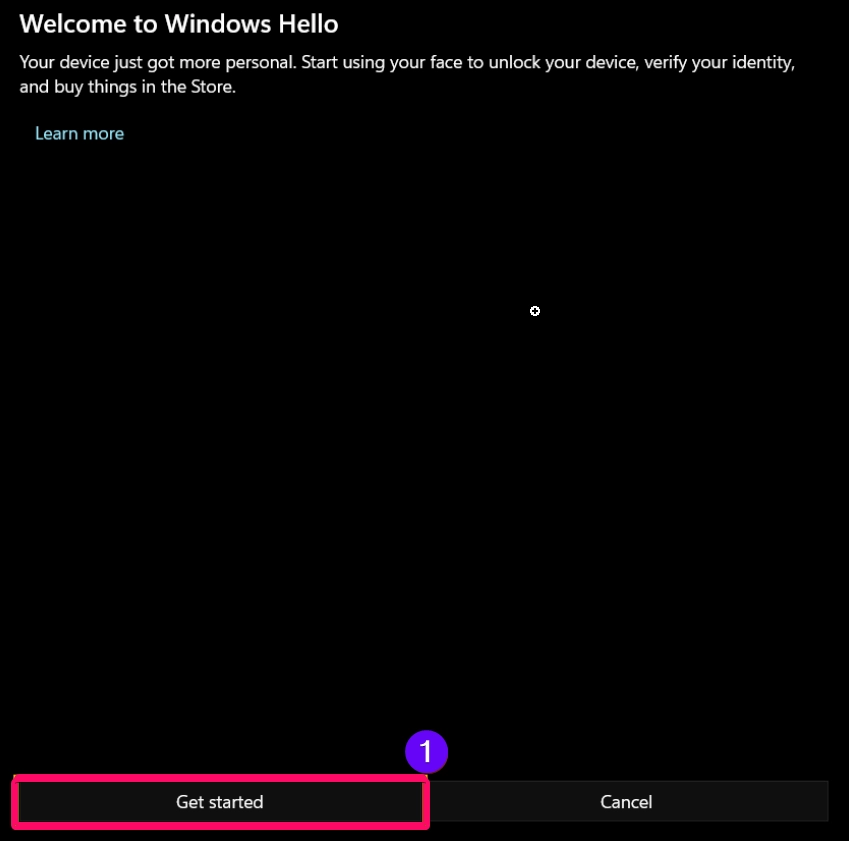
- Click Set up and then select Get started.
- Follow the on-screen instructions to position your face in front of the camera. The system will scan and save your facial data for future logins.
- Once the setup is complete, click Close to finalize the setup.
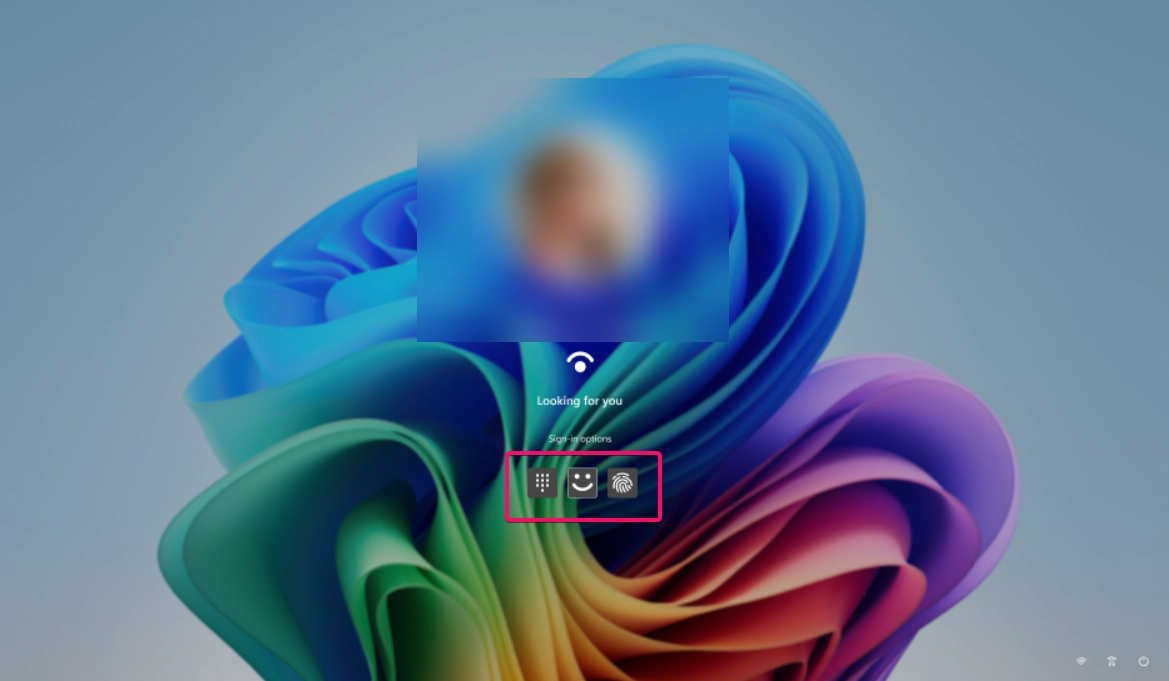
Note: Make sure you’re in a well-lit environment during setup to ensure accuracy.
Method 2: Improving Facial Recognition with Additional Scans
Windows Hello allows you to add additional scans of your face to improve recognition, especially if you wear glasses or work in different lighting conditions. Here’s how to add an additional scan:
- Go to Settings > Accounts > Sign-in options.

- Select Facial recognition (Windows Hello).

- Click on Improve recognition.
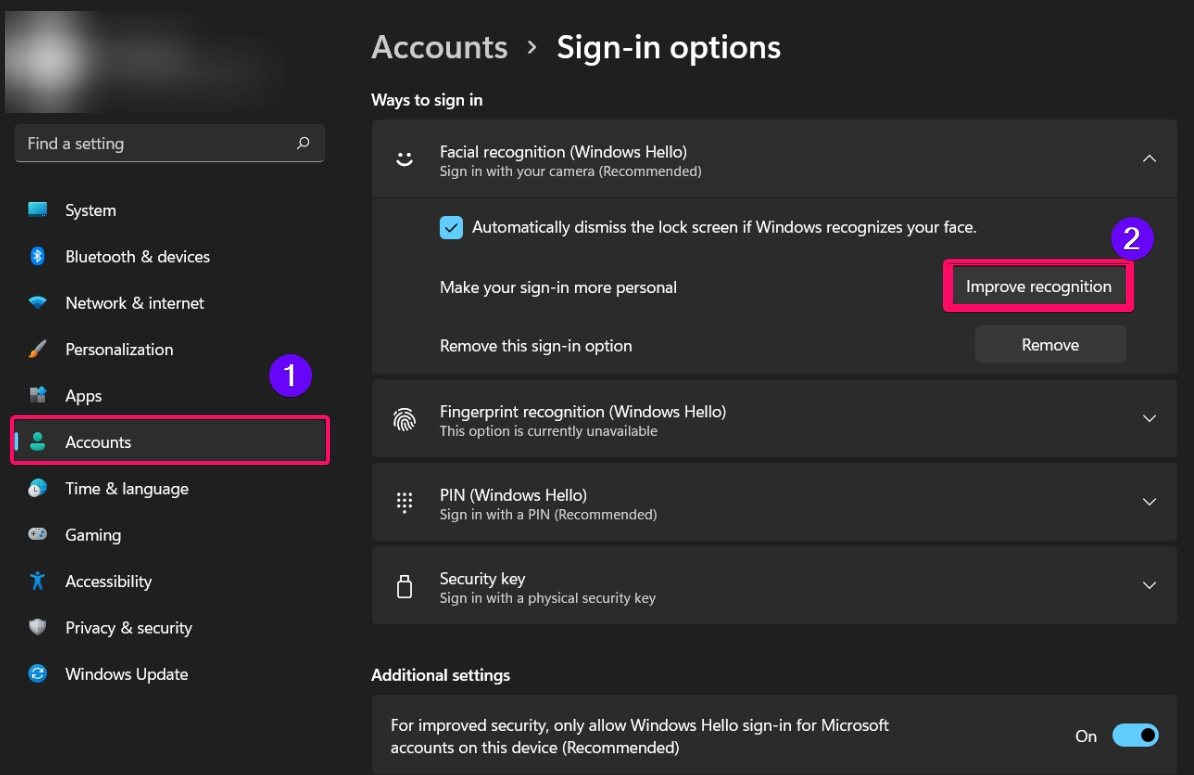
- Follow the prompts to capture additional facial data, enhancing the system’s ability to recognize you under varied conditions.
Adding extra scans can help Windows Hello adapt to your appearance changes, such as wearing glasses or changing hairstyles, for a seamless sign-in experience.
Method 3: Using an External Windows Hello-Compatible Camera
If your device lacks a compatible camera, you can use an external Windows Hello-compatible camera to set up facial recognition:
- Connect the camera to your device using a USB port.
- Follow the instructions from Method 1 to set up facial recognition through Settings > Accounts > Sign-in options.

- Select Facial recognition (Windows Hello) and click Set up to complete the setup with your external camera.

This option is ideal for desktop users or those using older laptops without built-in facial recognition support.
Method 4: Troubleshooting Facial Recognition Sign-in Issues
If you encounter issues while setting up or using facial recognition, here are some troubleshooting tips:
See Also: Turn On/off Facial Recognition Auto Dismiss Lock Screen In Windows 11
- Ensure your camera drivers are up-to-date:
- Go to Device Manager, expand Cameras, right-click your camera, and select Update driver.
- Check for Windows updates:
- Keeping your system up-to-date ensures compatibility and fixes for any known issues.
- Recalibrate facial recognition:
- Go to Settings -> Accounts -> Sign-in options and select Improve recognition to capture new scans for better accuracy.

- Restart your device to refresh settings, especially if the camera is not activating during sign-in.
These troubleshooting steps can help resolve common issues with Windows Hello facial recognition.
Conclusion
Setting up facial recognition in Windows 11 offers a fast, secure way to sign in to your device. By following the methods above, you can easily configure and optimize Windows Hello for a seamless experience. Whether you’re using the built-in camera or an external one, facial recognition is a convenient, hands-free method to access your account while maintaining high security.
Queries Asked by Users:
Does facial recognition work in low light?
Windows Hello cameras are designed to work in various lighting conditions, but adding additional scans in different lighting can improve recognition.
Can I use both facial recognition and a PIN for sign-in?
Yes, Windows 11 allows you to set up multiple sign-in options, including facial recognition, PIN, and fingerprint (if supported).
What if Windows Hello doesn’t recognize my face?
Try recalibrating with Improve recognition in the Sign-in options. Ensure your face is well-lit and visible to the camera.
See Also: Remove Account Facial Recognition Sign-in In Windows 11
Is facial recognition secure?
Yes, Windows Hello facial recognition uses biometric data, which is highly secure and stored locally on your device for privacy.
Can I use facial recognition on any Windows 11 device?
Facial recognition requires a compatible camera. Most modern devices support it, but you may need an external Windows Hello-compatible camera if yours doesn’t.
Read More:
- How to Add/Remove Common Program Groups from Start Menu in Windows 11?
- How to Add/Remove Android Apps from Your Phone to Start on Windows 11 PC?
- How to Turn On/Off Airplane Mode in Windows 11?
