How to Remove Account Facial Recognition Sign-In in Windows 11?
What are the different ays to remove account facial recognition signin in windows 11?
Windows 11 offers facial recognition sign-in as part of the Windows Hello suite, providing a quick and secure way to access your device. However, there may be situations where you need to remove the facial recognition sign-in, whether for security reasons, troubleshooting, or switching to another authentication method. This tutorial will guide you through multiple methods to disable or remove facial recognition on your Windows 11 account.
Read This: Remove Fingerprint Recognition Sign-in In Windows 11
Why Remove Facial Recognition Sign-In?
While facial recognition provides convenient access, you may want to remove it to enhance security, switch to another sign-in method, or troubleshoot issues with the camera or recognition system. Disabling this feature doesn’t remove other sign-in options, allowing you to use a PIN, password, or fingerprint instead.
Method 1: Using the Settings App
The Settings app is the simplest way to remove facial recognition from your account. Here’s how:
- Open Settings by pressing Winkey + I.
- Navigate to Accounts on the left sidebar.
- Select Sign-in options.
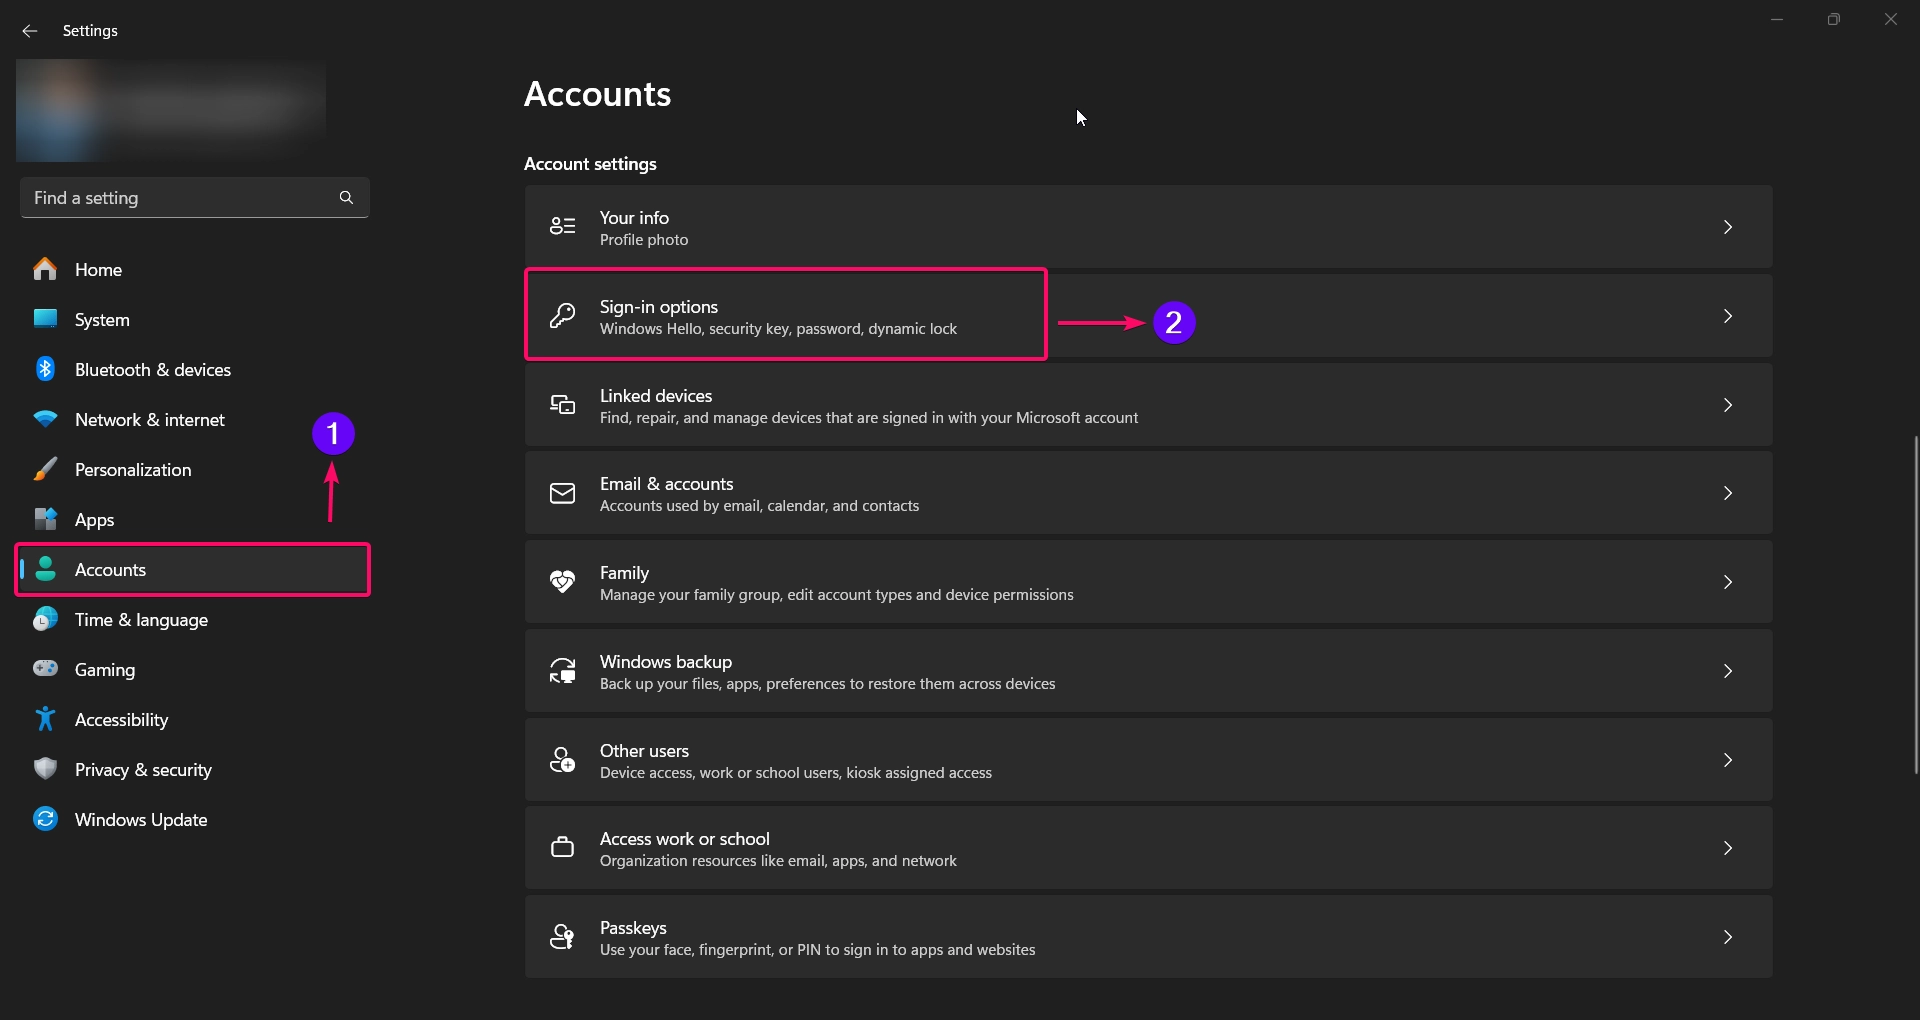
- Under Face Recognition (Windows Hello), click on Remove.
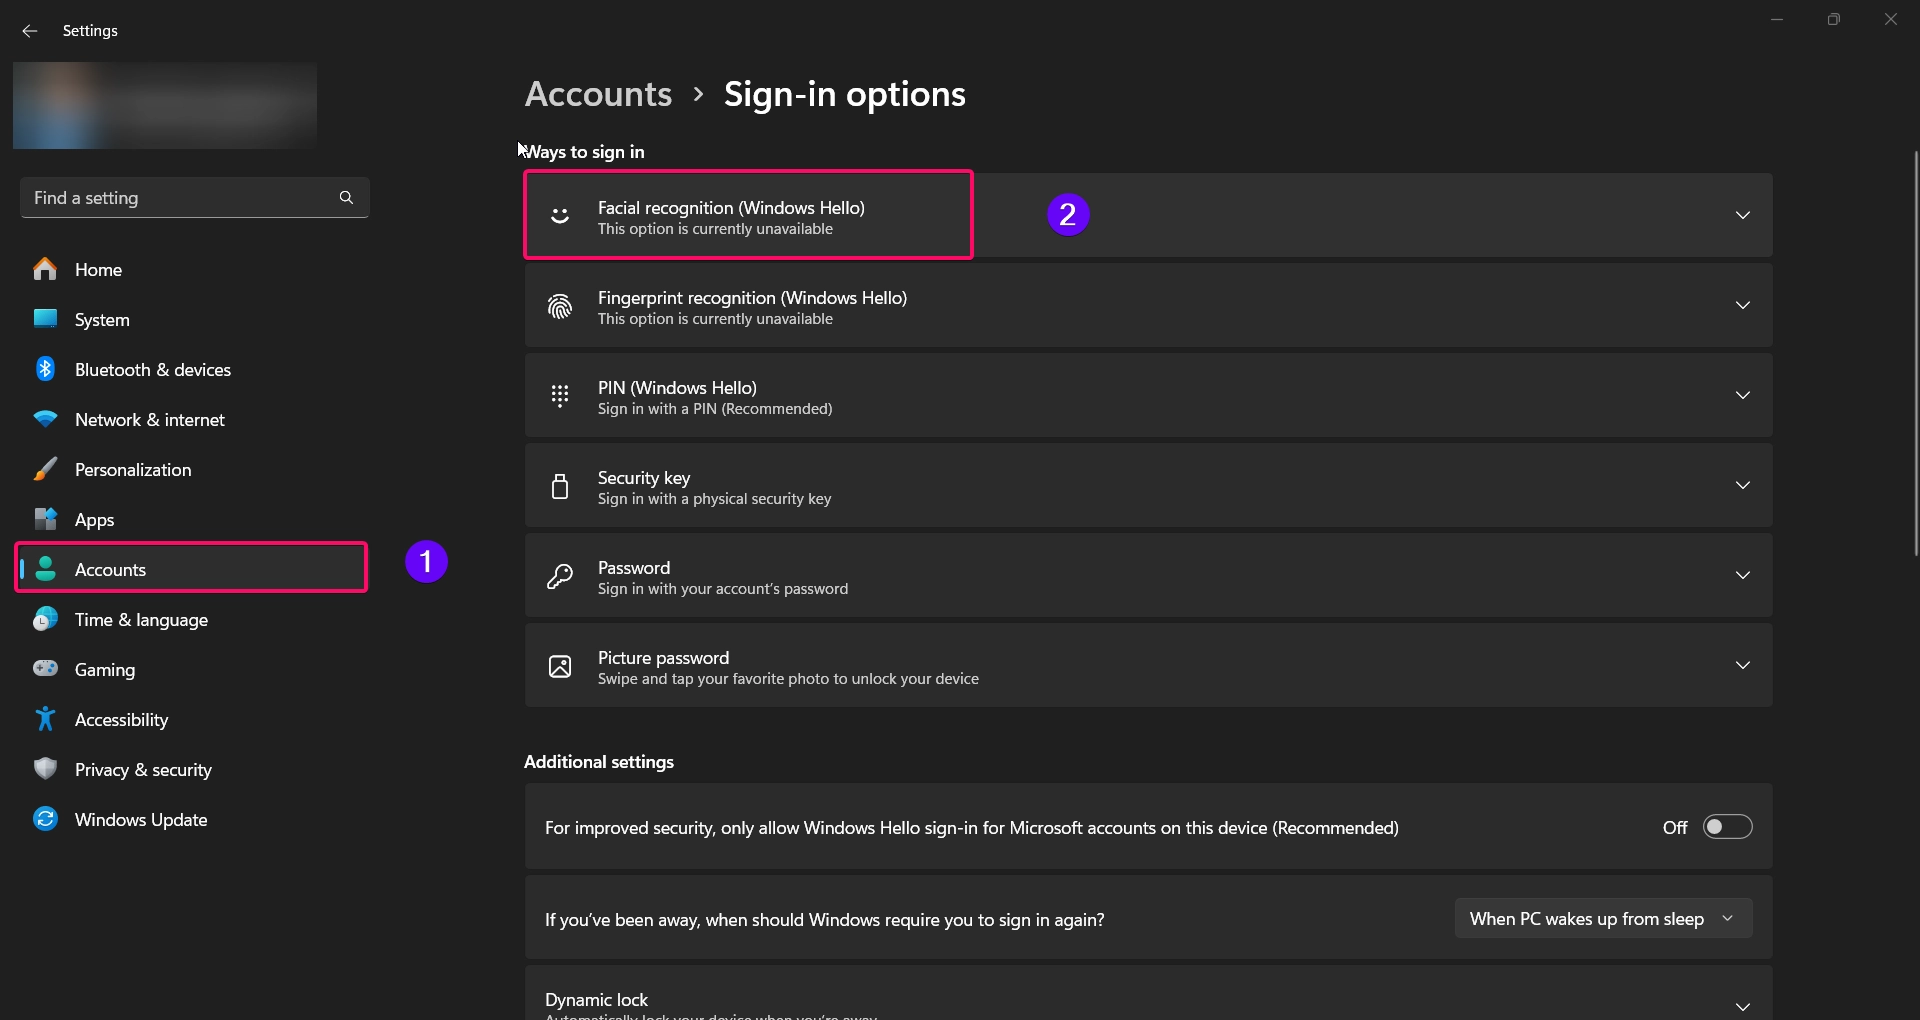
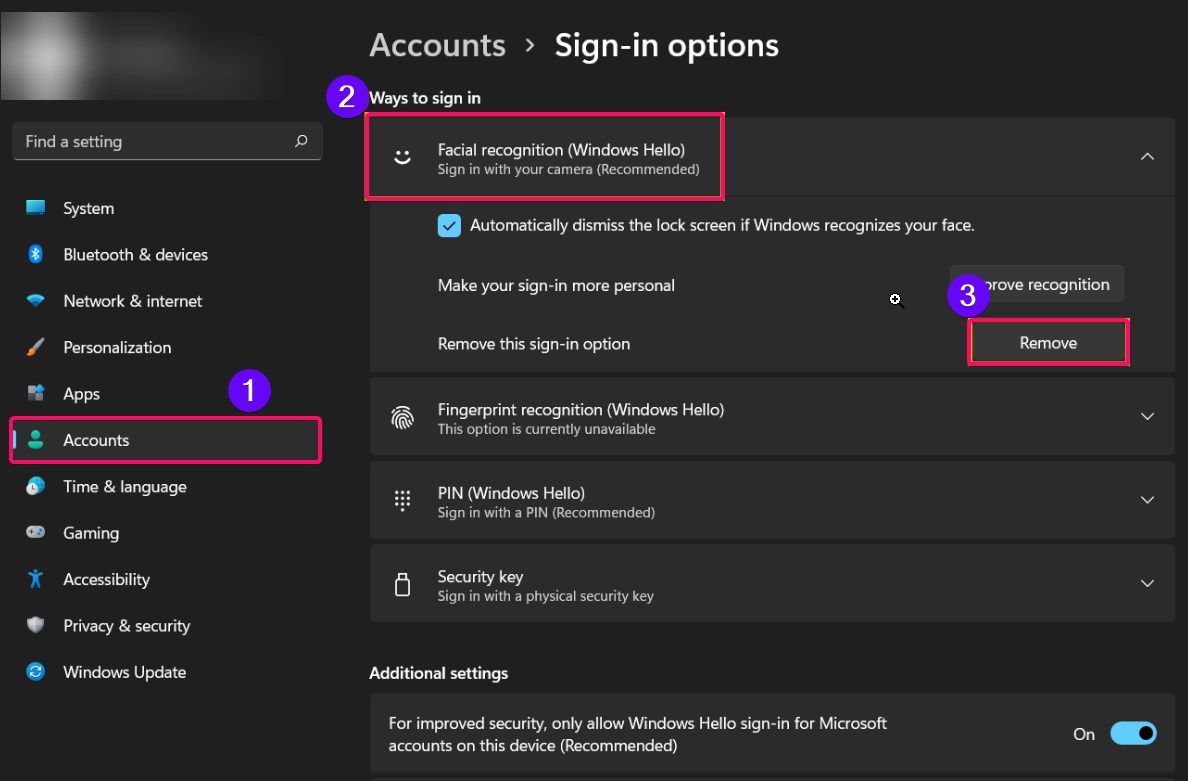
- Confirm your action if prompted, and the facial recognition data will be deleted.
Note: Removing facial recognition will not impact other Windows Hello options like PIN or fingerprint.
Method 2: Using Local Group Policy Editor
Note: This method is available only in Windows 11 Pro, Enterprise, and Education editions.
The Local Group Policy Editor provides an advanced way to disable facial recognition, particularly useful if you want to prevent it from being re-enabled:
- Press Winkey + R, type
gpedit.msc, and press Enter to open the Group Policy Editor.
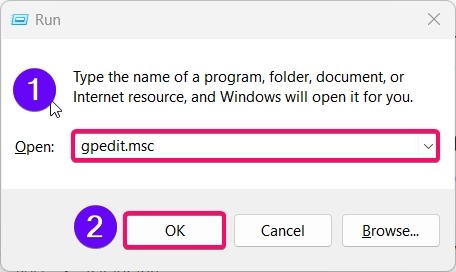
- Go to the following path:
Computer Configuration > Administrative Templates > Windows Components > Biometrics

- Locate Facial Features and double-click on Turn off face recognition.
- Select Enabled to disable face recognition, then click Apply and OK.
This policy change prevents users from enabling facial recognition on the device, providing a more permanent solution.
Recommended: Set Up Facial Recognition Sign-in In Windows 11
Method 3: Using Device Manager to Disable Camera
Another way to remove access to facial recognition is by disabling the camera device through Device Manager. Here’s how:
- Open Device Manager by typing “Device Manager” in the Windows search bar and selecting it.
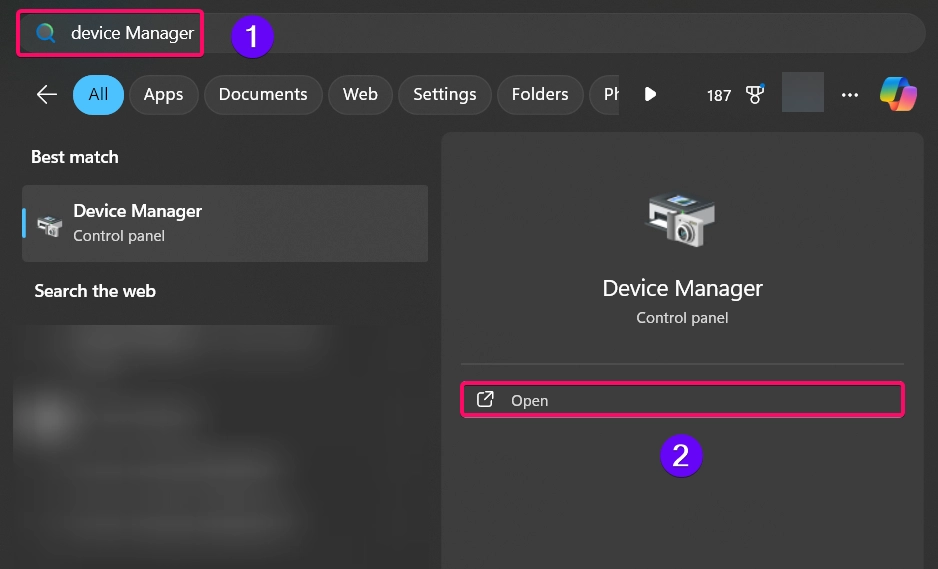
- Expand the Cameras section.
- Right-click your camera device and select Disable device.
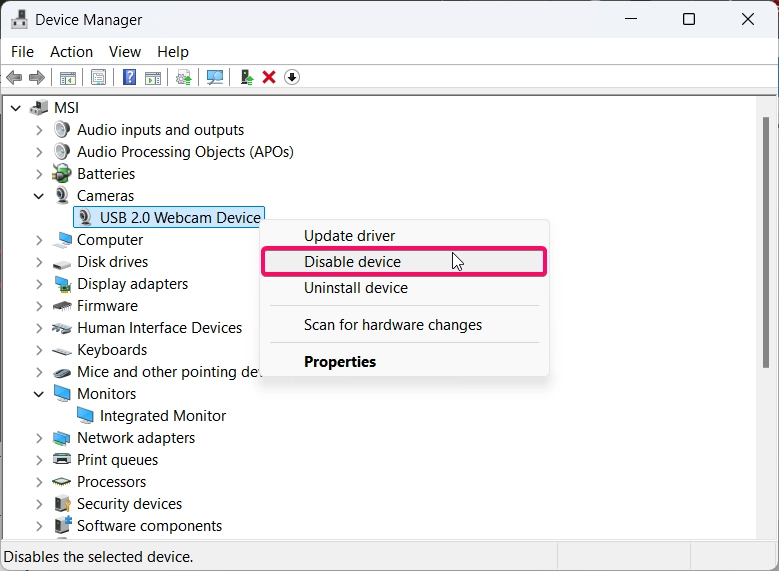
- Confirm if prompted.
Important: Disabling the camera will also affect other applications that rely on the camera.
This method effectively disables facial recognition but may limit the camera’s availability for other uses.
See Also: Turn On/off Facial Recognition Auto Dismiss Lock Screen In Windows 11
Method 4: Using Registry Editor
Warning: Editing the Windows registry can be risky. Always back up your registry before making changes.
If you’re comfortable with advanced settings, you can use the Registry Editor to disable facial recognition:
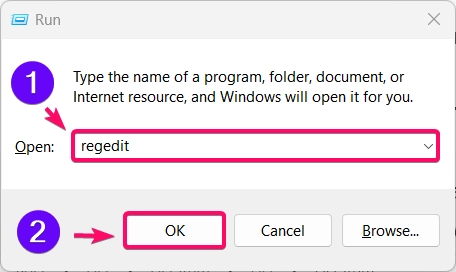
- Press Winkey + R, type
regedit, and press Enter.
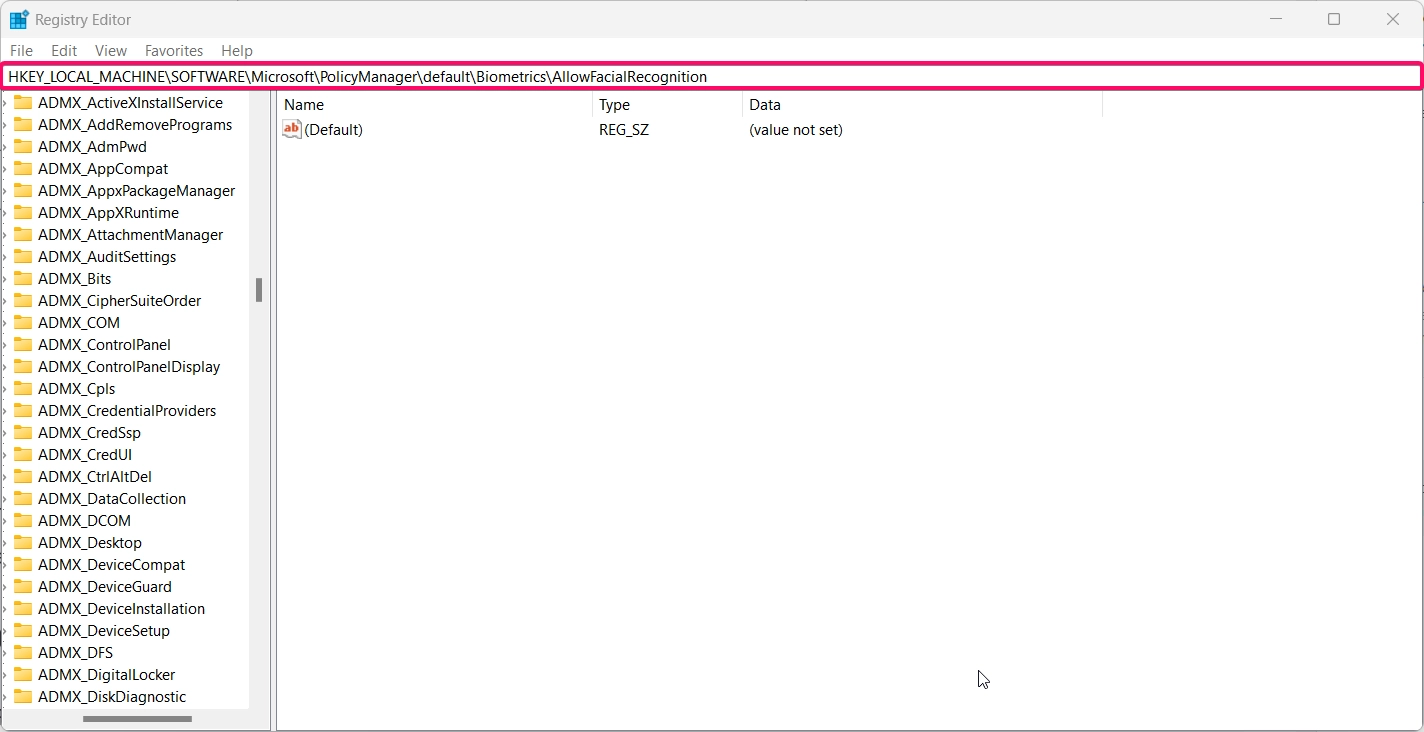
- Navigate to the following path:
HKEY_LOCAL_MACHINE\SOFTWARE\Microsoft\PolicyManager\default\Biometrics\AllowFacialRecognition
- Locate Value named
AllowFacialRecognition. If it doesn’t exist, create a new DWORD (32-bit) Value with this name. - Set the Value data to
0to disable facial recognition.
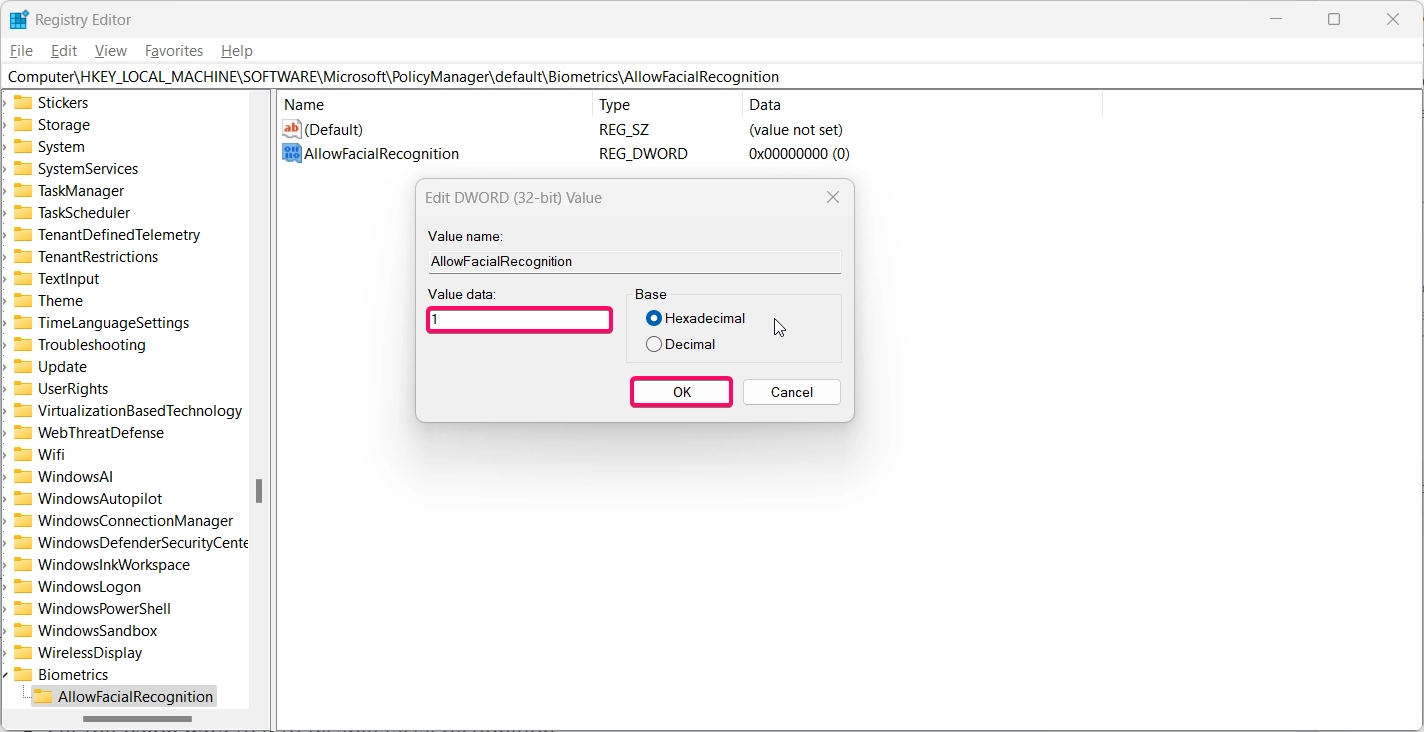
AllowFacialRecognition- Restart your computer for the changes to take effect.
This method provides a permanent way to disable facial recognition but should only be attempted by experienced users.
Conclusion
Removing facial recognition sign-in in Windows 11 is simple and can be done through several methods, including the Settings app, Local Group Policy Editor, Device Manager, and Registry Editor. Whether you’re looking to switch to another authentication method or improve security, these steps will help you remove facial recognition effectively.
Read More:
- How to Add/Remove Common Program Groups from Start Menu in Windows 11?
- How to Add/Remove Android Apps from Your Phone to Start on Windows 11 PC?
- How to Turn On/Off Airplane Mode in Windows 11?


