How to Enable or Disable Adaptive Color in Windows 11?
5 Unique Methods to Enable or Disable Adaptive Color in Windows 11 PC!
Adaptive color is a feature in Windows 11 that adjusts your screen’s color temperature and brightness based on ambient light conditions. It’s designed to improve visibility and reduce eye strain, especially during extended usage. In this guide, we’ll cover how to enable or disable adaptive color using multiple methods, ensuring a comfortable viewing experience for your needs.
Related: Enable Or Disable Store Activity History On Device In Windows 11
Adaptive color works by dynamically changing the screen’s brightness and color temperature. When enabled, it uses your device’s light sensors to detect ambient lighting conditions and automatically adjusts your display. This is particularly helpful when working in dim or overly bright environments.
Method 1: Using Windows Settings
The simplest way to manage adaptive color is through the Settings app. Follow these steps:
- Open Settings by pressing Winkey + I.
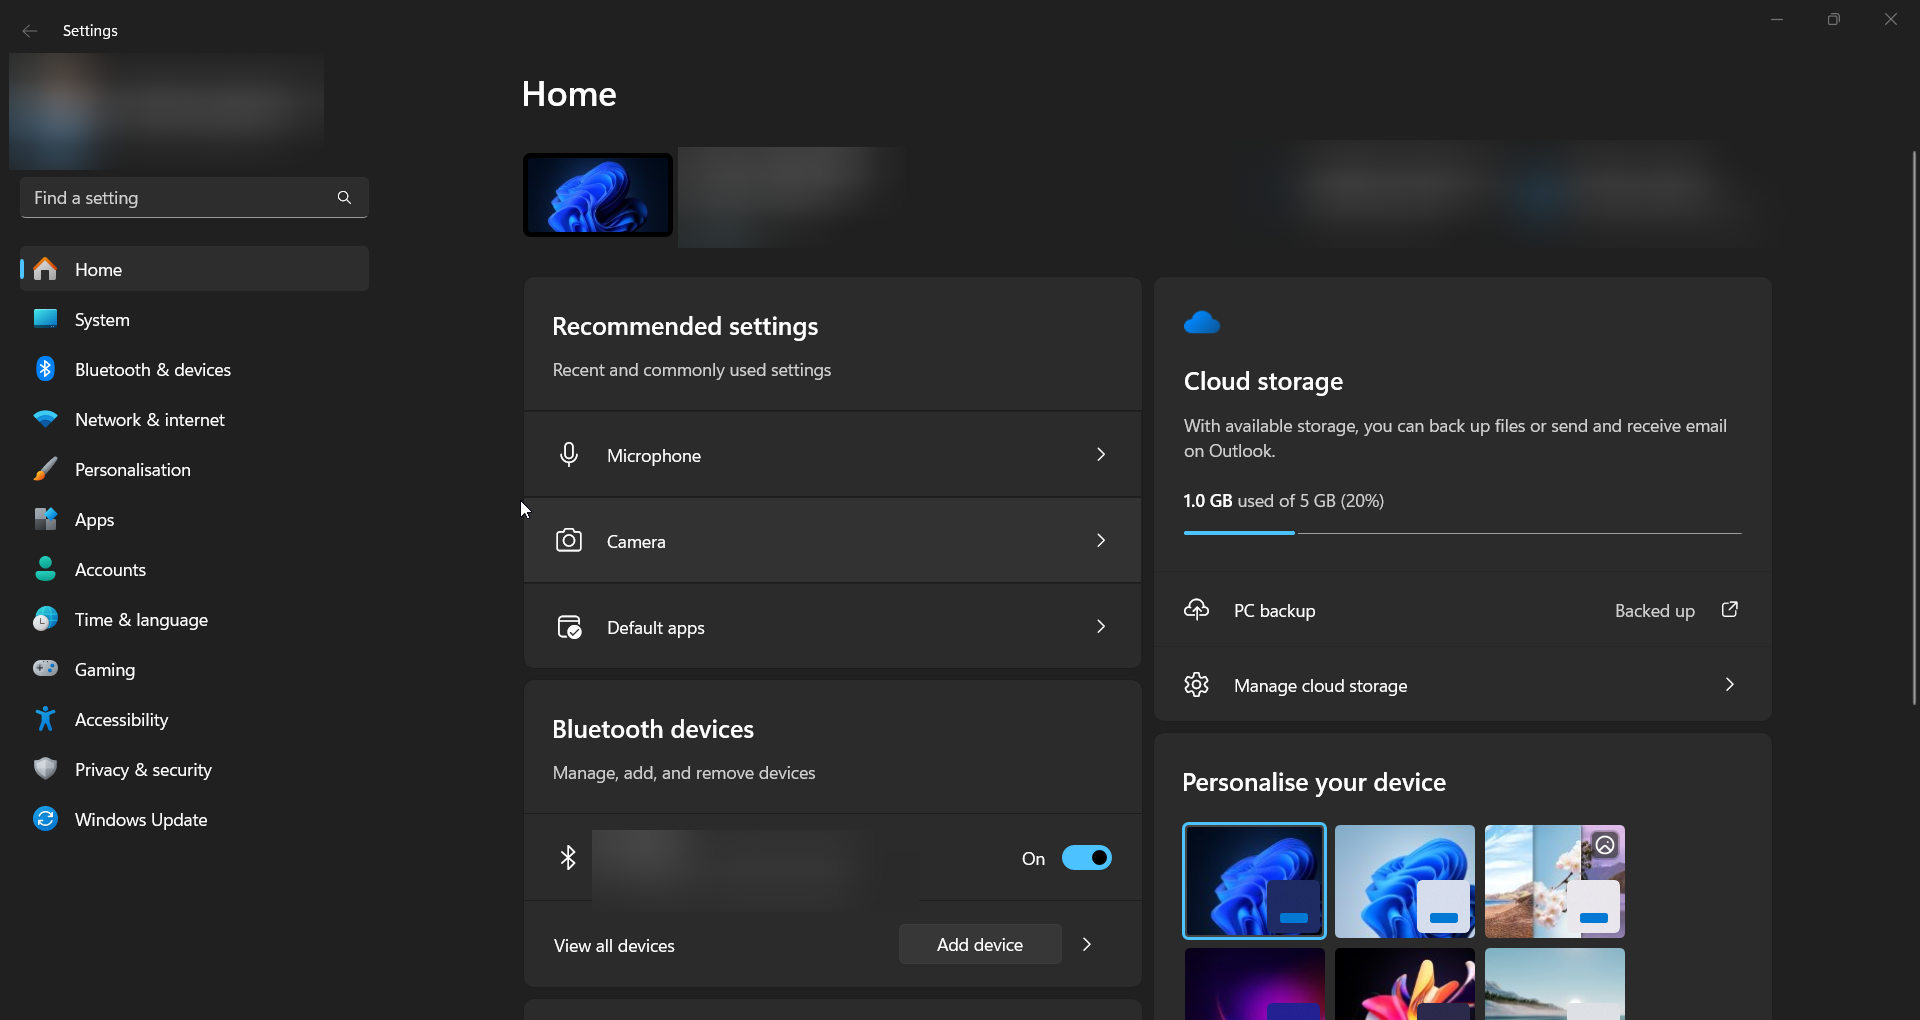
- Navigate to System in the left pane.
- Select Display from the options.
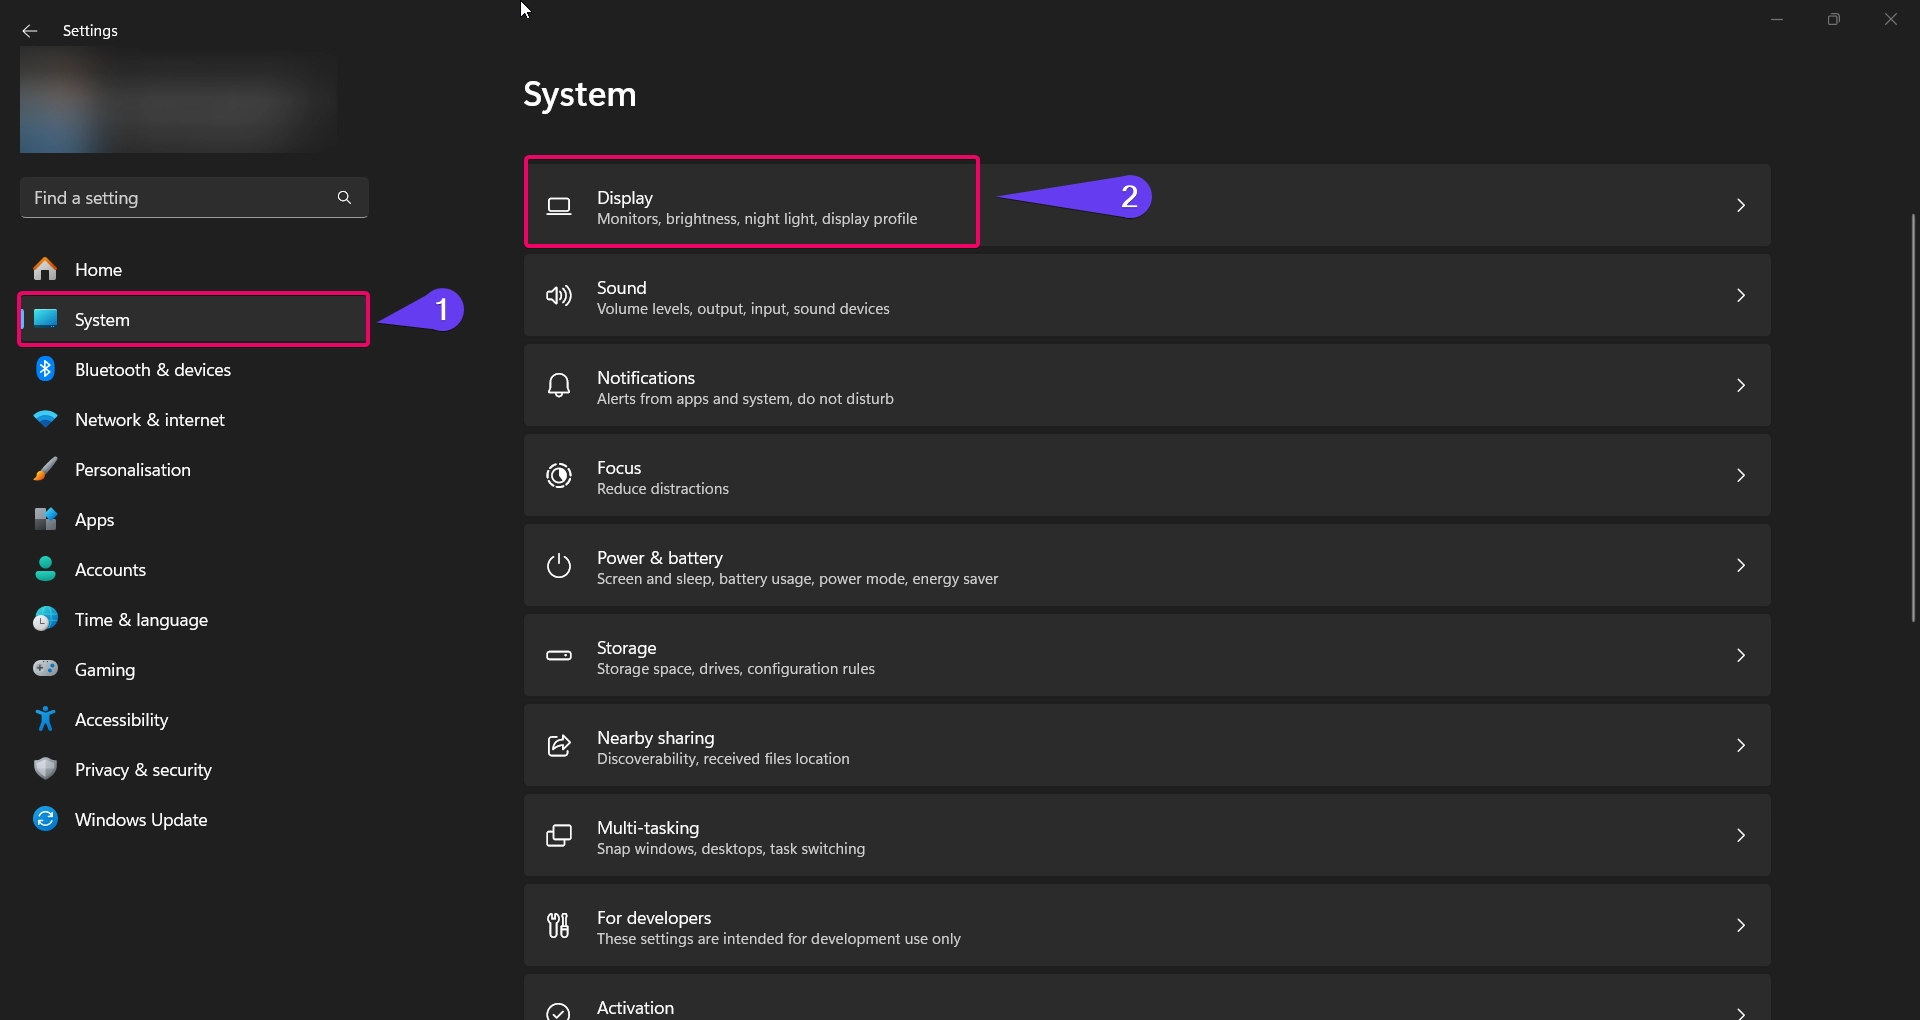
- Scroll down to find the Brightness and color section.
- Look for the Change brightness automatically when lighting changes option.
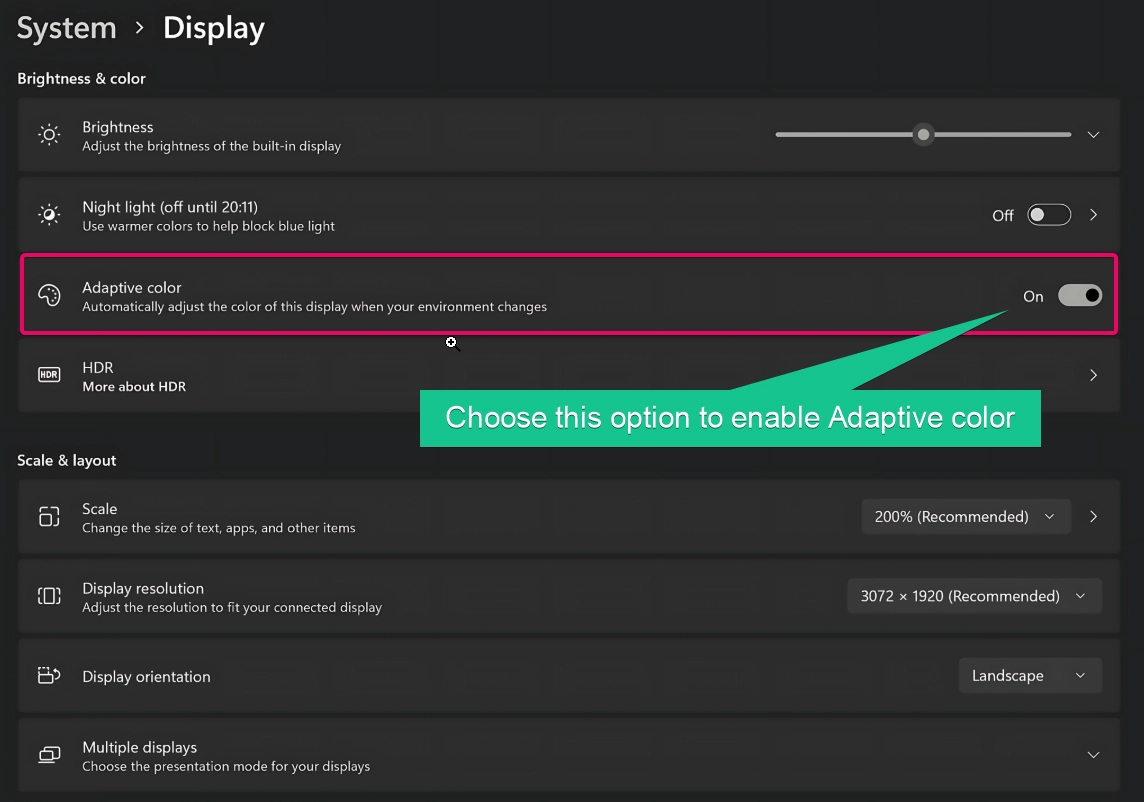
- Toggle this setting On to enable adaptive color or Off to disable it.
Note: If you don’t see this option, your device may not support adaptive color, or the light sensor drivers may be missing.
Method 2: Using the Control Panel
For those familiar with the Control Panel, this method provides an alternative way to adjust adaptive color settings:
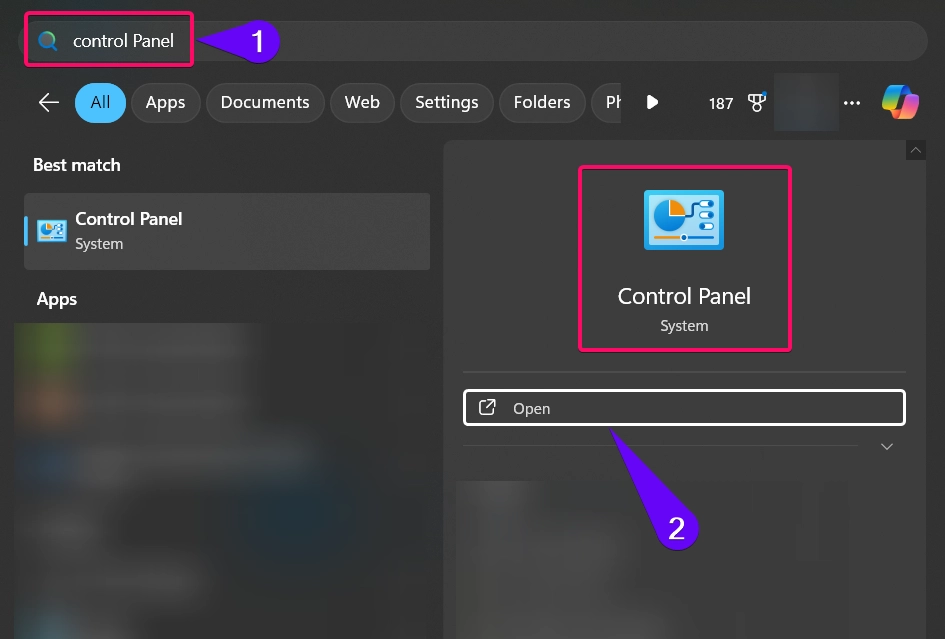
- Open the Control Panel by typing “Control Panel” into the Windows search bar and selecting it.
- Navigate to Hardware and Sound > Power Options.
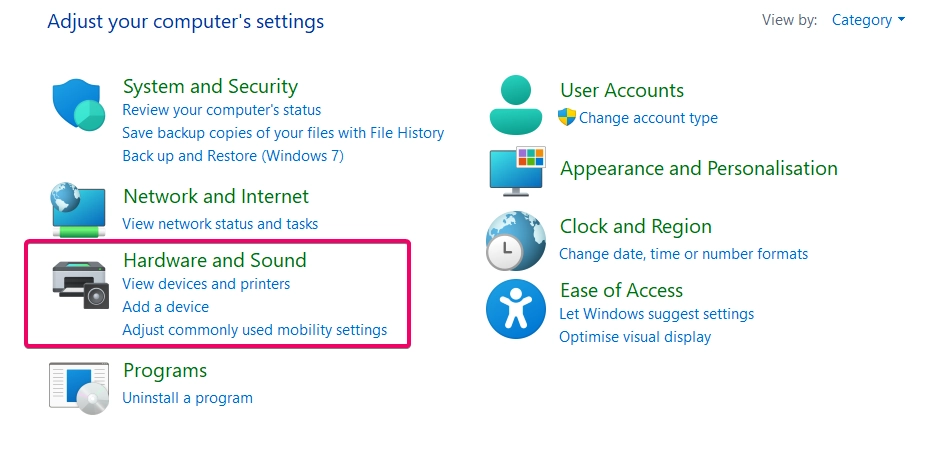

- Click on Change plan settings next to your current power plan.

- Select Change advanced power settings.
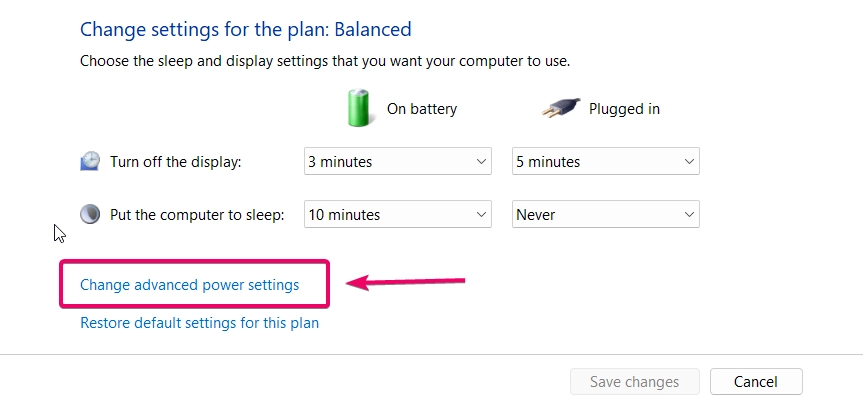
- In the advanced settings window, expand Display and then Enable adaptive colors.
- Set the option to On or Off for both On battery and Plugged in scenarios.
- Click Apply and OK to save the changes.
Method 3: Using the Registry Editor
Important: Editing the registry can be risky. Always back up your registry before making changes.
If the above methods aren’t available, you can enable or disable adaptive color using the Registry Editor:
- Open the Run dialog by pressing Winkey + R, type
regedit, and press Enter.

- Navigate to the following key:
HKEY_LOCAL_MACHINE\SOFTWARE\Microsoft\Windows\CurrentVersion\AdaptiveBrightness

- Locate the AdaptiveBrightnessEnabled value. If it doesn’t exist, create a new
DWORD (32-bit) Valueand name it AdaptiveBrightnessEnabled. - Set the value to:
1to enable adaptive color.0to disable it.
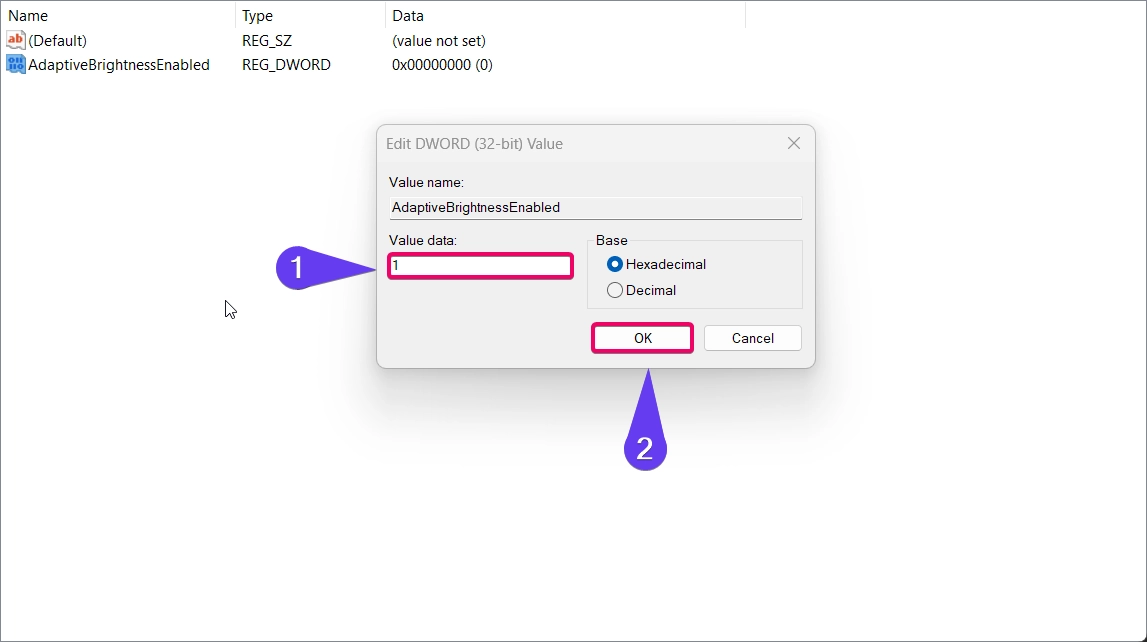
- Restart your computer to apply the changes.
Method 4: Using PowerShell
For advanced users, PowerShell offers a quick way to enable or disable adaptive color:
- Open PowerShell as Administrator by right-clicking the Start menu and selecting Windows Terminal (Admin).

- To enable adaptive color, enter the following command:
powercfg /SETACVALUEINDEX SCHEME_CURRENT SUB_VIDEO ADAPTBRIGHT 1 ; powercfg /SETACTIVE SCHEME_CURRENT

- To disable adaptive color, use:
powercfg /SETACVALUEINDEX SCHEME_CURRENT SUB_VIDEO ADAPTBRIGHT 0 ; powercfg /SETACTIVE SCHEME_CURRENT

- Close PowerShell and check your display settings to ensure the changes have taken effect.
Method 5: Using Graphics Control Software
Some devices come with graphics control software, such as Intel Command Center or NVIDIA Control Panel, that can manage display settings, including adaptive color:
Recommended: Enable Or Disable Send Activity History To Microsoft In Windows 11
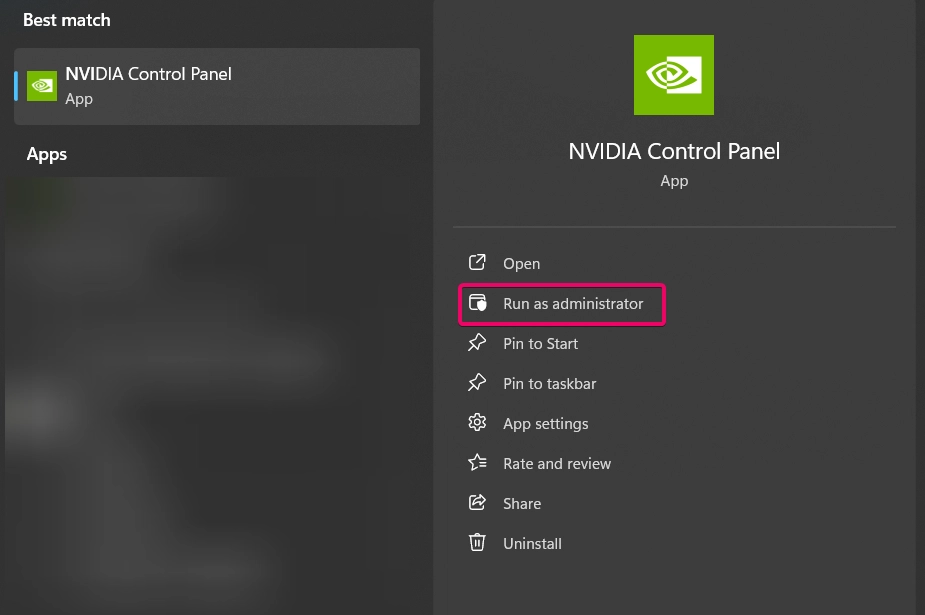
- Open your device’s graphics control software.
- Look for a Display settings or Color adjustment option.
- Toggle adaptive brightness or dynamic color features on or off, depending on your preference.
This method is specific to systems with dedicated graphics control software.
Enable Adaptive Color if you want to reduce eye strain during prolonged use, especially in changing light conditions. Disable Adaptive Color if you prefer consistent brightness and color settings or if the feature interferes with your work (e.g., for color-sensitive tasks like photo editing).
Conclusion
The adaptive color feature in Windows 11 is a helpful tool for improving screen visibility and reducing eye fatigue. By following the methods outlined above, you can easily turn it on or off based on your preferences. Whether you use the Settings app, Control Panel, Registry Editor, PowerShell, or graphics software, these steps ensure you have full control over your display settings.
Commonly Asked Queries:
Why don’t I see the adaptive color option in my settings?
Your device may lack the necessary light sensors or drivers. Check for driver updates or confirm if your hardware supports this feature.
Does enabling adaptive color affect battery life?
Slightly, as the light sensor runs continuously. However, the impact is minimal compared to other features.
How do I troubleshoot if adaptive color isn’t working?
Ensure your display drivers are updated, and check that the light sensors are enabled in Device Manager.
What’s the difference between adaptive color and Night Light?
Adaptive color adjusts brightness and color based on ambient light, while Night Light reduces blue light to ease eye strain during evening hours.
Can I enable adaptive color on an external monitor?
Adaptive color typically works only with built-in displays. External monitors may require separate settings or hardware support.
Read More:
- How to Add/Remove Common Program Groups from Start Menu in Windows 11?
- How to Add/Remove Android Apps from Your Phone to Start on Windows 11 PC?
- How to Turn On/Off Airplane Mode in Windows 11?
