How to Check if an Account is Administrator or Standard User in Windows 11?
4+ Different and Unique methods to Check if an Account is Administrator or Standard User in Windows 11 PC!
In Windows 11, there are different types of user accounts, primarily Administrator and Standard User accounts. Administrator accounts have full system access, allowing them to make changes, install applications, and configure system settings, while Standard User accounts have limited permissions. Knowing whether your account is an administrator or a standard user is essential for managing permissions and security. This tutorial will show you multiple methods to check if an account is Administrator or Standard User in Windows 11.
Check Out: Enable/disable Built-in Administrator Account Lockout In Windows 11
Understanding your account type is essential for system management and security. Administrator accounts have more privileges, so knowing which account type you’re using can help prevent unauthorized changes. Standard user accounts are ideal for everyday use, reducing the risk of accidental system modifications.
Method 1: For Current User Using the Settings App
The Settings app provides a quick way to check your account type. Follow these steps:
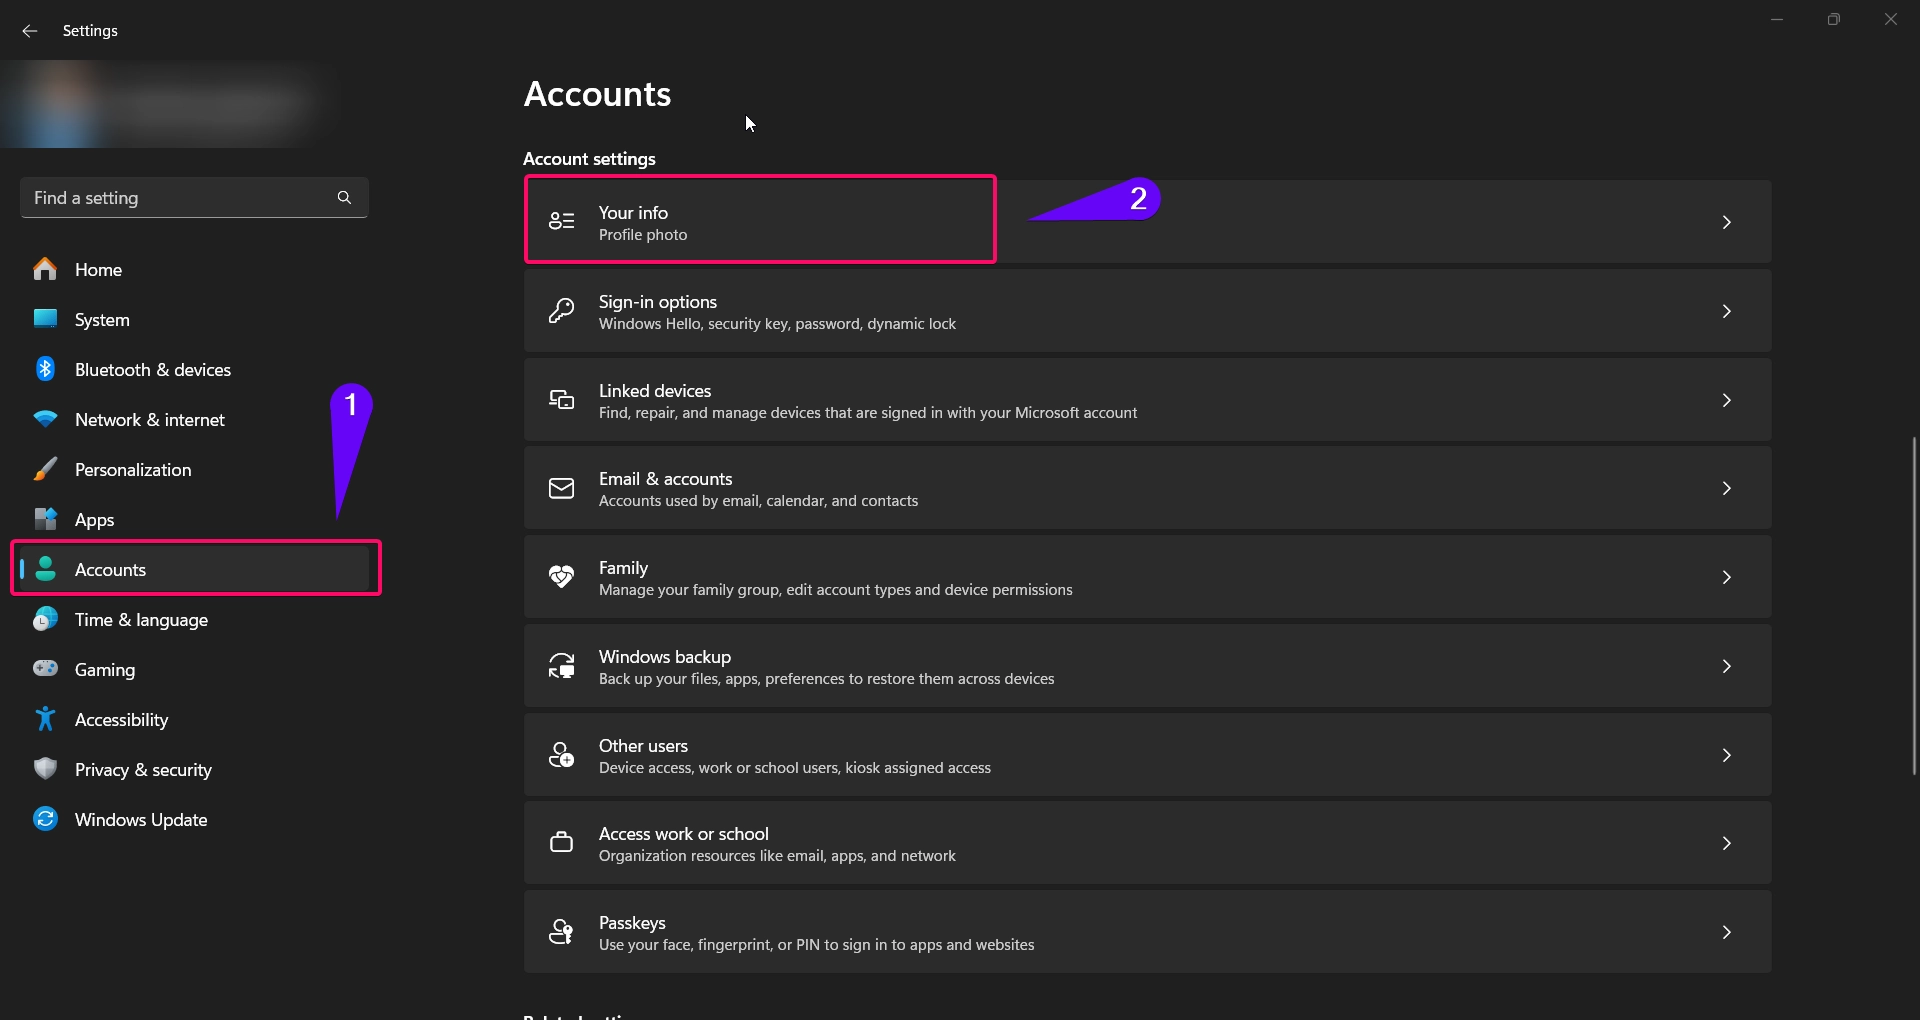
- Open Settings by pressing Winkey + I.
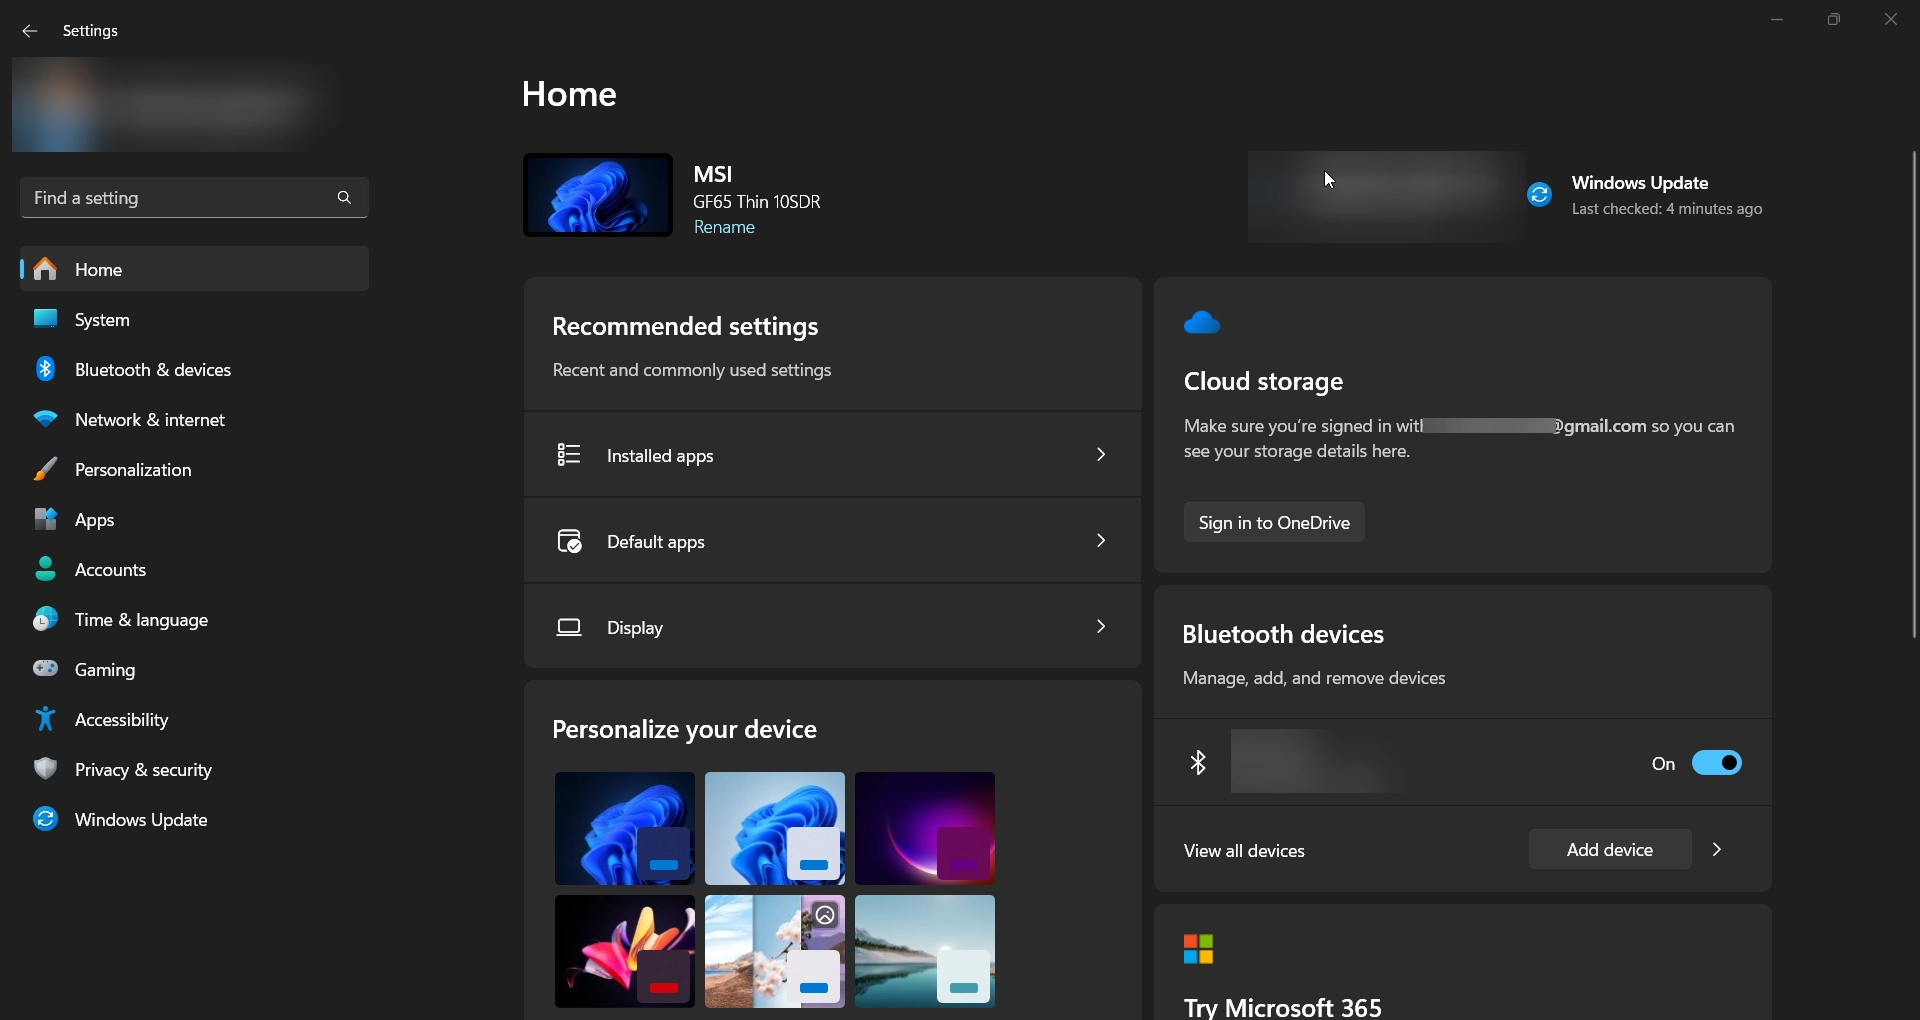
- Go to Accounts on the left sidebar.
- Click on Your Info in the main pane.
- Under your account name, you’ll see the account type (e.g., Administrator or Standard User).
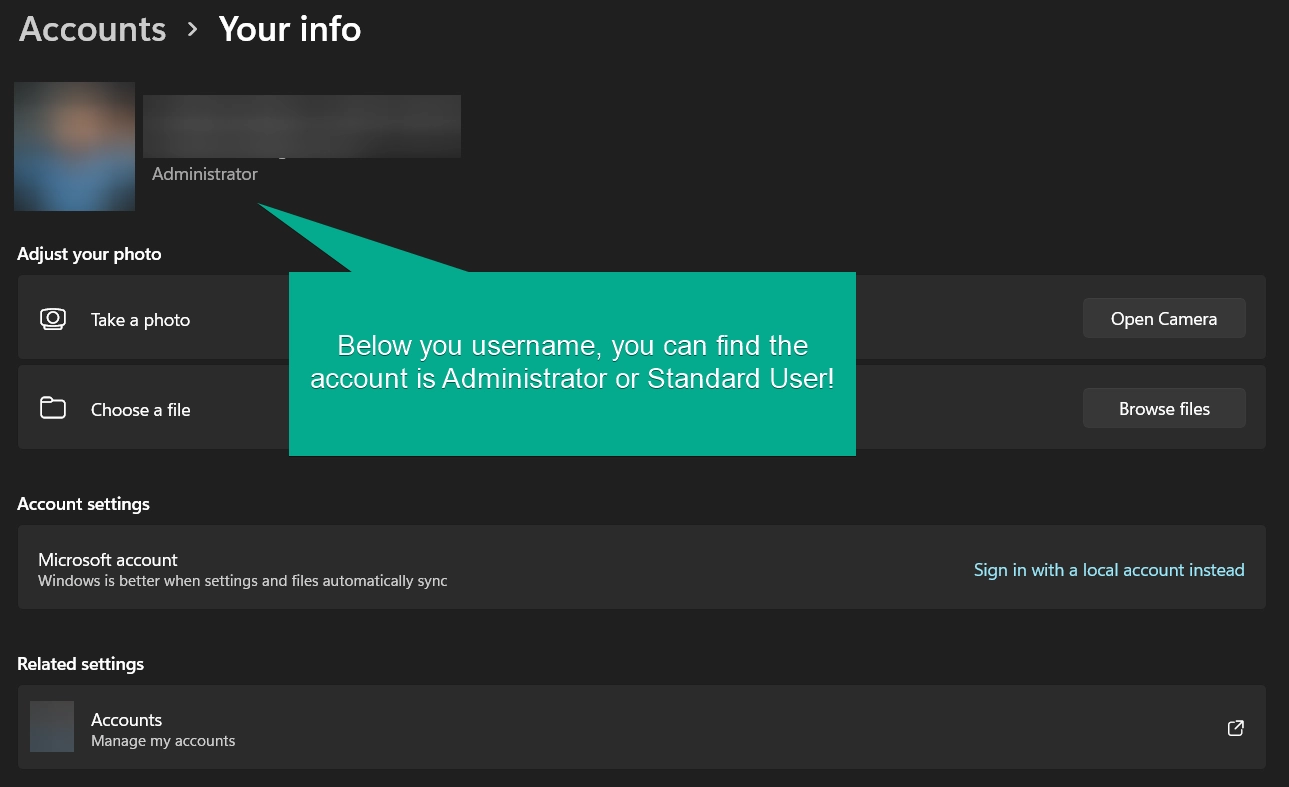
Tip: If you see “Administrator” under your account name, you have full access to system settings. If it says “Standard User,” your account has limited permissions.
Method 2: For Any User Using the Settings App:
The Settings app provides a quick way to check any or other account type. Follow these steps:
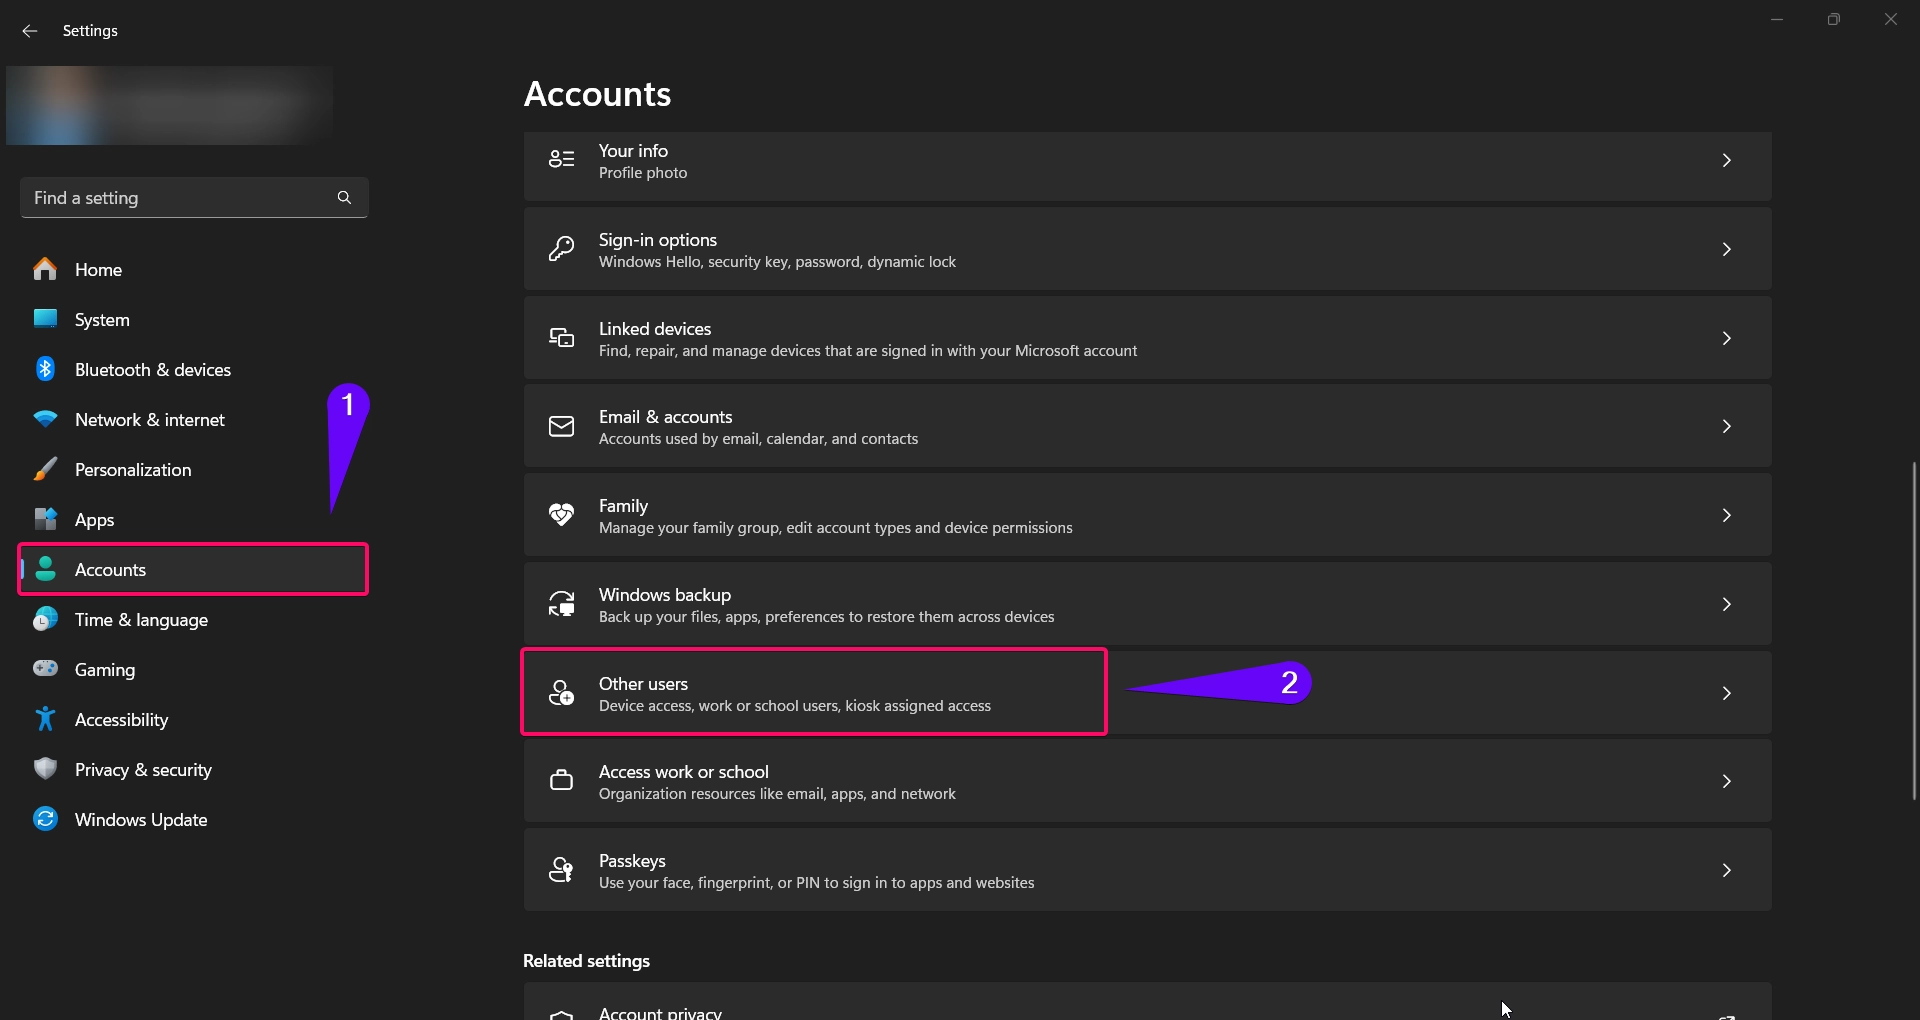
- Open Settings by pressing Winkey + I.

- Go to Accounts on the left sidebar.
- Click on Other Users in the main pane.
- If you do not see Administrator under an account name, then the account is a standard user.
- If you see Administrator under an account name, then the account is an administrator.
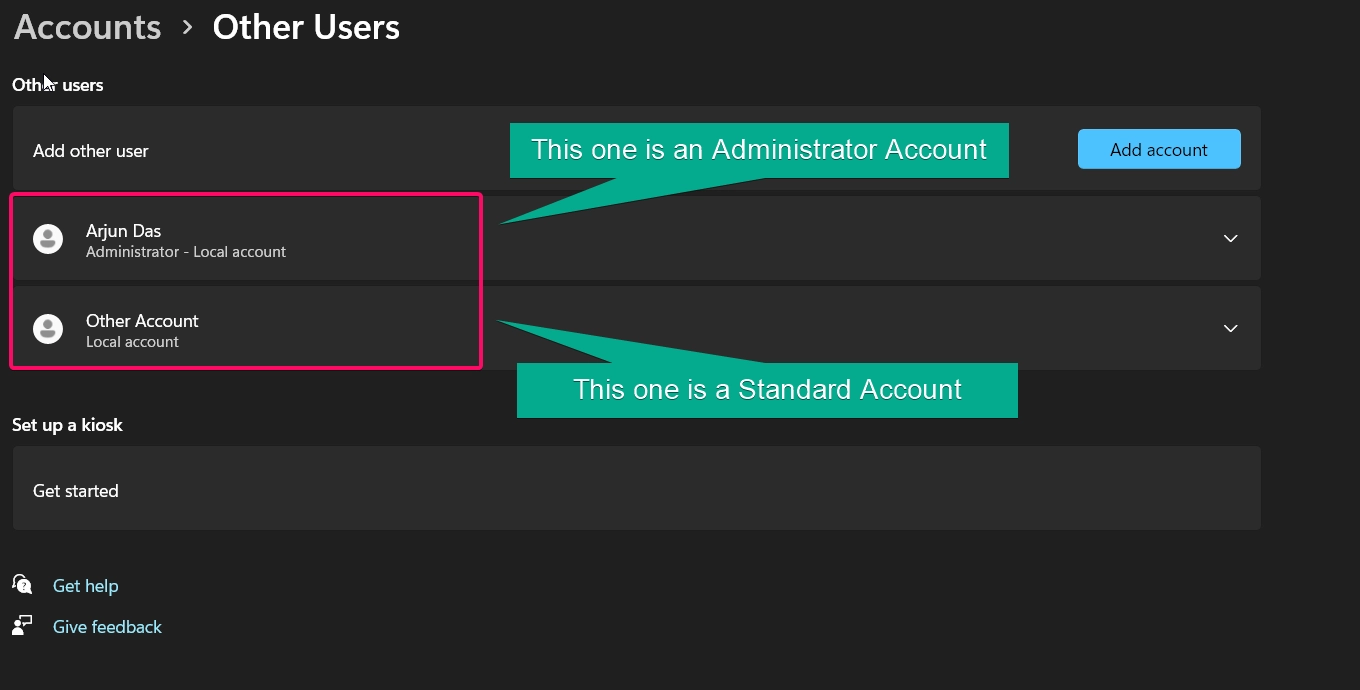
- In this way, you can find whether the other users accounts are admin or standard one.
Method 3: For Current User Using Control Panel:
The Control Panel offers an alternative way to view your account type, especially useful if you’re familiar with older Windows versions:
- Open Control Panel by typing “Control Panel” in the Windows search bar and selecting it.
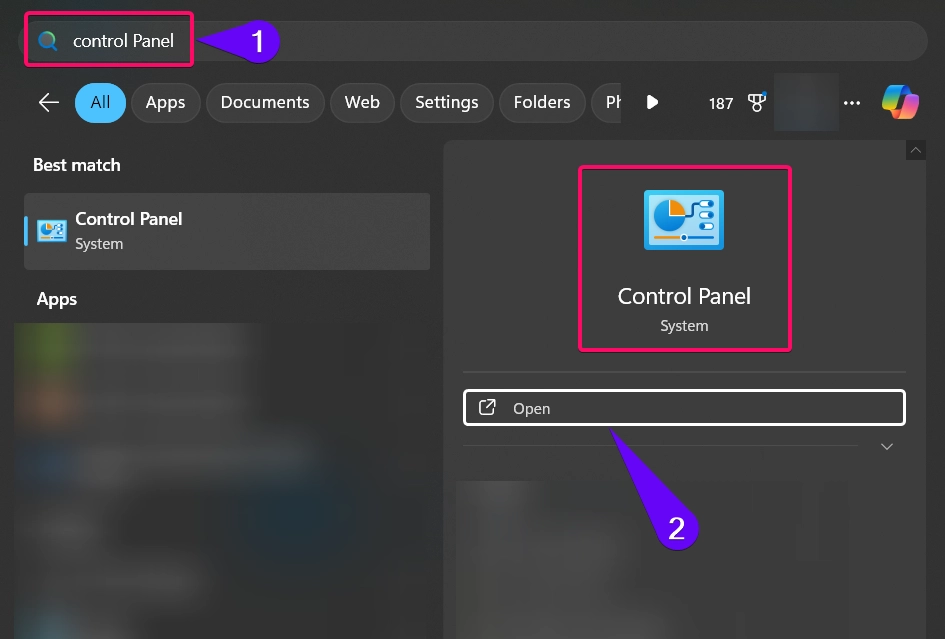
- Go to User Accounts.
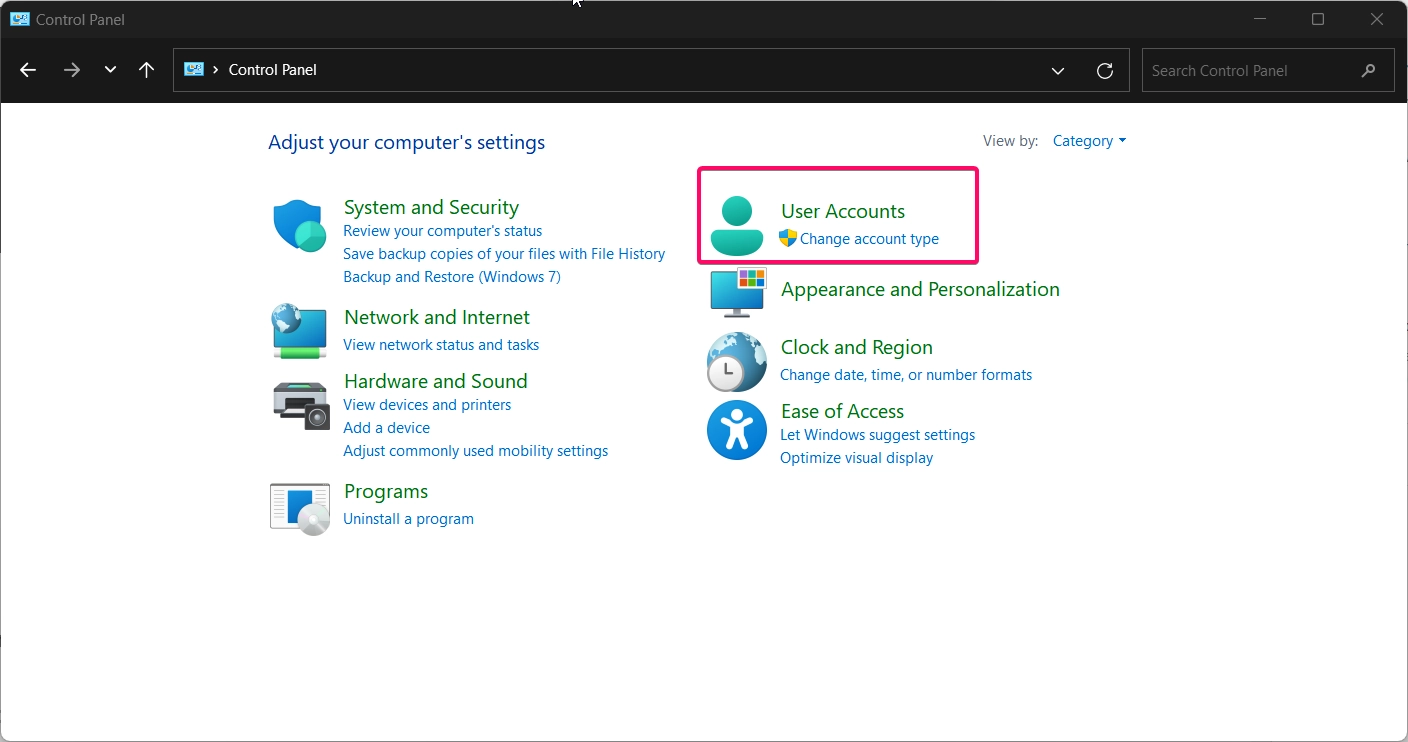
- Click on User Accounts again to see your account information.
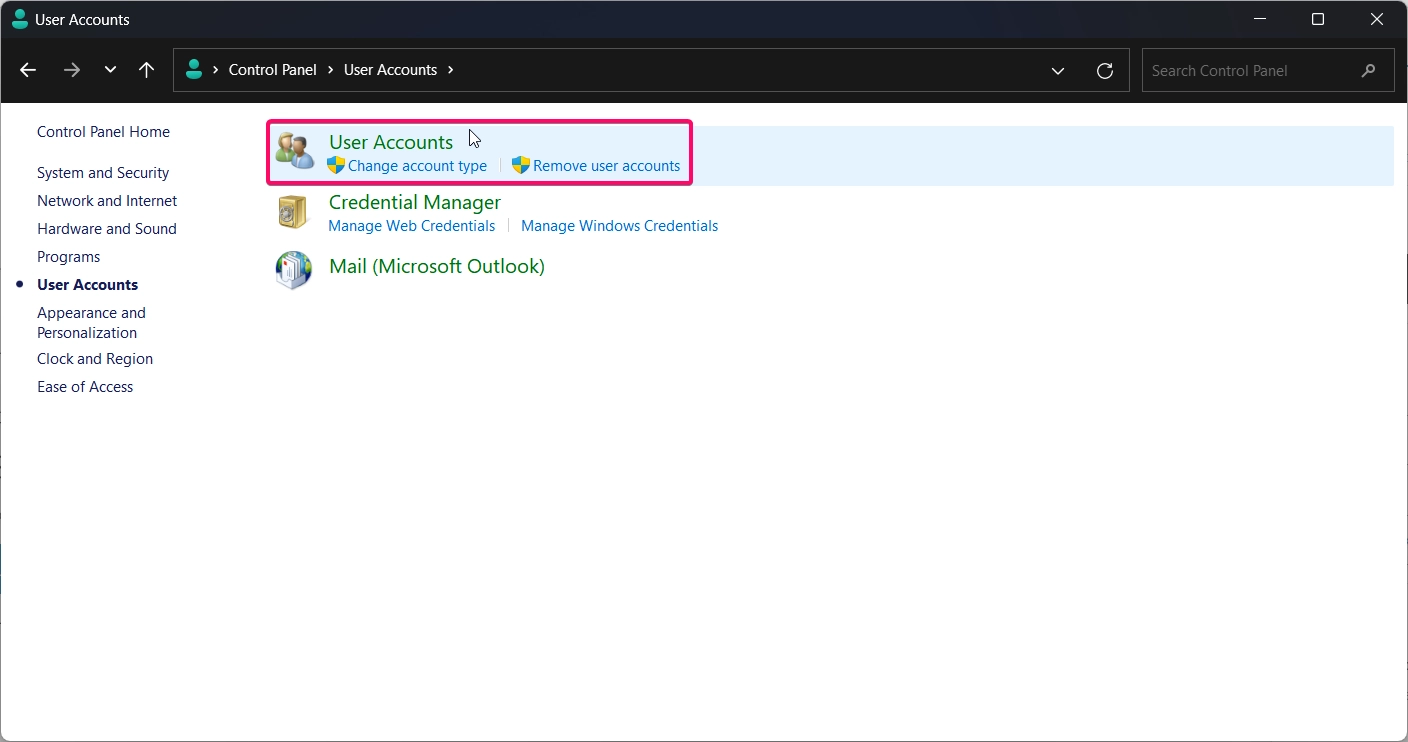
- Your account type will be displayed under your account name, indicating whether it’s Administrator or Standard User.
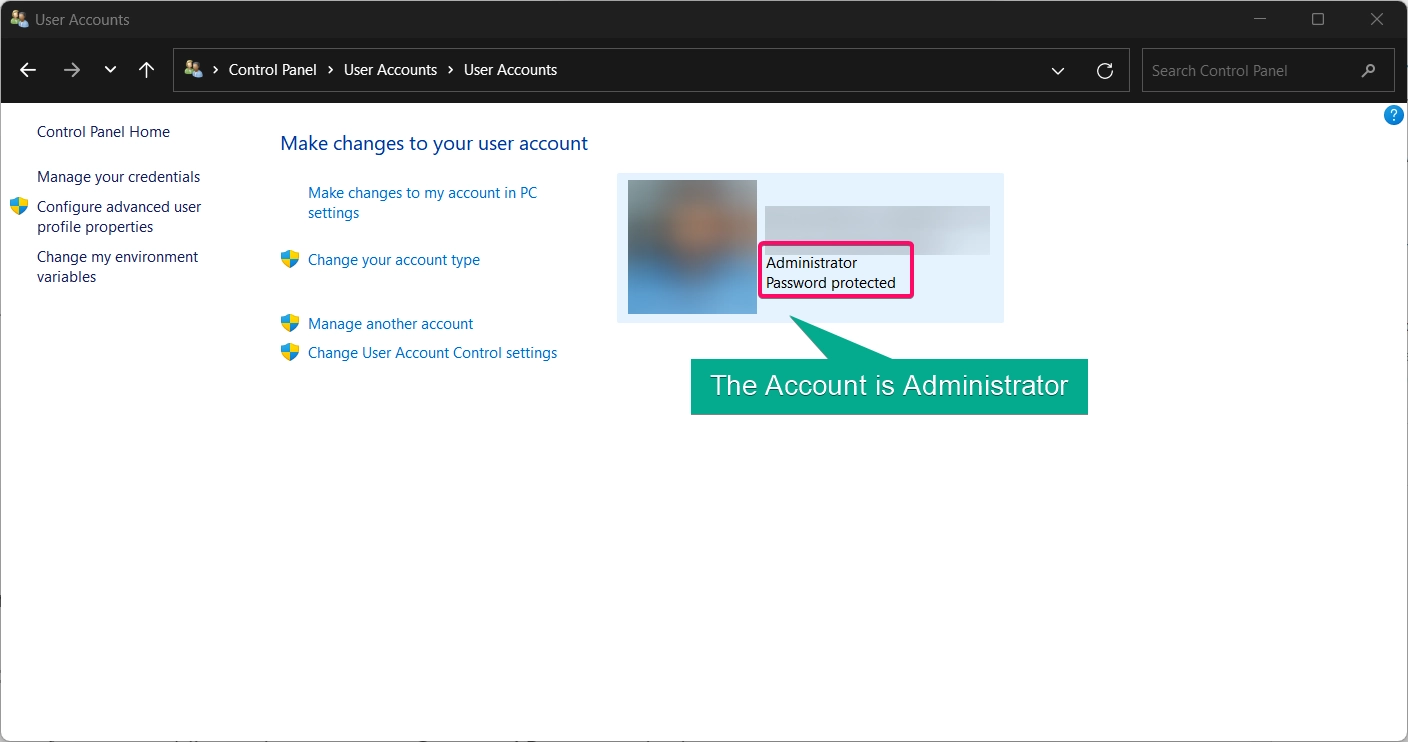
This method is straightforward and provides a direct way to verify your account type.
Method 4: For Other User Using Control Panel:
- Open Control Panel by typing “Control Panel” in the Windows search bar and selecting it.

- Go to User Accounts.

- Click on User Accounts again to see your account information.

- Now click Manage Another Account option.
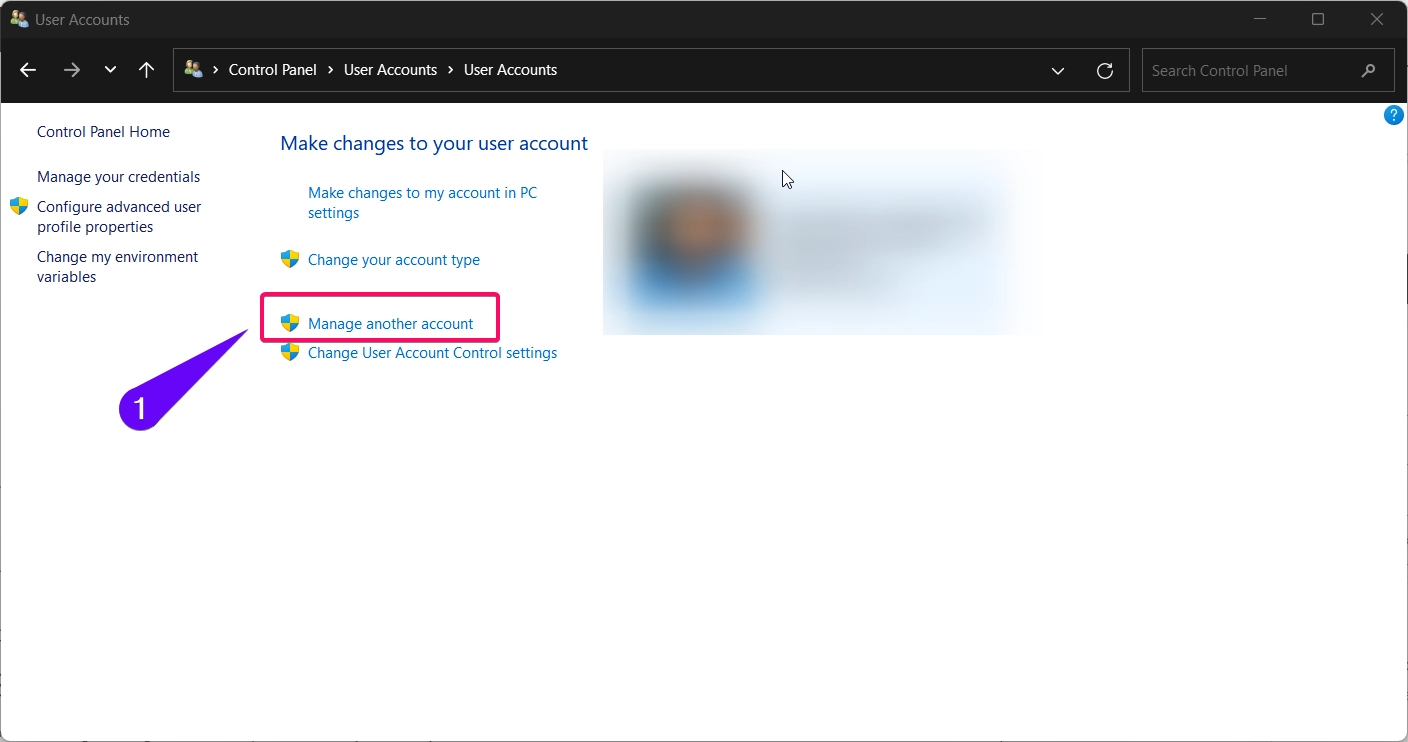
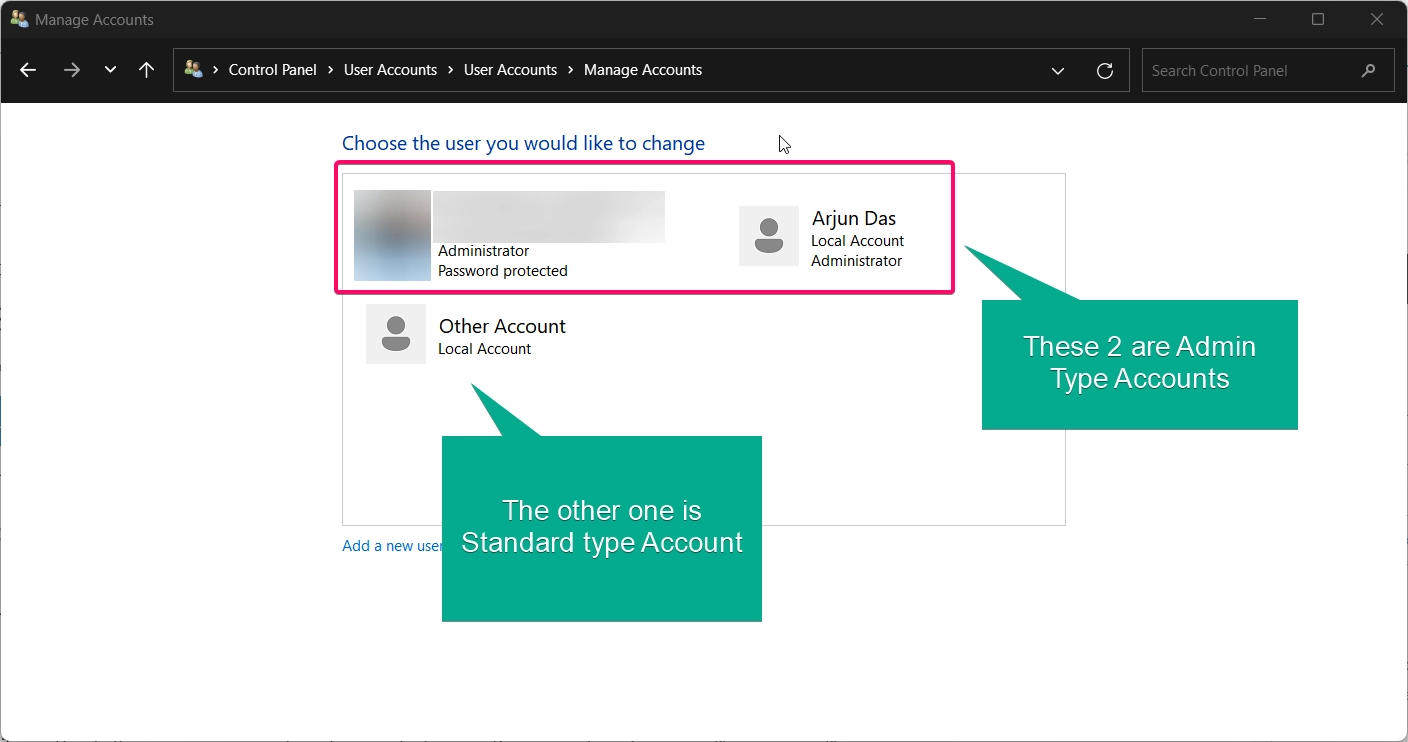
- It will display all the available users accounts including current user.
- If you do not see Administrator under an account name, then the account is a standard user.
- If you see Administrator under an account name, then the account is an administrator.
Method 5: For Current User Using Command Prompt
If you prefer command-line tools, you can use Command Prompt to check your account type:
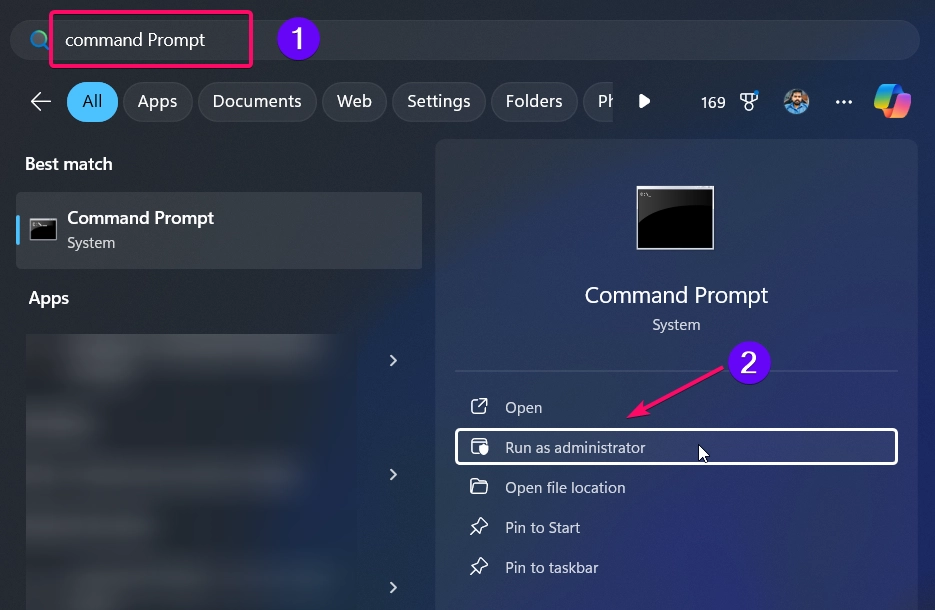
- Open Command Prompt by typing “cmd” in the Windows search bar and selecting Run as administrator (or open as a regular user for verification).
- Type the following command and press Enter:
net user %username%
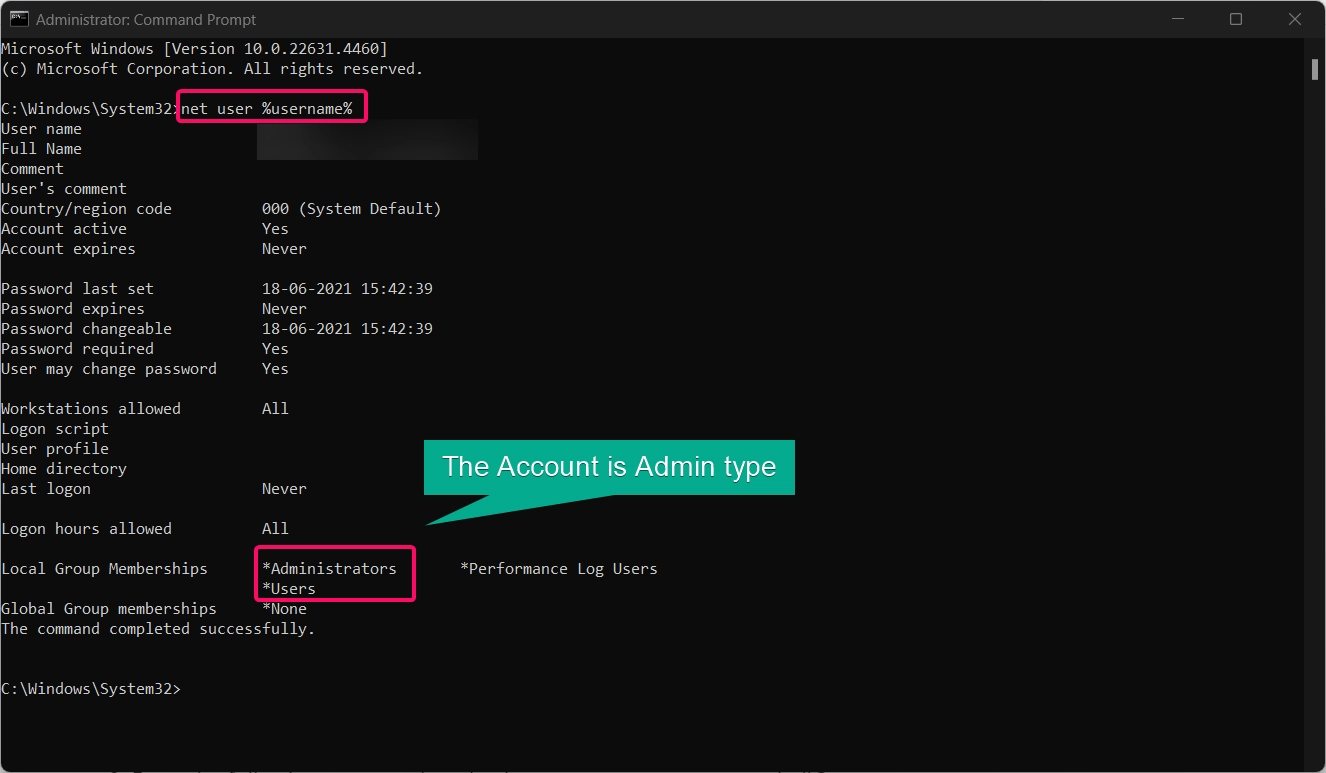
- Look for the Local Group Memberships section in the output. If it lists “Administrators,” your account is an administrator. If it shows “Users,” you have a standard user account.
Note: This method provides detailed account information, useful for verifying permissions at a technical level.
See Also: Enable/disable The Built-in Administrator Account In Windows 11
Method 6: For Current User Using Command Prompt
- Open Command Prompt by typing “cmd” in the Windows search bar and selecting Run as administrator (or open as a regular user for verification).

- Type the following command and press Enter:
net user "Replace with your username"

If an account is not listed as a member of the Administrators group, then the account is a standard user or else If an account is listed as a member of the Administrators group, then the account is an administrator.
Method 7: For Current User Using PowerShell
PowerShell offers another command-line method to check your account type quickly:
- Open PowerShell by typing “PowerShell” in the search bar and selecting Run as administrator.
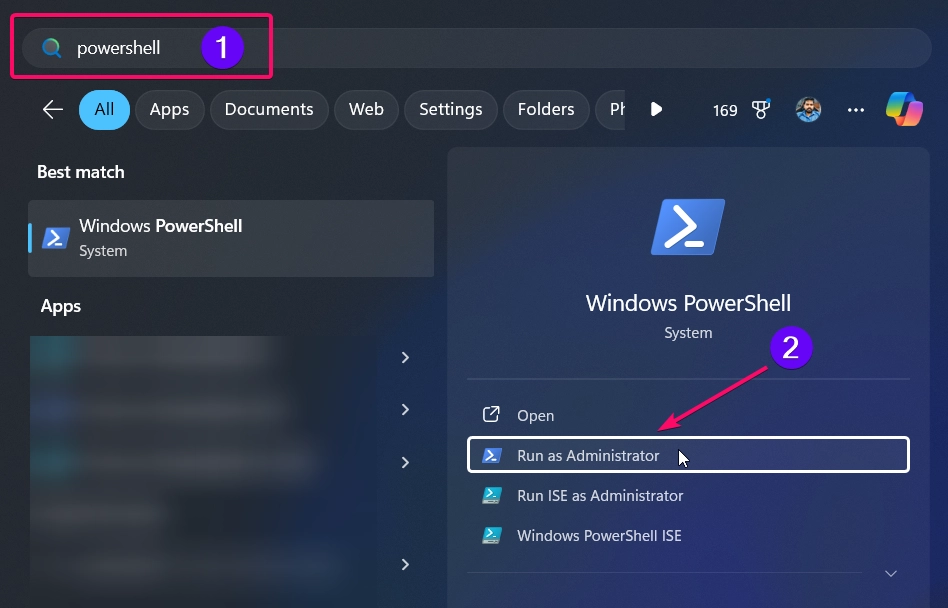
- Enter the following command to check your account type:
[System.Security.Principal.WindowsIdentity]::GetCurrent().Groups | ForEach-Object { $_.Translate([System.Security.Principal.NTAccount]).Value }

- If you see BUILTIN\Administrators in the output, your account is an administrator. If it’s not listed, your account is likely a standard user.
This method provides a direct way to verify your permissions and can be helpful for advanced users who rely on PowerShell.
Method 7: For Current User Using PowerShell
PowerShell offers another command-line method to check your account type quickly:
See Also: Delete User Profile Of An Account In Windows 11
- Open PowerShell by typing “PowerShell” in the search bar and selecting Run as administrator.

- Enter the following command to check your account type:
(New-Object System.Security.Principal.NTAccount("username")).Translate([System.Security.Principal.SecurityIdentifier]).Groups | ForEach-Object { $_.Translate([System.Security.Principal.NTAccount]).Value }
- Replace the Username with your account profile.

- This command will display information if “Other Account” is indeed part of the Administrators group.
- If there’s no output, it means the account is not in the Administrators group and is likely a Standard User.
Conclusion
Checking if your account is Administrator or Standard User in Windows 11 is essential for managing system permissions and maintaining security. Using any of the methods above, you can quickly verify your account type. From the Settings app and Control Panel to Command Prompt, PowerShell, and Local Users and Groups, each option offers a unique way to check your privileges.
Frequently Asked Questions:
Do I need administrator rights to install software?
Most software installations require administrator rights. If you’re using a standard account, you’ll need an administrator’s permission.
Can I change a standard user account to an administrator?
Yes, you can change account types through Settings > Accounts > Family & other users by selecting the account and modifying its permissions.
Is it safe to use an administrator account as my primary account?
It’s generally safer to use a standard account for daily tasks to reduce the risk of accidental system changes. Use an administrator account only when necessary.
Recommended: Reset Password For An Account In Windows 11
Can I have multiple administrator accounts on one computer?
Yes, Windows 11 allows multiple administrator accounts, useful for shared devices.
Why don’t I see Local Users and Groups on my Windows 11?
Local Users and Groups is available only on Windows 11 Pro, Enterprise, and Education editions. You can use other methods like Settings or Command Prompt.
Read More:
- How to Add/Remove Common Program Groups from Start Menu in Windows 11?
- How to Add/Remove Android Apps from Your Phone to Start on Windows 11 PC?
- How to Turn On/Off Airplane Mode in Windows 11?
