How to Change User Account Name in Windows 11?
Different Methods to Change User Account Name in Windows 11?
Changing your user account name in Windows 11 can help personalize your PC or correct any errors in the original name. Whether you want to change the name displayed on the sign-in screen or modify your account’s name within apps and file paths, this tutorial covers all the possible methods to update or change user account name in Windows 11.
Related: Change The Name Of The User Profile Folder In Windows 11
Why Change Your User Account Name?
The user account name is displayed on the login screen and is often used in various applications and system prompts. Changing it can provide a more personalized experience, correct a mistake, or update your account if there have been changes to your name or username preference.
Method 1: Using the Settings App (Microsoft Account)
If you’re using a Microsoft account to sign in, changing your account name is done through the Settings app and Microsoft’s website. Here’s how:
- Open Settings by pressing Winkey + I.
- Navigate to Accounts and select Your info.
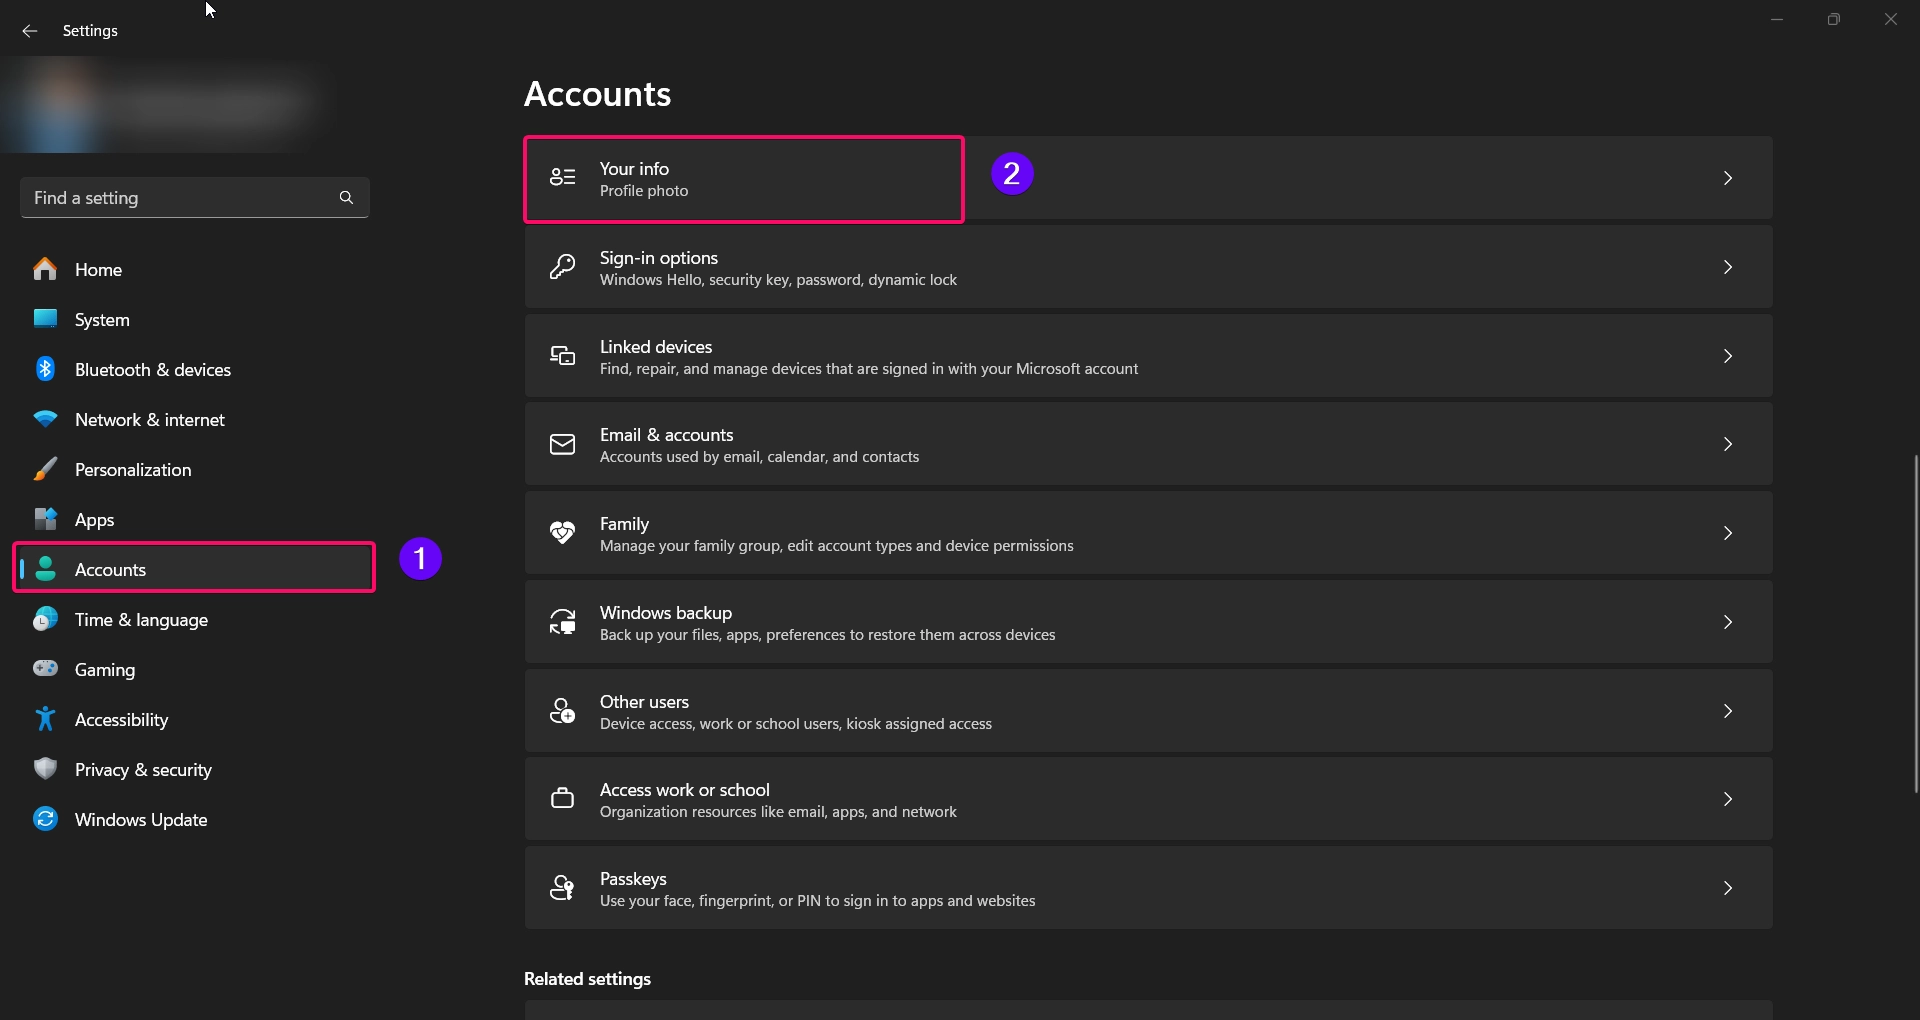
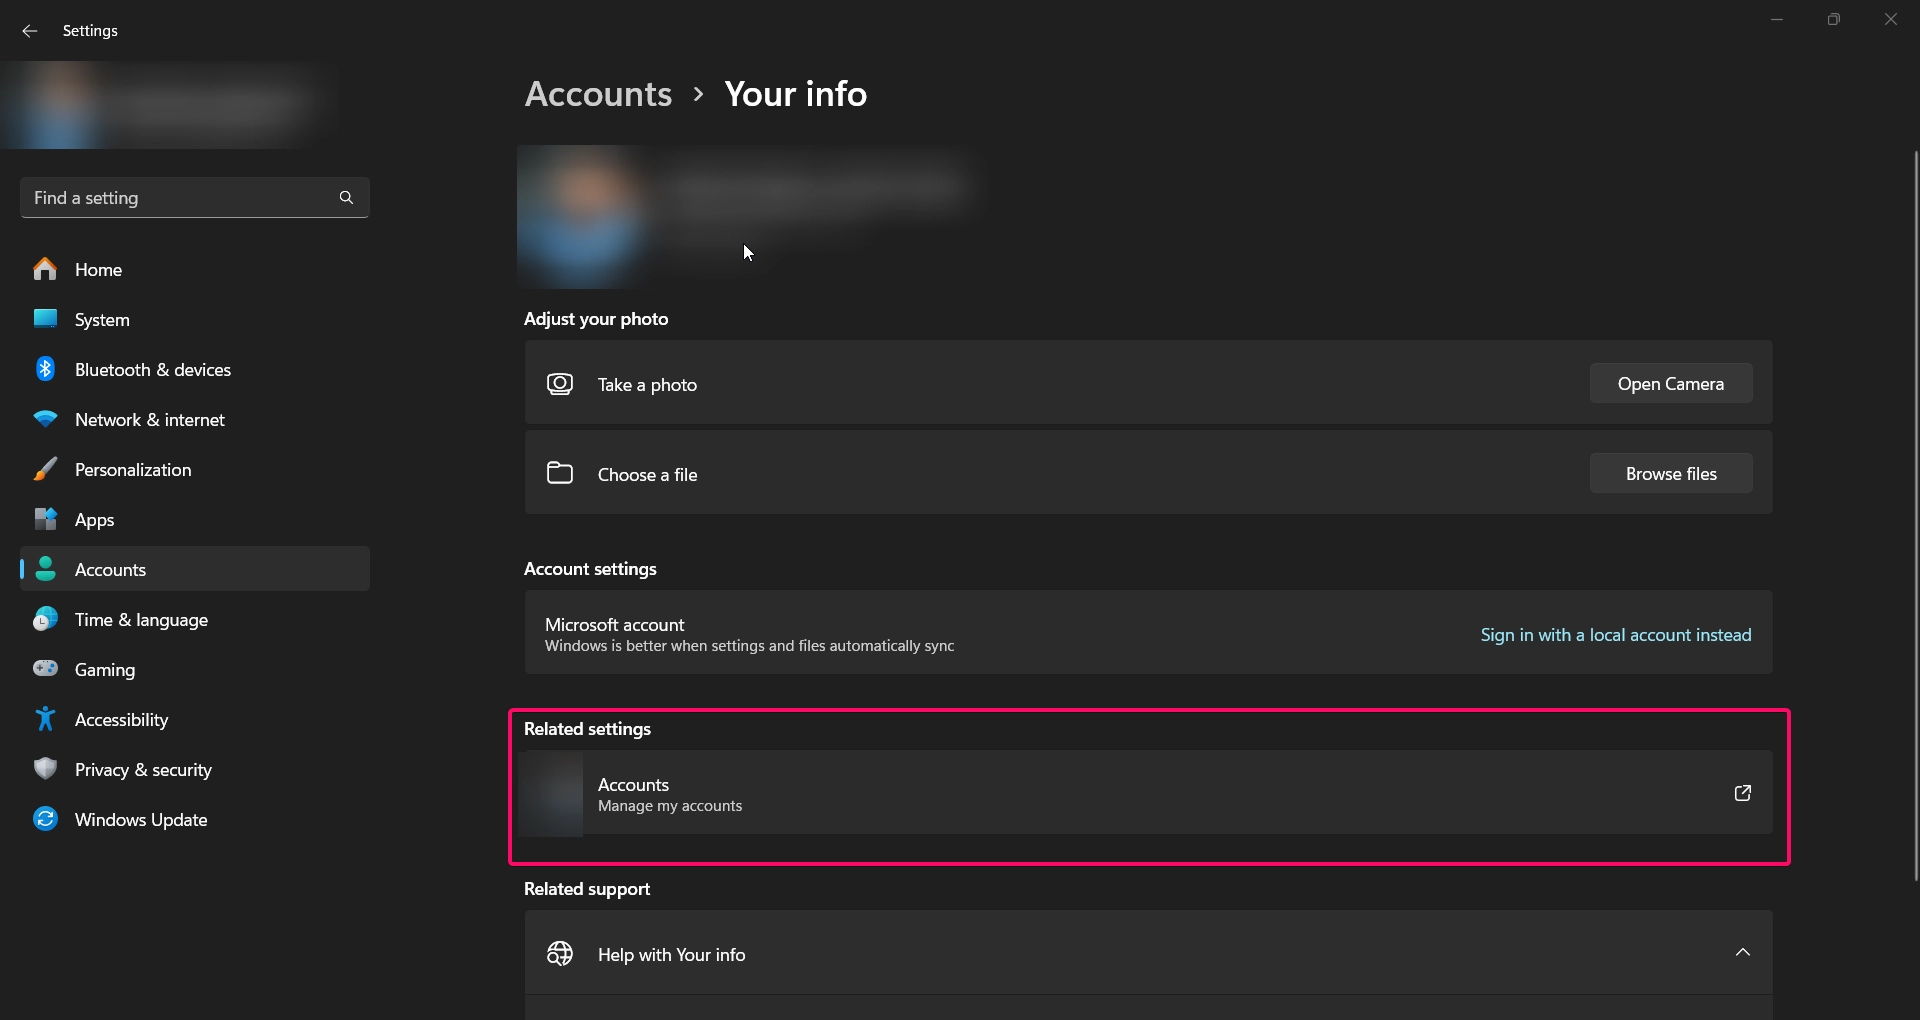
- Under Manage my Microsoft account, click Go to your Microsoft account. This will open your account page in a web browser.
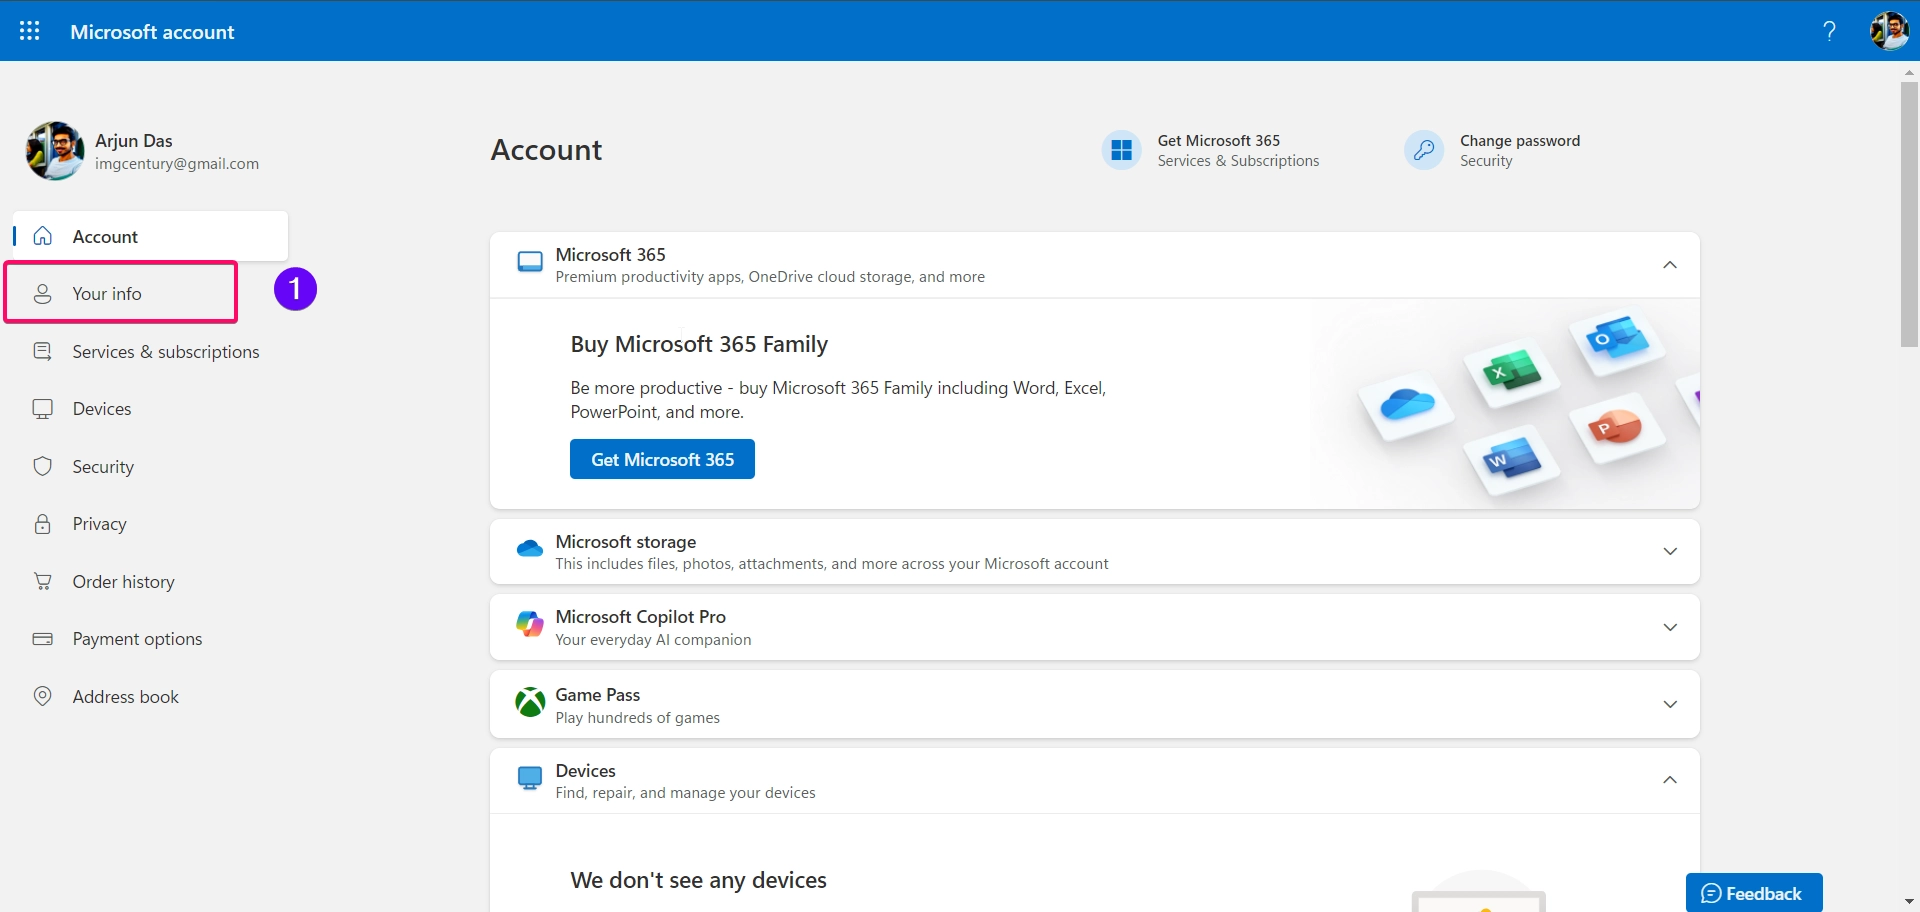
- In your Microsoft account, select Your info from the top menu.
- Click Edit name next to your display name.
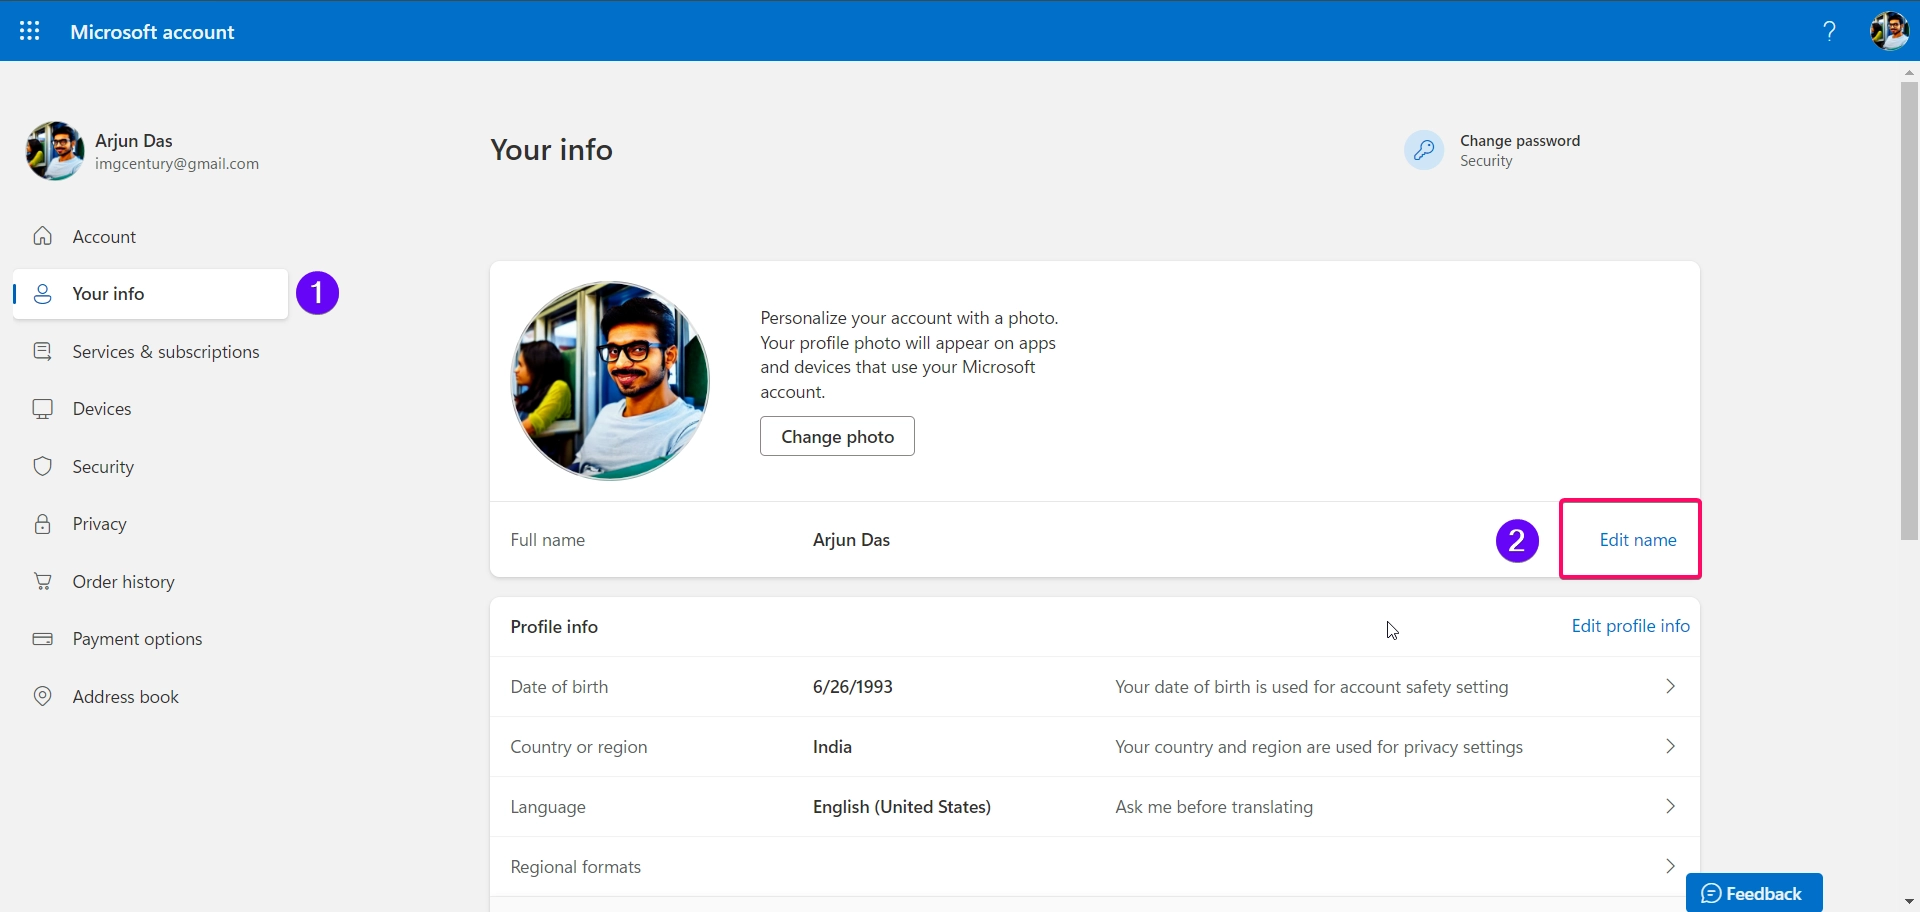
- Enter your preferred first and last name, complete the CAPTCHA, and select Save.
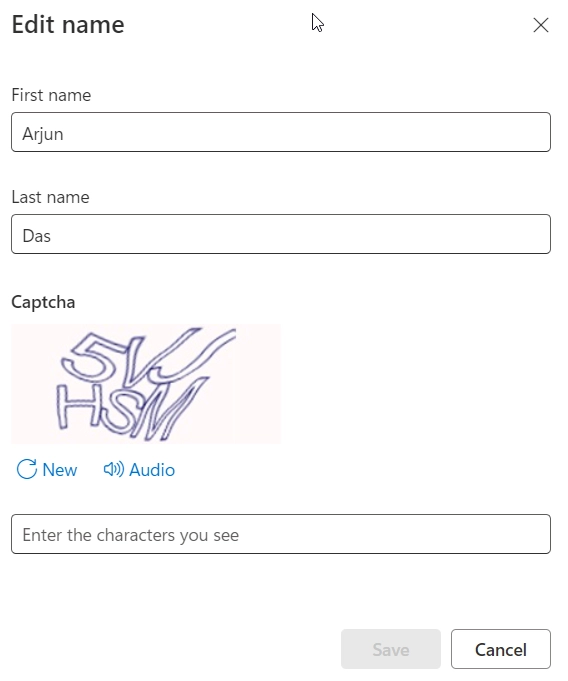
- Restart your computer to see the new name reflected in Windows 11.
Note: This method changes your display name across all Microsoft services, including Outlook, OneDrive, and other connected apps.
Method 2: Using Control Panel (Local Account)
For users with a local account in Windows 11, the Control Panel provides an easy way to change your account name:
- Open Control Panel by typing “Control Panel” in the search bar and selecting it.
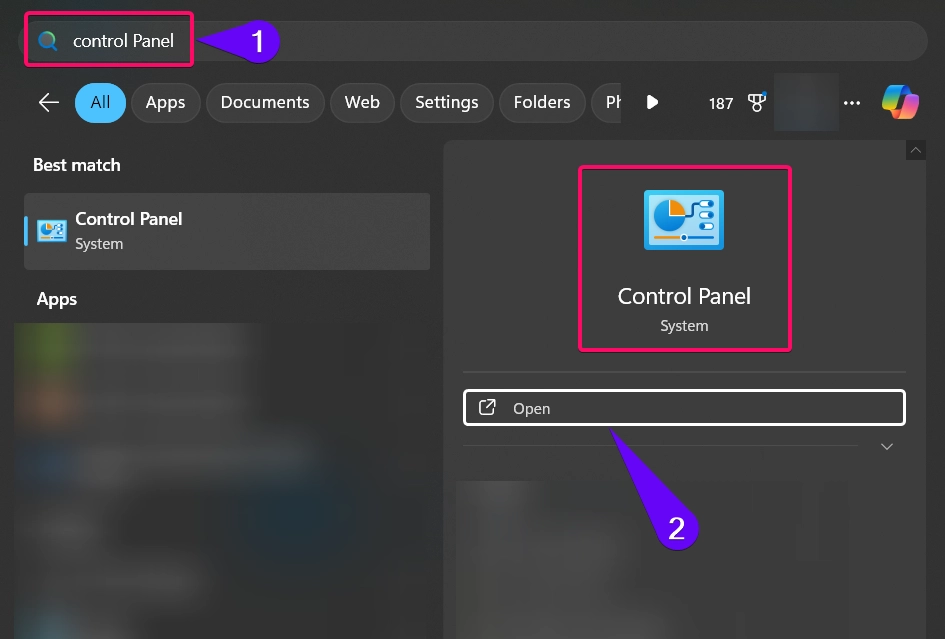
- Go to User Accounts and then click User Accounts again.
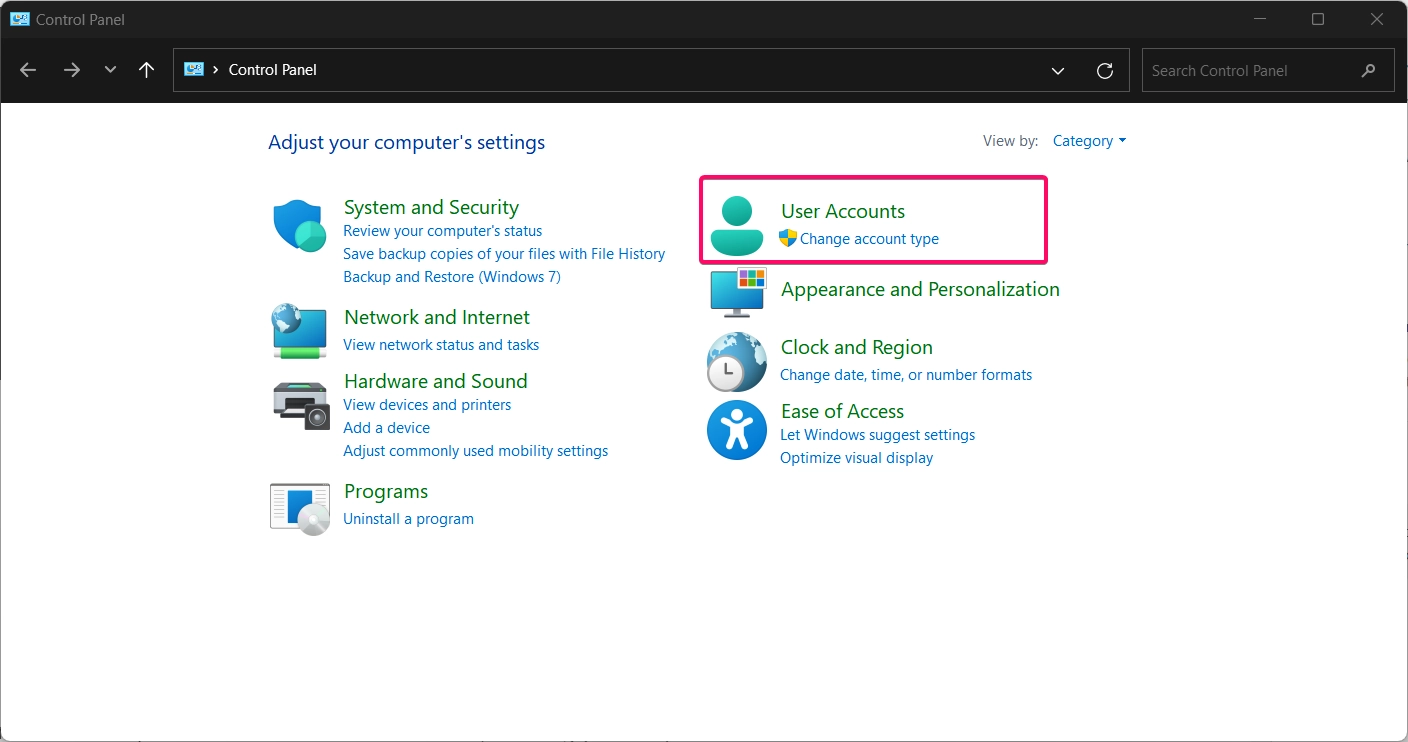
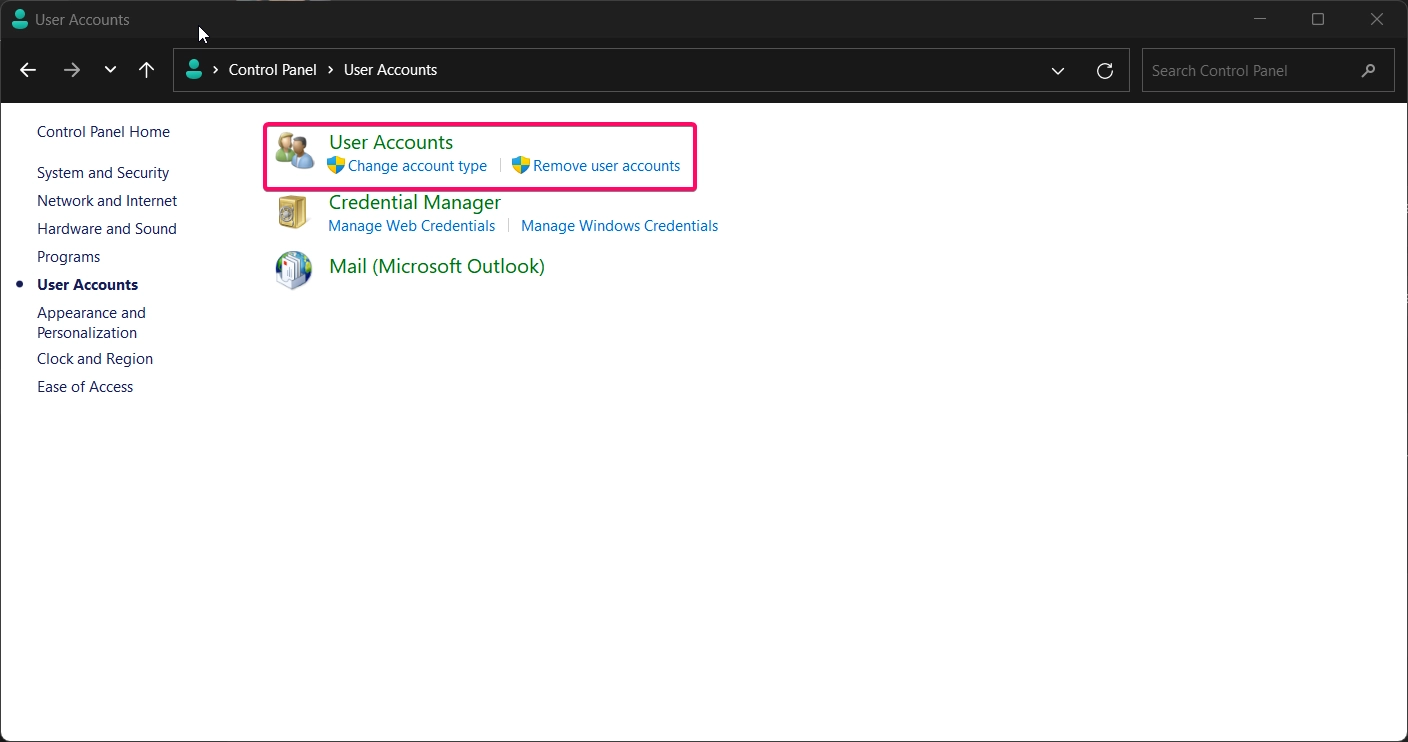
- Select Make Changes to my account in my pc settings.
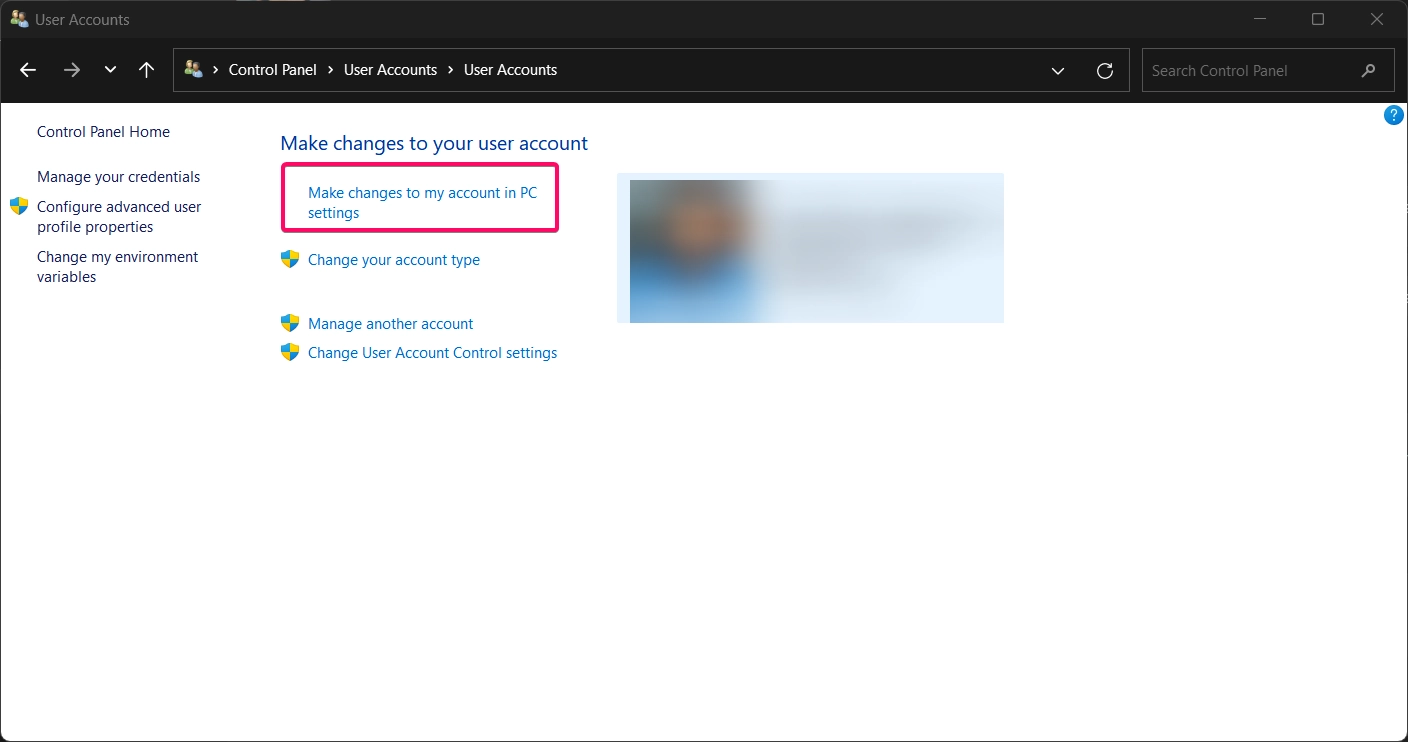
- Now the settings page will appear on your screen.
- Now follow the steps mentioned in the Method 1 above.
This method is simple and effective for local accounts, allowing you to update the name shown on the sign-in screen and in system menus.
Method 3: Using Local Users and Groups
Note: This method is available only in Windows 11 Pro, Enterprise, and Education editions.
The Local Users and Groups tool offers another way to change a user’s name for local accounts:
- Press Winkey + R to open the Run dialog, type
lusrmgr.msc, and press Enter.
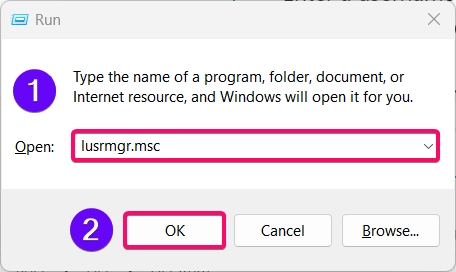
- In the Local Users and Groups window, select Users.
- Right-click the account you want to rename and select Rename.
- Enter the new name and press Enter to confirm.
This method is more advanced and ideal for users with administrative access who want direct control over account properties.
Recommended: Delete User Profile Of An Account In Windows 11
Method 4: Using Command Prompt
If you prefer command-line tools, you can rename a local user account using Command Prompt:
- Open Command Prompt as Administrator by typing “cmd” in the search bar, right-clicking it, and selecting Run as administrator.
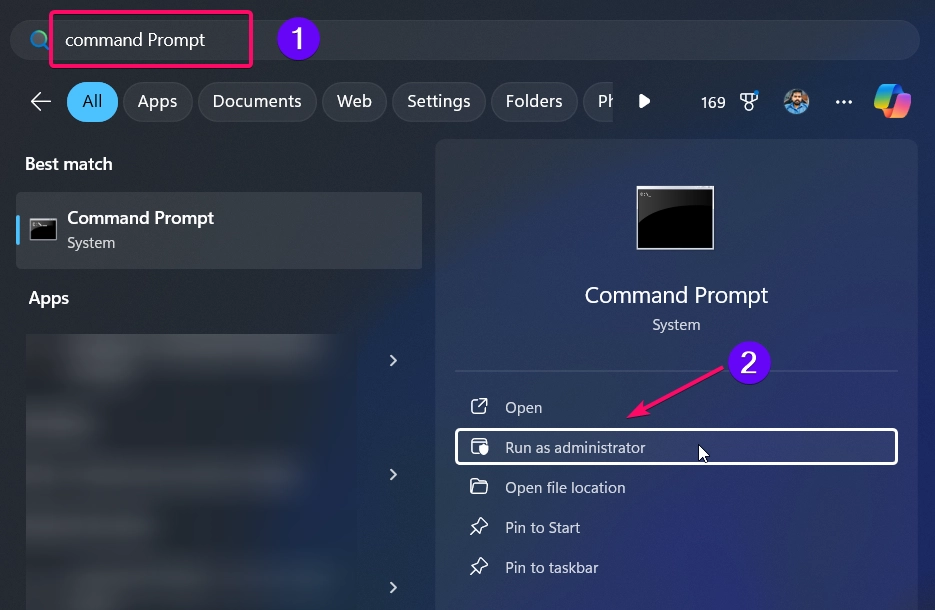
- Type the following command to list all user accounts:
wmic useraccount get fullname,name
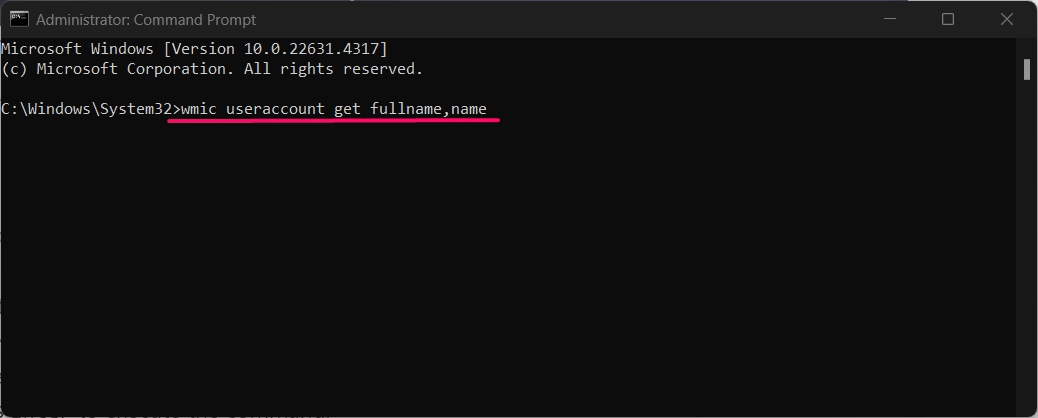
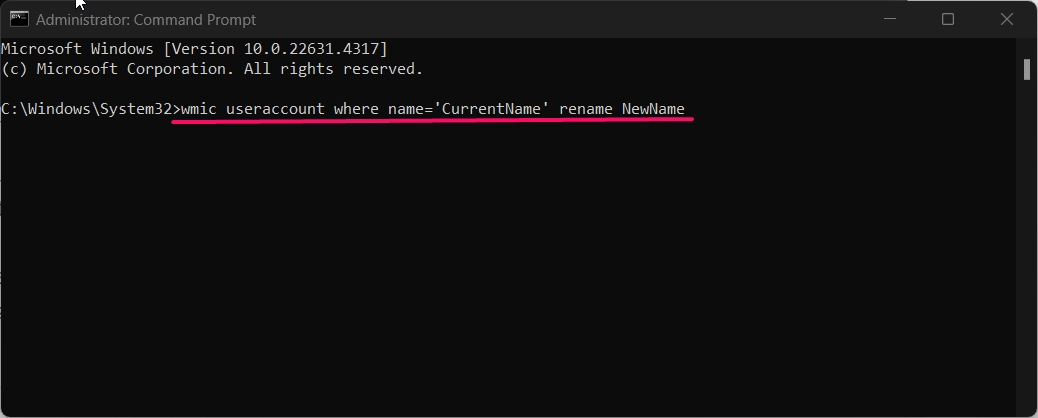
- Identify the account you want to rename, then enter this command:
wmic useraccount where name='CurrentName' rename NewName
- Replace
CurrentNamewith the current username andNewNamewith the new username you want.
- Press Enter to execute the command.
This method provides a quick way to rename user accounts without accessing the Control Panel or Settings app.
Method 5: Using PowerShell
For advanced users, PowerShell offers another option to change the account name:
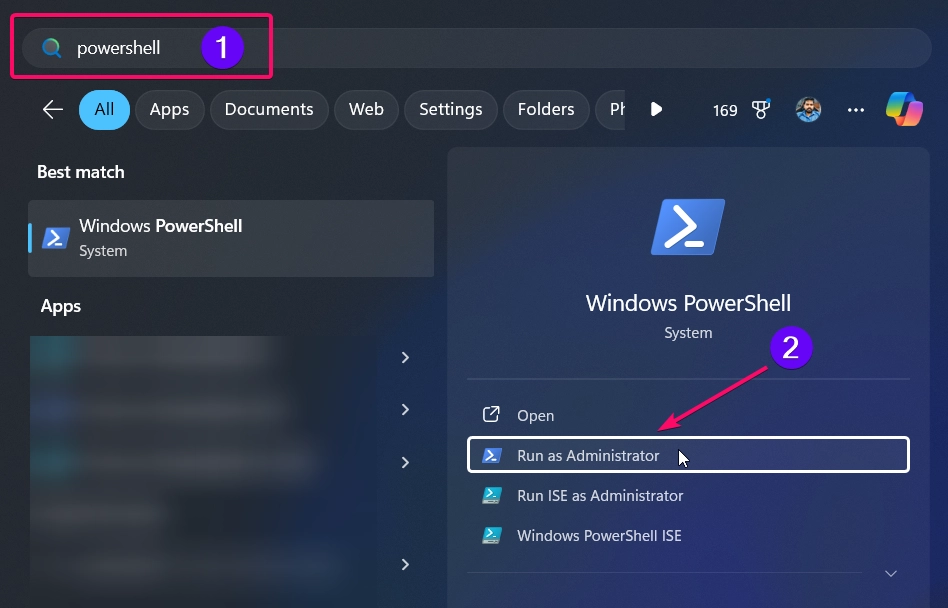
- Open PowerShell as Administrator by right-clicking the Start menu and selecting Windows Terminal (Admin).
- To list all user accounts, enter the following command:
Get-LocalUser
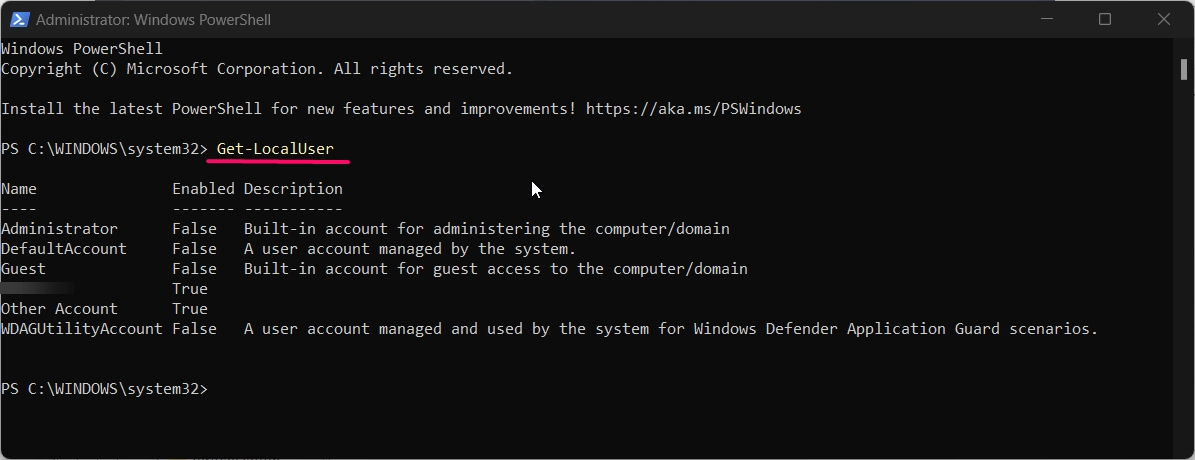
- Identify the user account you want to rename, then use this command:
Rename-LocalUser -Name "CurrentName" -NewName "NewName"
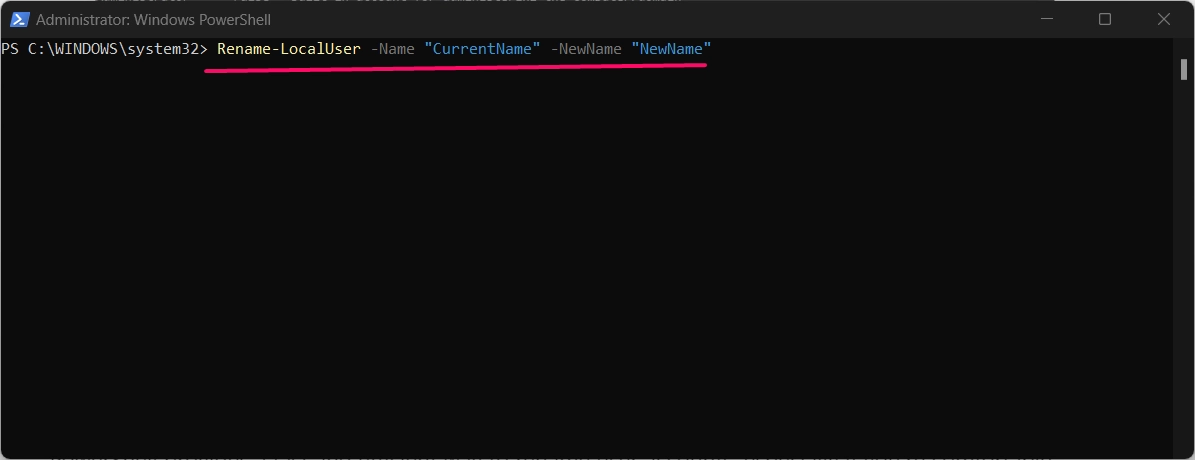
- Replace
CurrentNamewith the existing username andNewNamewith the new username. - Press Enter to apply the change.
PowerShell provides a fast and efficient way to rename user accounts, especially if you’re comfortable with command line operations.
Read This: Check If An Account Is Administrator Or Standard User In Windows 11
Conclusion
Changing your user account name in Windows 11 offers a more personalized experience and lets you easily correct any errors in your original account setup. The methods above cover all possible ways to rename your user account, from the Settings app and Control Panel to Local Users and Groups, Command Prompt, and PowerShell. Whether you’re using a Microsoft account or a local account, these steps will help you update your name quickly and effectively.
Frequently Asked Queries:
Is it safe to rename my user account?
Yes, it’s safe to rename your account. However, for local accounts, it’s recommended to restart your computer to ensure all changes are applied.
Can I revert to the old username if I change my mind?
Yes, you can rename the account back using the same method you used initially.
Can I change my Microsoft account name from Windows settings?
No, you’ll be redirected to the Microsoft website to change your account name.
See Also: Change Account Type In Windows 11
Will changing my account name affect my files or folders?
No, changing your account name won’t affect your files, but the name displayed in the User folder may remain unchanged.
Why don’t I see Local Users and Groups on my Windows 11?
The Local Users and Groups tool is available only on Windows 11 Pro, Enterprise, and Education editions.
Read More:
- How to Add/Remove Common Program Groups from Start Menu in Windows 11?
- How to Add/Remove Android Apps from Your Phone to Start on Windows 11 PC?
- How to Turn On/Off Airplane Mode in Windows 11?


