How to Add/Remove Microsoft, Work, or School Accounts used to sign in by other apps in Windows 11?
Different Methods to Add/Remove Microsoft, Work, or School Accounts used to sign in by other apps in Windows 11 pc!
Windows 11 allows users to add multiple accounts, such as Microsoft, work, or school accounts, that can be used to sign in to various apps. Managing these accounts is essential for seamless access and proper account security. In this tutorial, we’ll explain how to add and remove these accounts in Windows 11, offering step-by-step instructions to make the process effortless.
Recommended: Add/remove Android Apps From Your Phone To Start On Windows 11 Pc
Adding or removing accounts in Windows 11 helps you manage app access, streamline your workflow, and maintain your device’s security. For instance, a work or school account allows access to organizational resources, while a Microsoft account enables synchronization of apps, settings, and files across devices.
Method 1: Add an Account via the Settings App
- Open Settings by pressing Winkey + I on your keyboard.
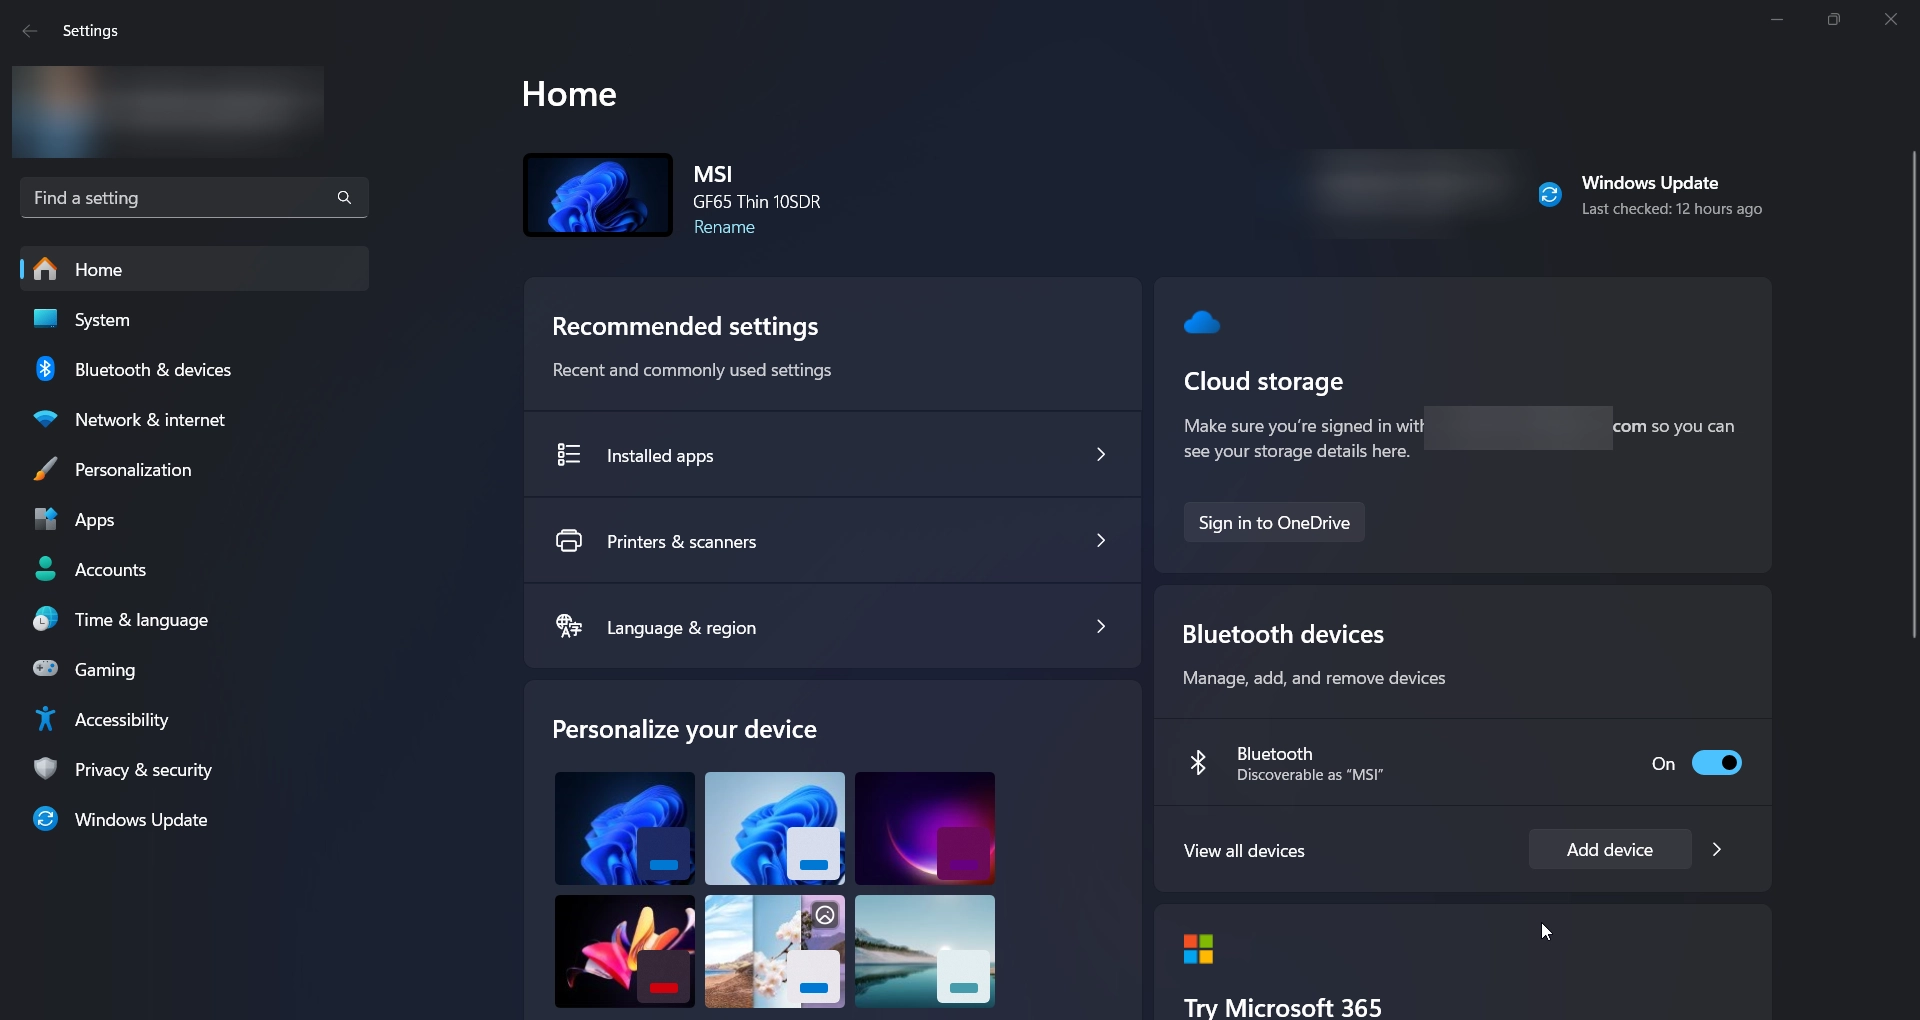
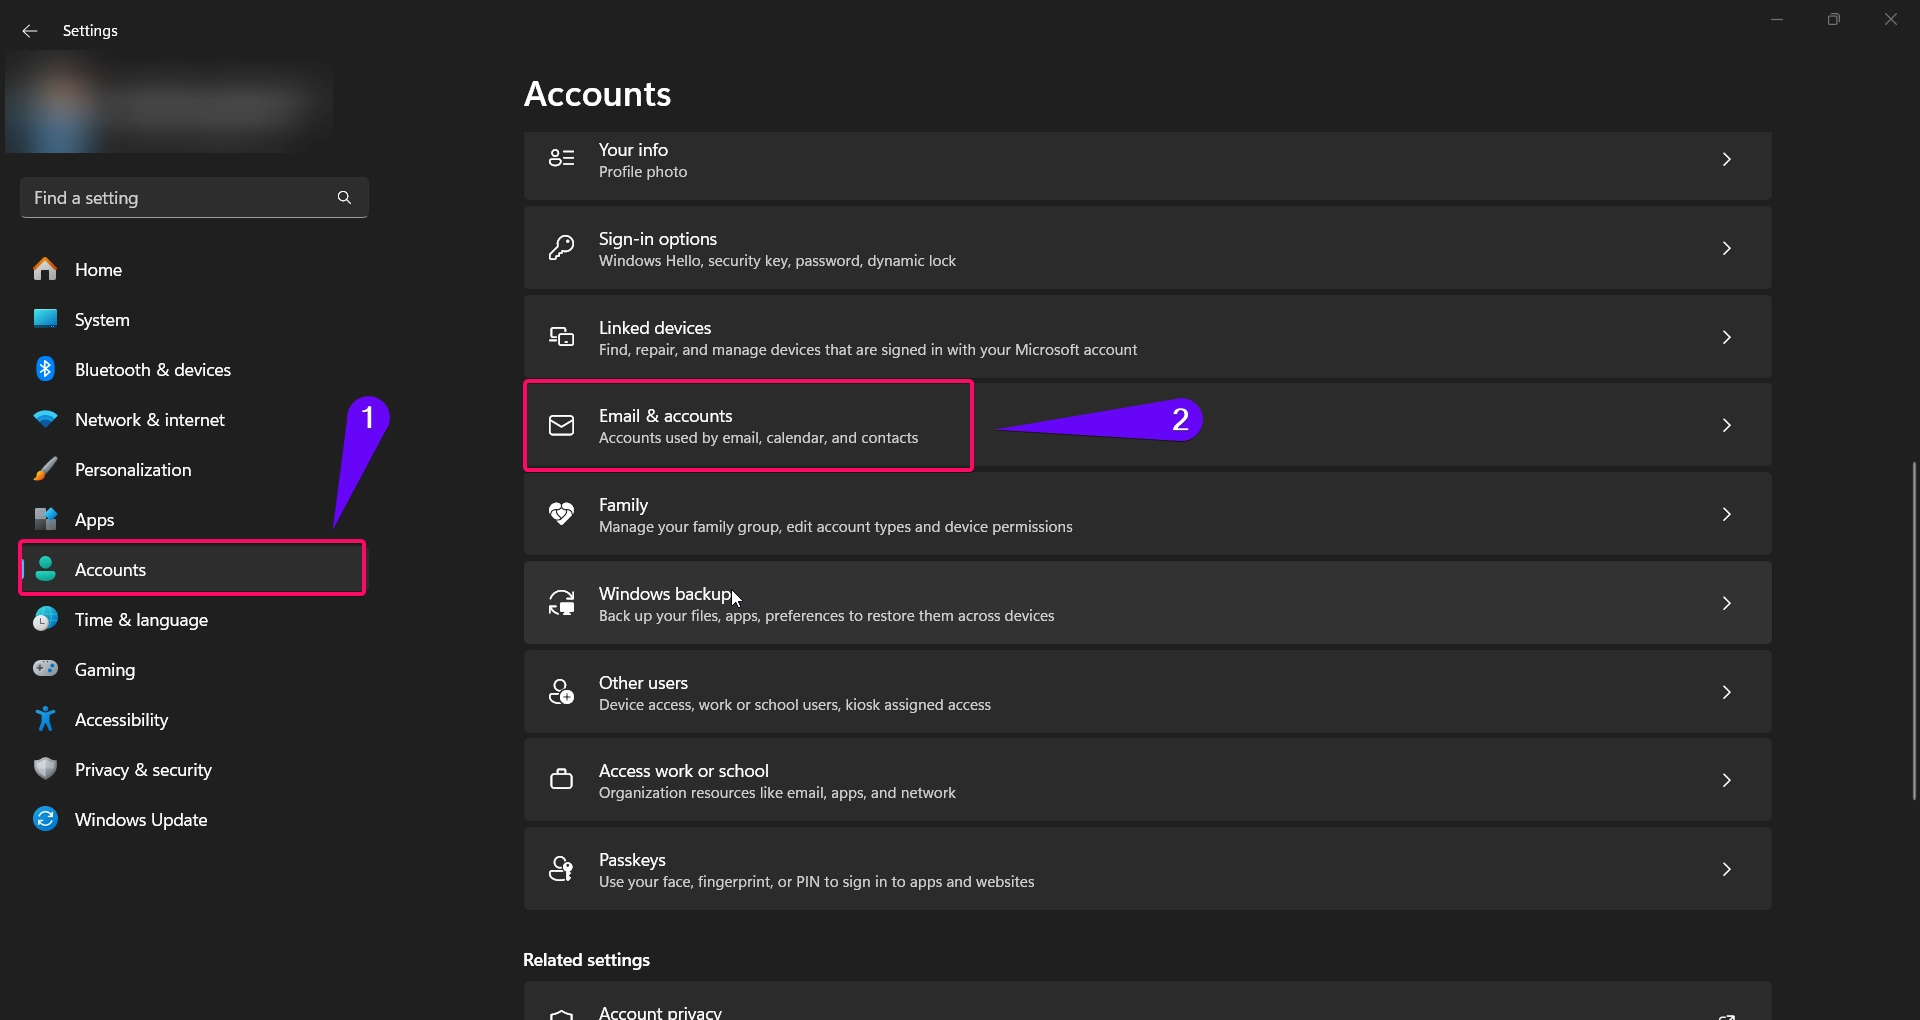
- Navigate to Accounts in the left sidebar.
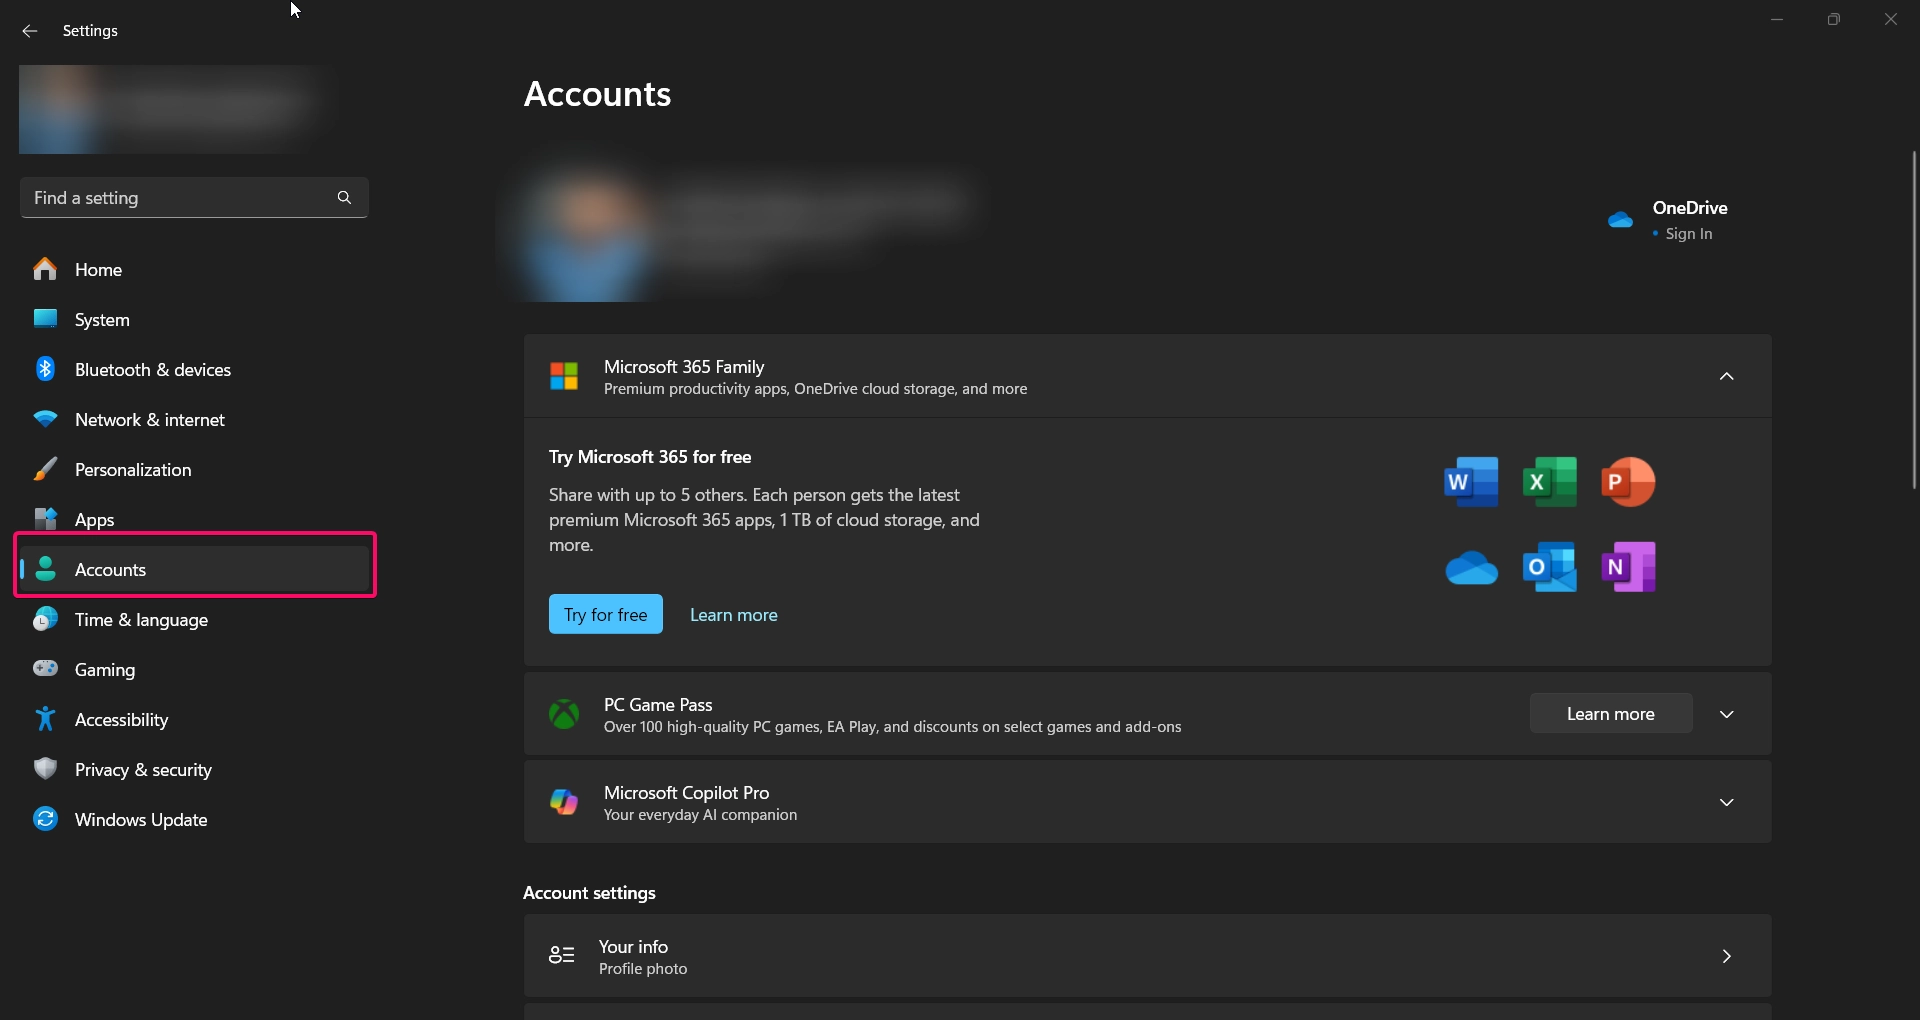
- Select Email & accounts from the right panel.
- Under the Accounts used by other apps section, click Add a Microsoft account or Add a work or school account.
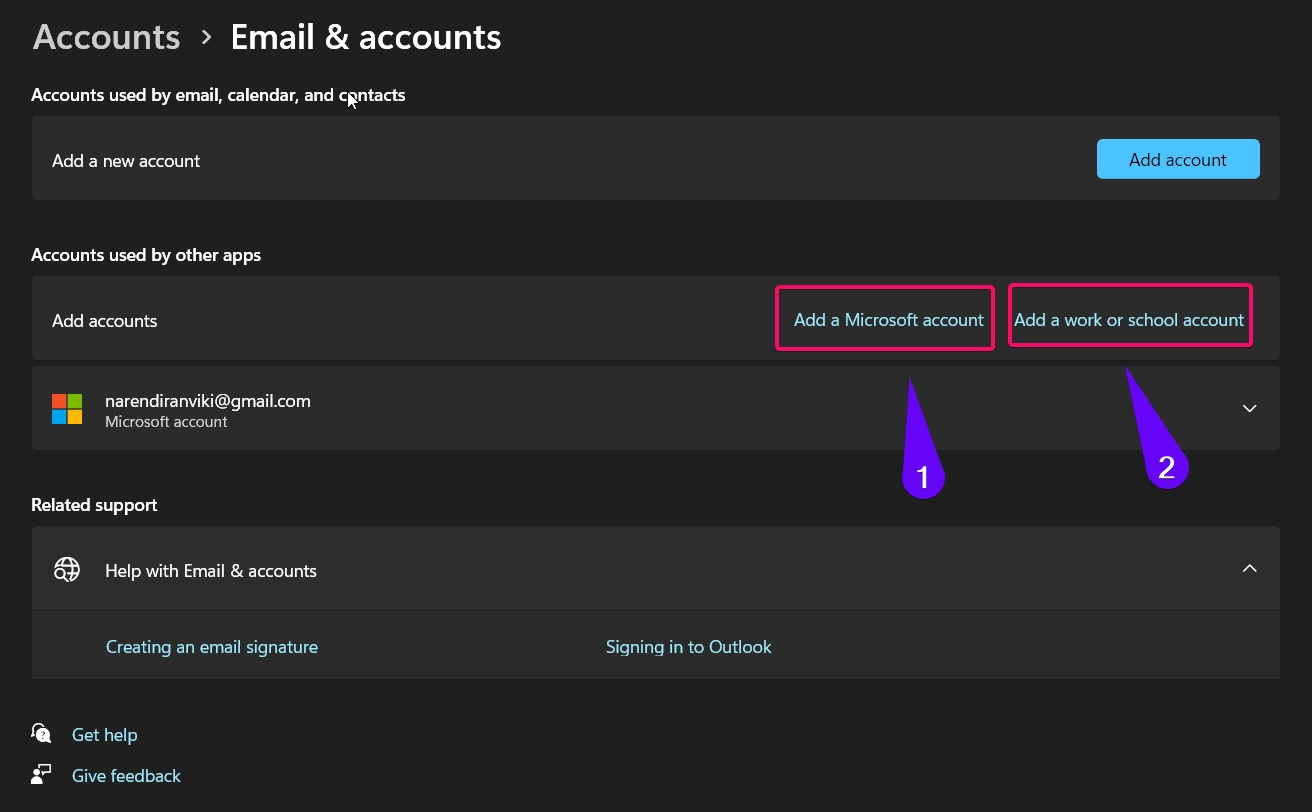
- Follow the on-screen instructions:
- For a Microsoft account, enter your email address and password.
- For a work or school account, provide your organizational credentials.
- Once added, the account will appear in the Accounts used by other apps section.
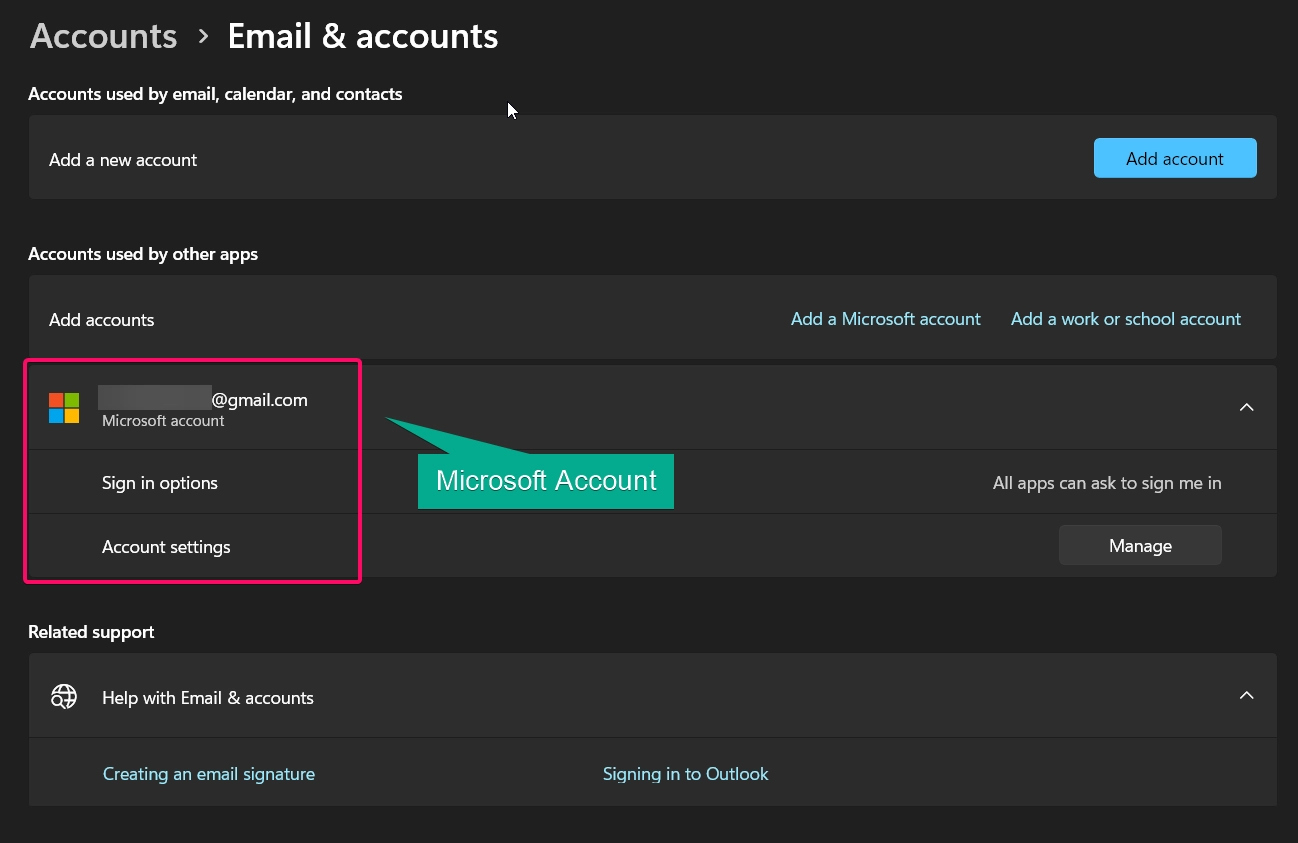
Tip: Adding a Microsoft account enables seamless synchronization, while a work or school account provides access to organizational tools and files.
Method 2: Remove an Account via the Settings App
- Open Settings by pressing Winkey + I.

- Navigate to Accounts > Email & accounts.

- Under the Accounts used by other apps section, locate the account you want to remove.
- Click on the account, and select Remove.
- Confirm the action by clicking Yes when prompted.
This will remove the account from being used by other apps, but it won’t delete the account itself.
Method 3: Add a Work or School Account via Access Work or School
- Open Settings by pressing Winkey + I.

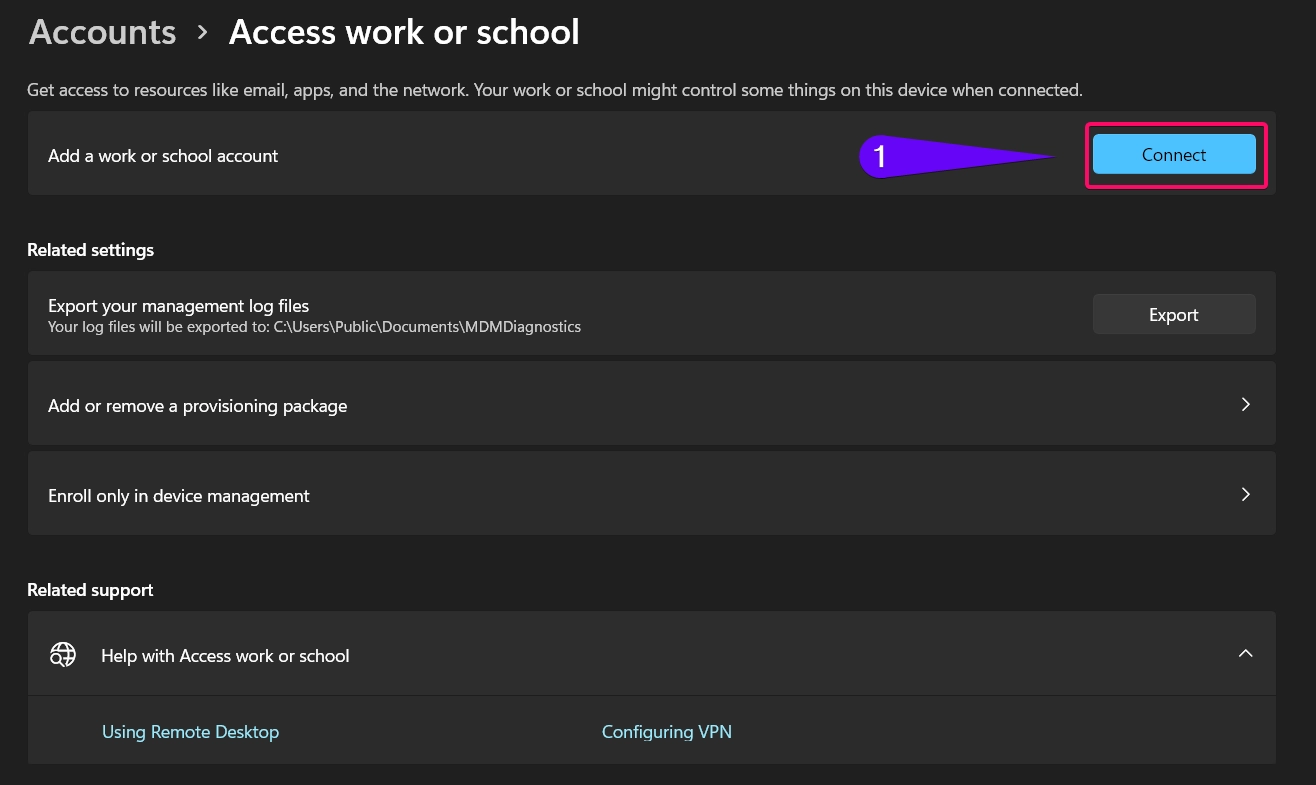
- Navigate to Accounts and select Access work or school from the right panel.
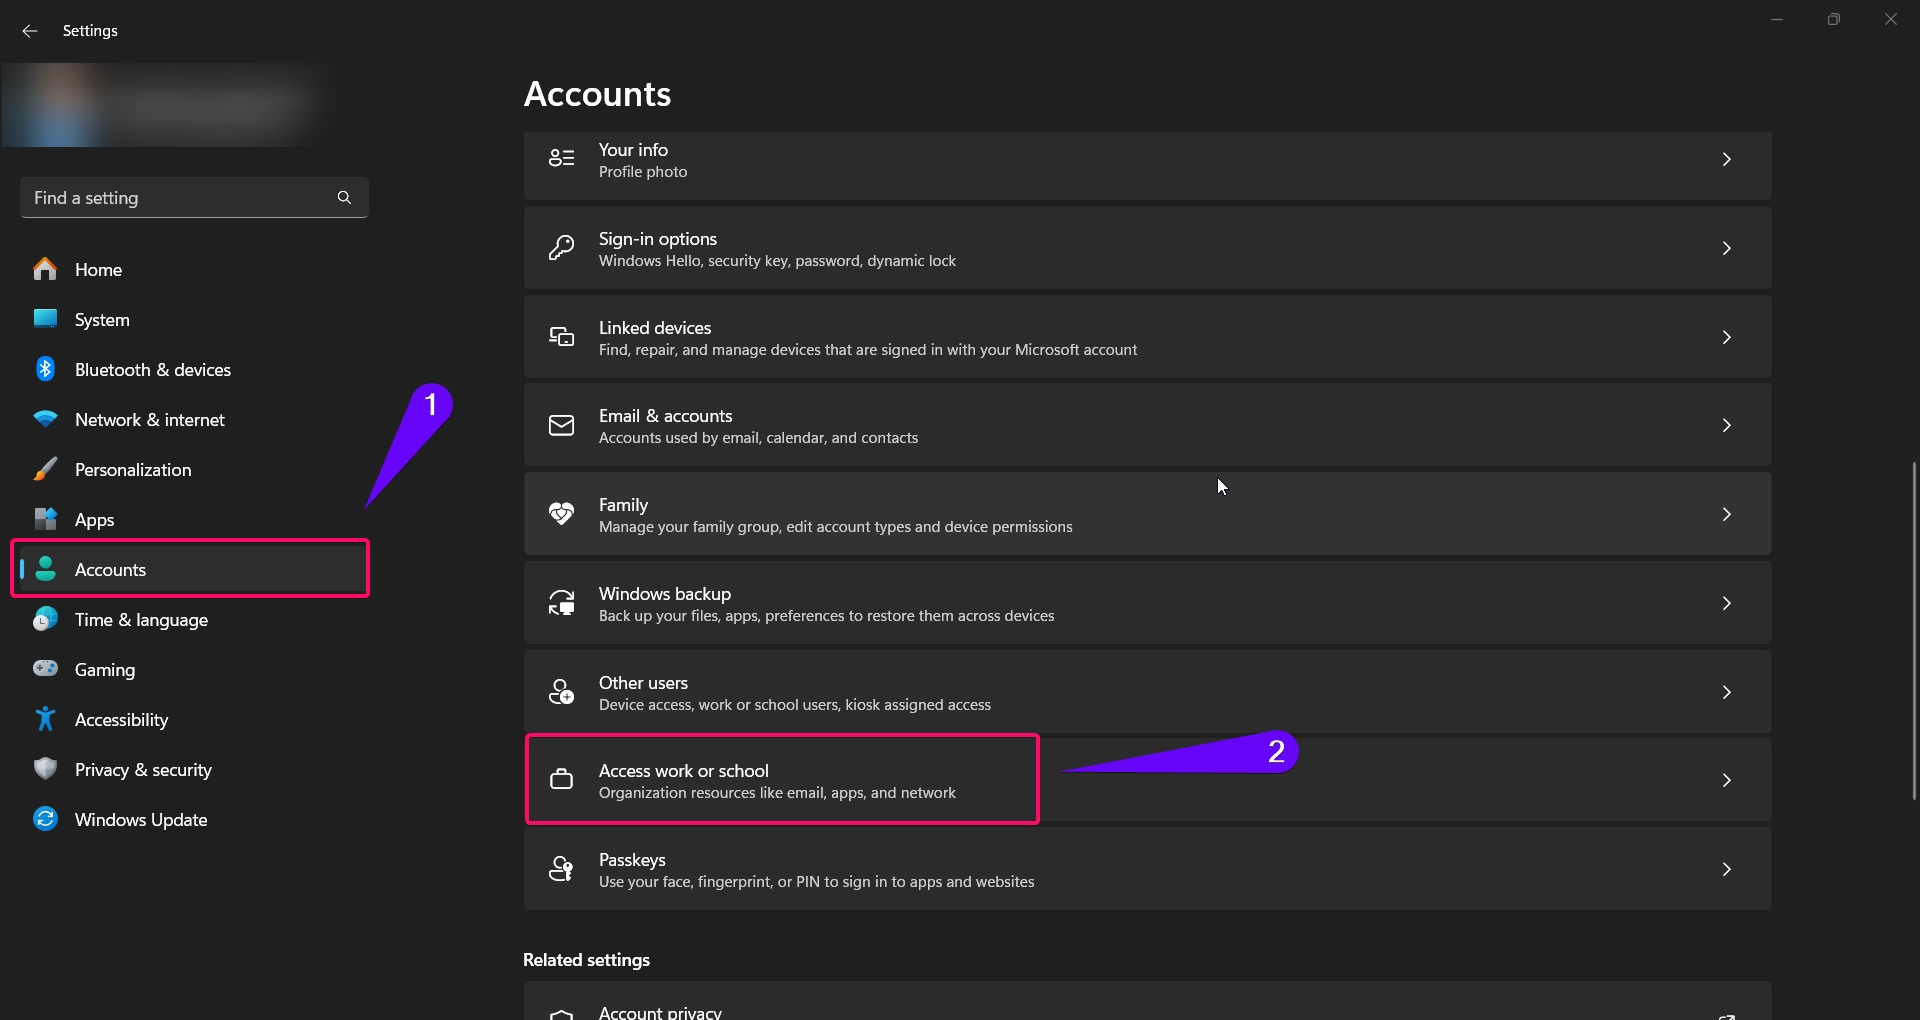
- Click Connect and choose Set up a work or school account.
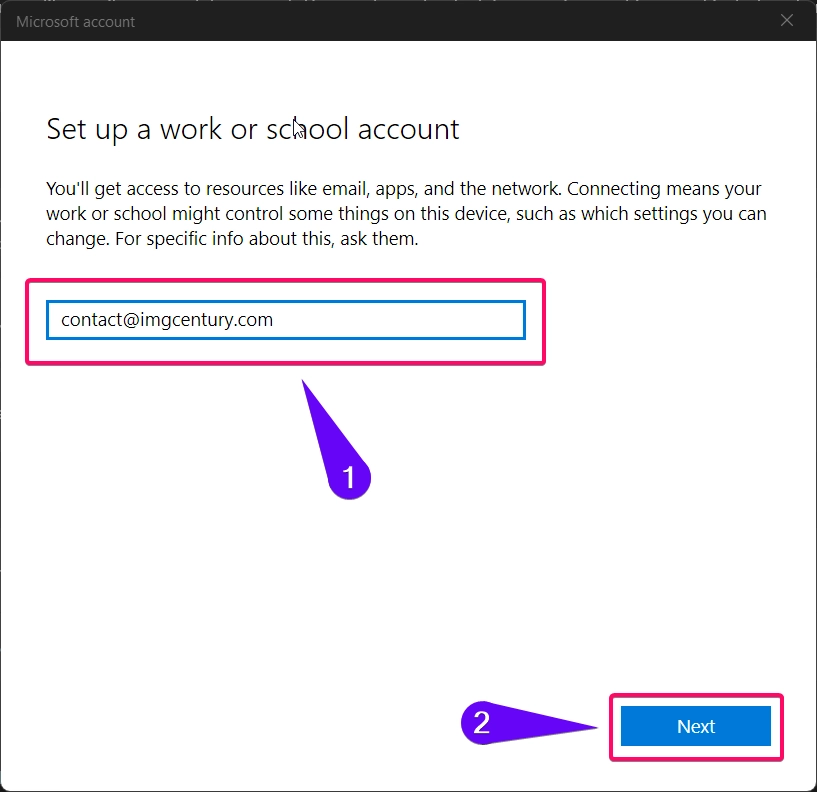
- Enter your organizational email and credentials when prompted.
- Complete the setup by following the on-screen instructions.
This method ensures your work or school account is linked directly to Windows 11 for access to additional resources like OneDrive for Business, email, and organization specific apps.
Method 4: Remove a Work or School Account via Access Work or School
- Open Settings by pressing Winkey + I.

- Navigate to Accounts > Access work or school.

- Locate the account you want to remove and click on it.
- Select Disconnect and confirm the action by clicking Yes.
This will unlink the account from Windows 11, ensuring it no longer appears or provides access to organizational resources.
Method 5: Using PowerShell to Remove an Account
For advanced users, PowerShell can be used to remove accounts from Windows 11:
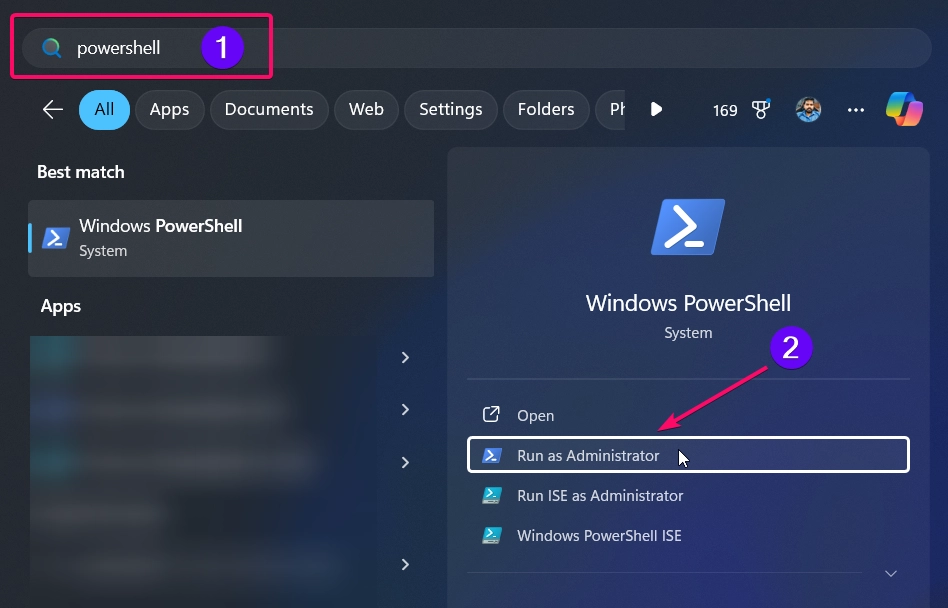
- Open PowerShell as Administrator by right-clicking the Start menu and selecting Windows Terminal (Admin).
- To view all connected accounts, use the following command:
Get-WmiObject Win32_UserAccount

- To remove a specific account, enter:
Remove-LocalUser -Name "AccountName"

- Replace
"AccountName"with the name of the account you want to remove. - Confirm the changes and restart your computer if necessary.
This method provides a fast and powerful way to manage accounts.
Before Deleting the Accounts:
- Microsoft accounts are tied to app synchronization and cloud services. Removing these accounts may impact functionality in apps like OneDrive and Microsoft Store.
- Work or school accounts grant access to organizational resources. Ensure you no longer need access before removing them.
- Use PowerShell cautiously as improper commands can cause issues with your user profiles.
Conclusion
Managing your Microsoft, work, or school accounts in Windows 11 is crucial for maintaining a secure and efficient workflow. Whether you need to add an account for seamless app access or remove one to declutter your system, the methods outlined above provide comprehensive solutions. Choose the method that suits your needs and customize your account management with confidence.
Commonly Asked Queries:
Can I use multiple Microsoft accounts in Windows 11?
Yes, you can add multiple Microsoft accounts for different purposes, such as personal and work-related use.
What happens if I remove a work or school account?
Removing a work or school account disconnects access to organizational resources, apps, and files. Ensure you’ve backed up necessary data before removal.
Why don’t I see the account in the Email & accounts section?
The account might be added under Access work or school instead. Check this section in the Settings app.
Can I switch between multiple accounts easily?
Yes, you can switch between accounts in apps like Microsoft Store, Outlook, or OneDrive by selecting the account dropdown.
Will removing a Microsoft account affect my files?
No, removing a Microsoft account only prevents it from being used by apps. Your files will remain on the system unless they’re stored in the account’s OneDrive.
Read More:
- How to Add/Remove Common Program Groups from Start Menu in Windows 11?
- How to Add/Remove Android Apps from Your Phone to Start on Windows 11 PC?
- How to Turn On/Off Airplane Mode in Windows 11?
