How to Add or Remove Additional Clocks for Different Time Zones in Windows 11?
4 Unique Methods to Add or Remove Additional Clocks for Different Time Zones in Windows 11 PC!
Windows 11 offers a useful feature to add additional clocks for different time zones. This is particularly helpful for users who work across multiple time zones or have friends and family in different parts of the world. With this feature, you can easily keep track of time in other regions without needing third-party tools or websites.
In this tutorial, we’ll explain how to add or remove additional clocks in Windows 11 using simple and effective methods.
Why Need to Add Additional Clocks in Windows 11?
Adding additional clocks to your system allows you to:
- Keep track of different time zones for work or personal use.
- Plan meetings and events across multiple locations.
- Avoid confusion when dealing with international schedules.
With Windows 11, you can add up to two additional clocks alongside your primary system clock.
Method 1: Using the Settings App
The Settings app provides a quick and user-friendly way to add or remove additional clocks. Here’s how you can do it:
- Open Settings by pressing Winkey + I.
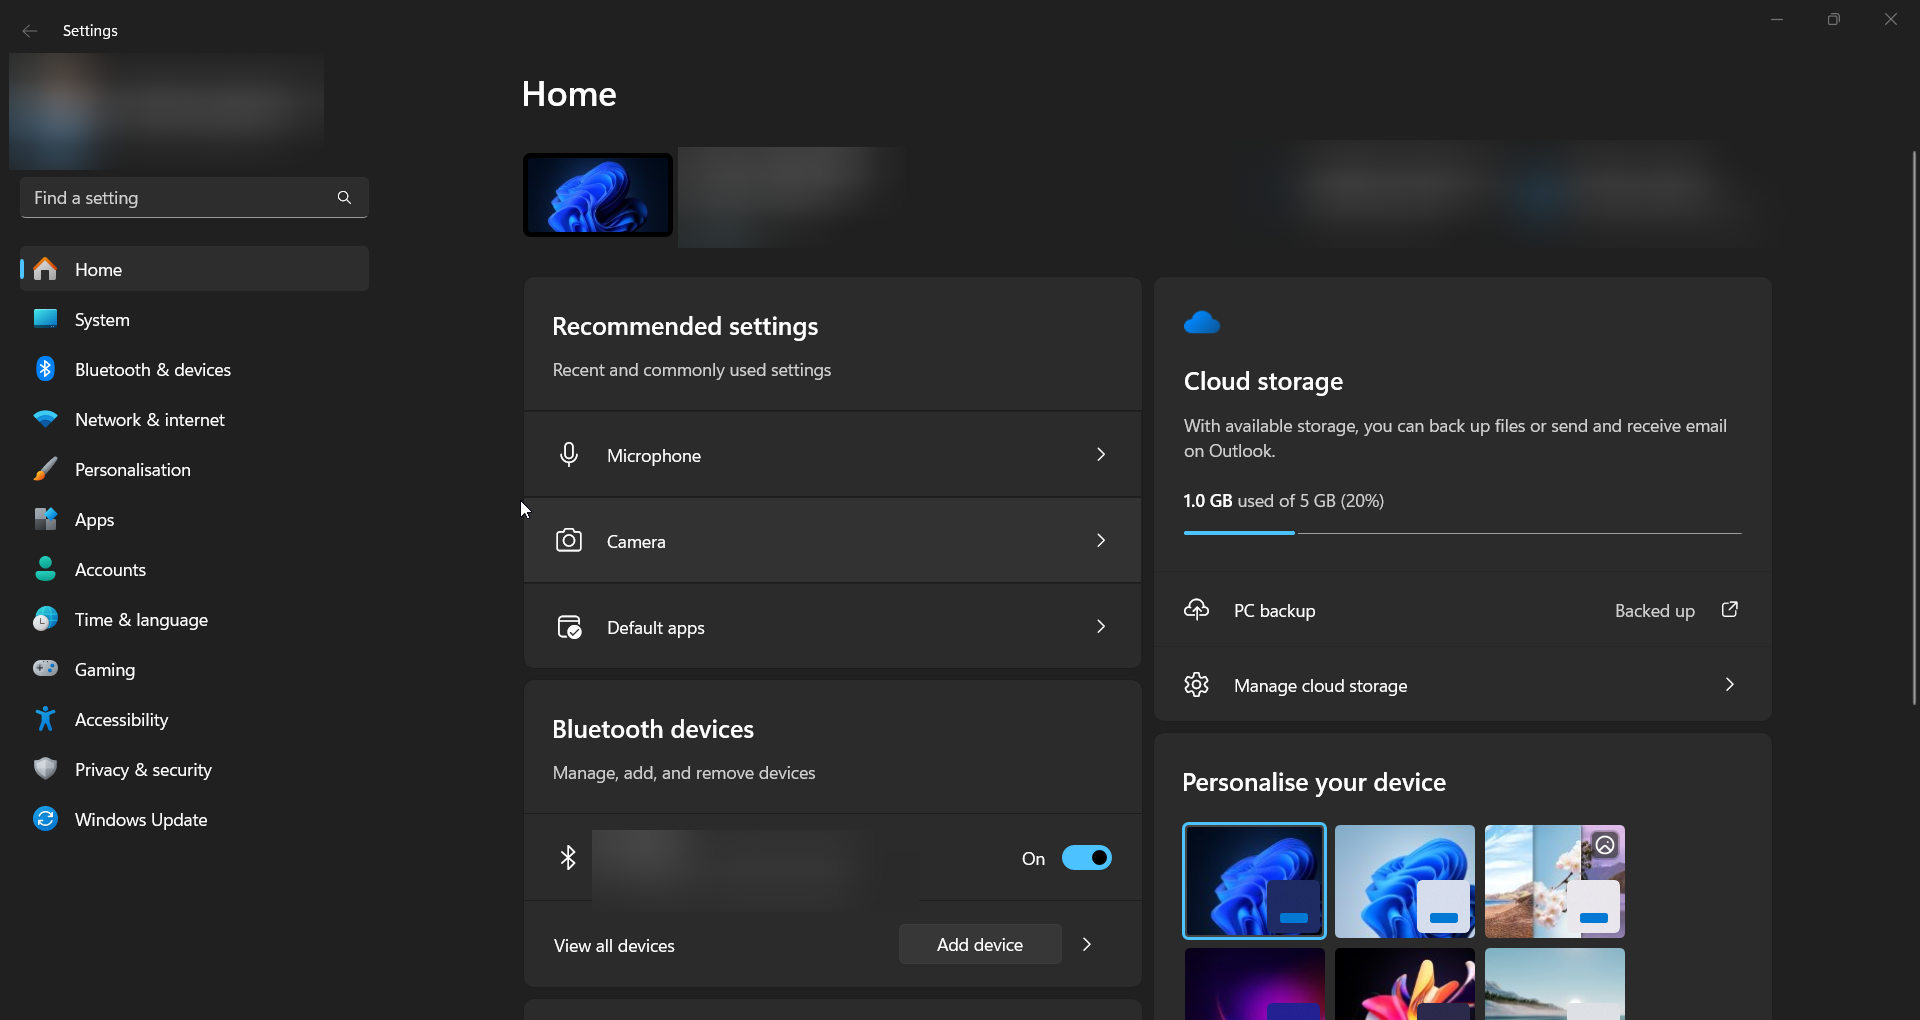
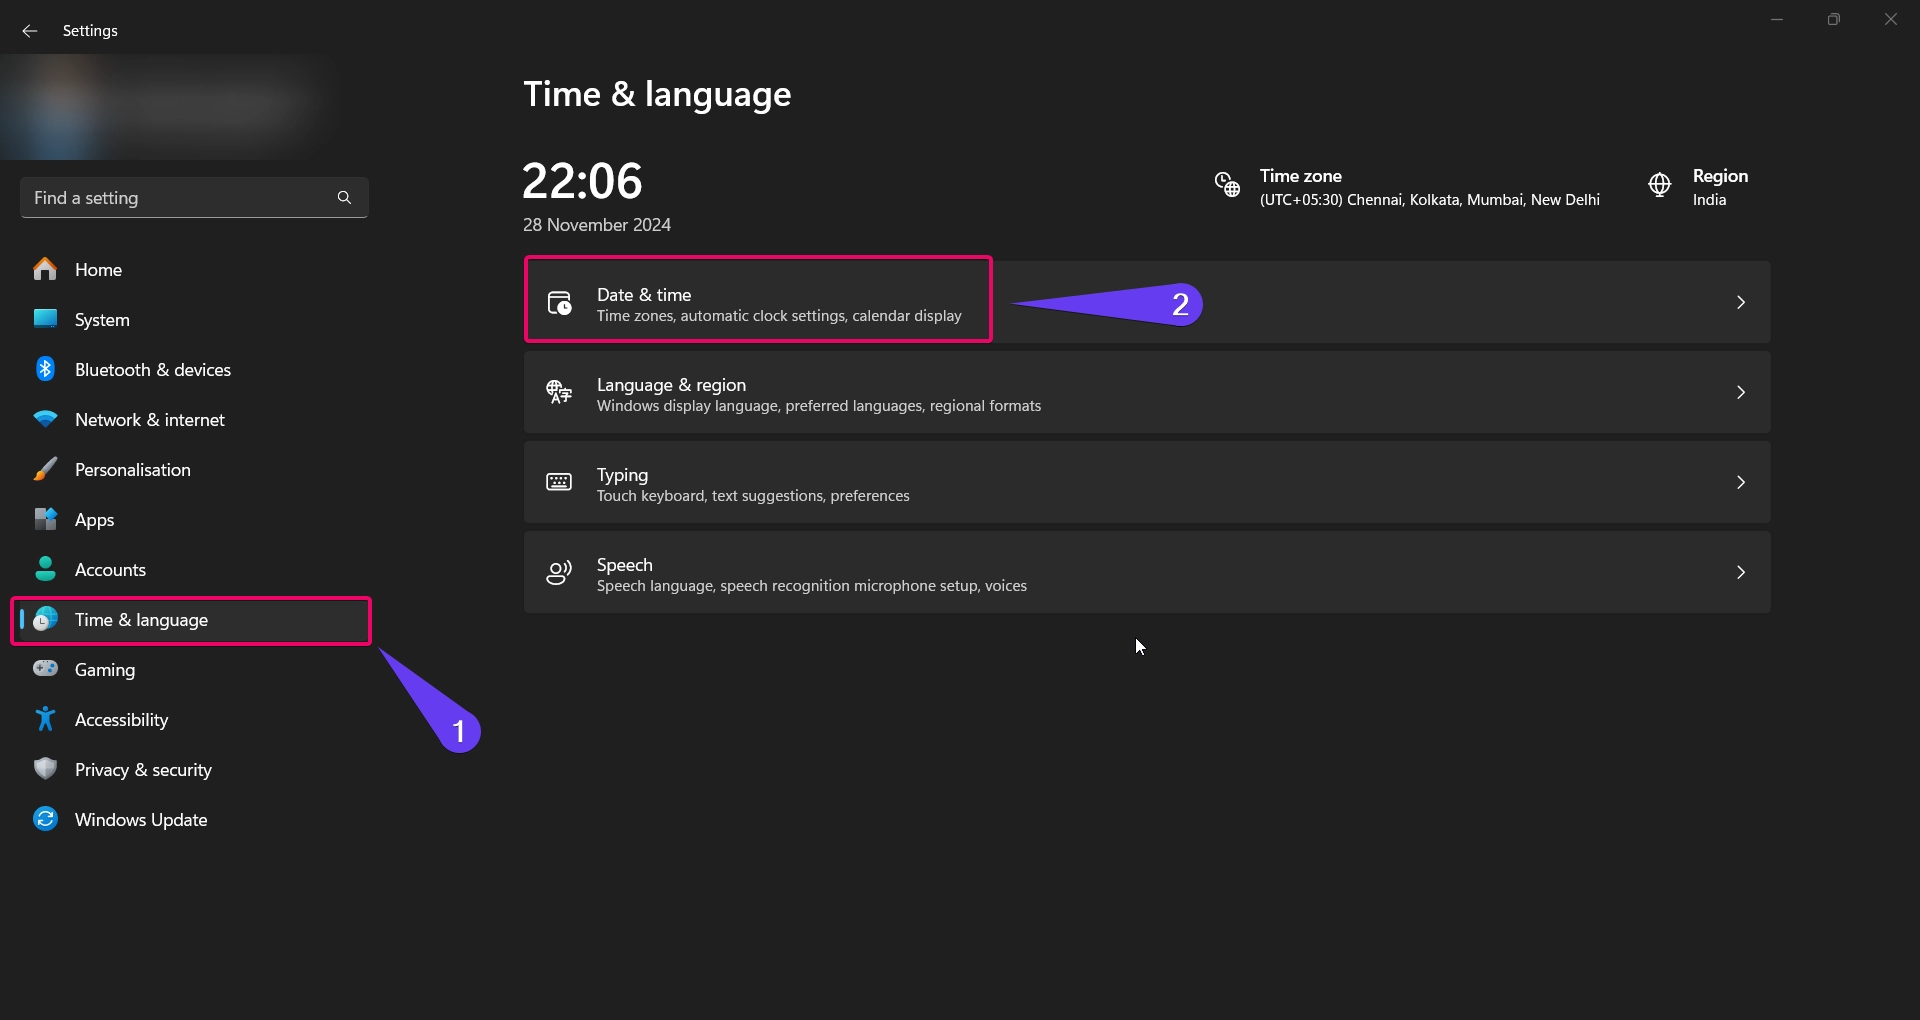
- Navigate to Time & Language from the left-hand menu.
- Select Date & time from the options.
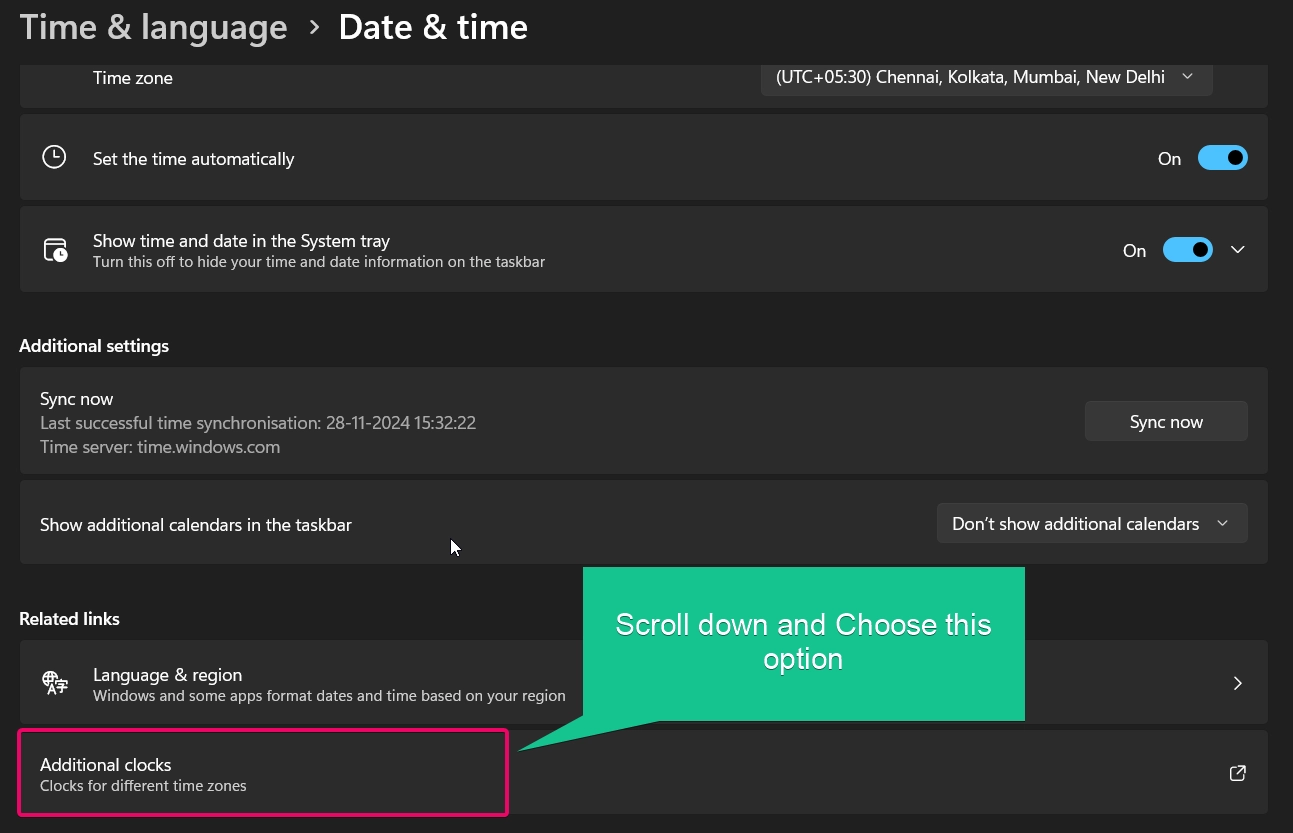
- Scroll down and click on Additional clocks for different time zones under the Related links section.
- This will open the old-style Date and Time settings window.
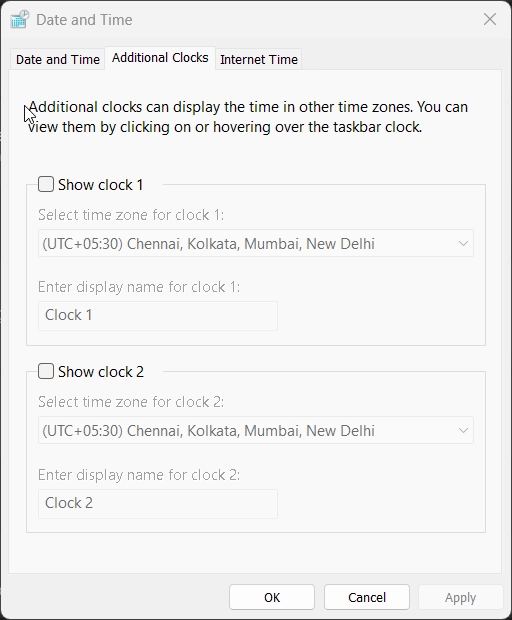
- In the Additional Clocks tab:
- Check the box for Show this clock to enable an additional clock.
- Select a time zone from the dropdown menu.
- You can find the list of timezone and along with its country: https://en.wikipedia.org/wiki/List_of_tz_database_time_zones
- Enter a display name for the clock, such as “New York” or “Tokyo.”
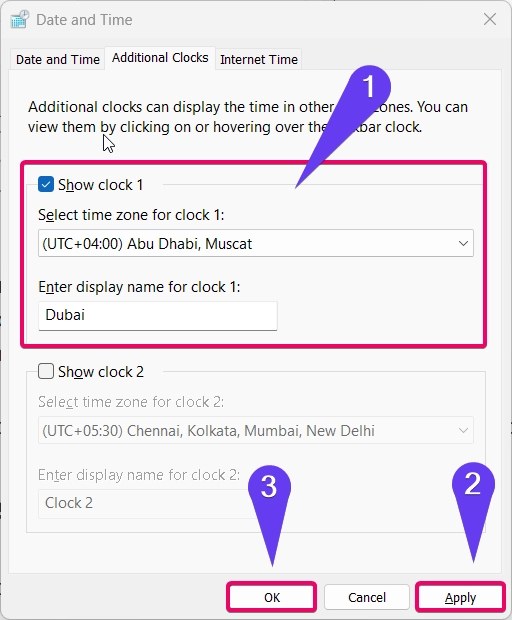
- Click Apply and then OK to save your changes.
To remove an additional clock, simply uncheck the Show this clock option for the respective time zone.
Method 2: Using Control Panel
If you prefer the traditional Control Panel, you can use it to manage additional clocks. Follow these steps:
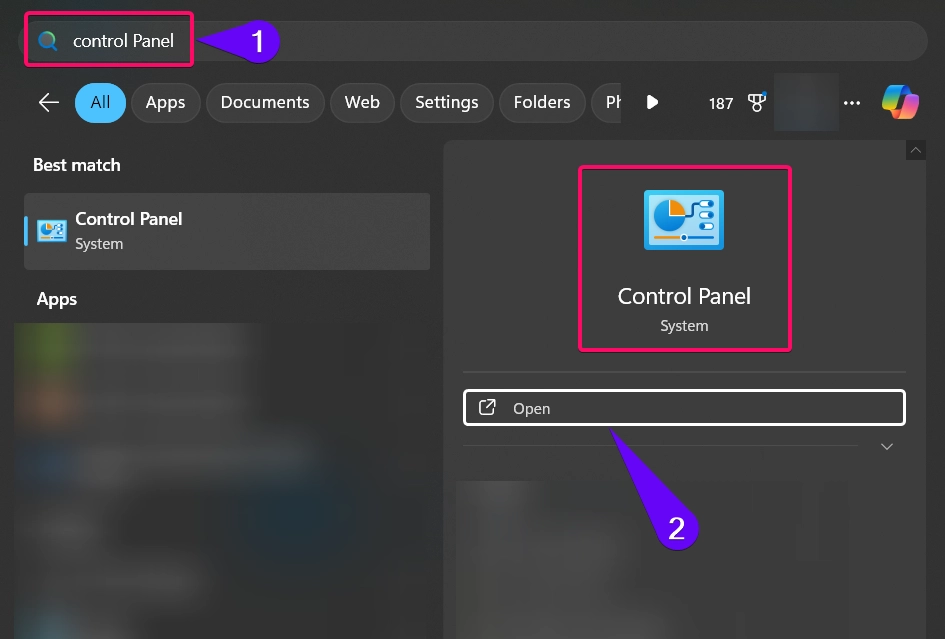
- Open the Control Panel by typing “Control Panel” in the Windows search bar and selecting it.
- Go to Clock and Region.
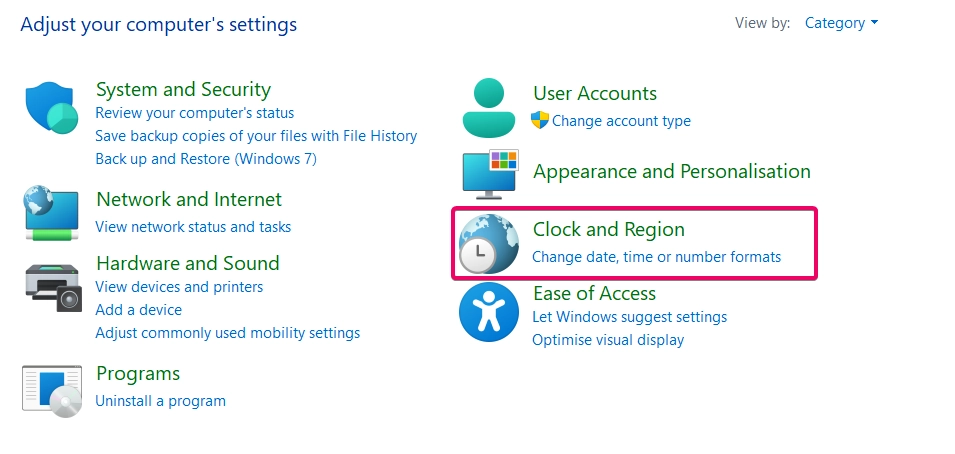
- Click on Date and Time.

- Navigate to the Additional Clocks tab.
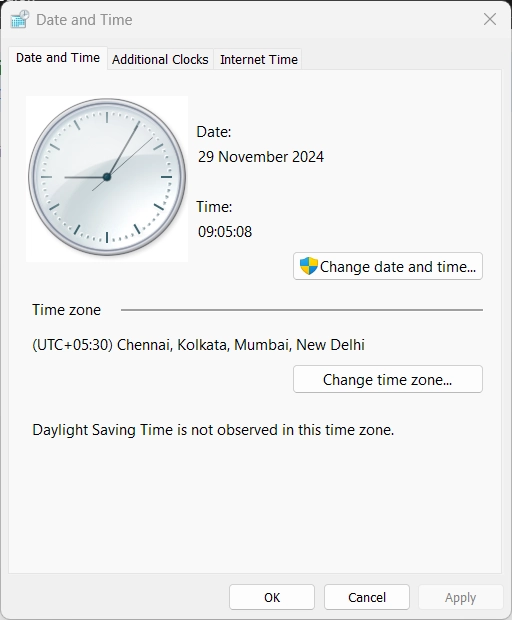
- To add a clock:
- Check Show this clock for one or both available slots.
- Select the desired time zone from the dropdown menu.
- Enter a label for the clock to easily identify the region.

- To remove a clock, uncheck the Show this clock option.
- Click Apply and then OK to save the settings.
Method 3: Using Registry Editor
Important: Editing the registry can be risky if not done correctly. Always back up your registry before making any changes.
For advanced users, the Registry Editor allows you to add or remove additional clocks. Here’s how:
- Country based timezones list: https://en.wikipedia.org/wiki/List_of_tz_database_time_zones
- Press Winkey + R, type
regedit, and press Enter to open the Registry Editor. - Navigate to the following path:
HKEY_CURRENT_USER\Software\Microsoft\Windows\CurrentVersion\DateTime\AdditionalClocks
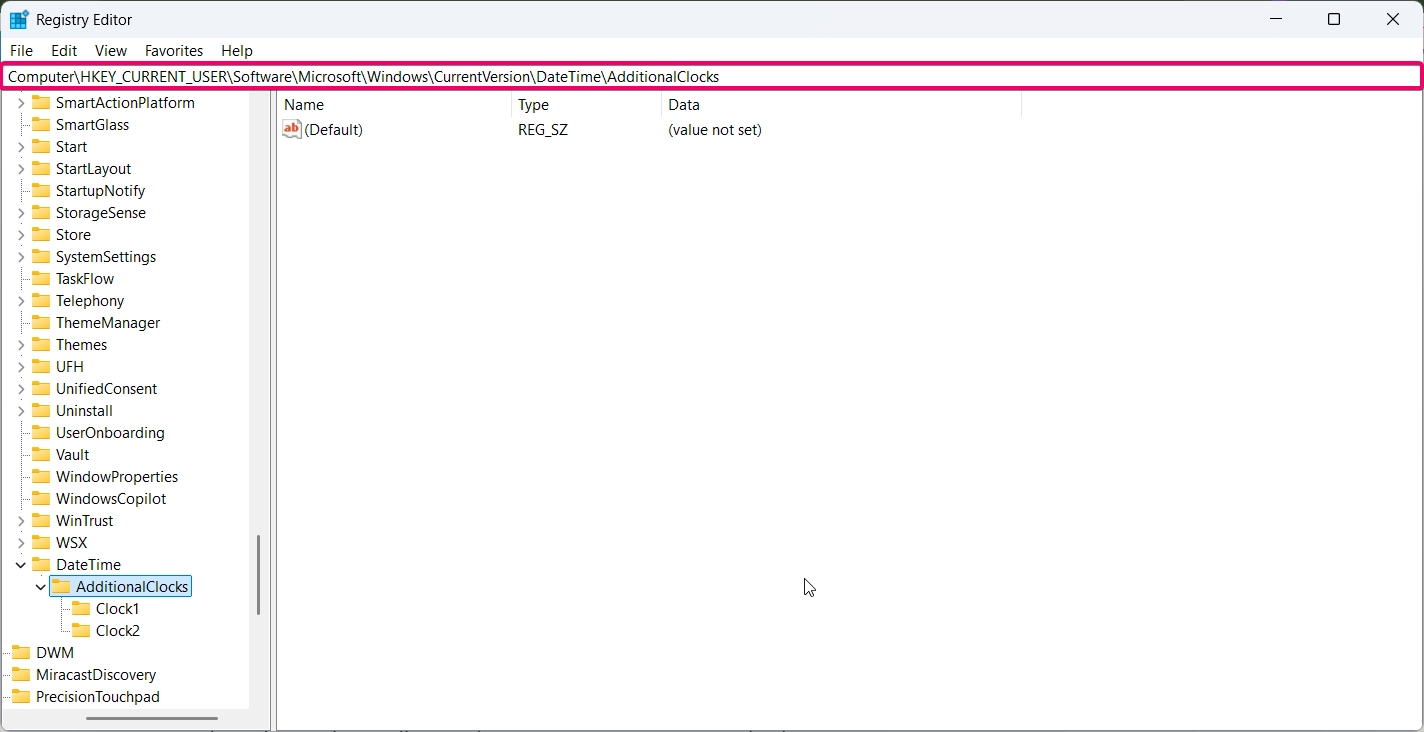
- Right-click on the AdditionalClocks folder in the left pane.
- Select New > Key and name the first key Clock1.
- Repeat the process to create another key named Clock2 (if needed for the second clock).
- Click on the Clock1 key you created.
- In the right pane, right-click and select New > String Value.
- Name the first value DisplayName and double-click it to set a name (e.g., “New York”).
- Right-click again and select New > String Value.
- Name the second value TimeZone and double-click it to set the time zone ID (e.g.,
Eastern Standard Timefor New York).
- Name the second value TimeZone and double-click it to set the time zone ID (e.g.,
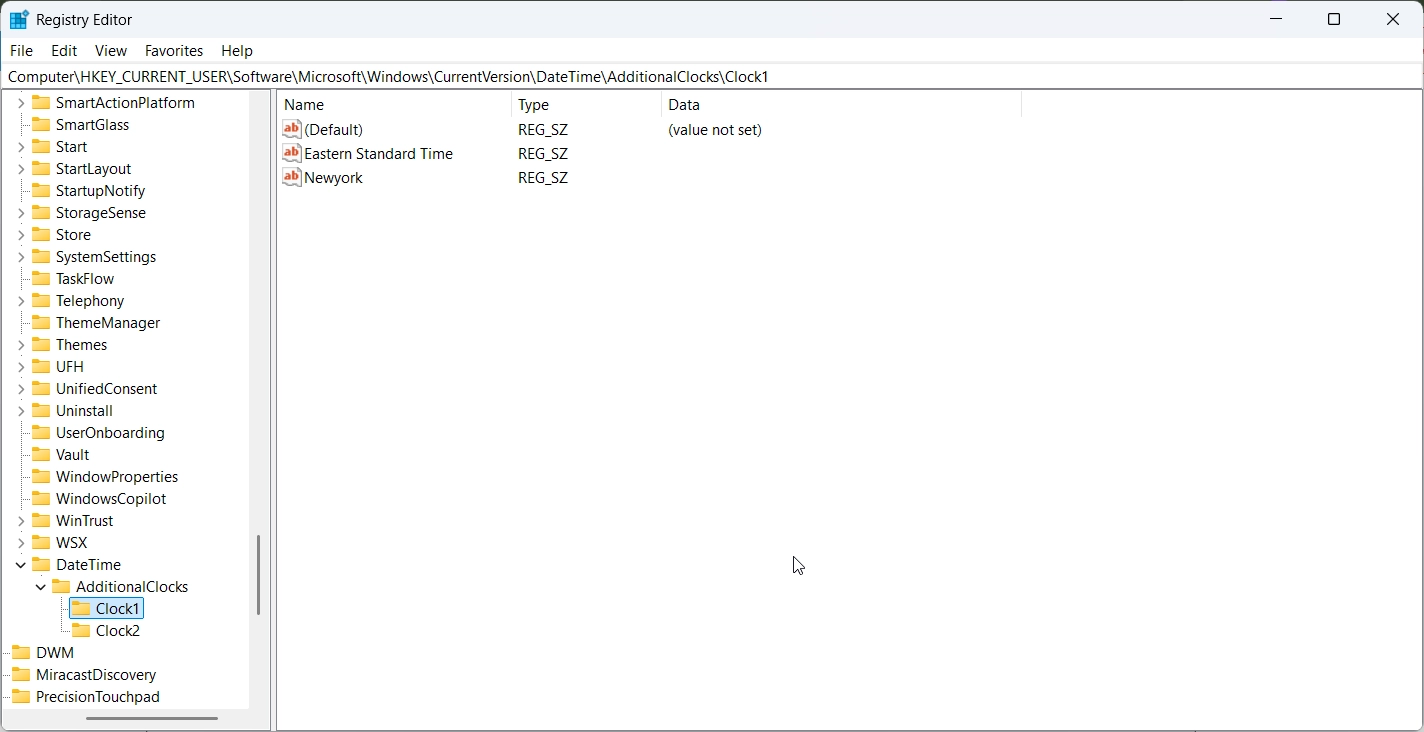
- If you want a second additional clock, click on Clock2, and repeat the same process, setting DisplayName and TimeZone values for the second time zone.
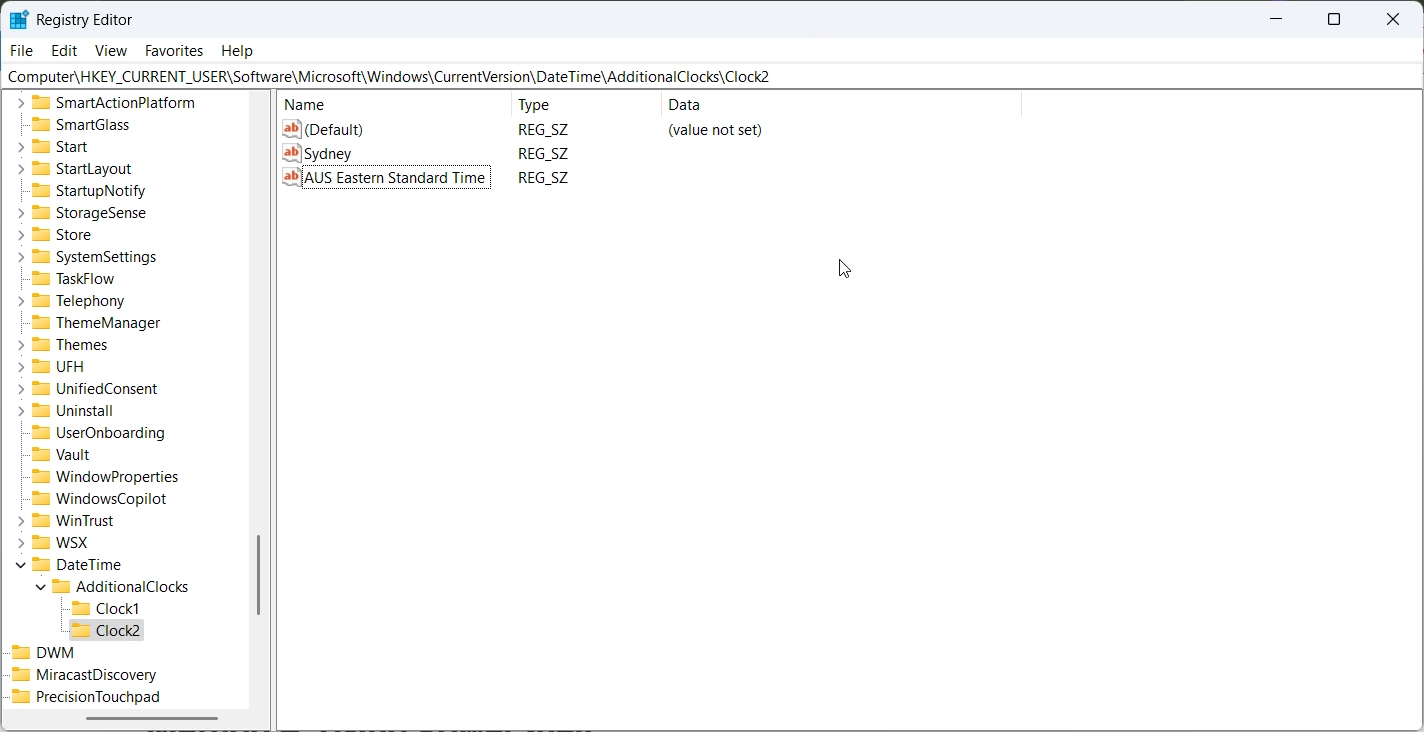
- You will see entries for Clock1 and Clock2. To configure:
- Double-click DisplayName and enter a name for the clock (e.g., “Sydney”).
- Double-click TimeZone and enter the time zone ID (e.g., “AUS Eastern Standard Time”).
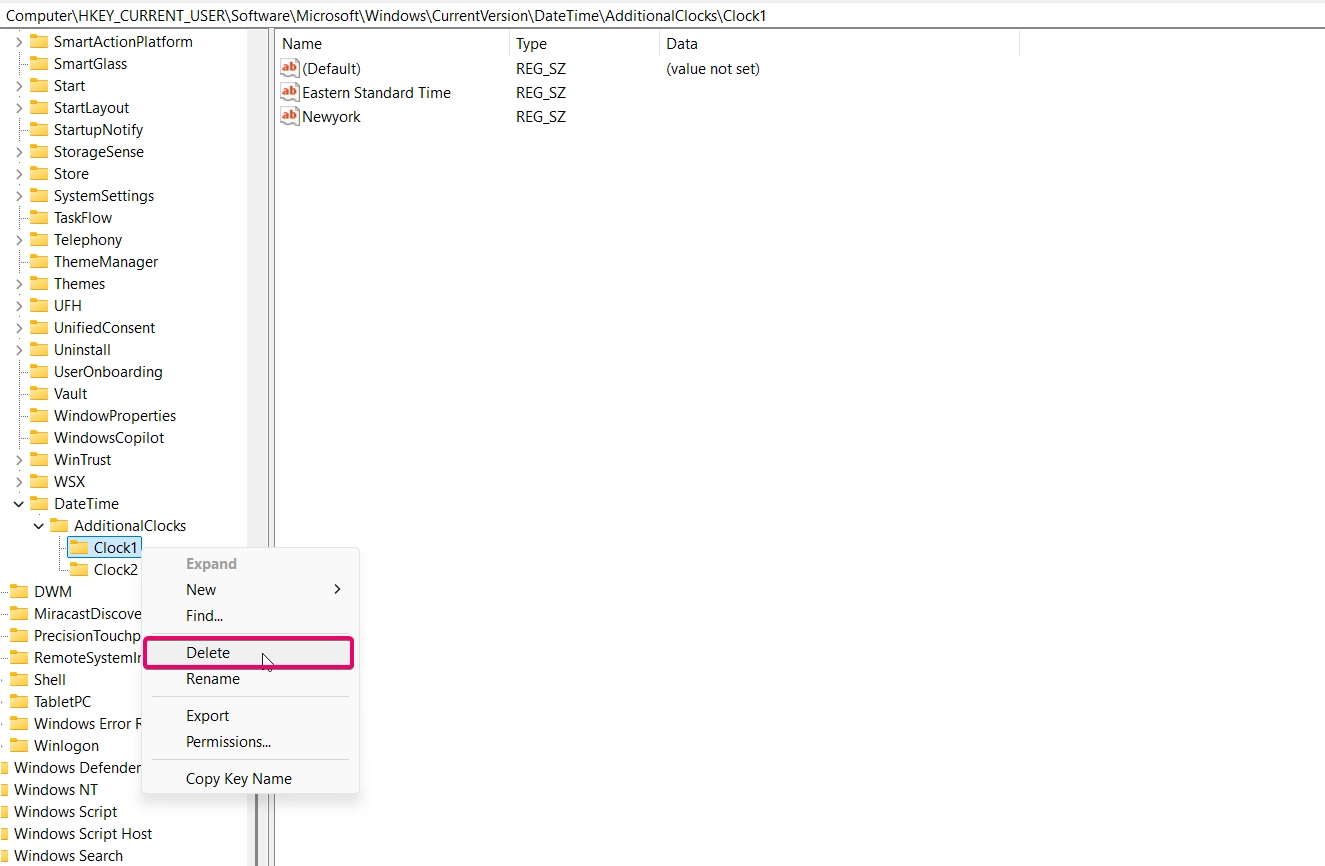
- To remove a clock, delete the corresponding Clock1 or Clock2 entry.
- Close the Registry Editor and restart your system to apply changes.
Method 4: Using PowerShell
If you prefer using command-line tools, PowerShell can be used to manage additional clocks programmatically:
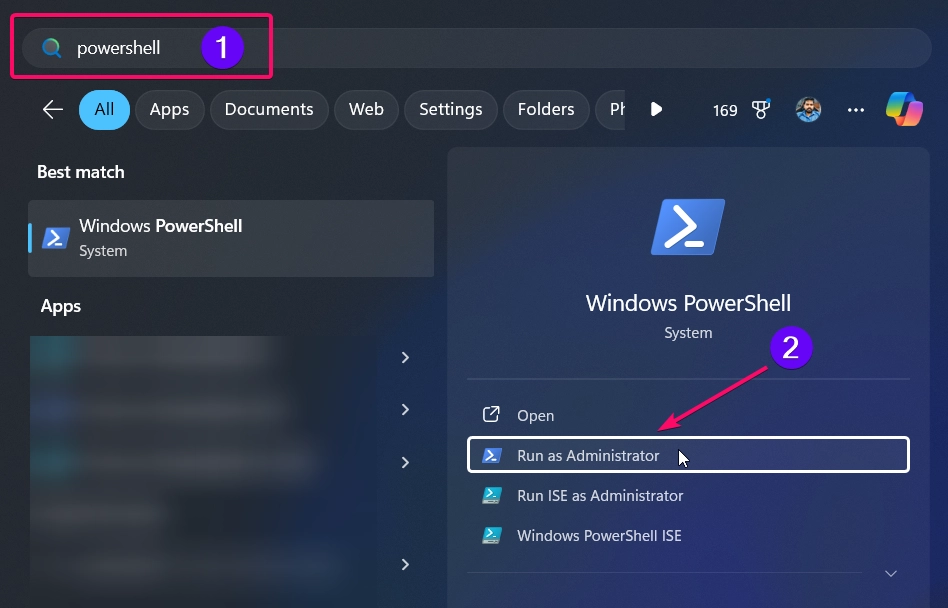
- Open PowerShell as Administrator by right-clicking the Start menu and selecting Windows Terminal (Admin).
- To add a clock, use the following commands one by one:
Set-ItemProperty -Path "HKCU:\Software\Microsoft\Windows\CurrentVersion\DateTime\AdditionalClocks\Clock1" -Name "DisplayName" -Value "London"

Set-ItemProperty -Path "HKCU:\Software\Microsoft\Windows\CurrentVersion\DateTime\AdditionalClocks\Clock1" -Name "TimeZone" -Value "GMT Standard Time"

- To remove a clock, delete the registry entry for that clock using:
Remove-Item -Path "HKCU:\Software\Microsoft\Windows\CurrentVersion\DateTime\AdditionalClocks\Clock1"

- Restart your computer to apply the changes.
Conclusion
Adding or removing additional clocks for different time zones in Windows 11 is a simple yet powerful feature. Whether you choose to use the Settings app, Control Panel, Registry Editor, or PowerShell, these methods ensure you can effectively manage time zones and stay organized.
By following the steps outlined in this guide, you’ll be able to track multiple time zones effortlessly, making it easier to stay connected with colleagues, clients, or loved ones across the globe.
Frequently ASked Queries:
How many additional clocks can I add in Windows 11?
Windows 11 allows you to add up to two additional clocks alongside the system clock.
Why can’t I see the option to add additional clocks in Settings?
The option might be moved under Related links in the Date & time section. Ensure your Windows version is up to date.
Can I customize the format of the additional clocks?
No, the format of additional clocks is tied to the system’s regional settings.
Is it possible to add more than two additional clocks?
By default, Windows 11 supports only two additional clocks. For more clocks, consider third-party tools.
Will the additional clocks appear on the taskbar?
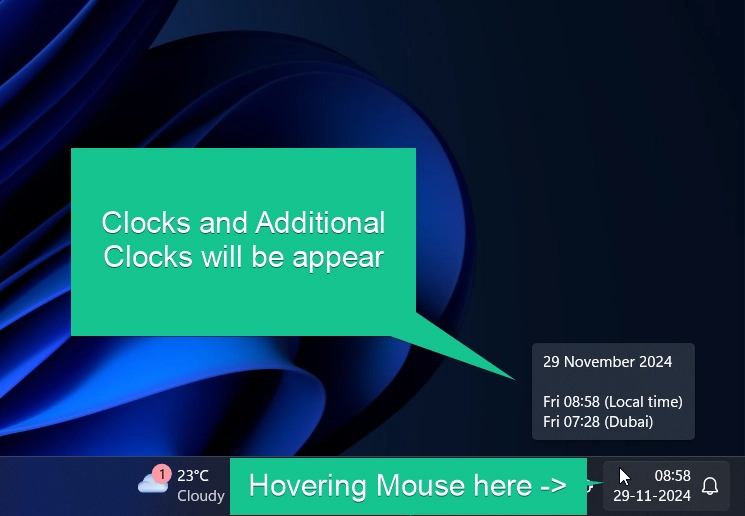
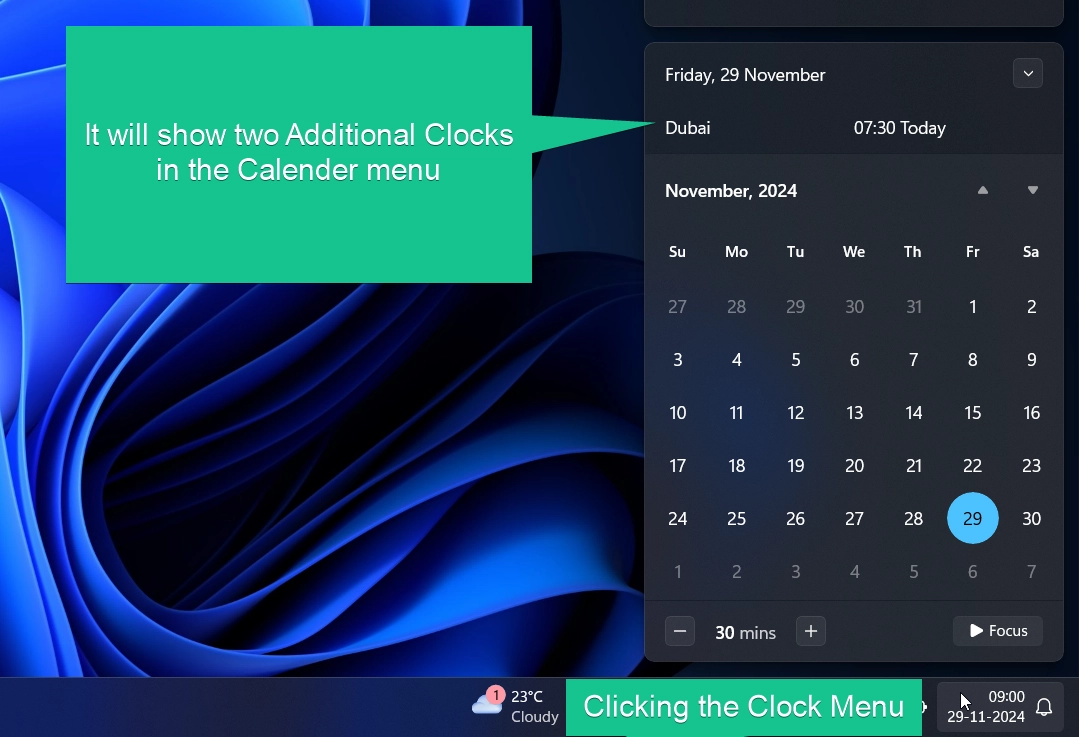
Additional clocks appear when you click the date and time section on the taskbar, not directly on the taskbar itself.
Read More:
- How to Add/Remove Common Program Groups from Start Menu in Windows 11?
- How to Add/Remove Android Apps from Your Phone to Start on Windows 11 PC?
- How to Turn On/Off Airplane Mode in Windows 11?