How to Check if You Are Using a Local Account or Microsoft Account in Windows 11?
What are the multiple methods to to Check if You Are Using a Local Account or Microsoft Account in Windows 11?
Windows 11 allows users to sign in with either a local account or Microsoft account. Knowing which type of account you’re using can help you understand the features available, including access to Microsoft services, cloud syncing, and personalization options. This guide will explain how to determine if you’re signed in with a local account or Microsoft account in Windows 11, covering multiple methods for accuracy.
Read This: Enable/disable Built-in Administrator Account Lockout In Windows 11
Why Identify Your Account Type?
There are important differences between a local account and a Microsoft account:
- Local Account: Offers offline-only access, with no connection to Microsoft services. It’s ideal for privacy focused users who don’t need cloud syncing.
- Microsoft Account: Allows access to Microsoft services like OneDrive, Office, and the Microsoft Store, with data syncing across devices.
By identifying your account type, you can better manage your Windows experience based on your needs.
Method 1: Using the Settings App
The Settings app provides a quick way to check your account type. Here’s how:
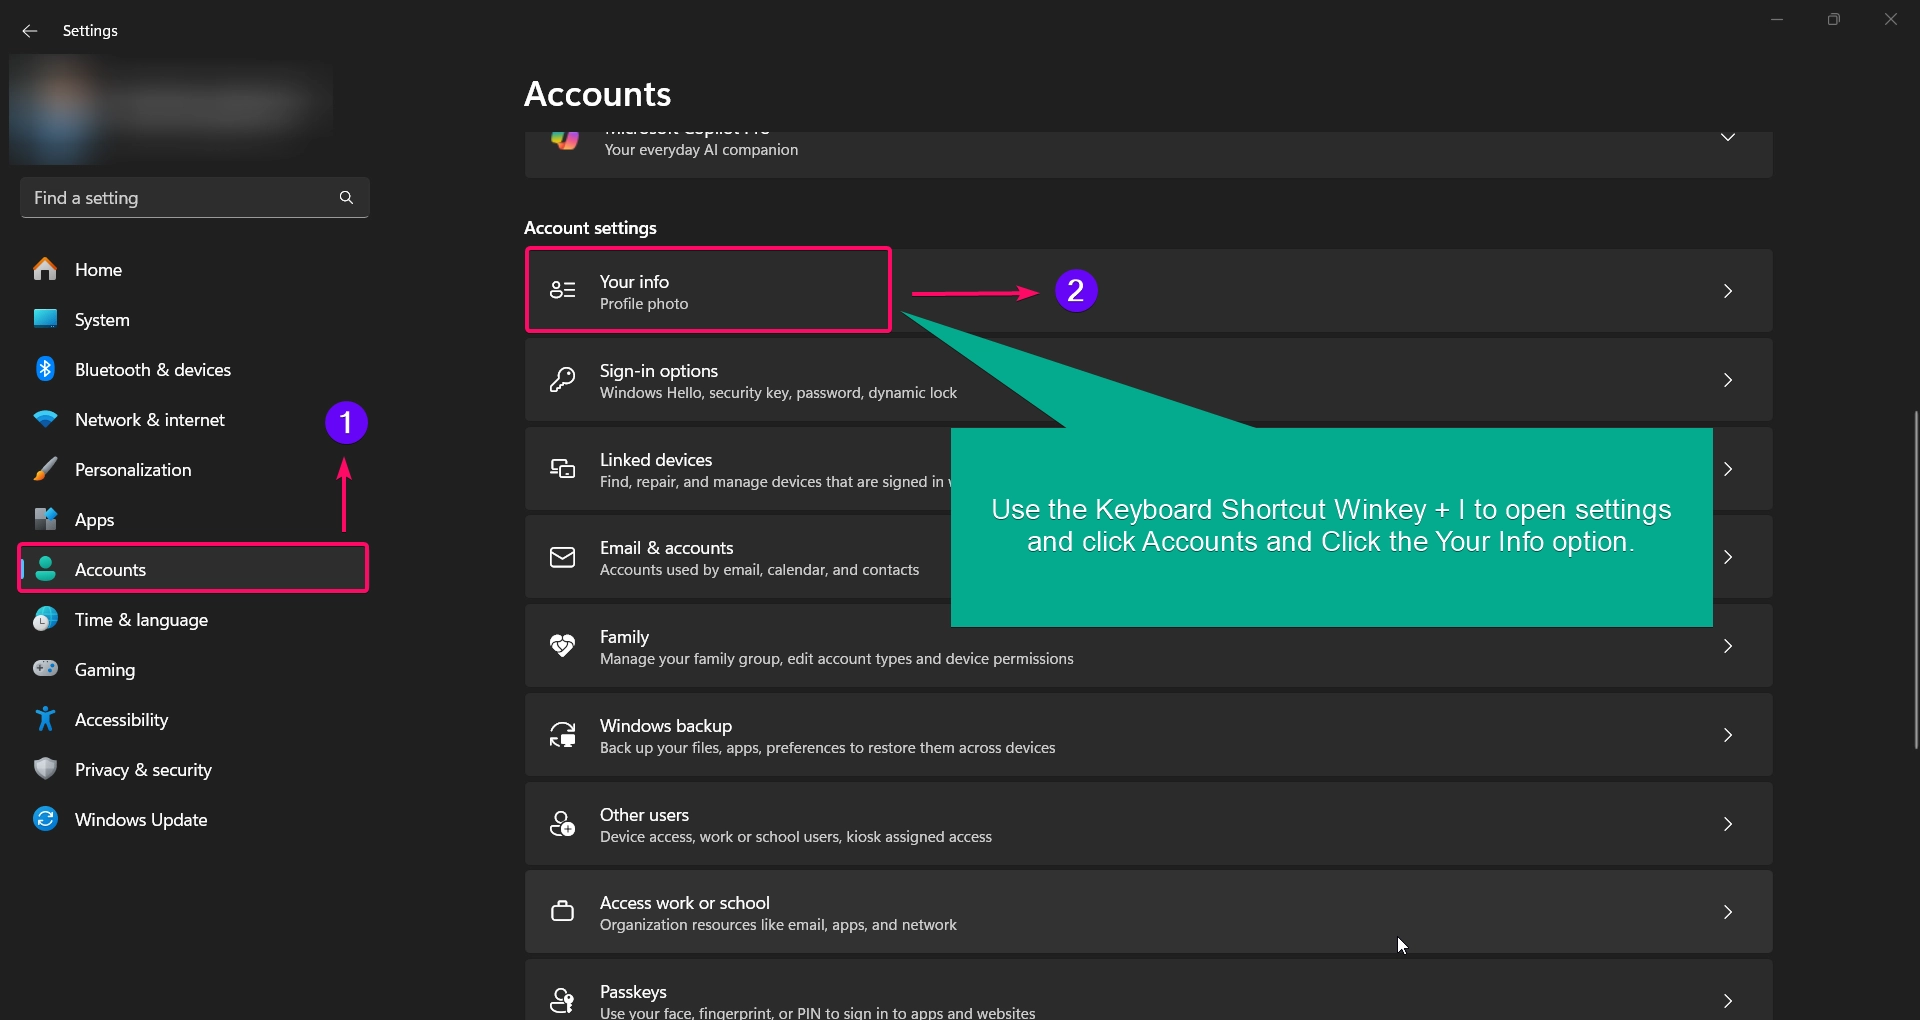
- Open Settings by pressing Winkey + I.
- Navigate to Accounts on the left sidebar.
- Click on Your info.
- Under your name and email, check for one of the following:
- Microsoft Account: If you see your email address with “Microsoft Account” labeled, you’re signed in with a Microsoft account.
- Local Account: If it says “Local Account” instead of an email address, you’re signed in with a local account.
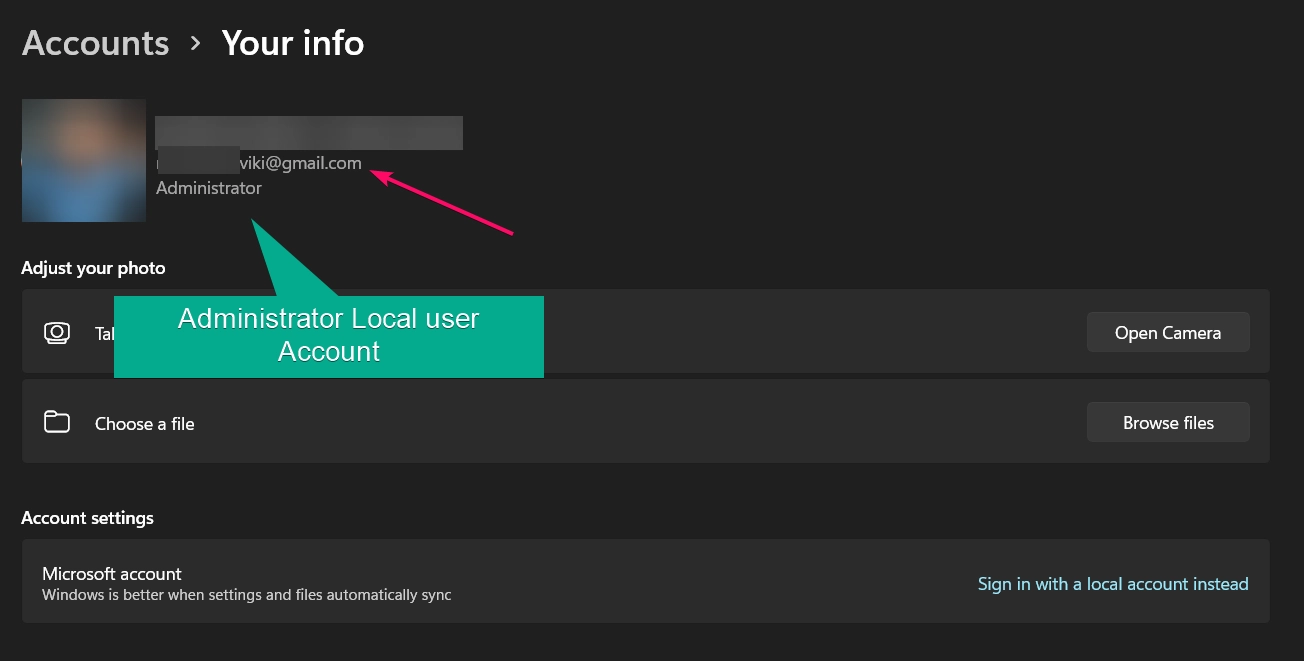
This is the simplest method, providing a clear indication of your account type.
Method 2: Checking Account Type from the Control Panel
If you prefer the Control Panel interface, you can verify your account type from there:
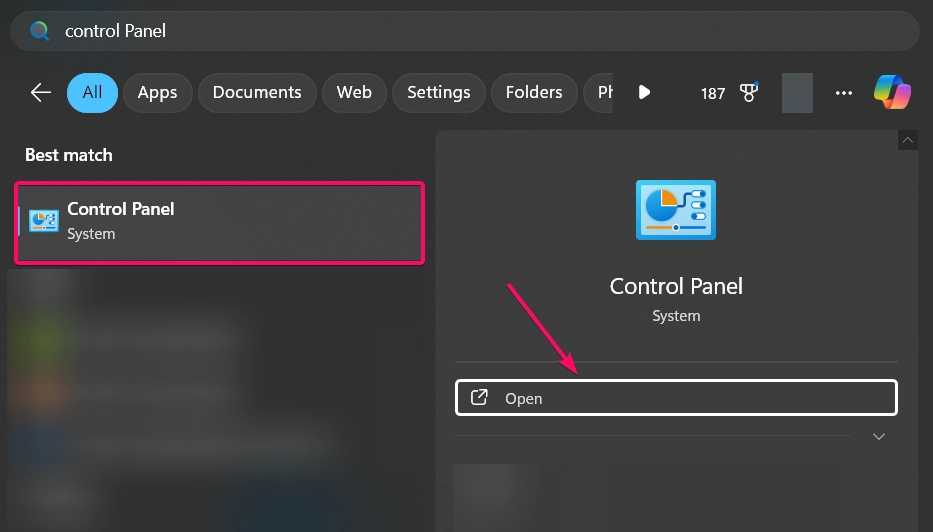
- Open Control Panel by searching for it in the Windows search bar.
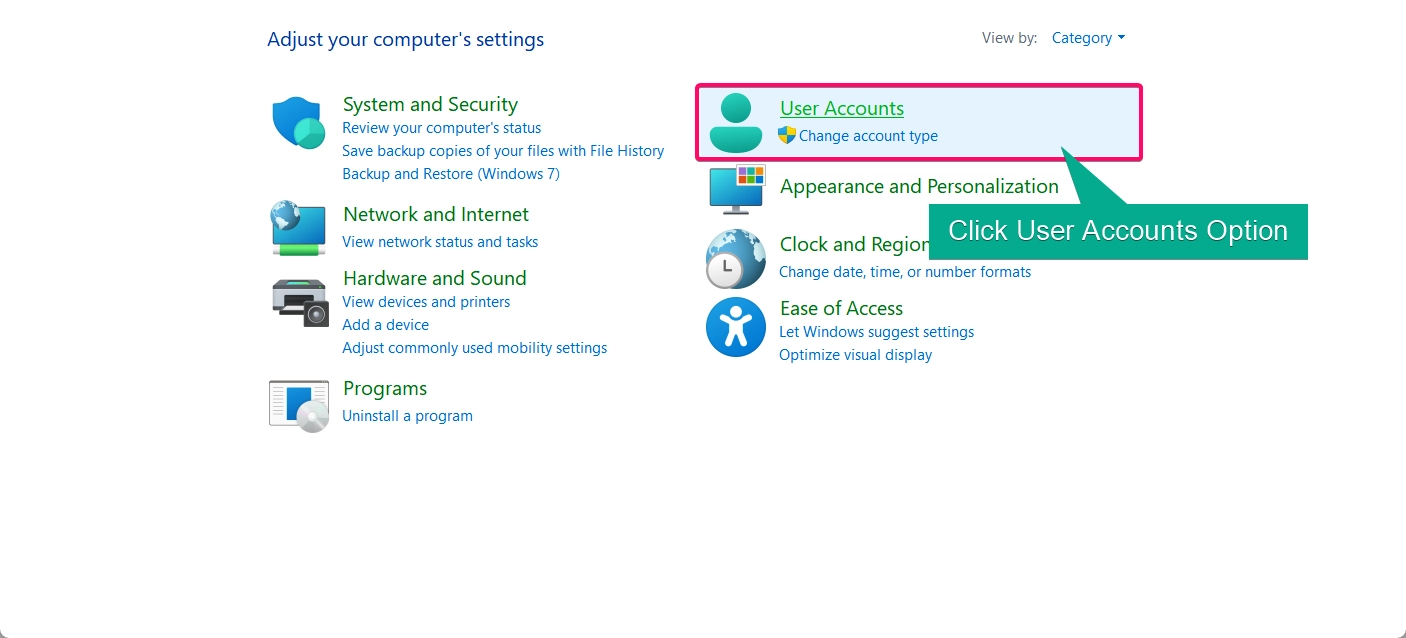
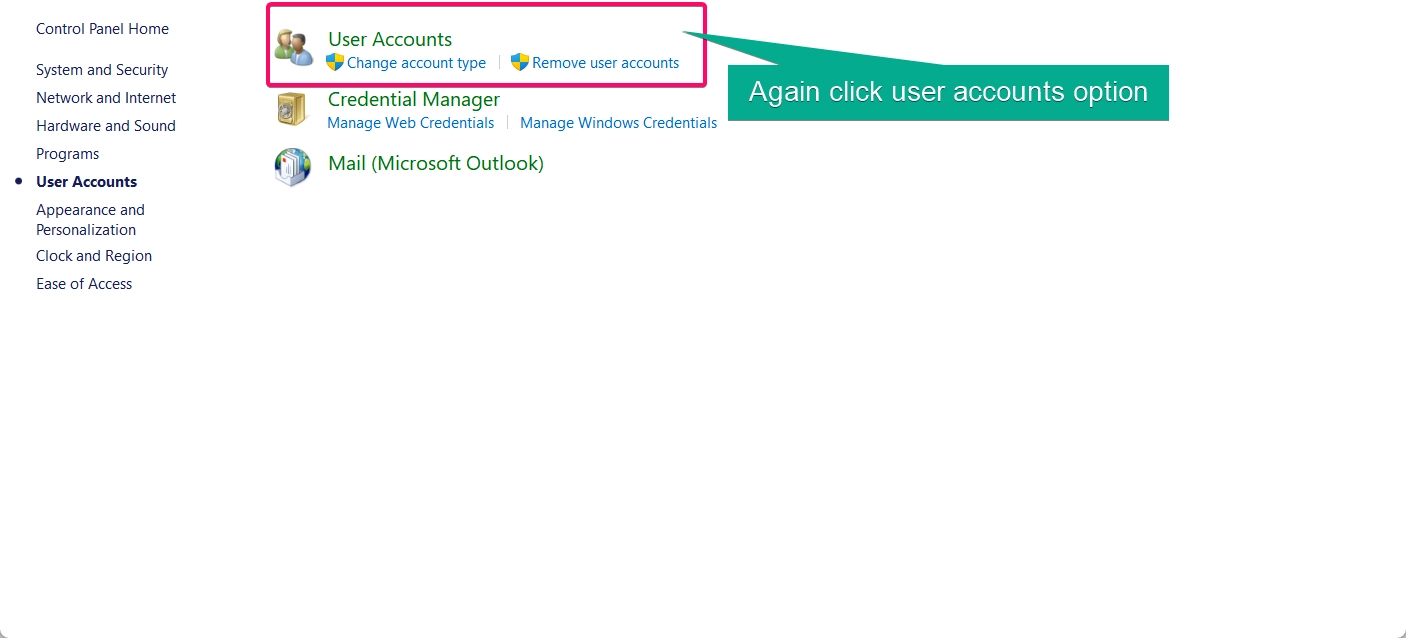
- Go to User Accounts and then click on User Accounts again.
- Here, you’ll see your account name and type:
- If it’s a Microsoft Account, you’ll see your email address displayed under your account name.
- If it’s a Local Account, only your username will appear without an associated email.
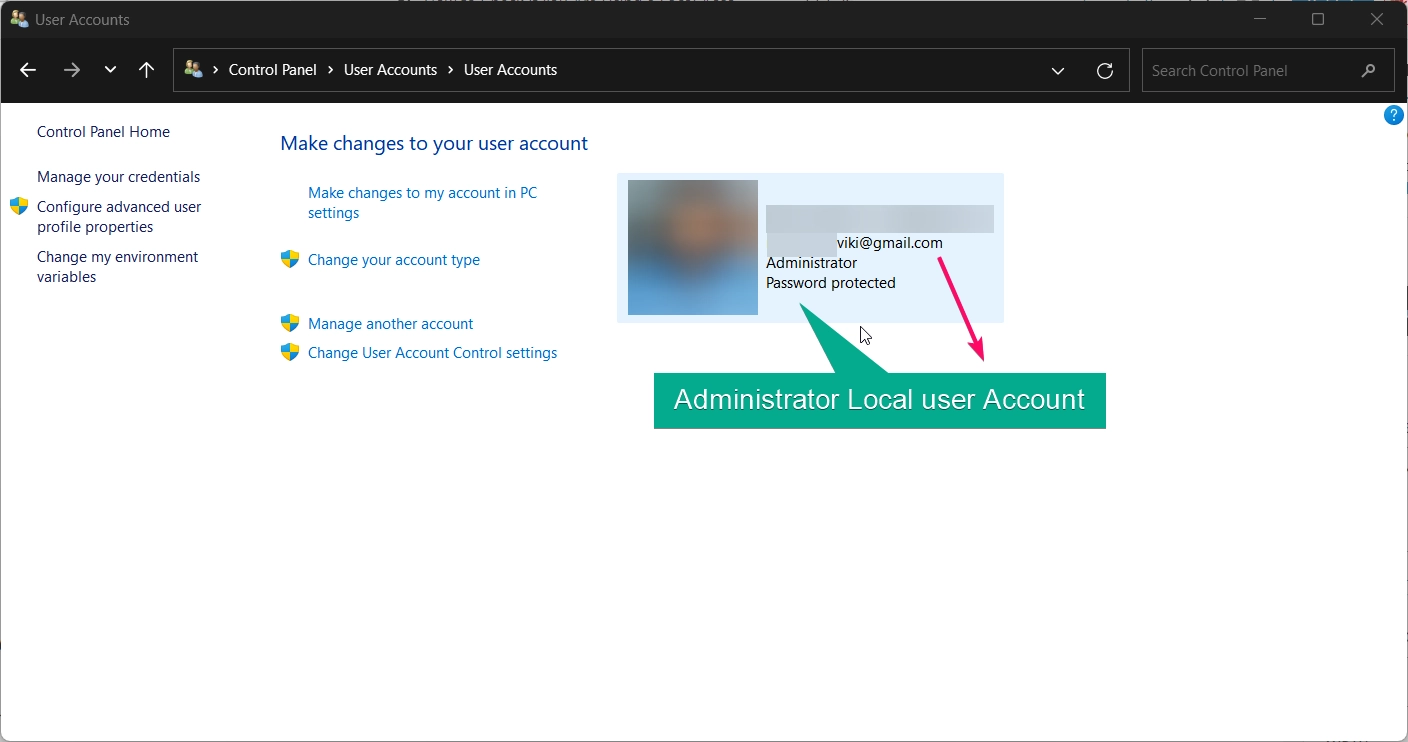
Note: This method works well if you’re accustomed to using Control Panel for account settings.
Method 3: Using the Start Menu
The Start Menu also provides clues about your account type:
- Open the Start Menu by clicking the Start button or pressing the Windows key.
- Click on your profile icon in the lower-left corner.
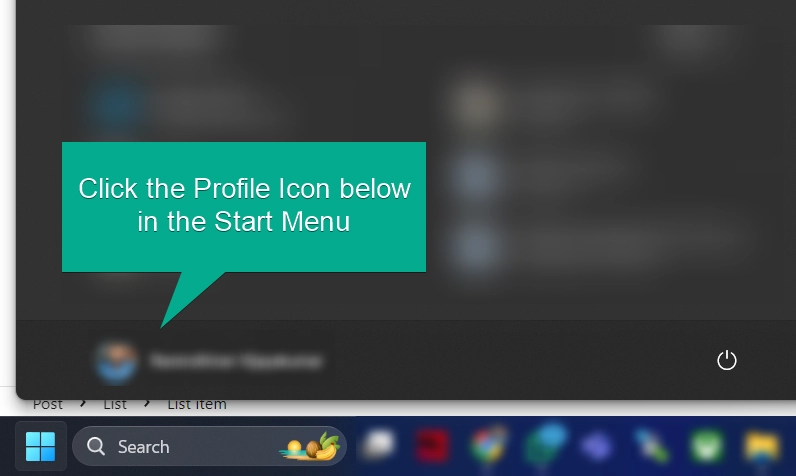
- If you see Manage Microsoft Account, you’re using a Microsoft account. If there’s no option related to a Microsoft account, then it’s likely a local account.
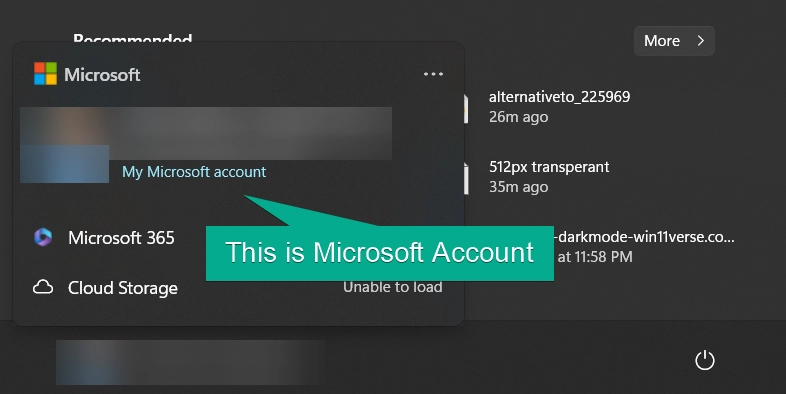
This quick check is handy if you’re already navigating the Start Menu and want to confirm your account type.
Related: Enable/disable The Built-in Administrator Account In Windows 11
Method 4: Using Command Prompt
For advanced users, the Command Prompt provides an alternate way to confirm your account type:
- Open Command Prompt by typing “cmd” in the search bar and selecting Run as administrator.
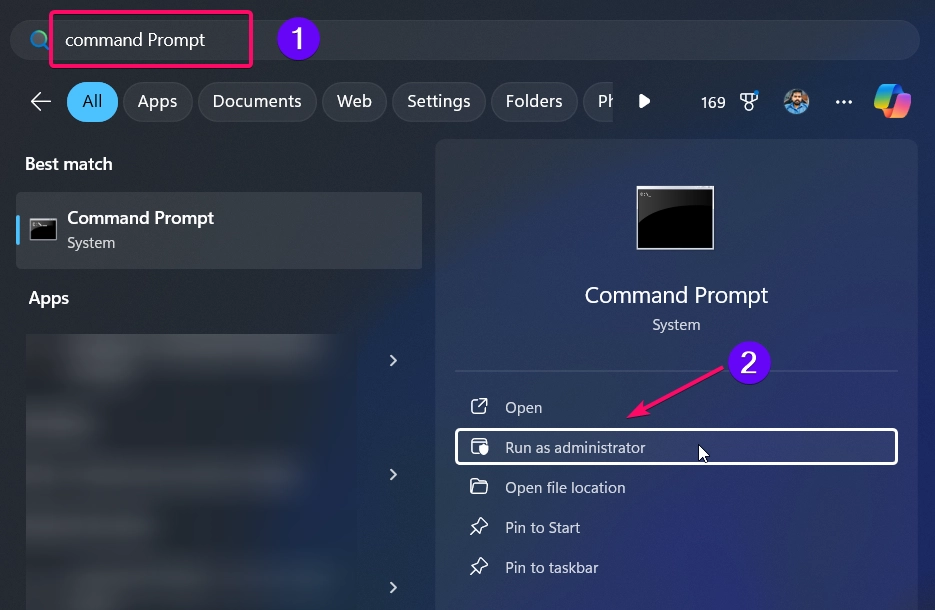
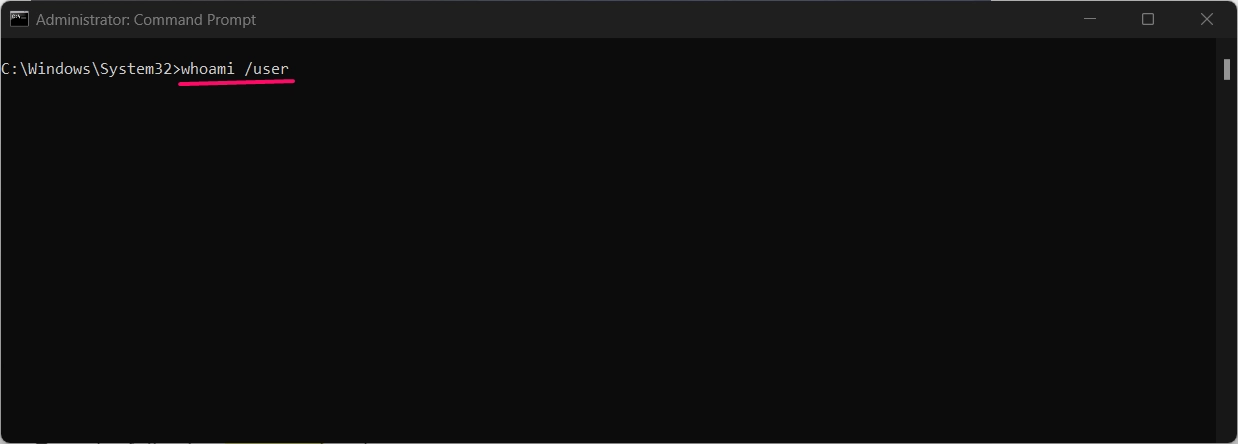
- Type the following command and press Enter:
whoami /user
- Observe the output. If it includes your Microsoft email address, you’re using a Microsoft account. If it displays only a local username, you’re signed in with a local account.
Tip: This method is helpful for users comfortable with command-line tools who want quick results.
Method 5: Using PowerShell
PowerShell also allows you to check your account type quickly:
- Open PowerShell as Administrator by right-clicking the Start button and selecting Windows Terminal (Admin).
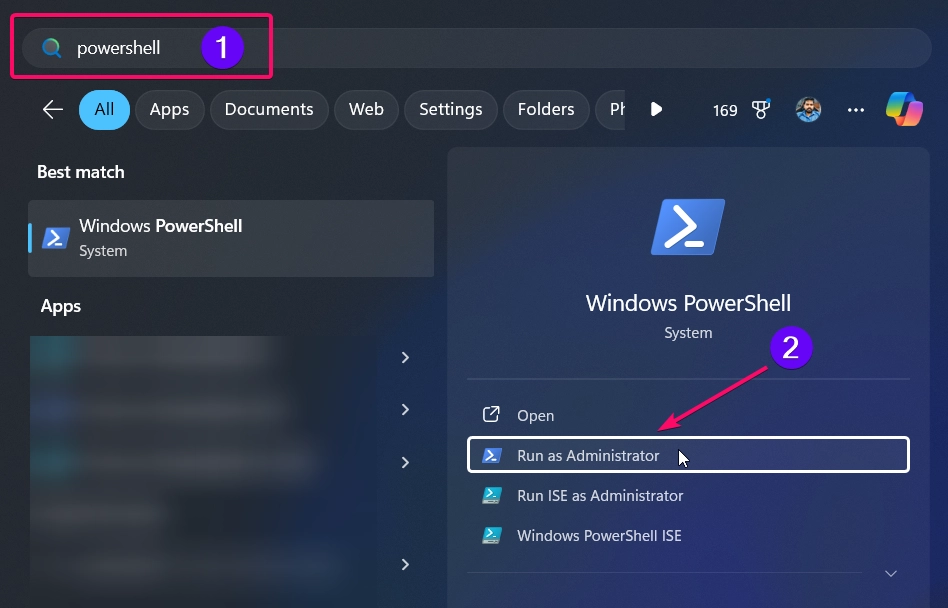
- Enter the following command and press Enter:
Get-LocalUser | Where-Object { $_.Name -eq $env:UserName }
- If your username appears as a Microsoft account email, you’re logged in with a Microsoft account. If only your username appears, it’s a local account.
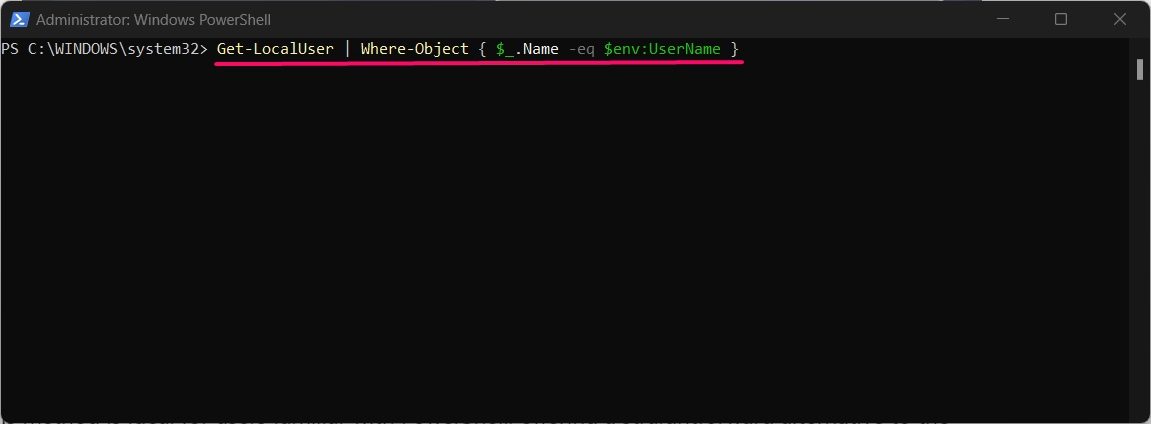
This method is ideal for users familiar with PowerShell, offering a straightforward alternative to the Settings app.
Read This: Activate Windows 11 Using A Product Key Or Digital License
Conclusion
Determining whether you’re using a local or Microsoft account in Windows 11 is simple with the methods outlined above. Whether you check through Settings, Control Panel, Command Prompt, PowerShell, or the Start Menu, each method provides a clear answer. Knowing your account type helps you manage your device efficiently, especially if you’re considering switching to a Microsoft account for cloud benefits or sticking with a local account for privacy.
Most Asked Querries:
-
Is a local account more secure than a Microsoft account?
Both account types are secure, but a local account doesn’t connect to the internet for syncing, which may appeal to privacy-focused users.
-
Will switching to a Microsoft account change my files or settings?
No, your files and local settings remain unchanged. However, switching enables syncing of certain settings and personalization across devices.
-
Can I use both a Microsoft and a local account on the same computer?
Yes, you can create separate accounts for each type and switch between them as needed.
-
How do I switch from a local account to a Microsoft account?
Go to Settings > Accounts > Your info and select Sign in with a Microsoft account instead to switch.
-
What are the benefits of a Microsoft account?
A Microsoft account allows you to access Microsoft Store apps, sync settings across devices, and use cloud services like OneDrive and Office.
Read More:
- How to Add/Remove Common Program Groups from Start Menu in Windows 11?
- How to Add/Remove Android Apps from Your Phone to Start on Windows 11 PC?
- How to Turn On/Off Airplane Mode in Windows 11?
