How to Set Active Hours for Windows Update in Windows 11?
4+ Unique Methods to Set Active Hours for Windows Update in Windows 11!
Windows Update is crucial for keeping your system secure and up to date. However, unexpected restarts during critical tasks can be frustrating. To avoid this, Windows 11 offers the Active Hours feature, allowing you to specify when your device is in use so updates don’t interrupt your workflow. In this guide, we’ll explain how to set active hours for Windows Update using various methods.
Active Hours ensure that Windows Update doesn’t restart your computer during times when you’re actively using it. By customizing this setting, you can let updates install outside your working hours, minimizing interruptions and ensuring your device stays updated.
Method 1: Using the Settings App
The easiest way to configure active hours is through the Settings app. Follow these steps:
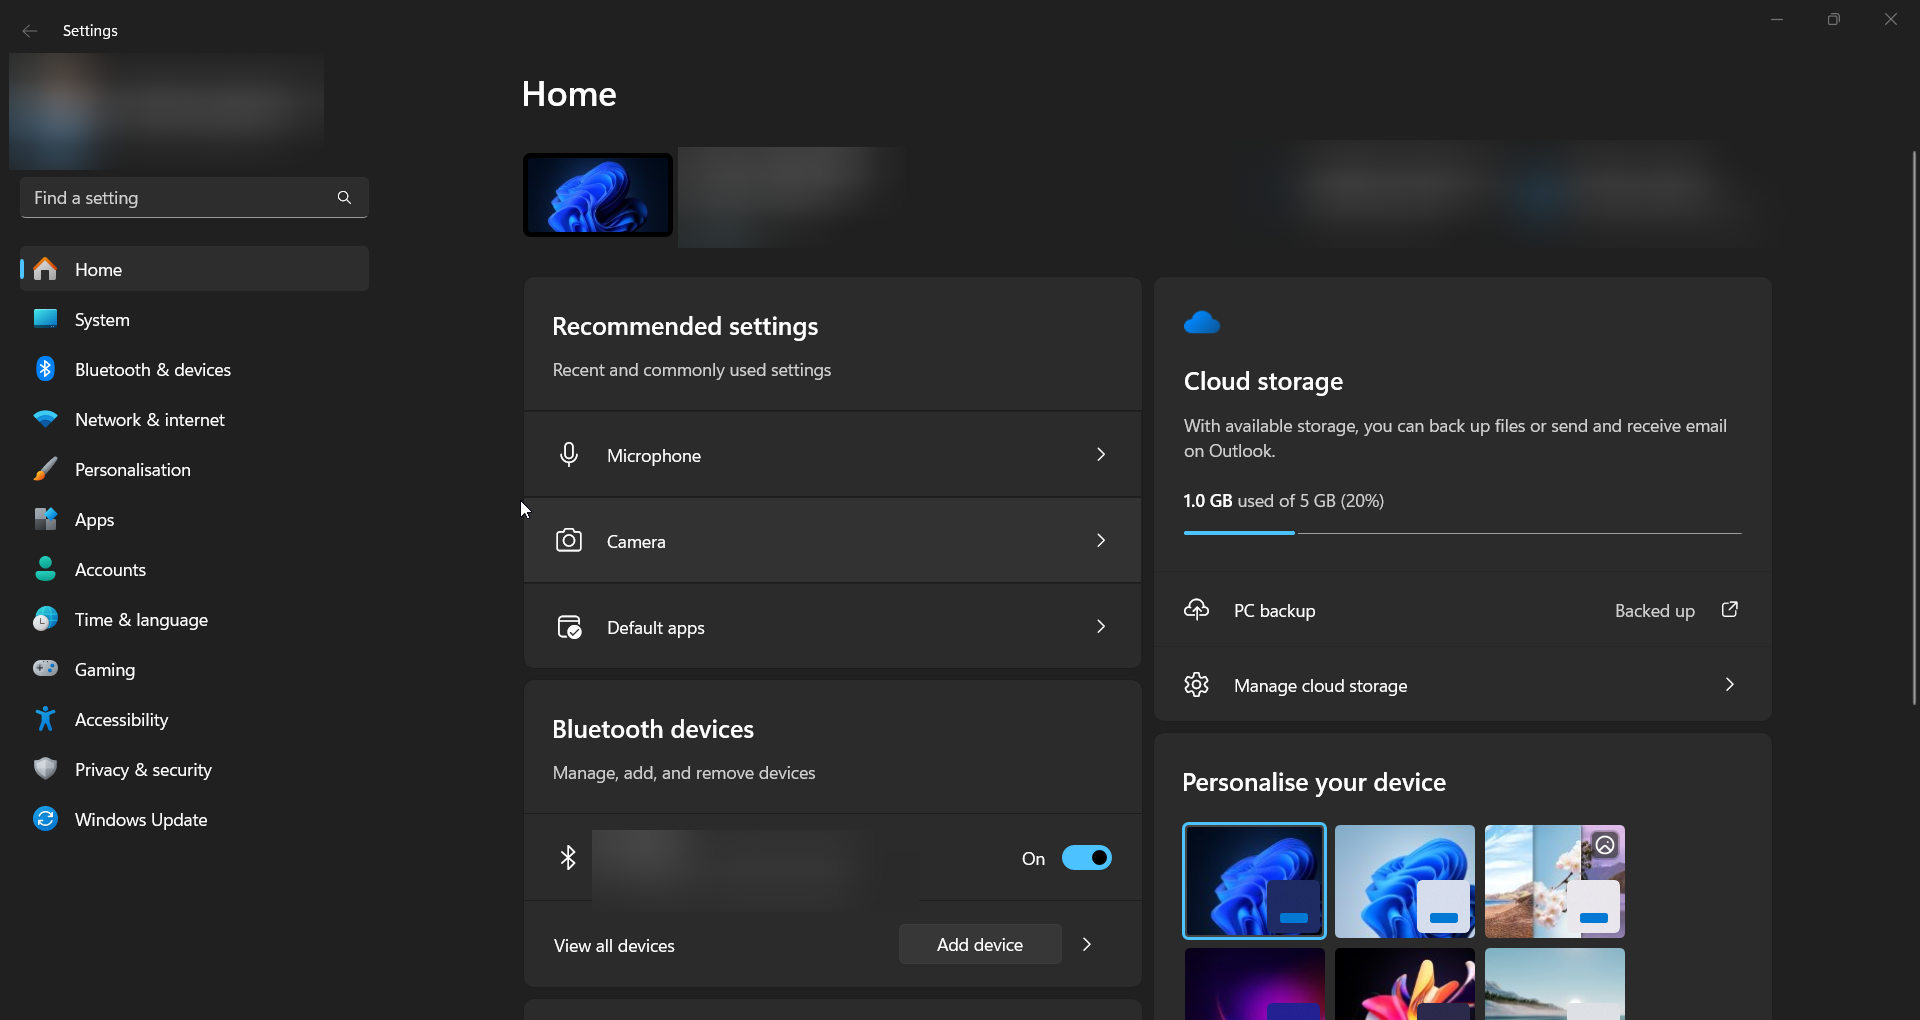
- Open Settings by pressing Winkey + I.
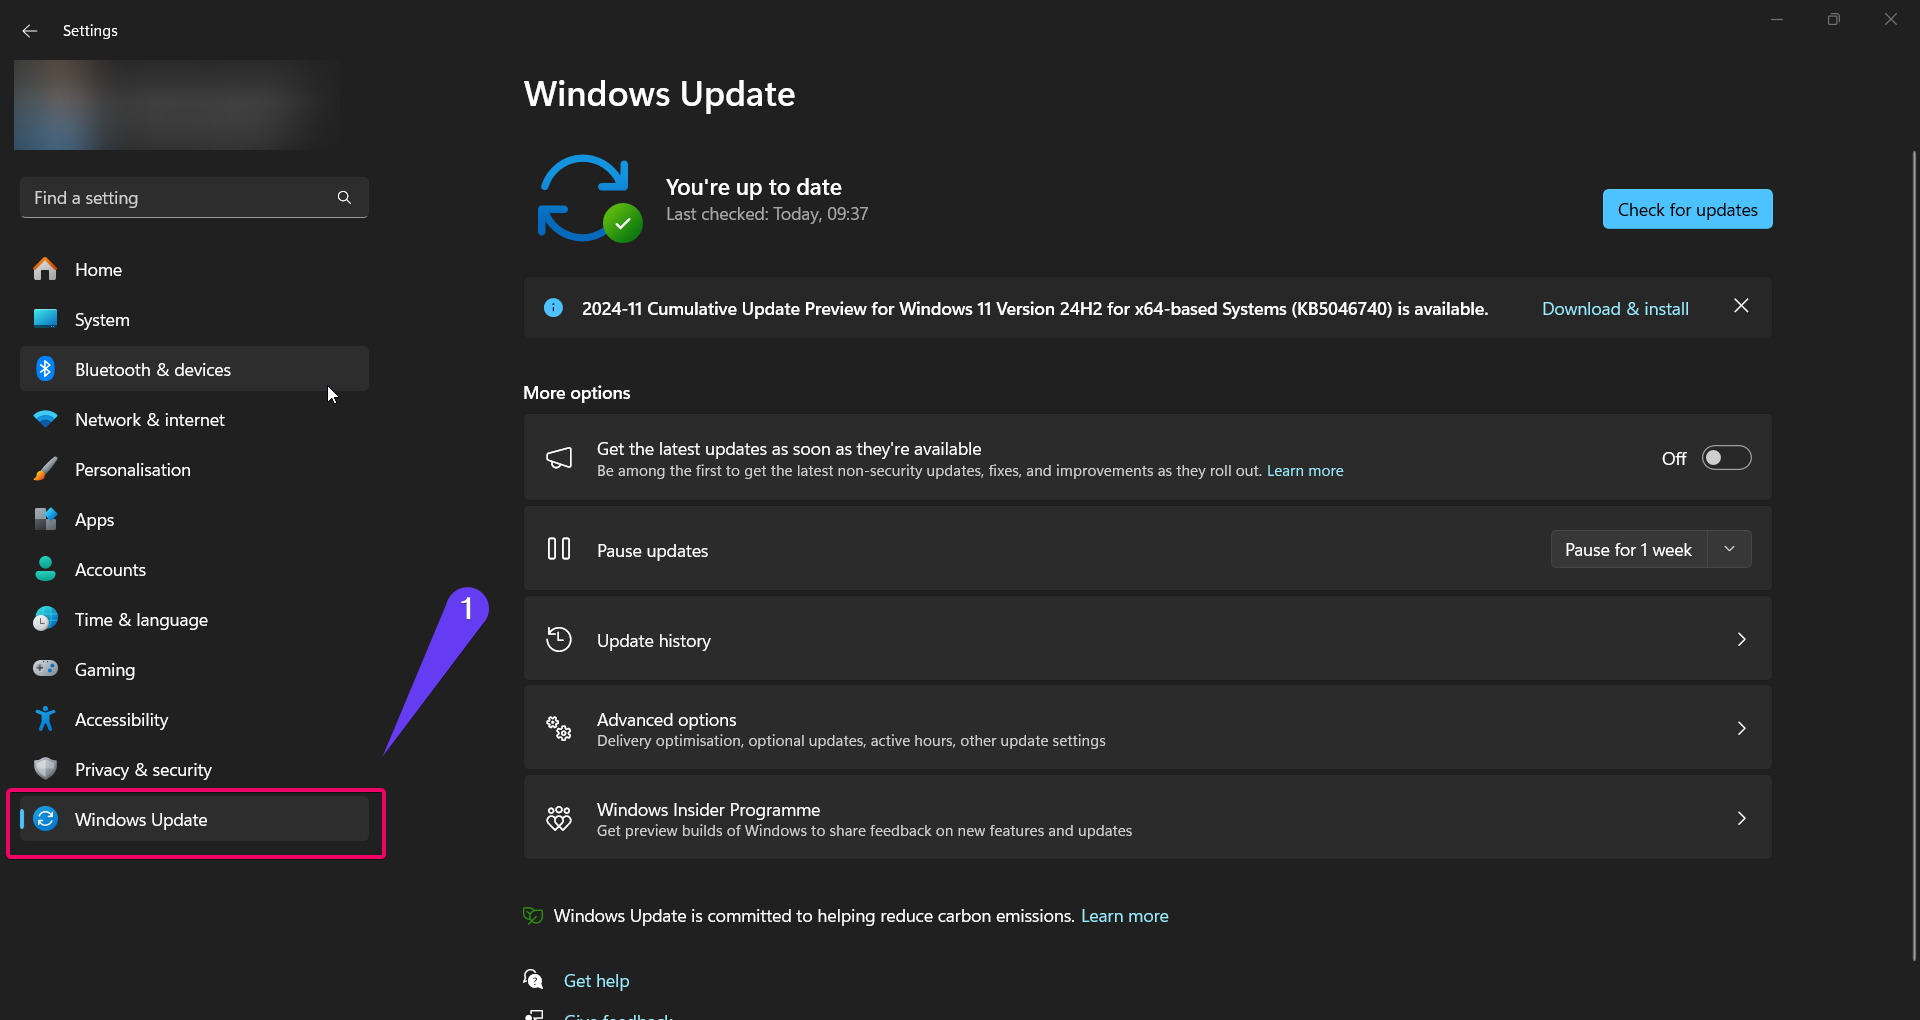
- Navigate to Windows Update on the left-hand menu.
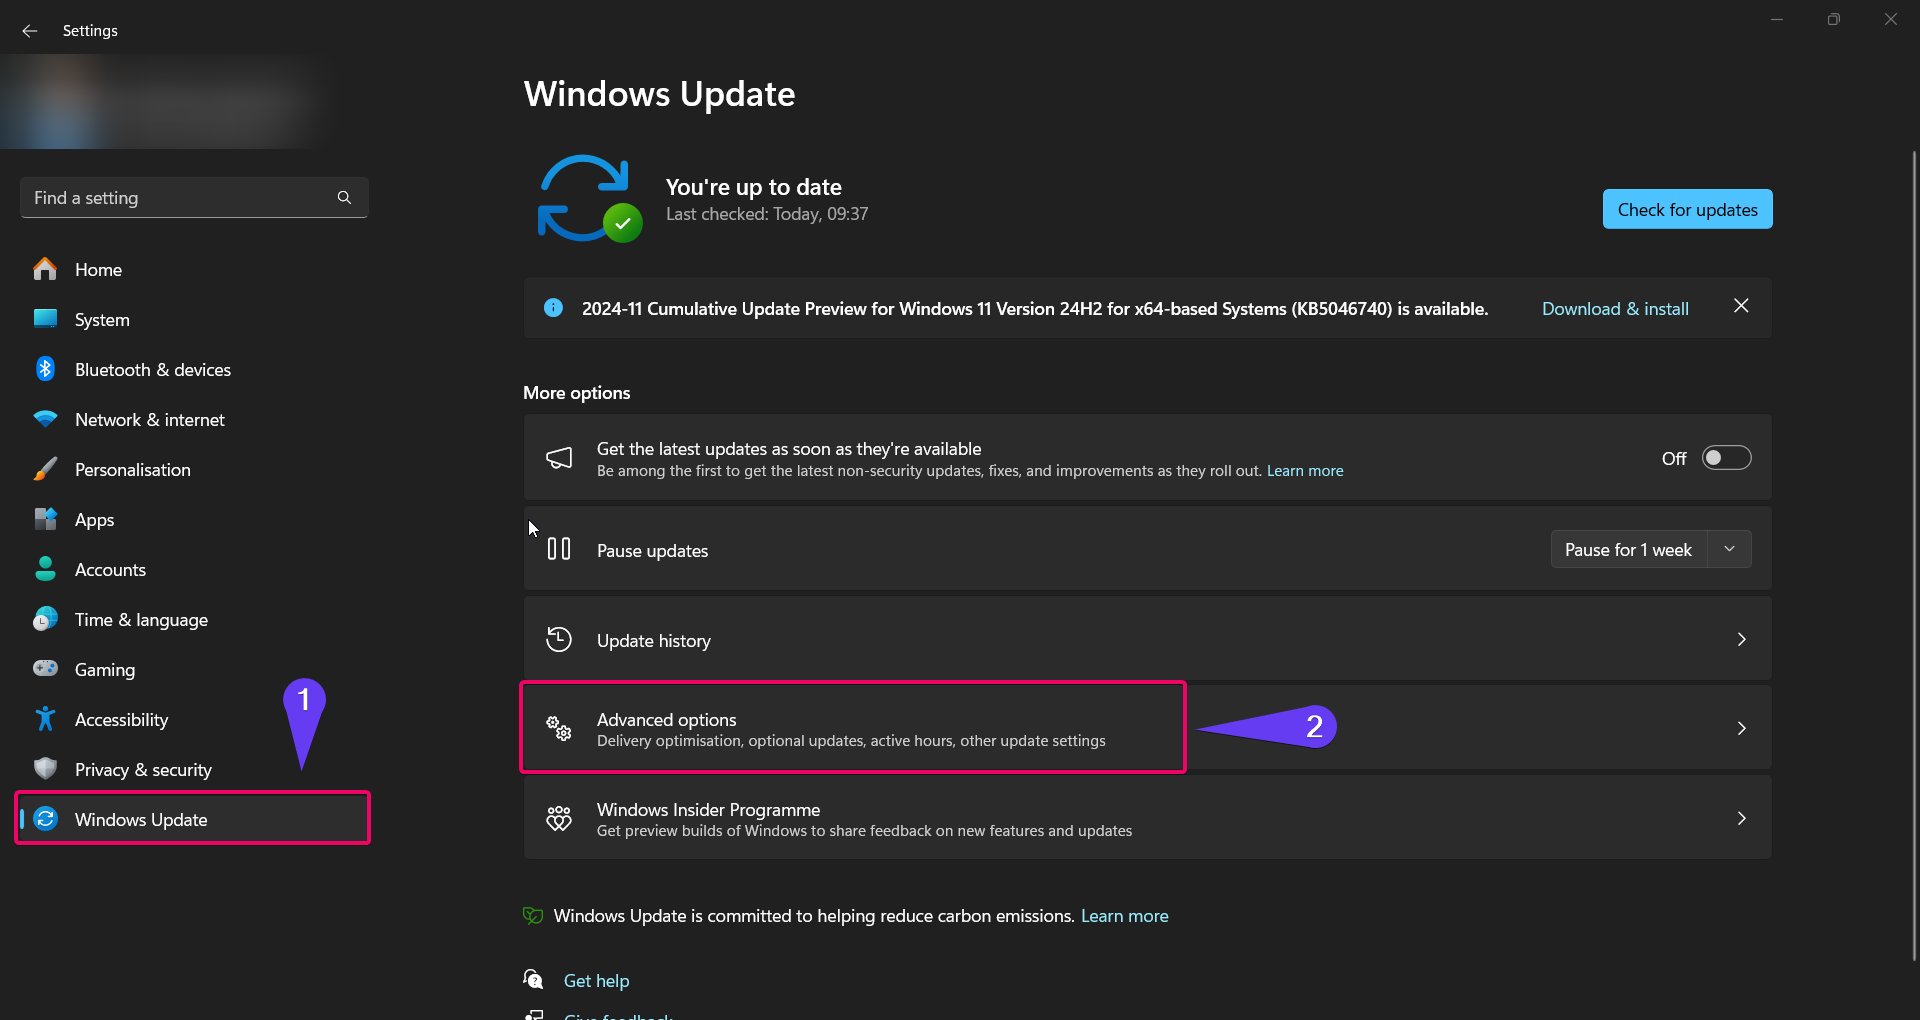
- Click on Advanced options.
- Under the Active hours section, choose one of the following:
- Automatically adjust active hours: Select this option to let Windows determine your active hours based on your usage patterns.
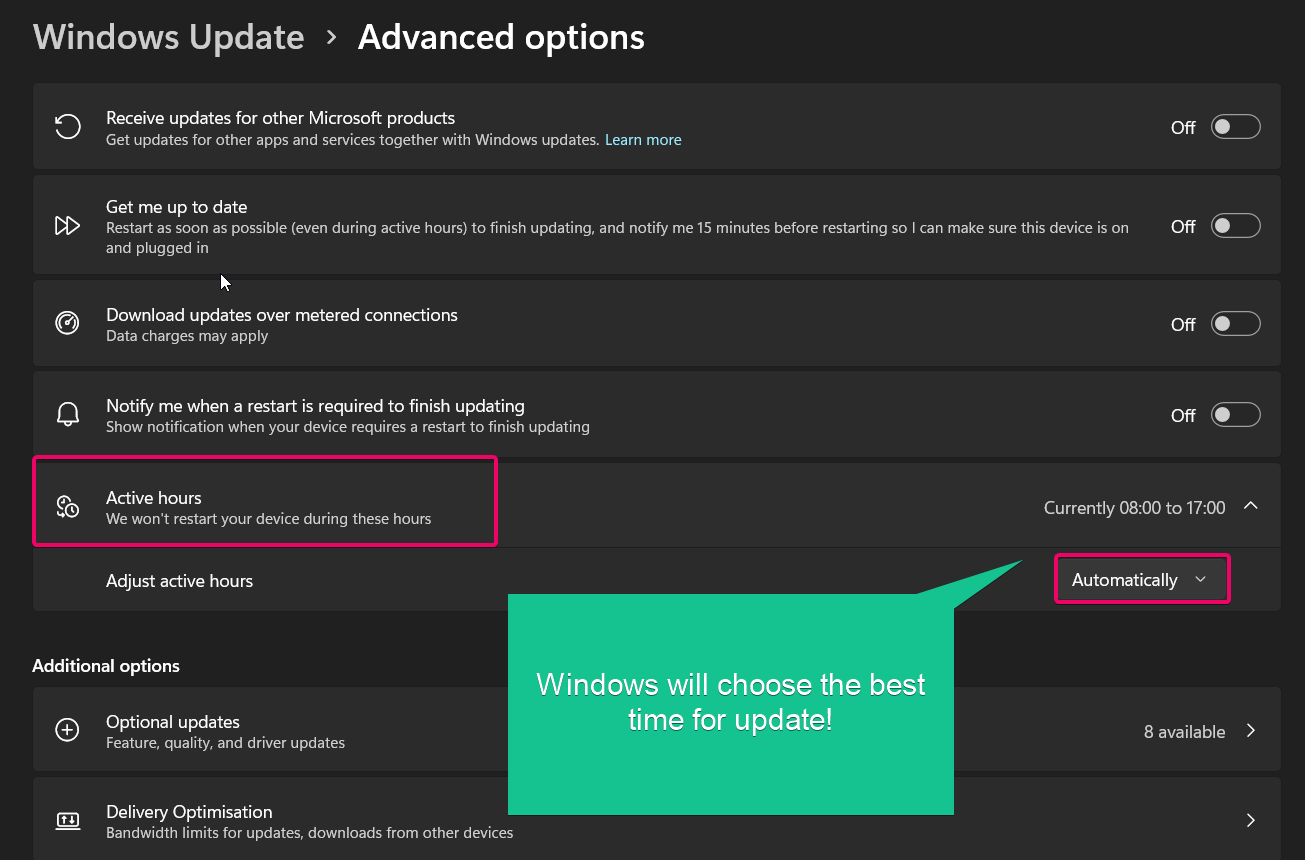
- Manually set active hours: Select this option to specify the start and end times for active hours.
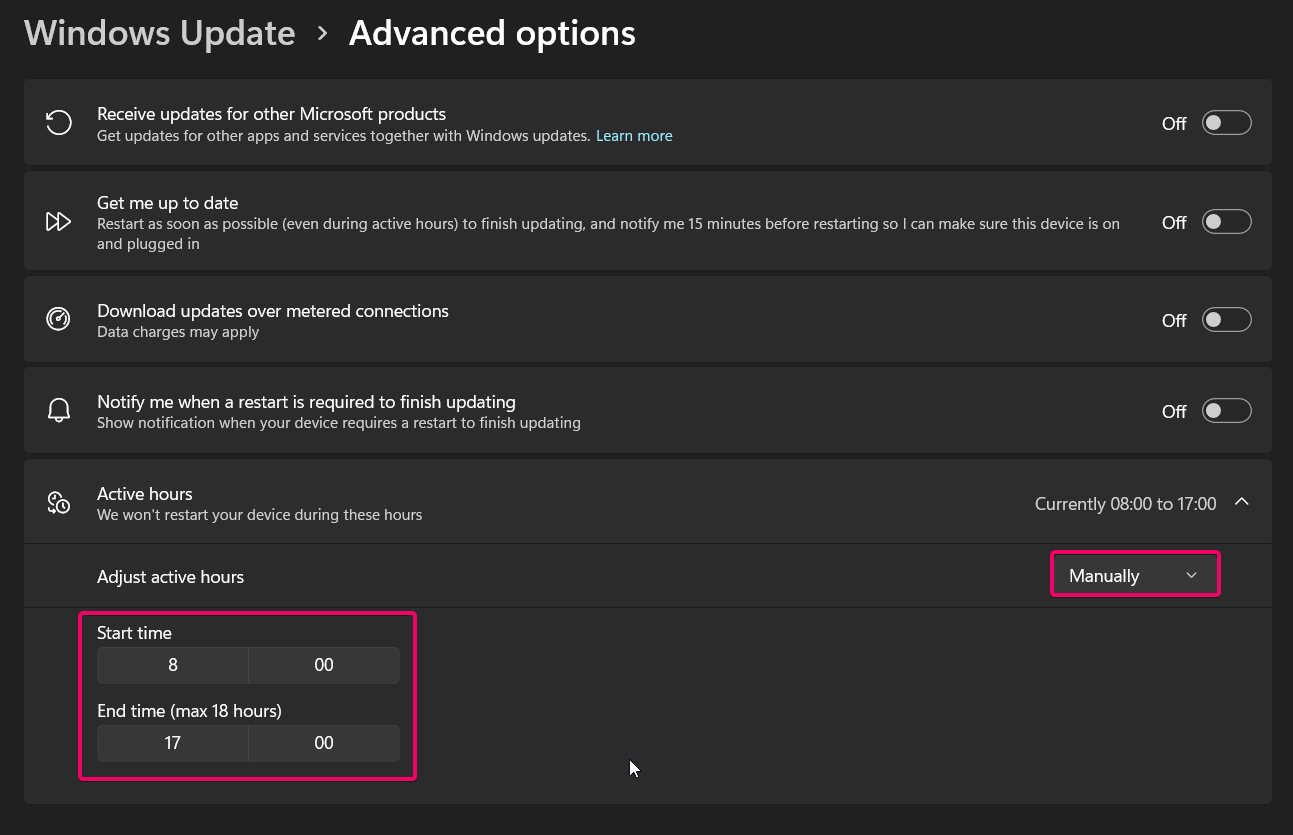
- If you choose manual settings, click Change and set the Start time and End time.
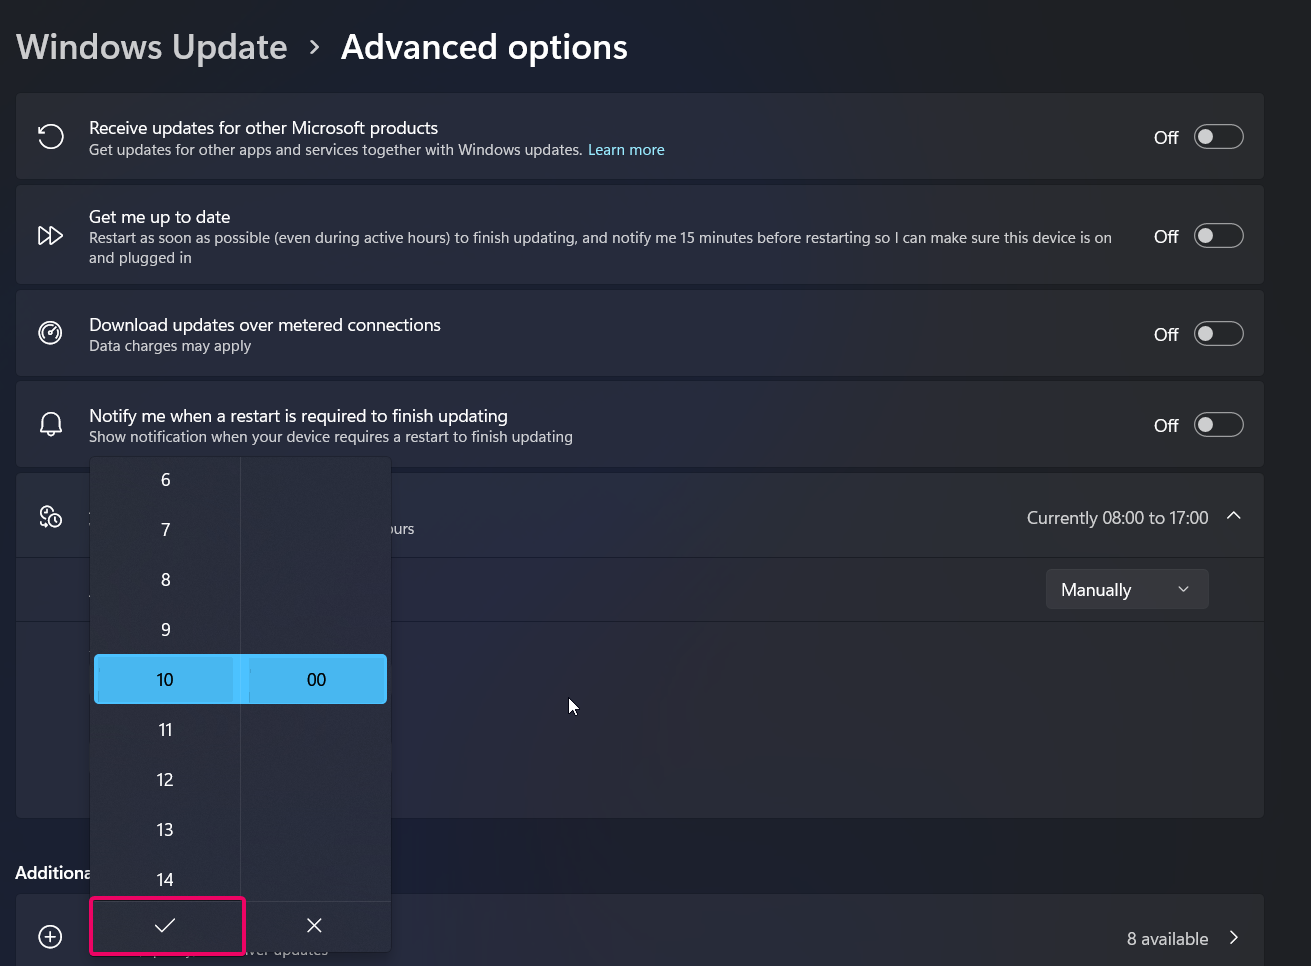
- Click Checkmark icon to apply the changes.
This method ensures that updates will install outside the specified active hours.
Method 2: Using Group Policy Editor
Note: The Group Policy Editor is only available in Windows 11 Pro, Enterprise, and Education editions.
If you’re using Windows 11 Pro or higher, you can set active hours through the Group Policy Editor:
- Press Winkey + R, type
gpedit.msc, and press Enter. - Navigate to:
Computer Configuration > Administrative Templates > Windows Components > Windows Update > Manage end user experience
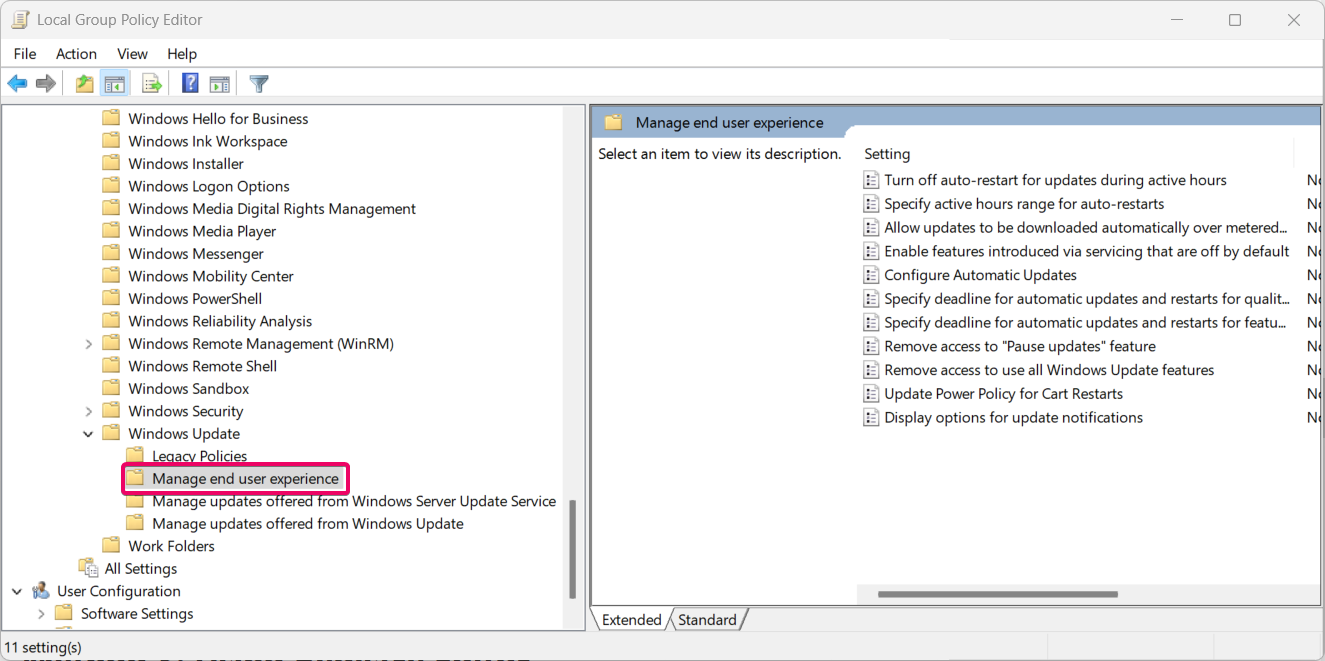
- Double-click Turn off auto-restart for updates during active hours.
- Select Enabled to activate the setting.
- Specify the Start time and End time for active hours.
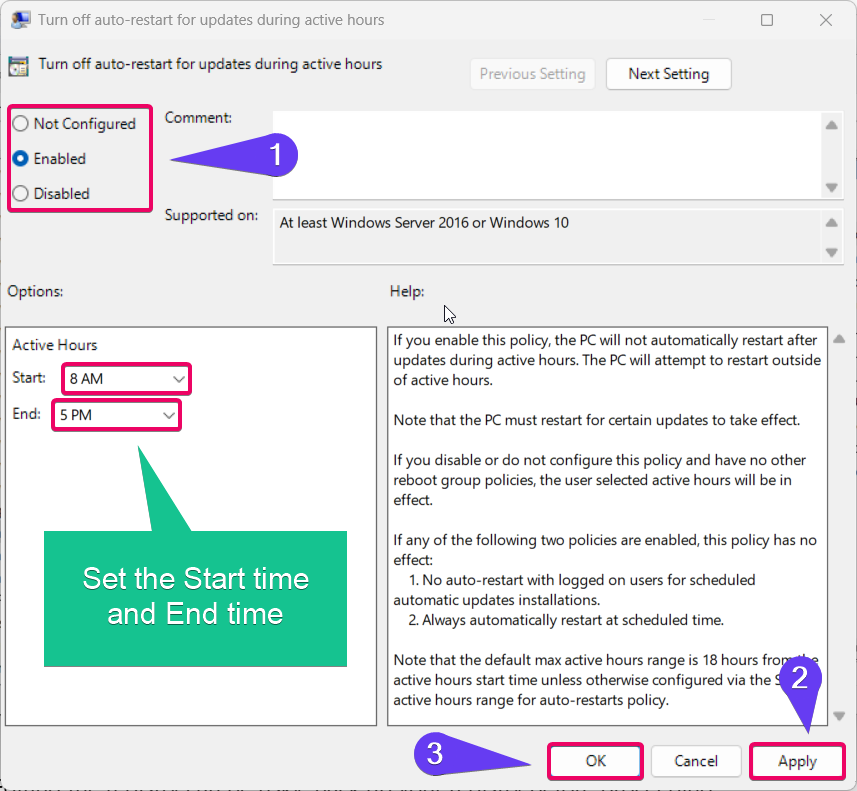
- Click Apply and then OK to save your changes.
This method is ideal for system administrators who need to enforce active hours across multiple devices.
Method 3: Using Registry Editor
Important: Editing the registry can be risky. Back up your registry before proceeding.
For advanced users, the Registry Editor provides a way to configure active hours manually:
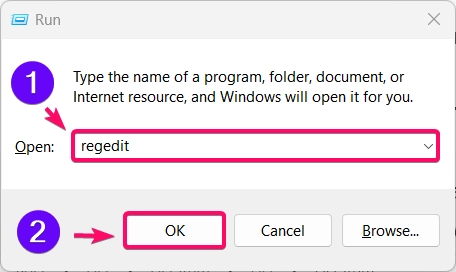
- Press Winkey + R, type
regedit, and press Enter.
- Navigate to the following key:
HKEY_LOCAL_MACHINE\SOFTWARE\Microsoft\WindowsUpdate\UX\Settings
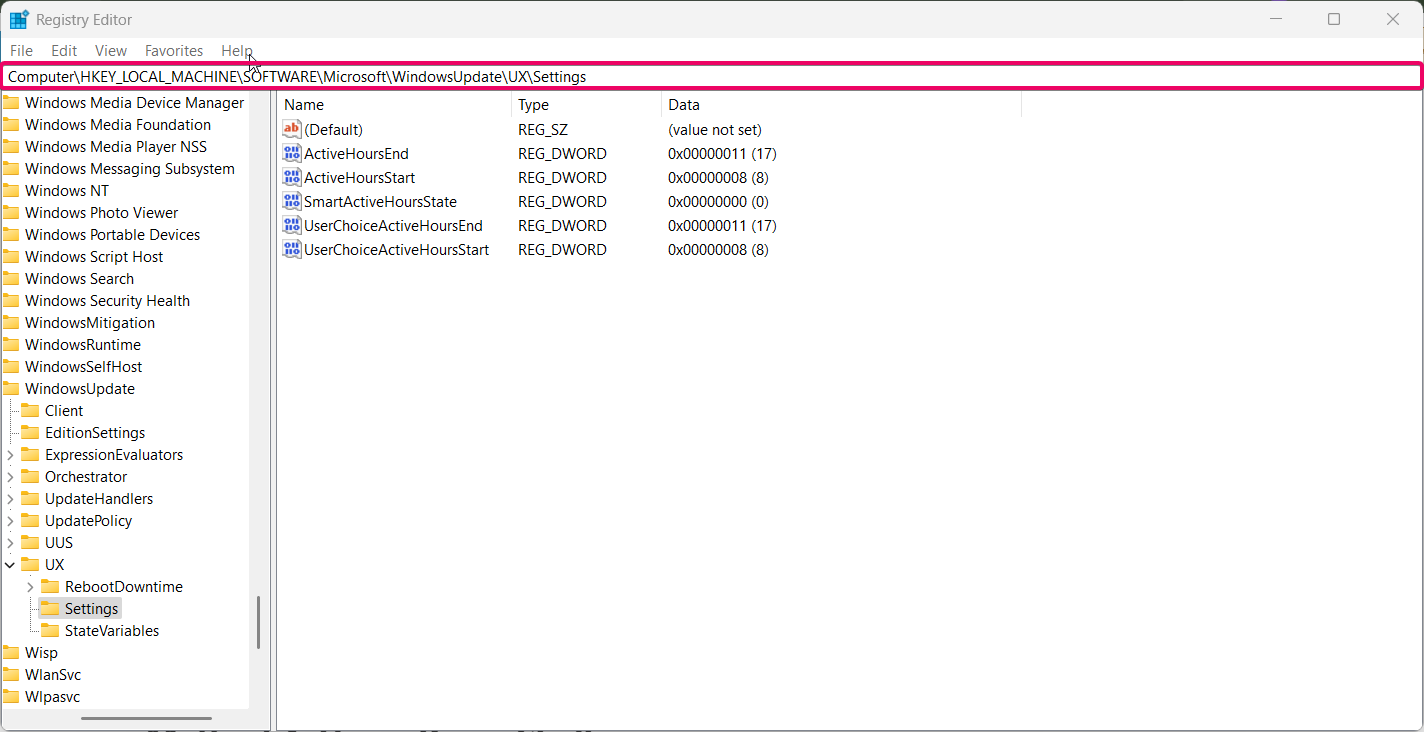
- Locate or create the following values:
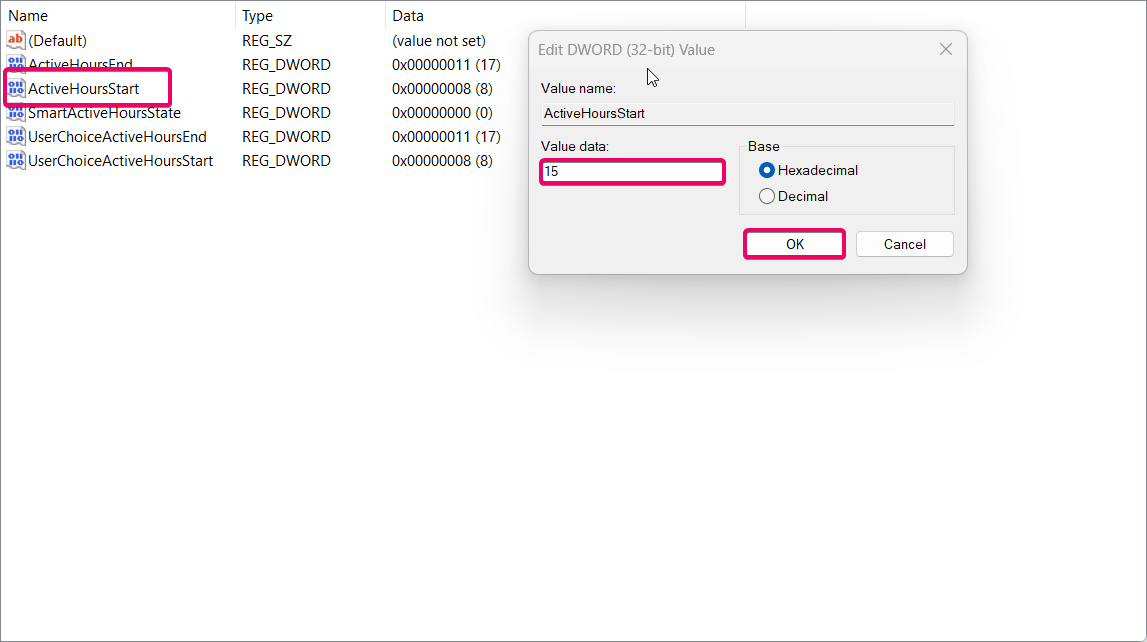
- ActiveHoursStart: A
DWORDvalue representing the start time in 24-hour format (e.g., 9:00 AM is9, 3:00 PM is15).
- ActiveHoursEnd: A
DWORDvalue representing the end time in 24-hour format.
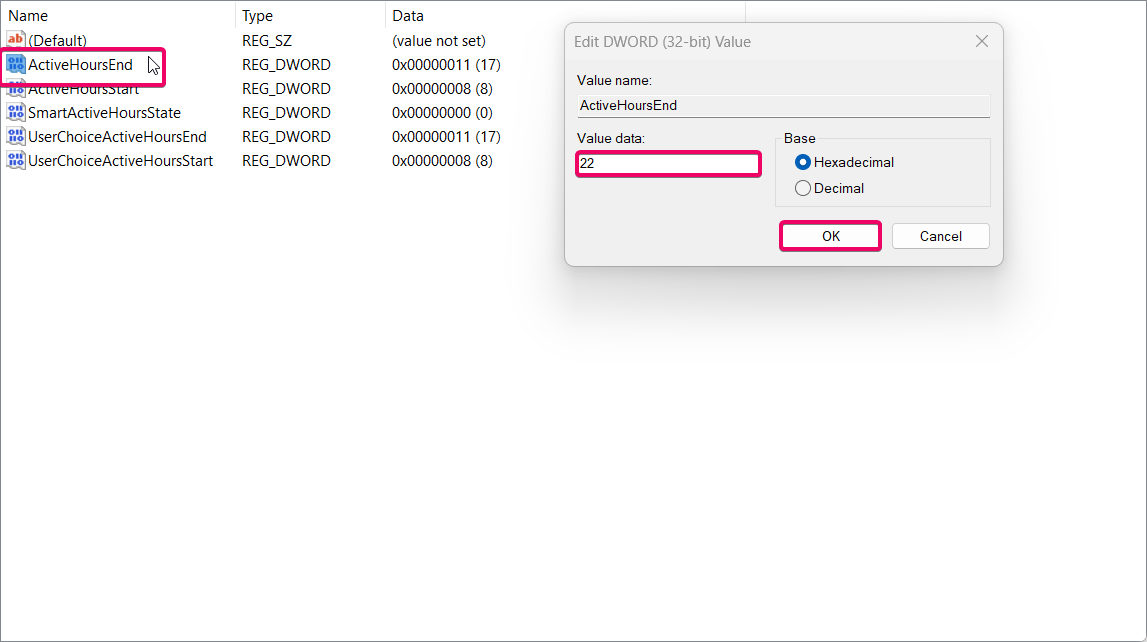
- Modify the values to set your desired start and end times.
- Restart your computer to apply the changes.
This method is particularly useful for users who need precise control over update settings.
Method 4: Using PowerShell
For command-line enthusiasts, PowerShell provides a quick way to set active hours:
- Open PowerShell as Administrator by right-clicking the Start button and selecting Windows Terminal (Admin).
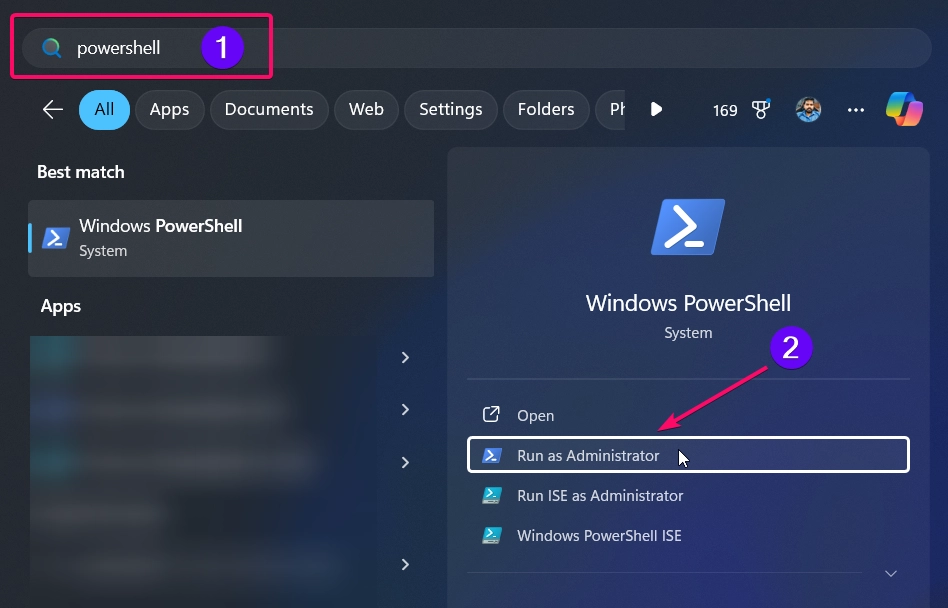
- To set active hours, run the following command:
Set-ActiveHours -StartTime "15:00" -EndTime "22:00"

- Replace
15:00and22:00with your desired start and end times. - Press Enter to execute the command.
This method is ideal for automation and scripting, especially in professional environments.
Conclusion
Setting active hours for Windows Update in Windows 11 helps you avoid interruptions during critical tasks while ensuring your system stays up to date. Whether you prefer the simplicity of the Settings app, the administrative control of Group Policy Editor, or the flexibility of PowerShell, this guide provides a method for everyone.
Frequently Asked Questions:
What happens if I don’t set active hours?
If active hours are not set, Windows will determine usage patterns automatically and may restart your device during non-active times.
Can I extend the duration of active hours?
Yes, you can set active hours for up to 18 hours using the manual option in the Settings app.
Can I disable updates altogether during active hours?
No, updates are only postponed during active hours but cannot be entirely disabled. You can, however, pause updates temporarily via Settings > Windows Update > Pause updates.
Do active hours affect all types of updates?
Active hours primarily apply to system restarts caused by updates. Updates may still download in the background.
Why does my device restart even during active hours?
Ensure that active hours are set correctly and that the “Turn off auto-restart for updates during active hours” policy is enabled if using Group Policy.
Read More:
- How to Add/Remove Common Program Groups from Start Menu in Windows 11?
- How to Add/Remove Android Apps from Your Phone to Start on Windows 11 PC?
- How to Turn On/Off Airplane Mode in Windows 11?