How to Enable or Disable Store Activity History on Device in Windows 11?
What are the different methods to Enable or Disable Store Activity History on Device in Windows 11?
Windows 11 includes a feature called Activity History, which tracks your activities on the device to provide a more seamless experience. This feature can store your activity history locally and optionally send it to Microsoft for personalized services, such as timeline and cross-device experiences. In this tutorial, we’ll explain how to enable or disable store activity history on device, covering multiple methods for customization.
Recommended: Enable Or Disable Adaptive Color In Windows 11
Activity History is a Windows feature that logs the activities you perform, such as the apps you use, websites you visit, and files you open. This history is stored locally on your device and can help you pick up where you left off. If enabled, this data can also be synced to your Microsoft account for personalized recommendations and services. You might want to enable activity history to improve productivity, as it allows you to quickly resume tasks across apps and devices. Conversely, disabling activity history can enhance privacy by preventing Windows from logging your activities locally or syncing them with Microsoft.
Method 1: Using the Settings App
The most straightforward way to manage your activity history is through the Settings app. Follow these steps:
- Open Settings by pressing Winkey + I.
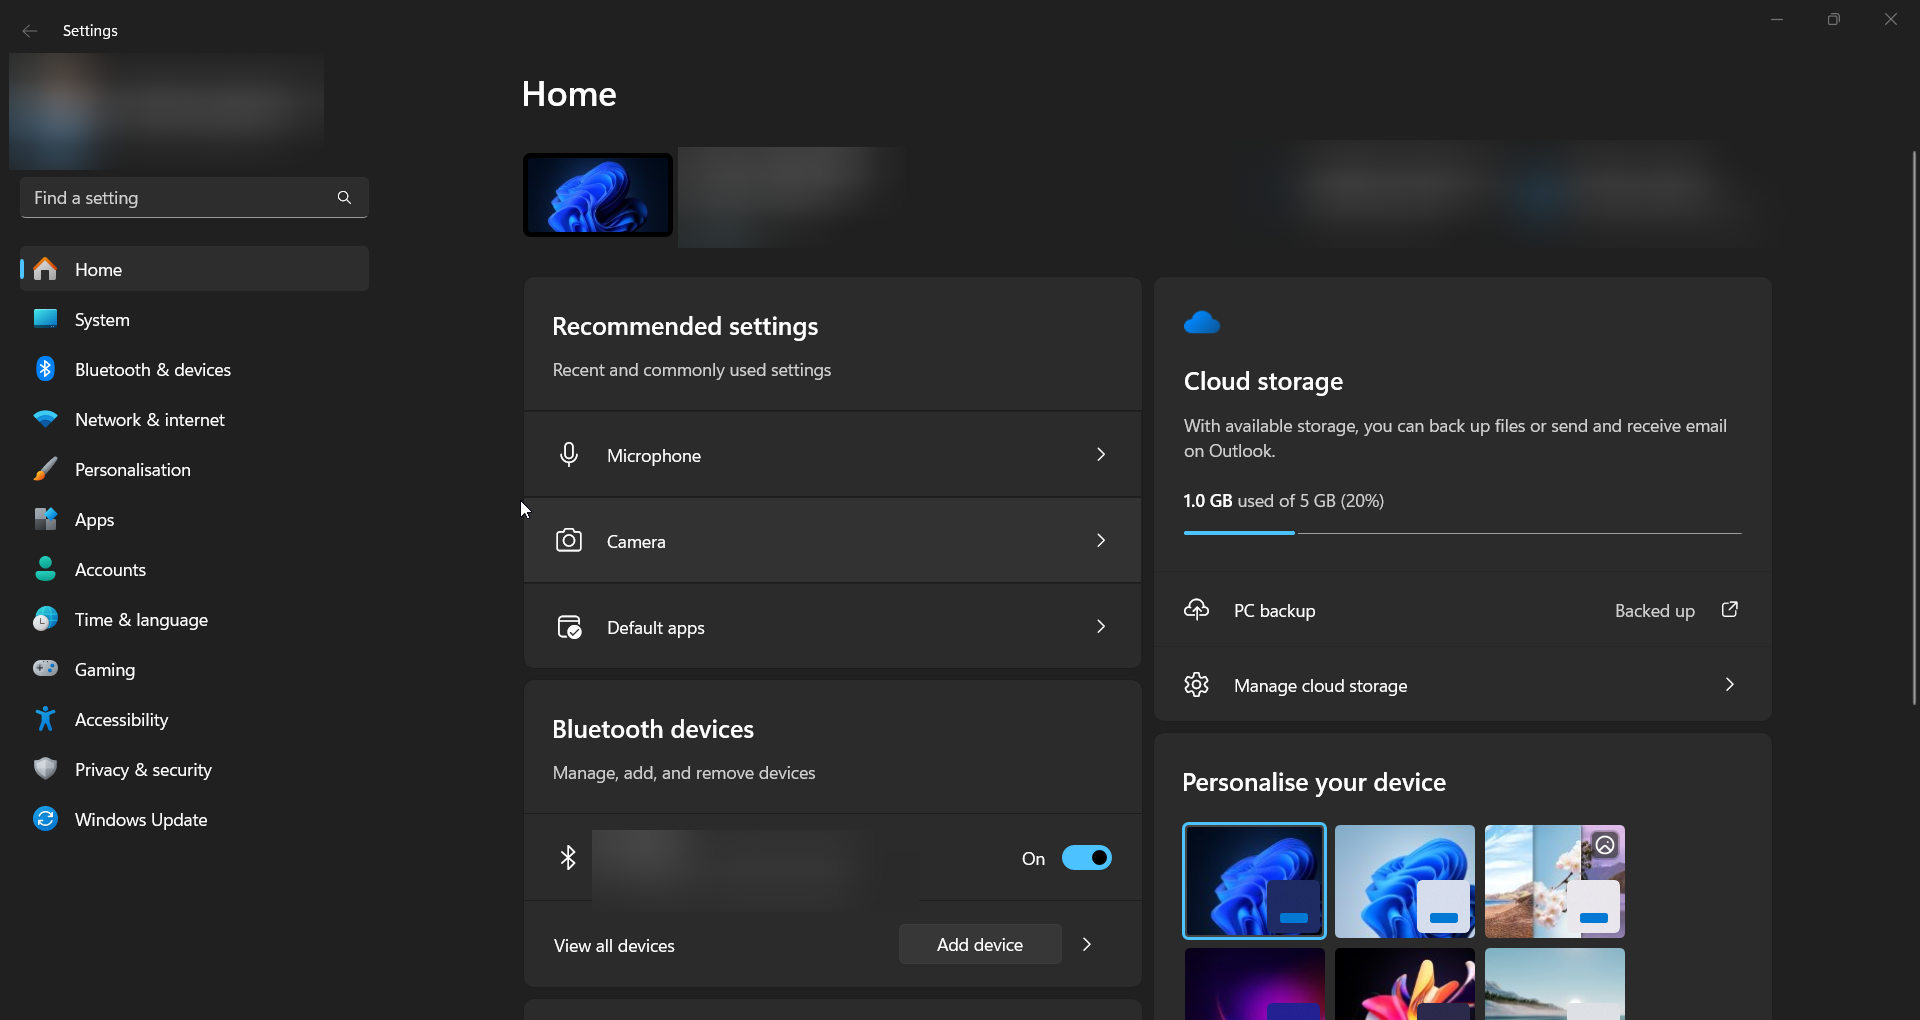
- Navigate to Privacy & Security in the left pane.
- Click on Activity history under the Windows permissions section.
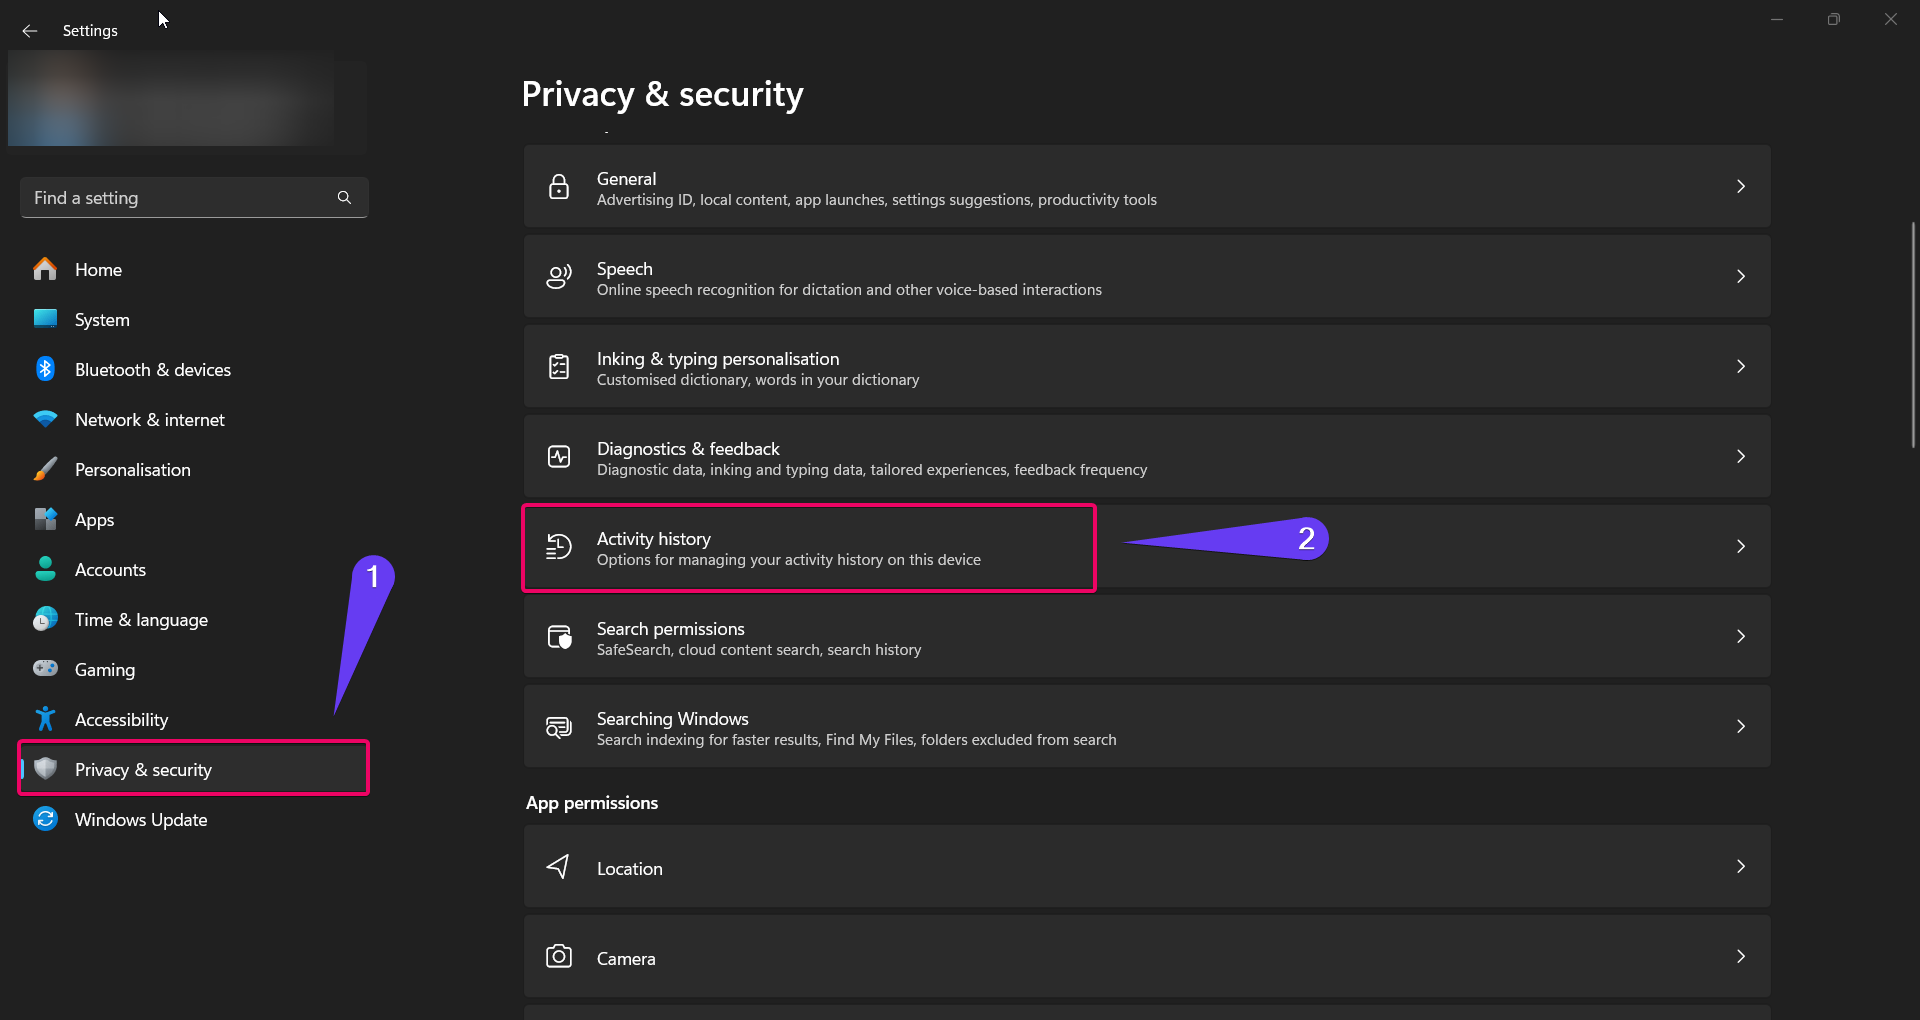
- To enable activity history, Enable the radio button next to Store my activity history on this device.

- To disable activity history, Disable the radio button next to Store my activity history on this device.
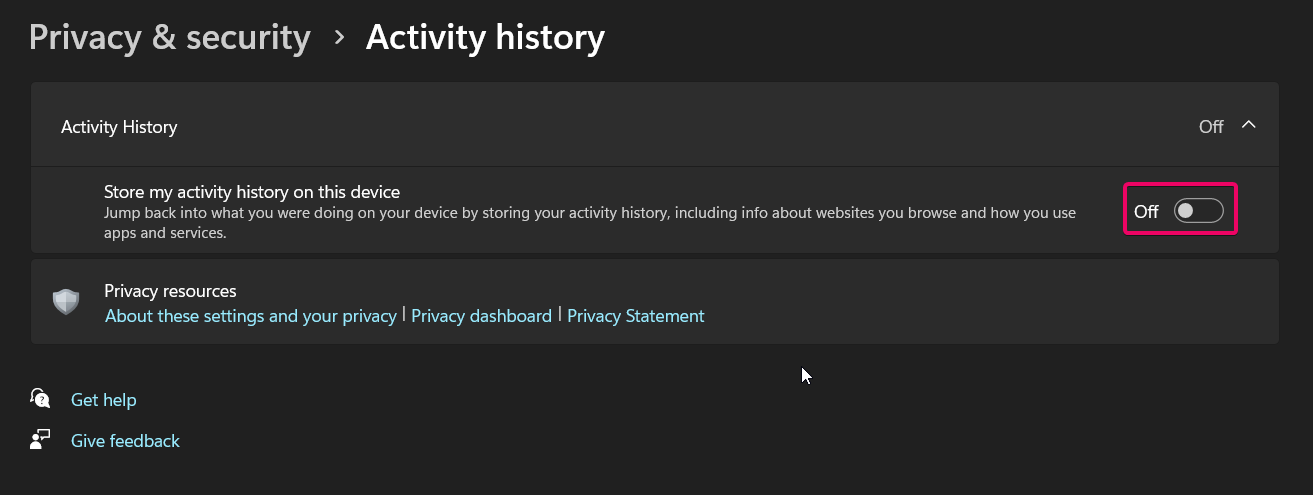
- If you want to stop syncing activity history with your Microsoft account, also uncheck Send my activity history to Microsoft.
The changes will take effect immediately.
Method 2: Using Group Policy Editor
Note: The Group Policy Editor is only available on Windows 11 Pro, Enterprise, and Education editions.
If you’re using one of these editions, the Group Policy Editor offers a more controlled approach to enable or disable storing activity history:
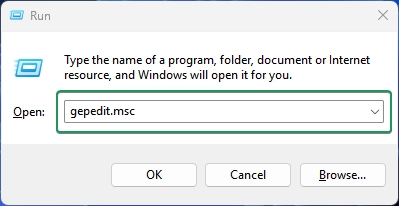
- Press Winkey + R to open the Run dialog, type
gpedit.msc, and hit Enter.
- Navigate to the following path:
Computer Configuration > Administrative Templates > System > OS Policies
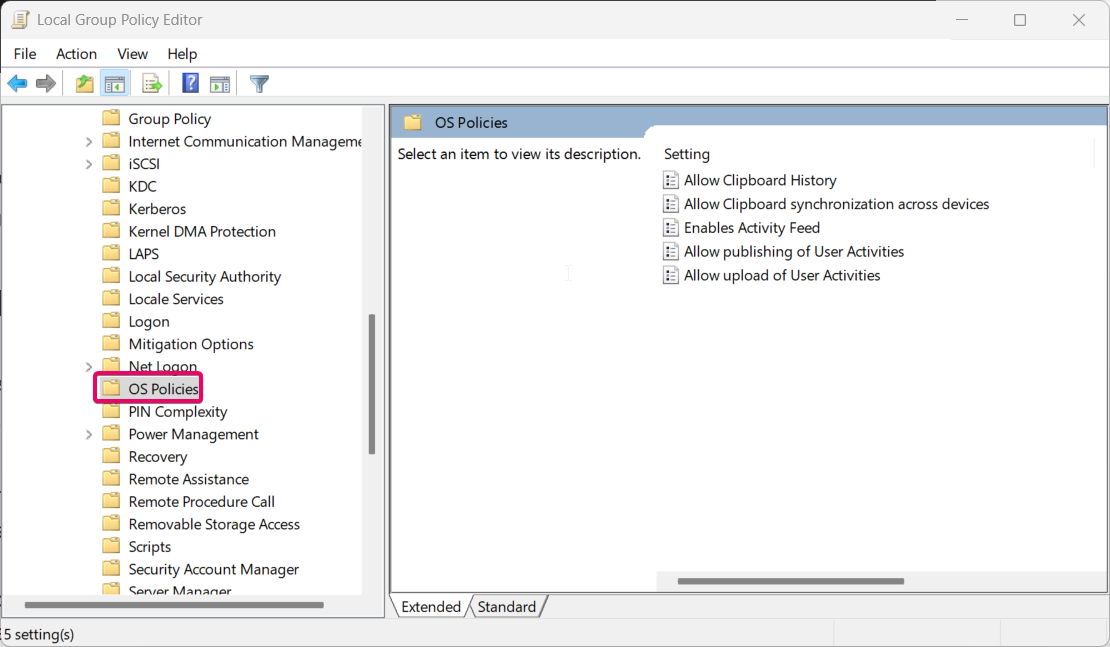
- Double-click on Allow publishing of User Activities.
- To disable activity history, select Disabled and click Apply.
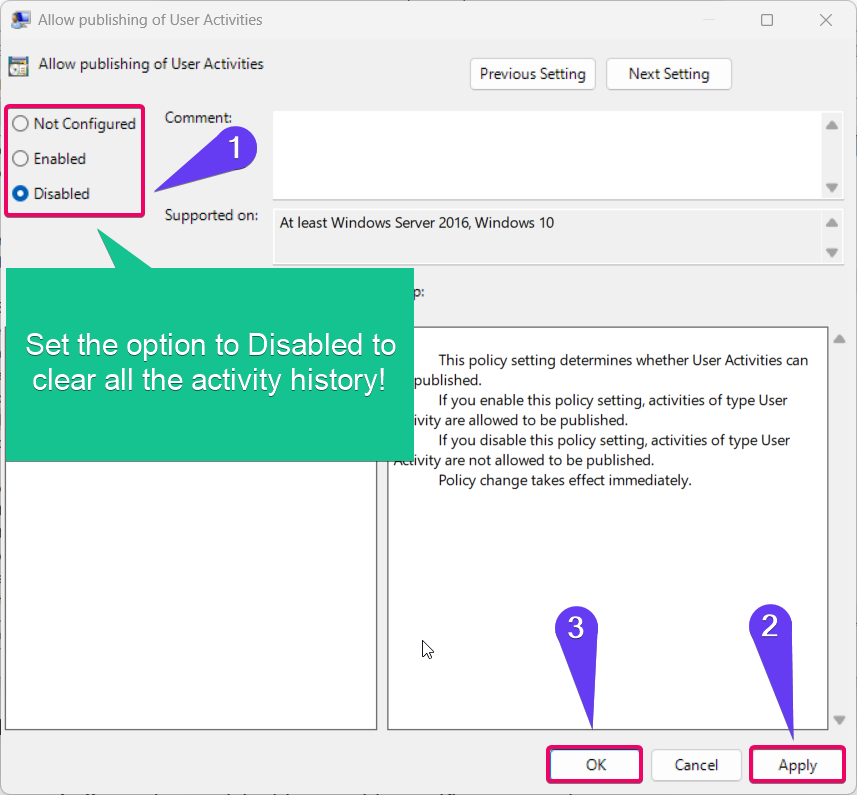
- To enable activity history, select Enabled and click Apply.
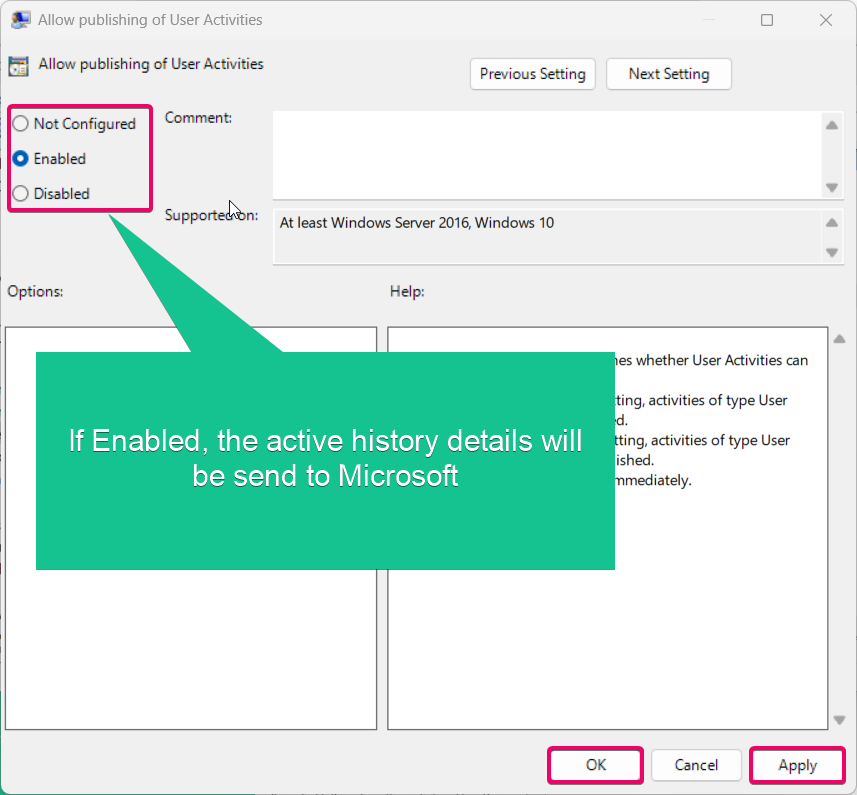
- Restart your device for the changes to take effect.
This method ensures centralized management of activity history settings, especially for administrators.
See Also: Enable Or Disable Send Activity History To Microsoft In Windows 11
Method 3: Using Registry Editor
Caution: Editing the registry can cause system issues if not done correctly. Back up your registry before making changes.
For advanced users, the Registry Editor provides a way to modify activity history settings:
- Press Winkey + R, type
regedit, and press Enter. - Navigate to the following key:
HKEY_LOCAL_MACHINE\SOFTWARE\Policies\Microsoft\Windows\System
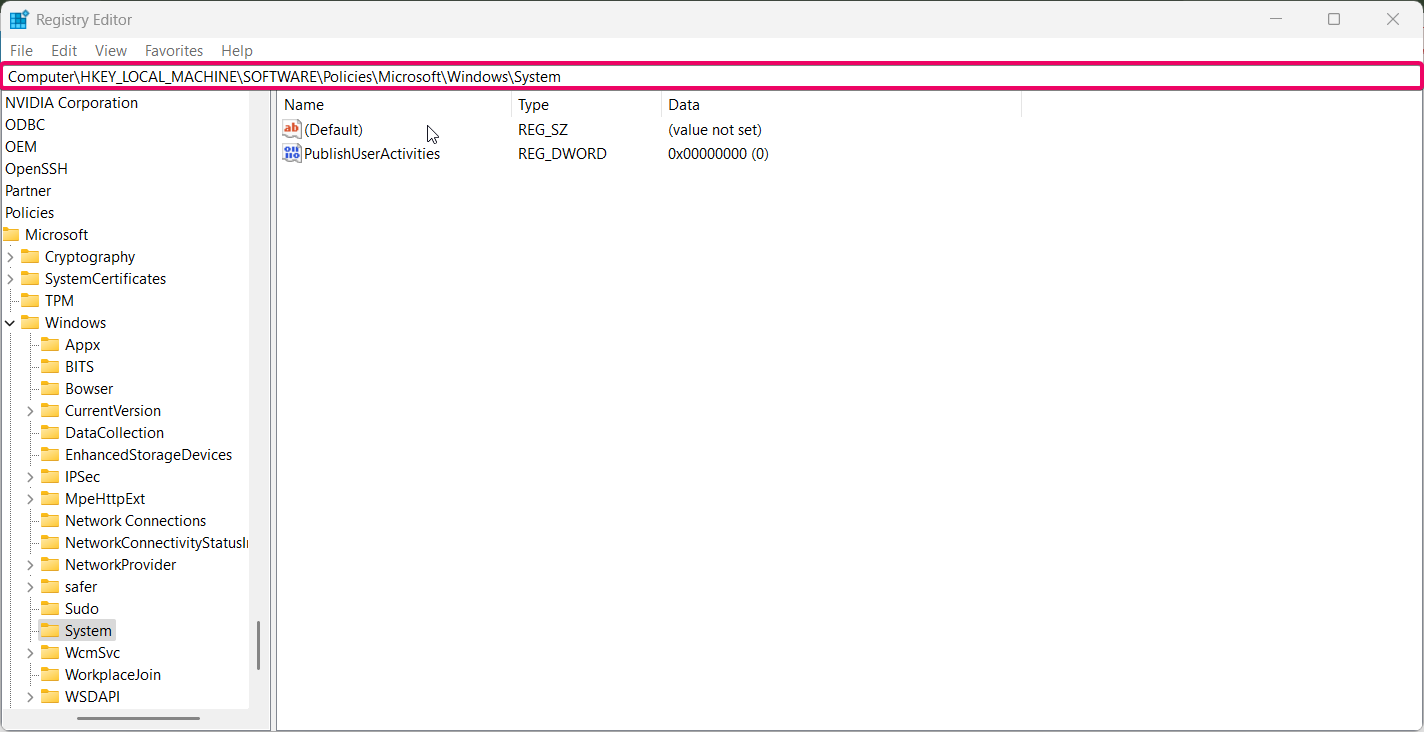
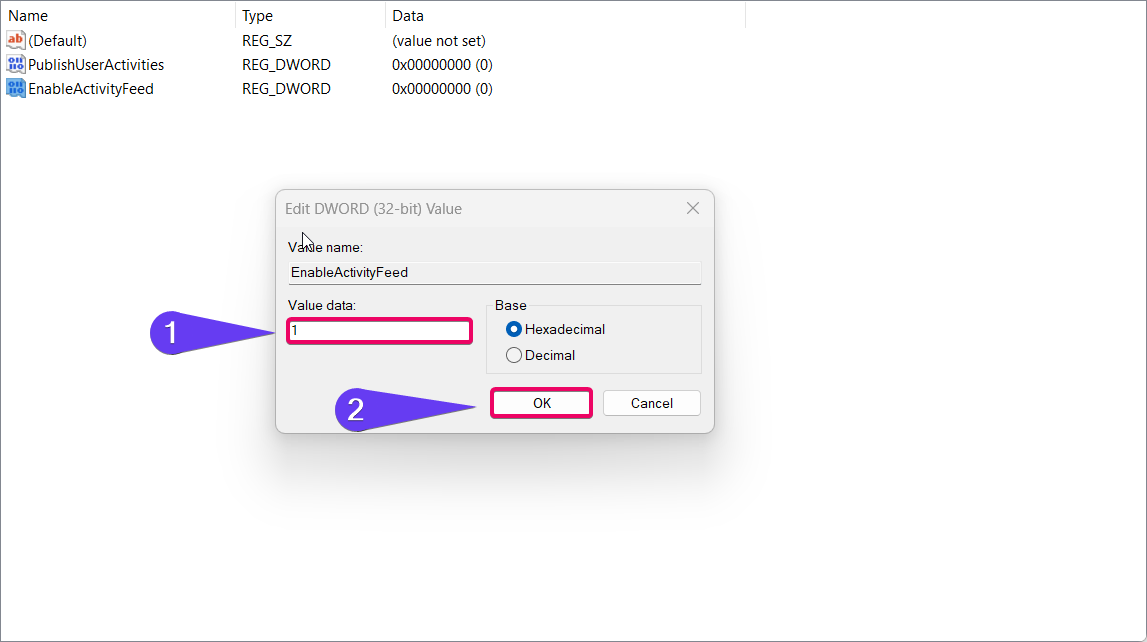
- Look for the DWORD value EnableActivityFeed. If it doesn’t exist, create it by right-clicking, selecting New > DWORD (32-bit) Value, and naming it EnableActivityFeed.
- Set the value to:
1to enable storing activity history.
0to disable storing activity history.
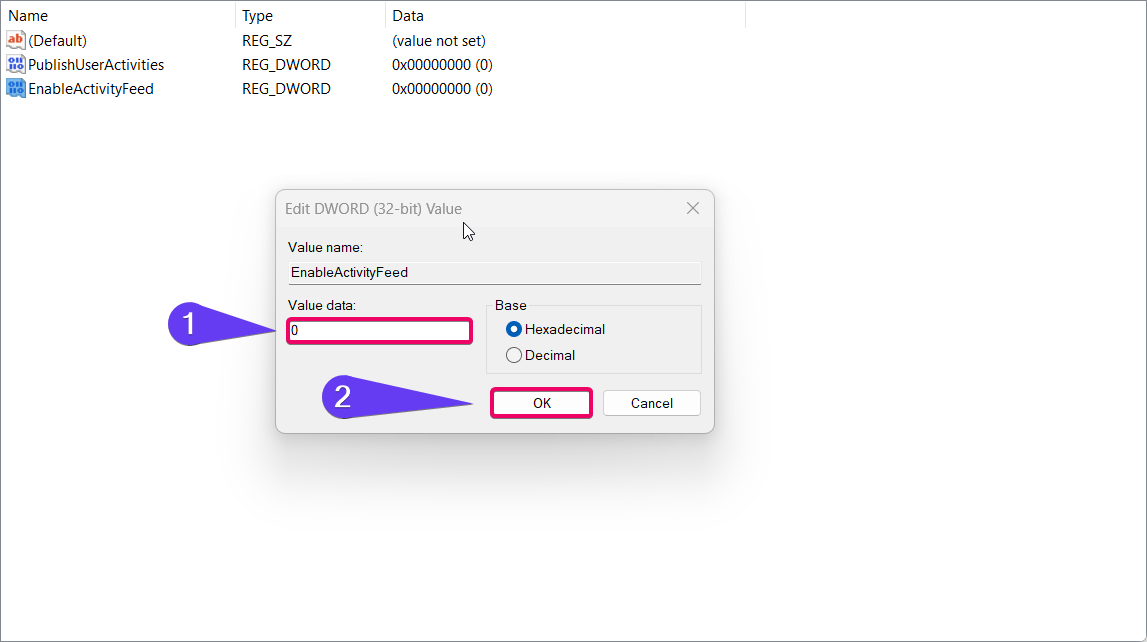
- Close the Registry Editor and restart your computer to apply the changes.
This method is particularly useful for users who want to automate changes or apply them across multiple devices.
Read This: Clear Activity History In Windows 11
Method 4: Using Registry File:
To Enable Store Activity History on this device option:
- Copy the below code
[HKEY_LOCAL_MACHINE\SOFTWARE\Policies\Microsoft\Windows\System] "PublishUserActivities"=-
- Save the file as Enable_Store_activity_history_on_this_device.reg
- Run the file, if prompted to confirm the yes option for UAC and click the allow button to merge the files.
- Now you can delete the registry file.
To Disable Store Activity History on this device option:
- Copy the below code
[HKEY_LOCAL_MACHINE\SOFTWARE\Policies\Microsoft\Windows\System] "PublishUserActivities"=dword:00000000
- Save the file as Disable_Store_activity_history_on_this_device.reg
- Run the file, if prompted to confirm the yes option for UAC and click the allow button to merge the files.
- Now you can delete the registry file.
Notes to Consider:
Disabling activity history only stops new data from being recorded. To delete existing activity history, you’ll need to do so manually in the Settings > Privacy & Security > Activity history section.If you use a Microsoft account, disabling syncing will prevent activity history from being shared across devices.
Conclusion
Managing activity history in Windows 11 is essential for maintaining the balance between productivity and privacy. By following the methods above, you can easily enable or disable the feature based on your preferences. Whether you use the Settings app, Group Policy Editor, or Registry Editor, these steps ensure you have full control over your activity history settings.
Commonly Asked Questions:
Can I selectively enable activity history for certain apps?
No, activity history settings apply universally to all apps and activities on the device.
Does disabling activity history improve system performance?
Disabling activity history has a negligible impact on system performance but can enhance privacy.
Is activity history shared with Microsoft by default?
Activity history is stored locally by default. However, if you sign in with a Microsoft account and enable syncing, your activity history may be shared with Microsoft.
Can I delete existing activity history?
Yes, you can delete stored activity history by going to Settings > Privacy & Security > Activity history and clicking on Clear activity history.
What happens if I disable activity history?
Disabling activity history prevents Windows from recording your activities locally. If syncing is also disabled, your activities won’t be shared with Microsoft or across devices.
Read More:
- How to Add/Remove Common Program Groups from Start Menu in Windows 11?
- How to Add/Remove Android Apps from Your Phone to Start on Windows 11 PC?
- How to Turn On/Off Airplane Mode in Windows 11?
