How to Enable/Disable Advertising ID for Personalized Ads in Apps in Windows 11?
4 Unique Methods to Enable/Disable Advertising ID for Personalized Ads in Apps in Windows 11 PC!
Windows 11 includes an Advertising ID feature that allows apps to provide personalized ads based on your activity. While some users appreciate targeted advertisements, others prefer to maintain their privacy by disabling this feature. This guide will explain how to enable or disable the Advertising ID for personalized ads in apps, using various methods.
The Advertising ID is a unique identifier assigned to your device, enabling apps and services to deliver personalized ads. This feature ensures that ads are more relevant to your interests based on your app usage and activity. However, for users who value privacy or want to avoid targeted advertising, disabling the Advertising ID is a simple way to limit personalized ads.
Method 1: Using the Settings App
The Settings app is the easiest way to manage the Advertising ID. Here’s how:
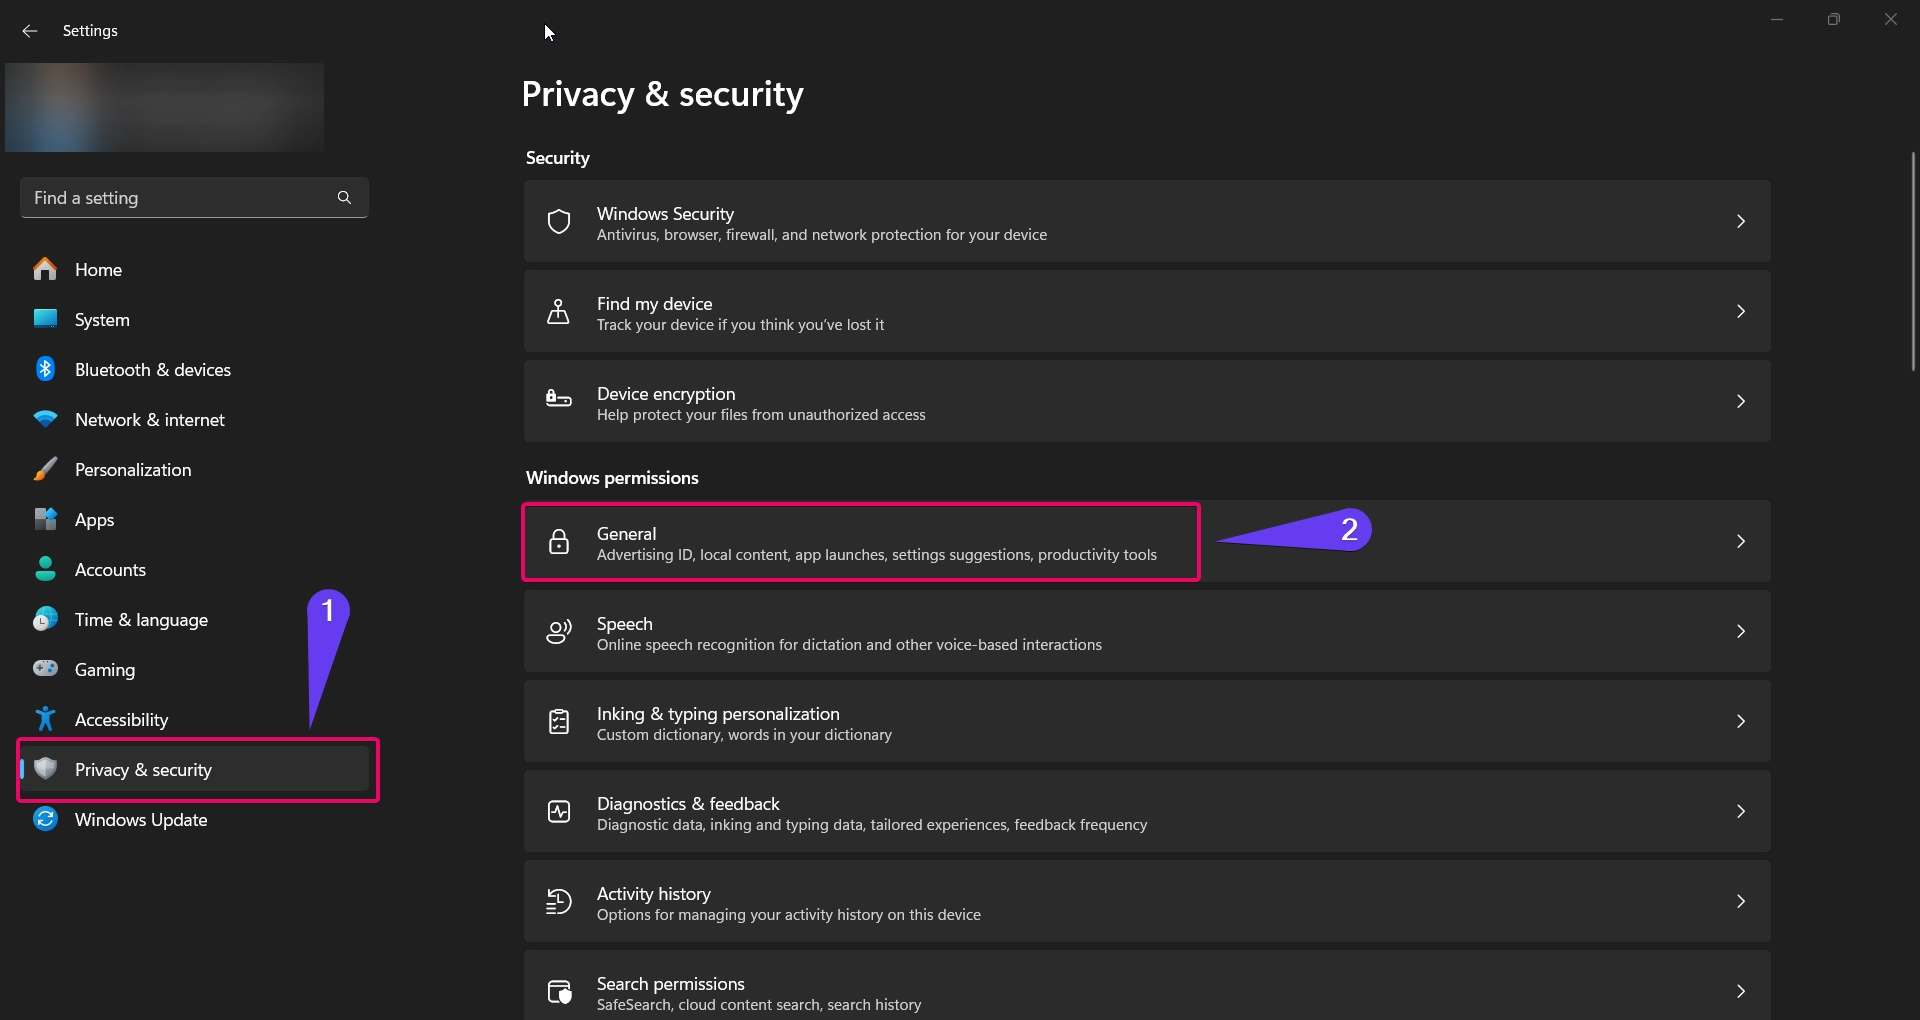
- Open Settings by pressing Winkey + I.
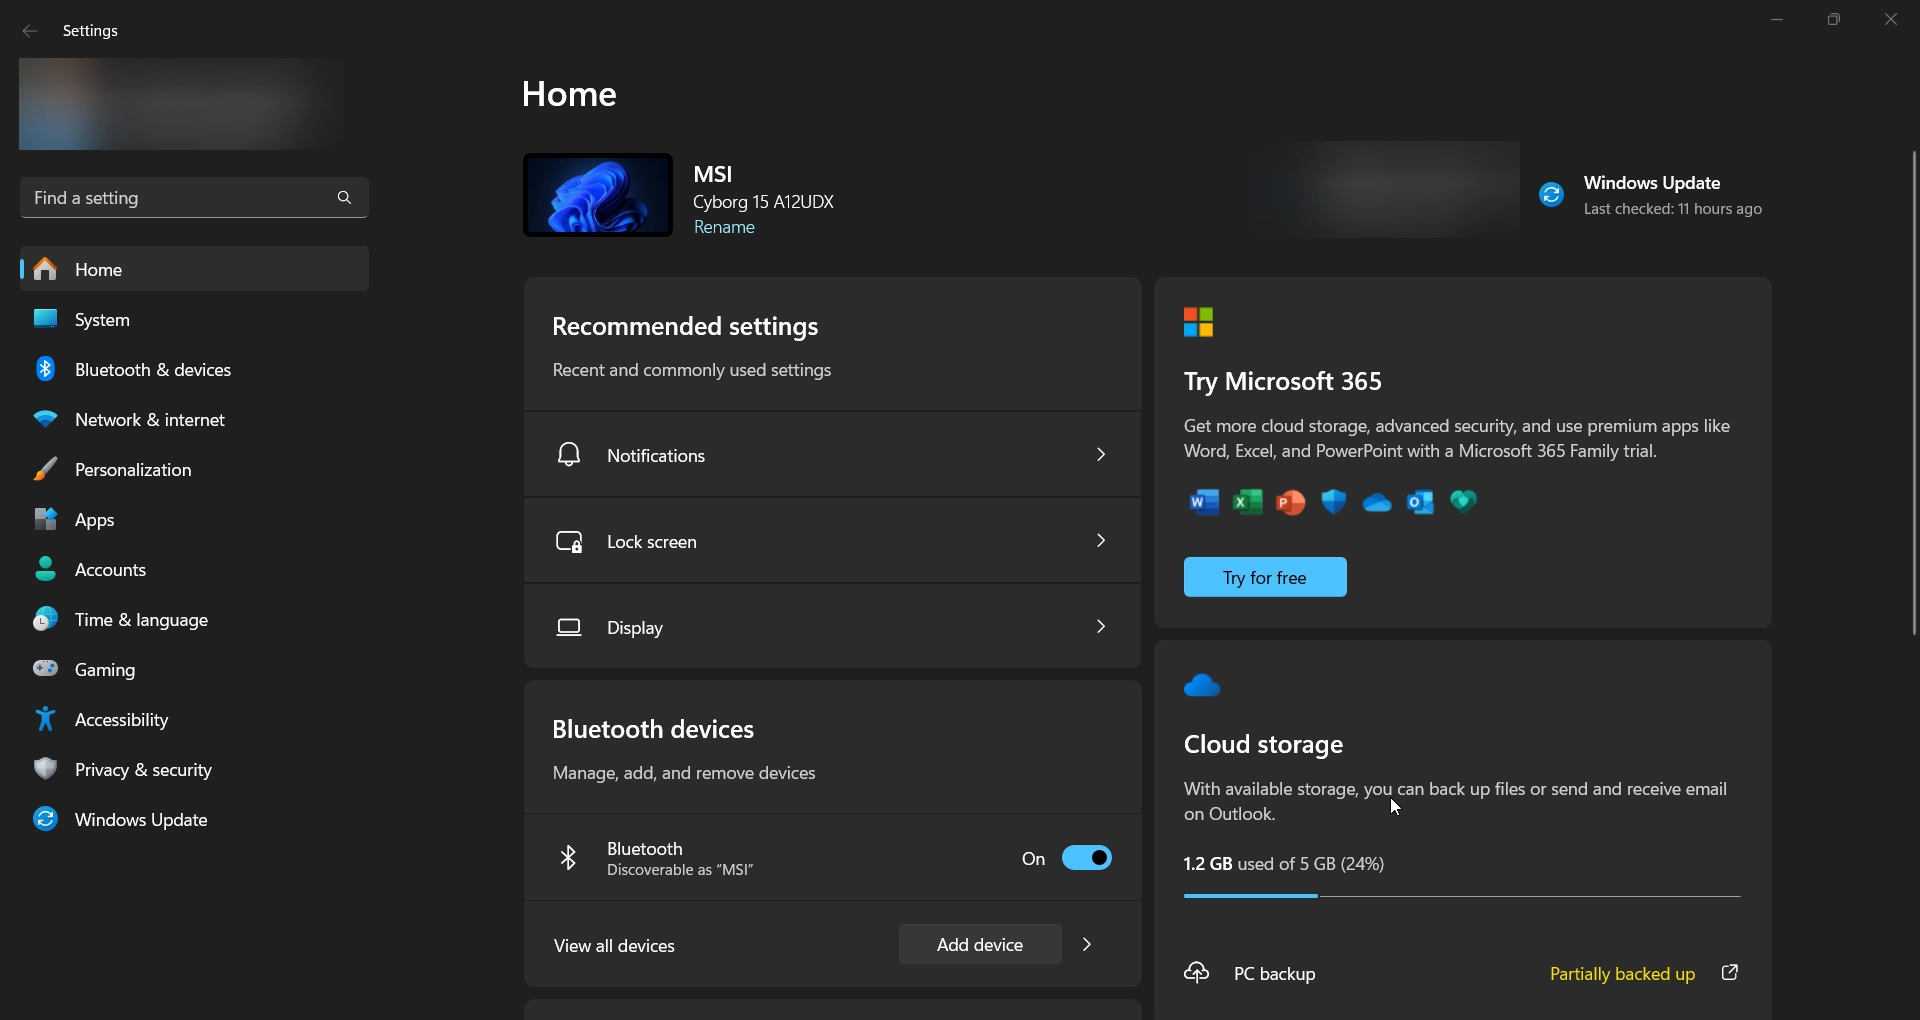
- Navigate to Privacy & security from the left-hand menu.
- Scroll down and click on General under the Windows permissions section.
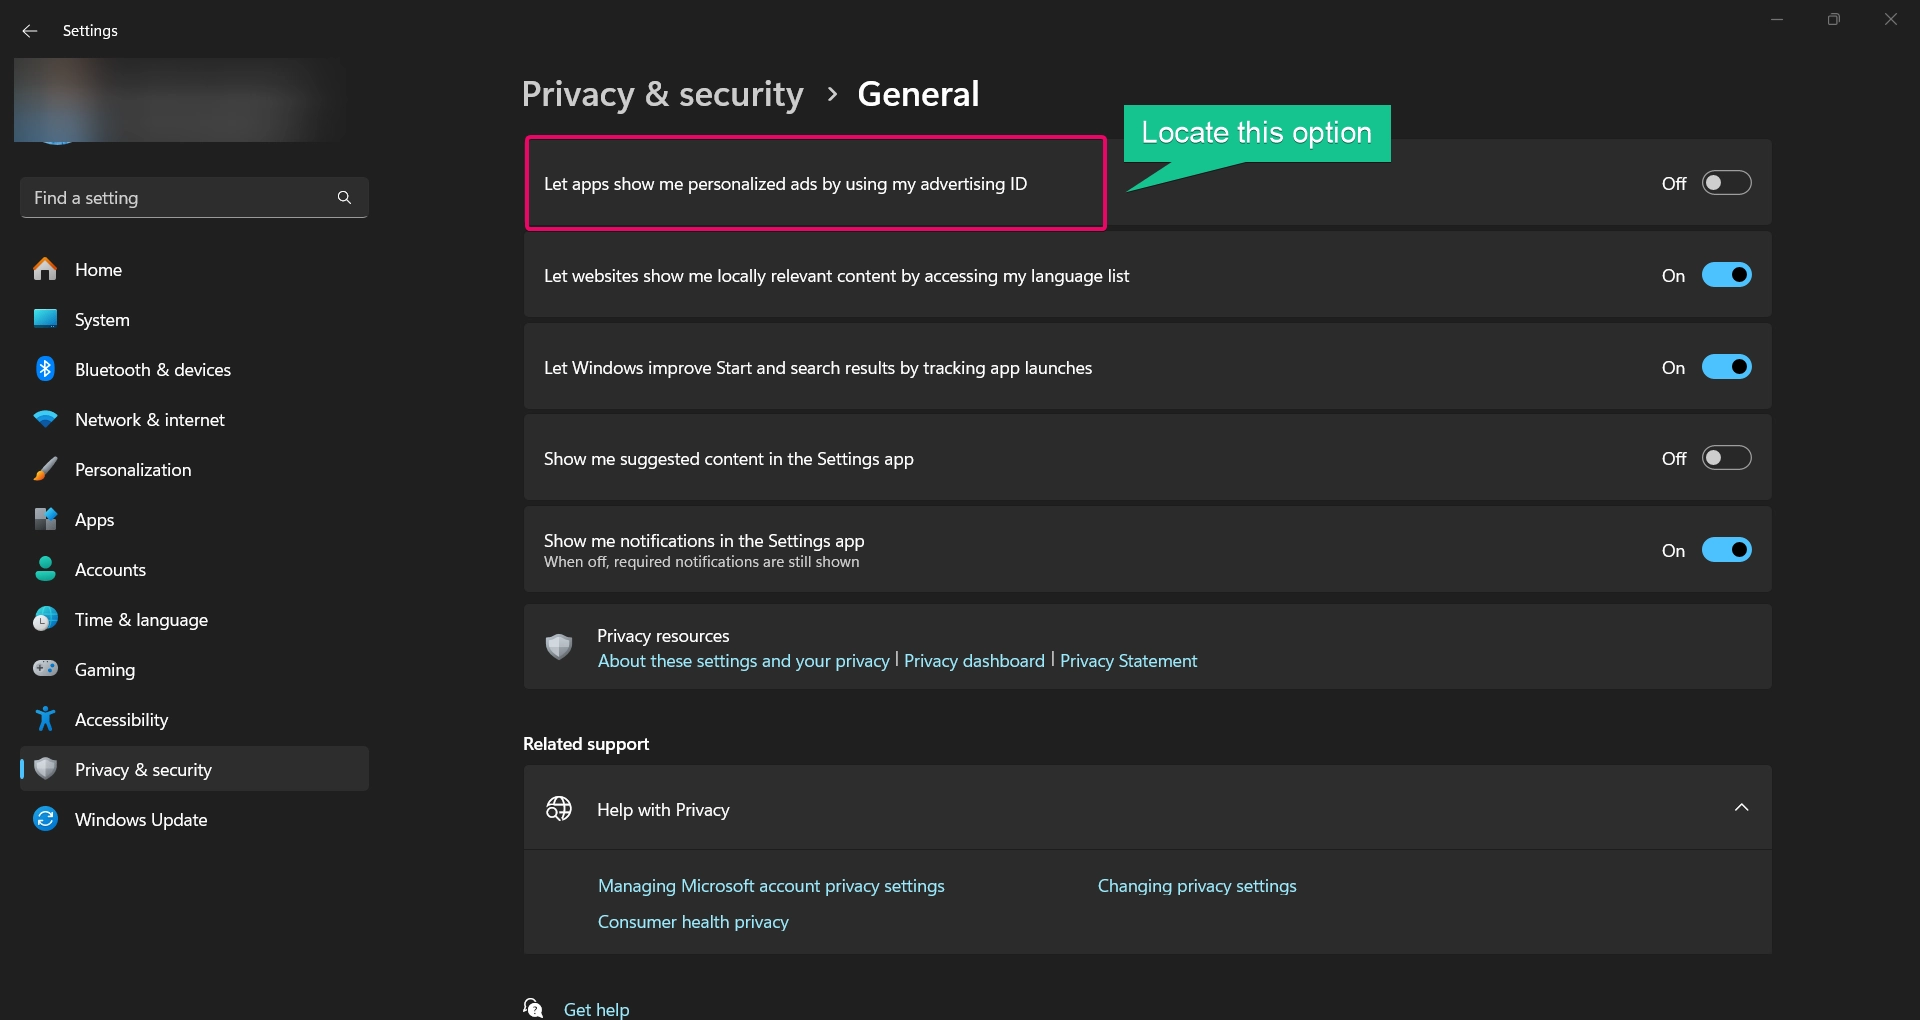
- Locate the option “Let apps show me personalized ads by using my advertising ID.”
- Toggle the switch to On to enable or Off to disable the Advertising ID.
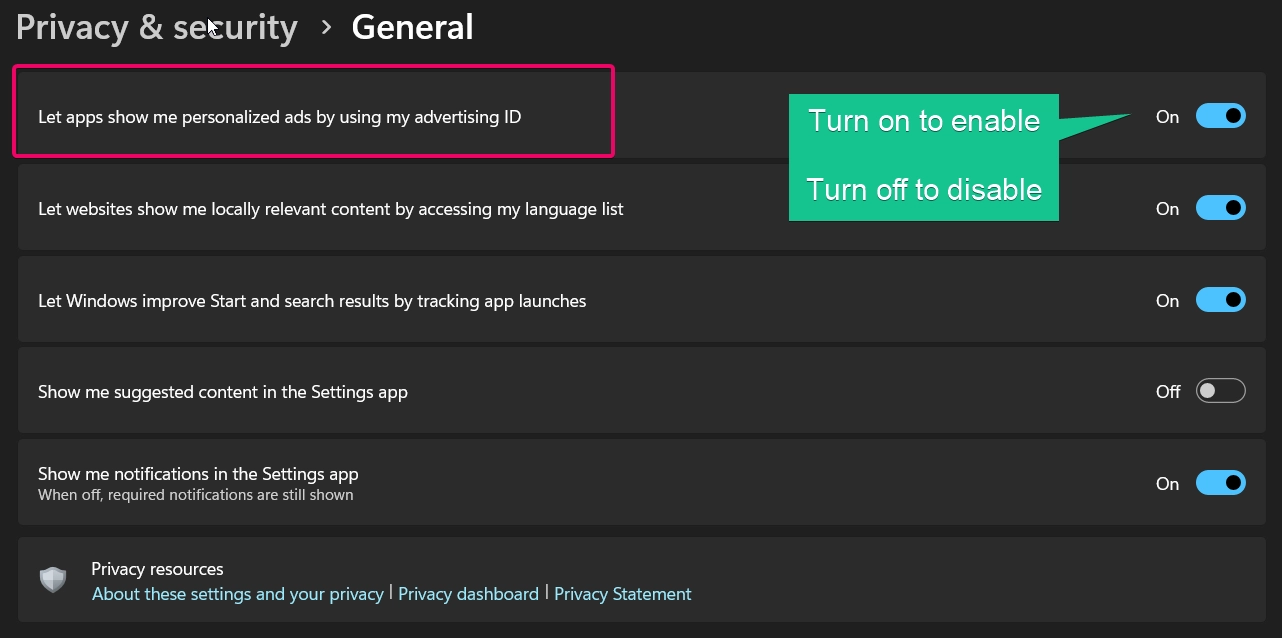
Changes take effect immediately, and apps will adjust their behavior accordingly.
Method 2: Using Group Policy Editor
Note: The Group Policy Editor is available only in Windows 11 Pro, Enterprise, and Education editions.
If you’re using a version of Windows 11 that includes the Group Policy Editor, follow these steps:
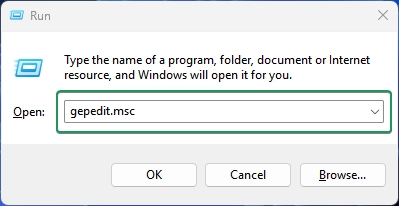
- Press Winkey + R to open the Run dialog, type
gpedit.msc, and press Enter.
- Navigate to the following path:
Computer Configuration > Administrative Templates > System > User Profile
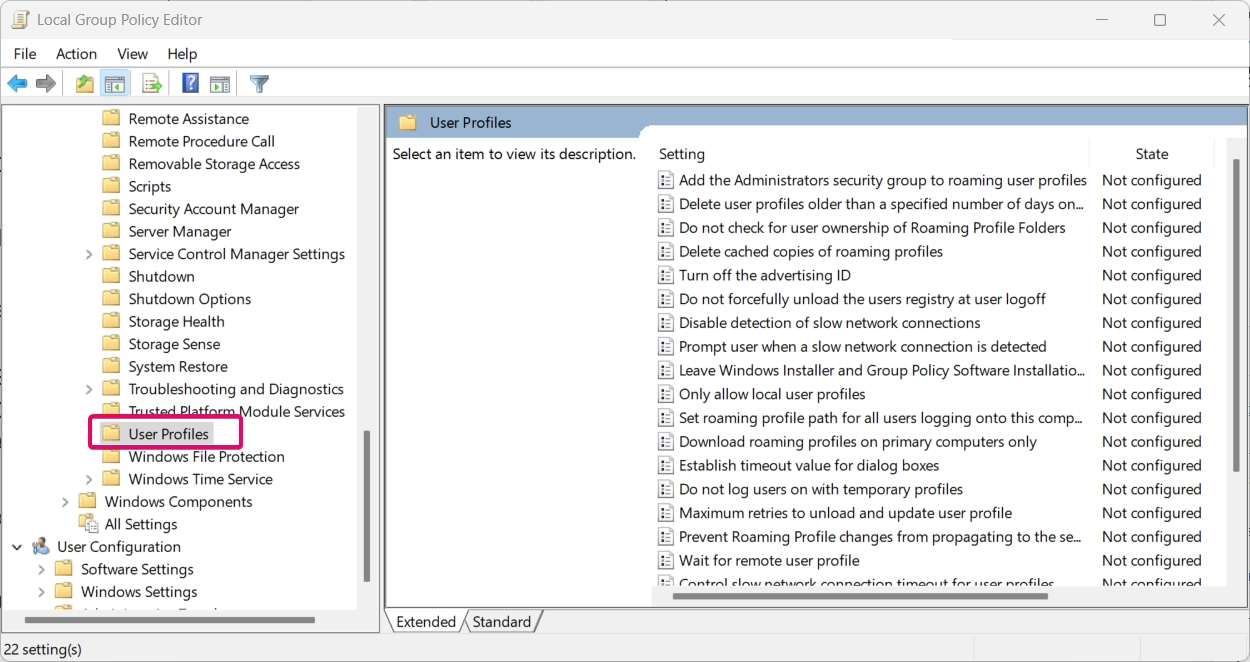
- Locate and double-click “Turn off the advertising ID.”
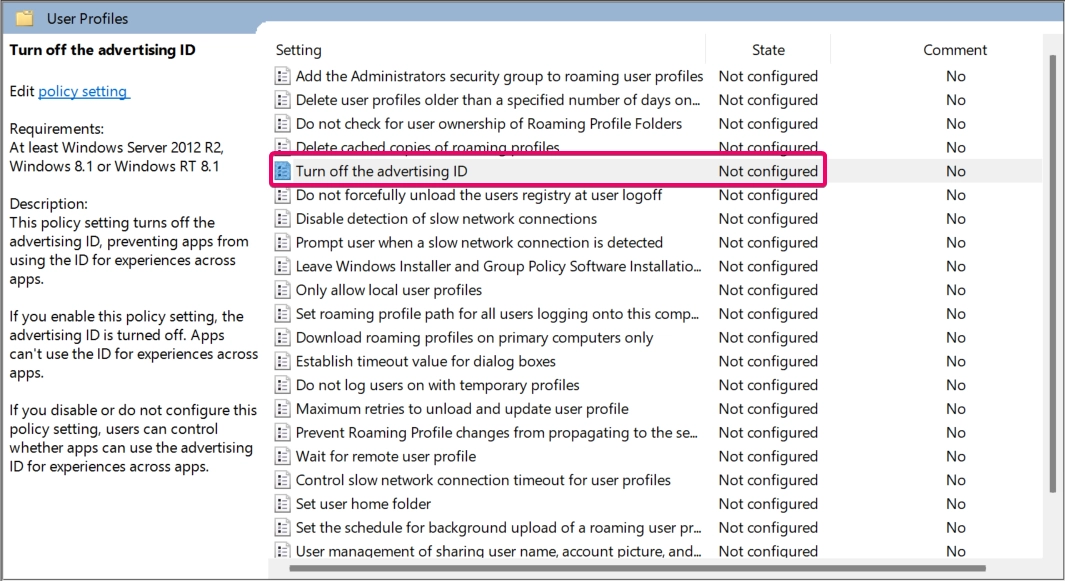
- In the pop-up window, choose:
- Enabled to disable the Advertising ID.
- Disabled to enable the Advertising ID.
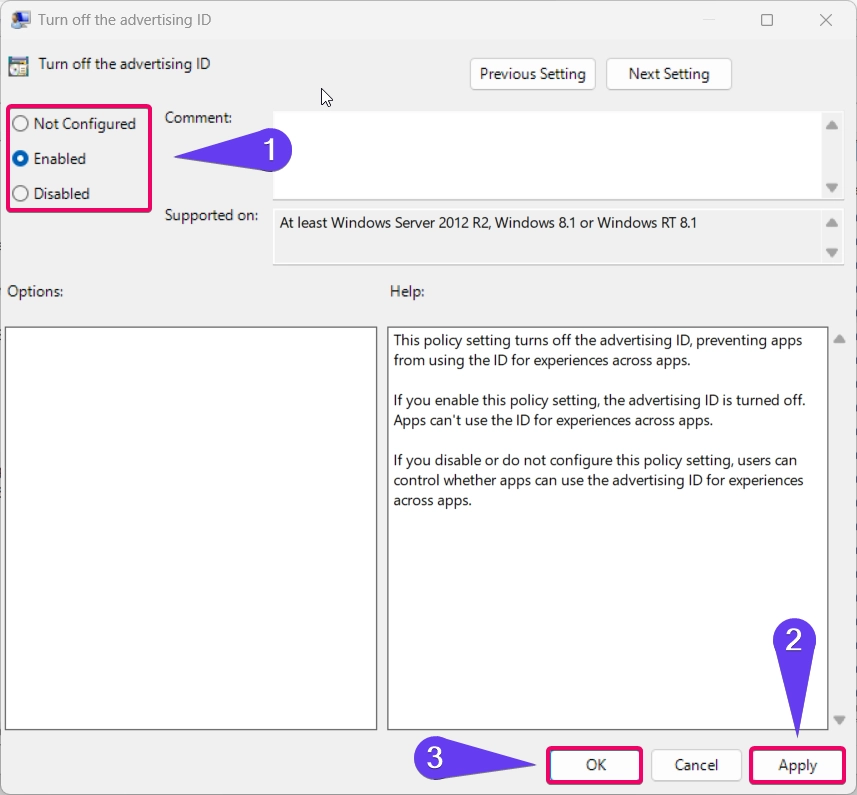
- Click Apply and then OK to save your changes.
This method ensures that the Advertising ID is controlled system-wide, overriding individual app settings.
Method 3: Using Registry Editor
Important: Modifying the registry can impact your system if done incorrectly. Back up your registry before proceeding.
If you’re comfortable using the Registry Editor, follow these steps to enable or disable the Advertising ID:
- Press Winkey + R to open the Run dialog, type
regedit, and press Enter. - Navigate to the following registry key:
HKEY_LOCAL_MACHINE\SOFTWARE\Microsoft\Windows\CurrentVersion\AdvertisingInfo
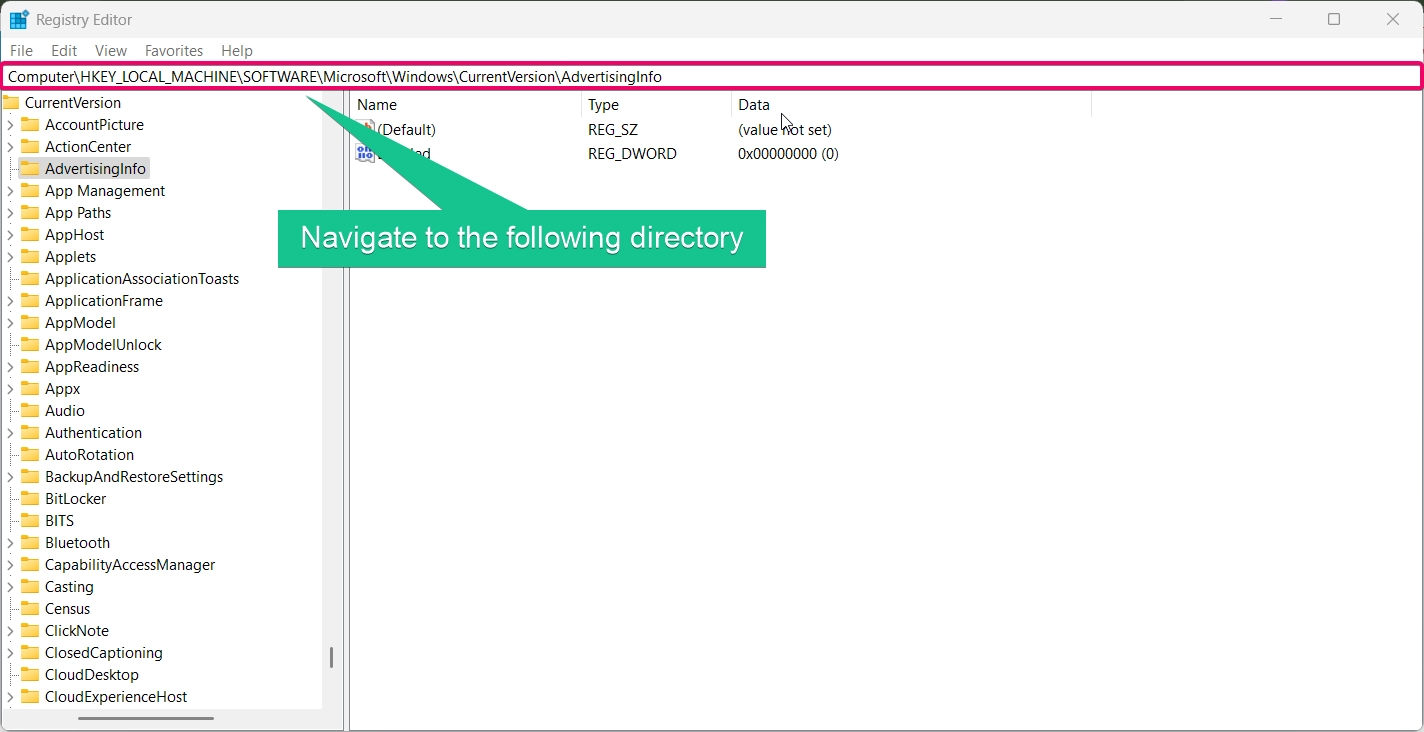
- Locate the Enabled value. If it doesn’t exist, create a new
DWORD (32-bit) Valuenamed Enabled. - Set the value to:
1to enable the Advertising ID.0to disable the Advertising ID.
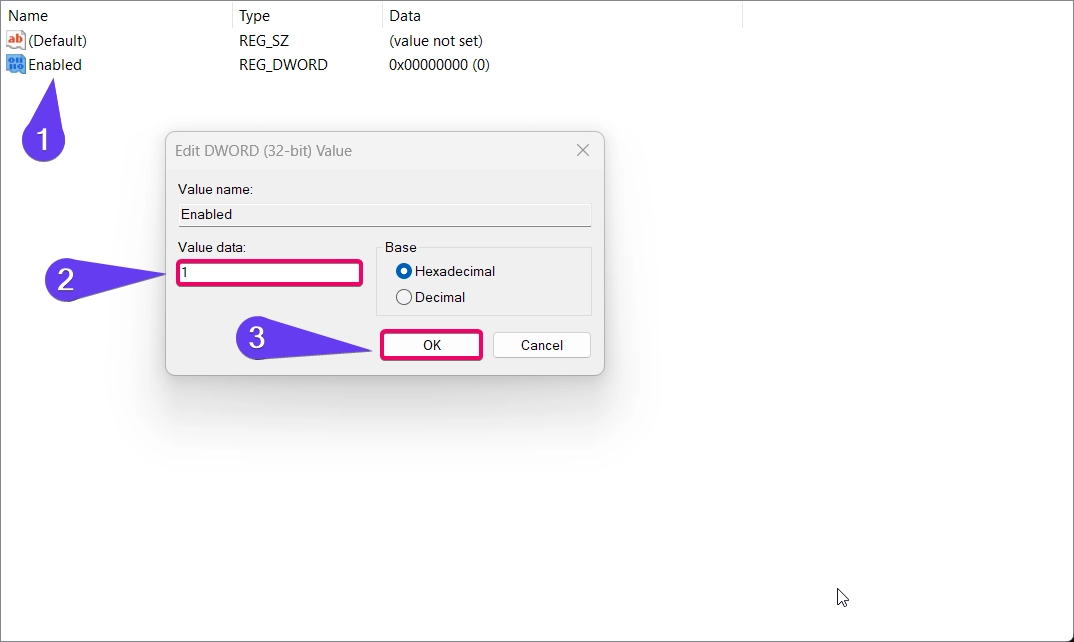
- Close the Registry Editor and restart your computer for changes to take effect.
This method offers precise control but should be used carefully to avoid unintended system changes.
Method 4: Using PowerShell
For advanced users, PowerShell provides a command-line method to manage the Advertising ID. Here’s how:
- Open PowerShell as Administrator by right-clicking the Start menu and selecting Windows Terminal (Admin).
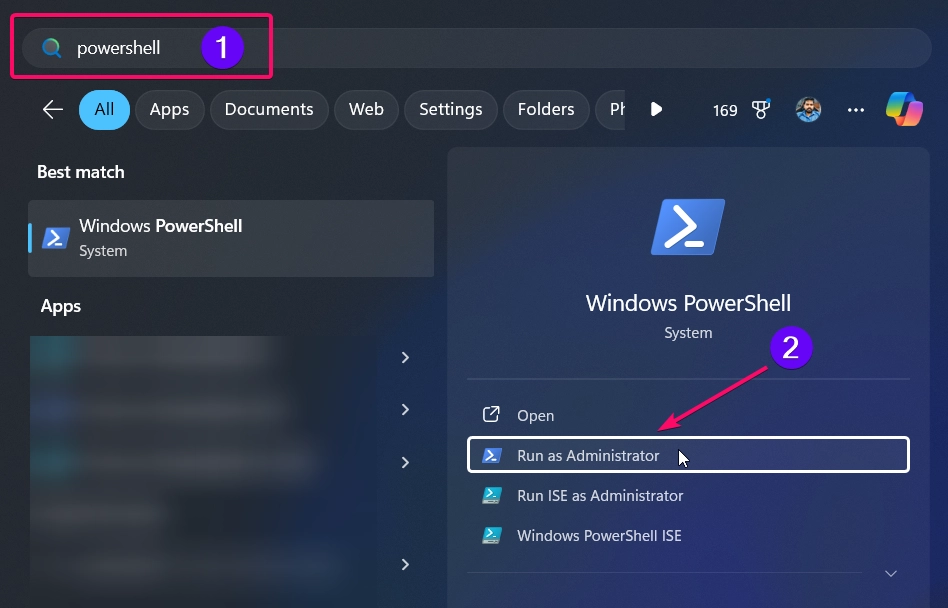
- To disable the Advertising ID, enter the following command:
Set-ItemProperty -Path "HKLM:\SOFTWARE\Microsoft\Windows\CurrentVersion\AdvertisingInfo" -Name "Enabled" -Value 0

- To enable the Advertising ID, use:
Set-ItemProperty -Path "HKLM:\SOFTWARE\Microsoft\Windows\CurrentVersion\AdvertisingInfo" -Name "Enabled" -Value 1

- Restart your computer to apply the changes.
This method is quick and efficient for users familiar with command-line operations.
Why Enable or Disable the Advertising ID?
Enabling the Advertising ID ensures you receive personalized ads tailored to your preferences. On the other hand, disabling the Advertising ID protects your privacy by preventing apps from tracking your activity for targeted advertisements. This choice depends on your priorities—whether you value personalized experiences or enhanced privacy.
Conclusion
Managing the Advertising ID for personalized ads in Windows 11 is a straightforward process, whether you choose to enable or disable it. By following the methods above, you can adjust your settings based on your privacy preferences. Whether you use the Settings app, Group Policy Editor, Registry Editor, or PowerShell, Windows 11 provides various ways to control this feature.
Read More:
- How to Add/Remove Common Program Groups from Start Menu in Windows 11?
- How to Add/Remove Android Apps from Your Phone to Start on Windows 11 PC?
- How to Turn On/Off Airplane Mode in Windows 11?
