How to Turn On or Off Activate Window by Hovering Over with Mouse Pointer in Windows 11?
What are the different methods to Turn On or Off Activate Window by Hovering Over with Mouse Pointer in Windows 11?
Windows 11 includes a feature that lets you activate a window by hovering over it with the mouse pointer. This feature is part of the Ease of Access settings and can enhance productivity for users who want a quicker way to switch between windows without clicking. In this tutorial, we’ll explain how to enable or disable Activate Window by Hovering Over with mouse pointer using multiple methods.
See Also: Turn On Or Off Adaptive Brightness In Windows 11
What Does “Activate Window by Hovering” Mean?
When this feature is turned on, hovering the mouse pointer over a window will bring it to the foreground and make it active without requiring a click. This can improve workflow efficiency, especially for multitasking users or those with mobility issues.
Method 1: Using the Control Panel
The Control Panel provides a simple way to adjust the hover activation time. Here’s how:
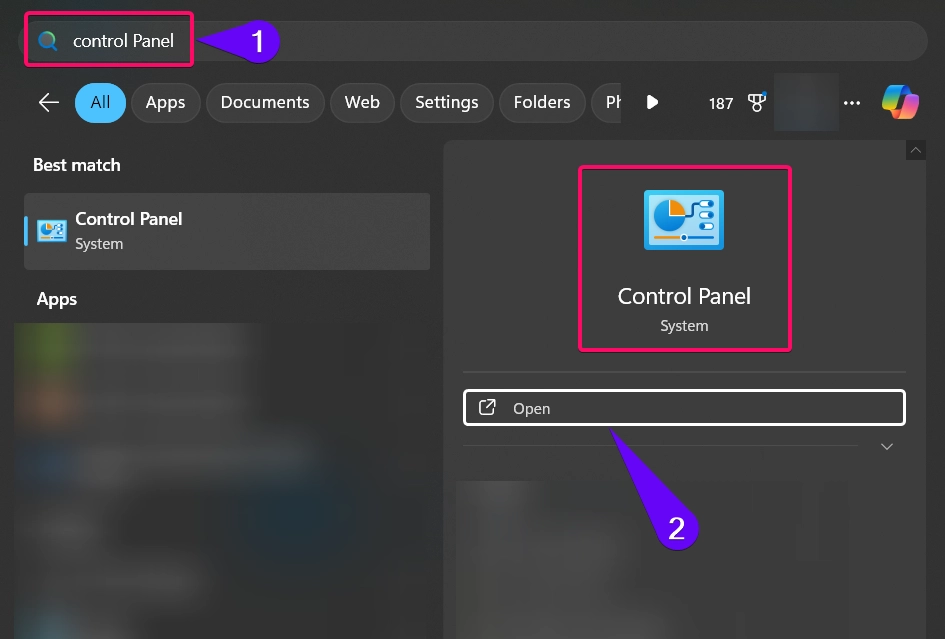
- Open the Control Panel by typing “Control Panel” in the search bar and selecting it.
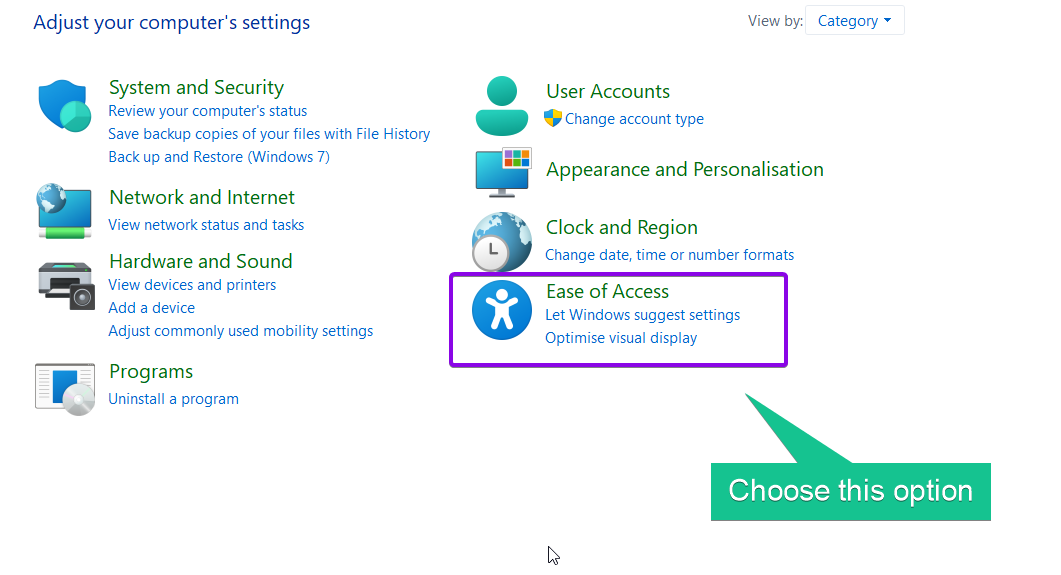
- Navigate to Ease of Access > Ease of Access Center.
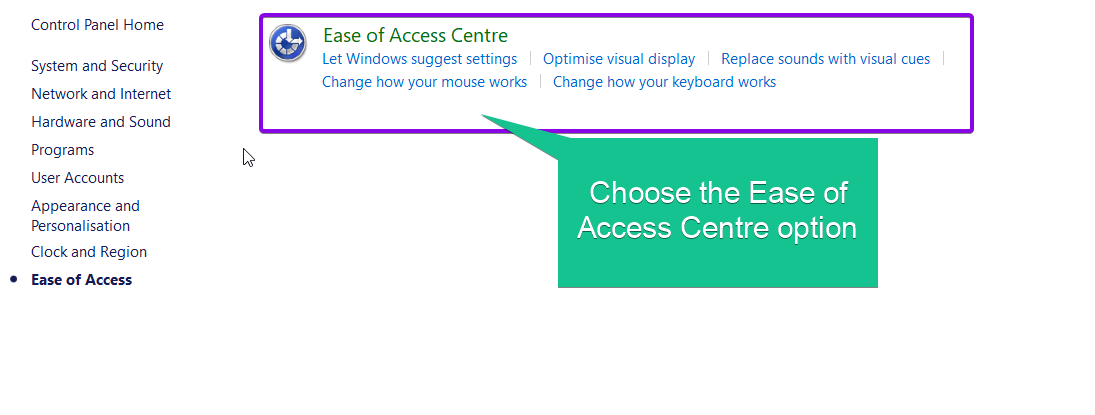
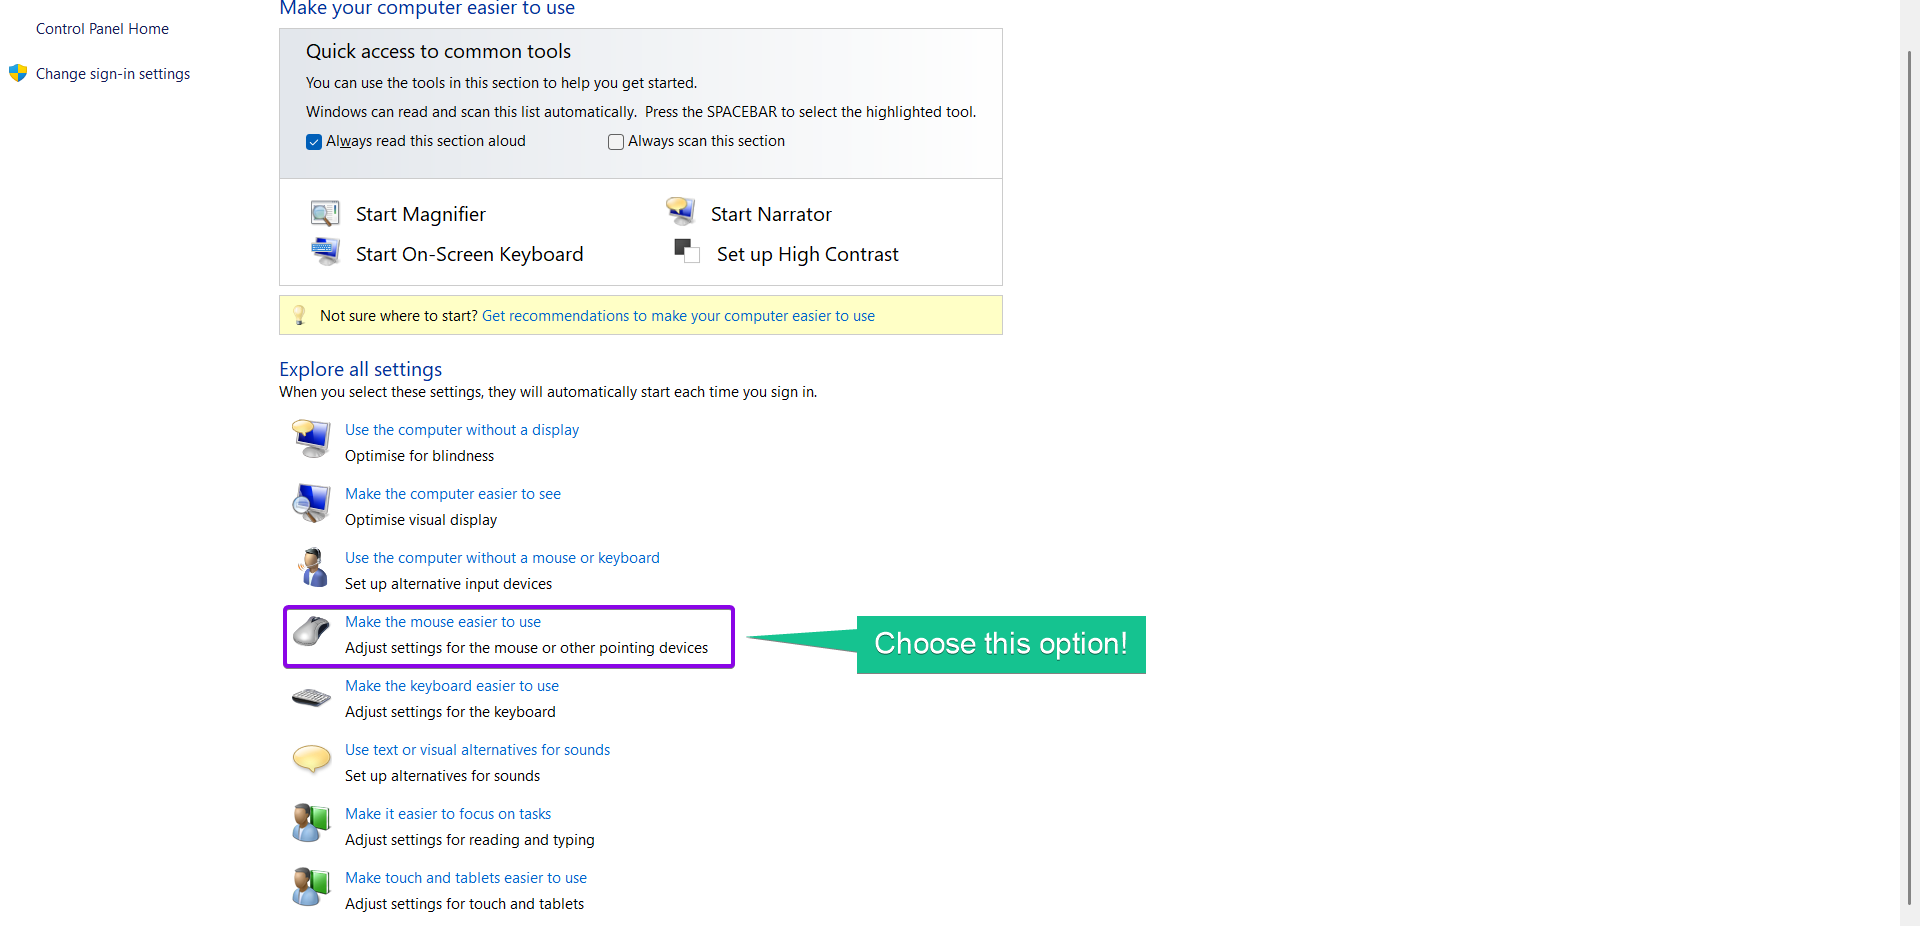
- Click on Make the mouse easier to use.
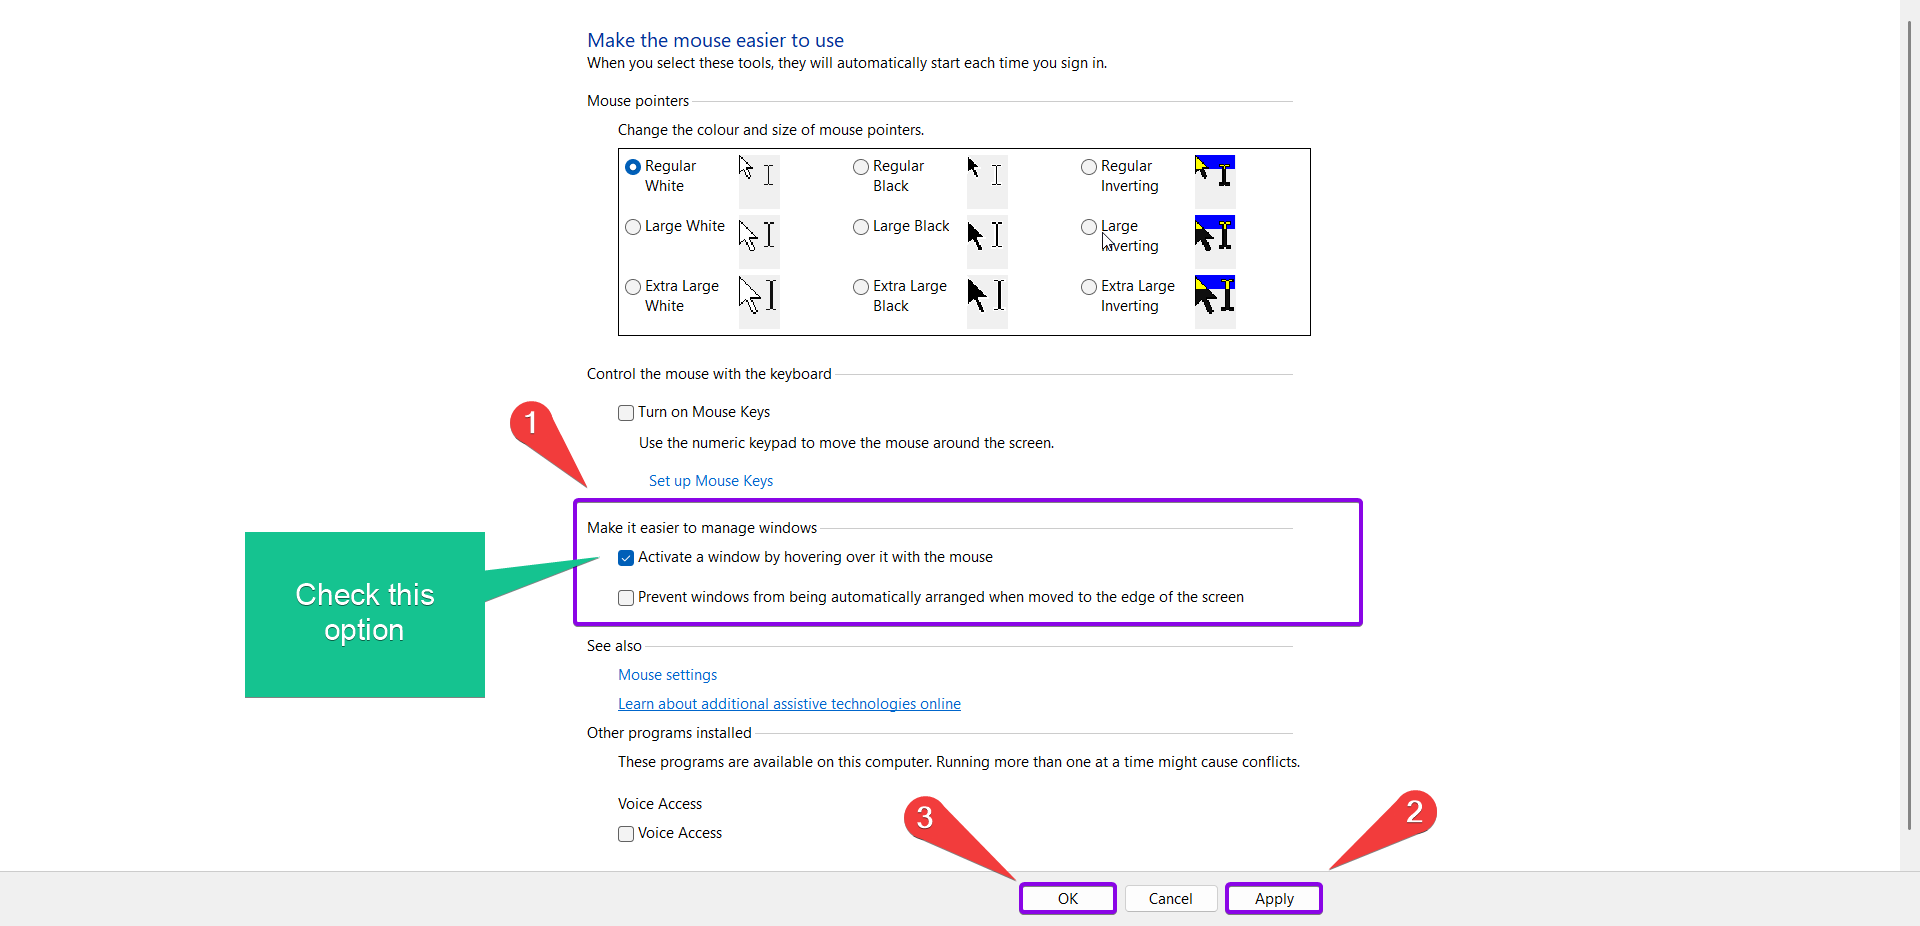
- Look for the option Activate a window by hovering over it with the mouse and enable it if it’s not already checked.
- To adjust the time, click on Set up Mouse Keys or explore additional settings within the Mouse or Accessibility options.
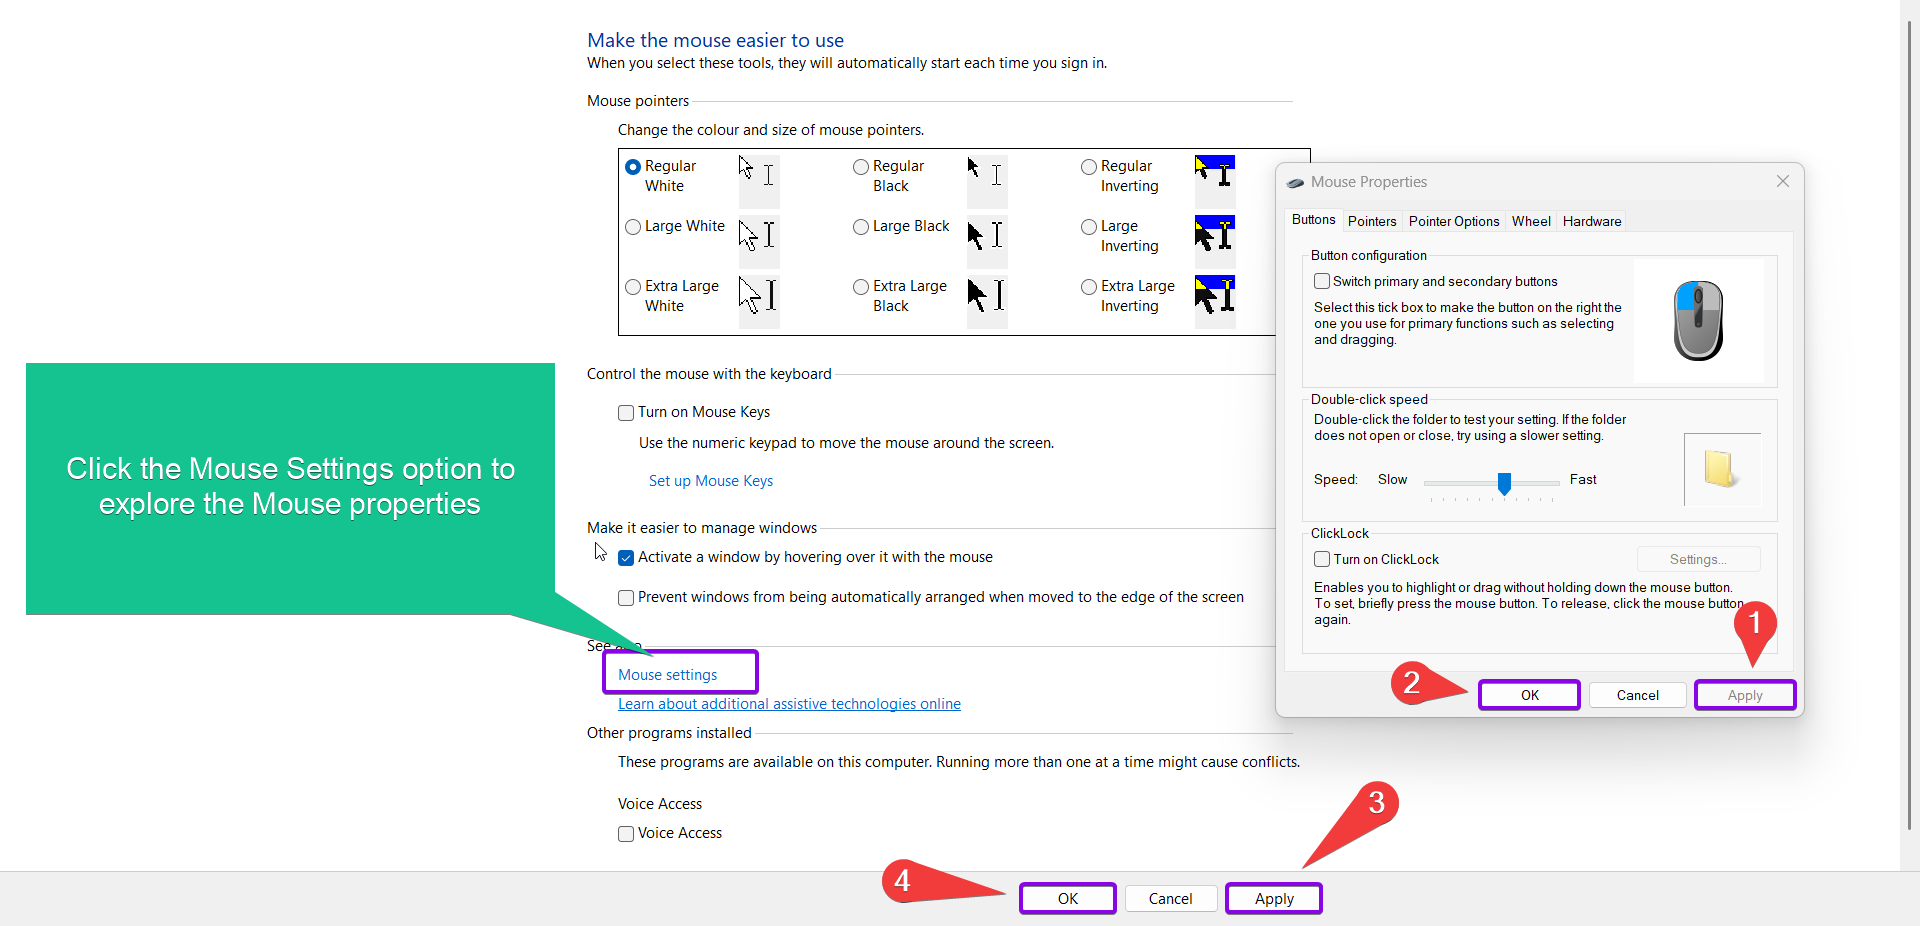
- Save your changes by clicking OK or Apply.
This method works well for users who prefer a graphical interface for making changes.
Method 2: Using the Settings App:
The Settings app provides a straightforward way to turn on or off the hover-to-activate feature.
- Open Settings by pressing Winkey + I on your keyboard.
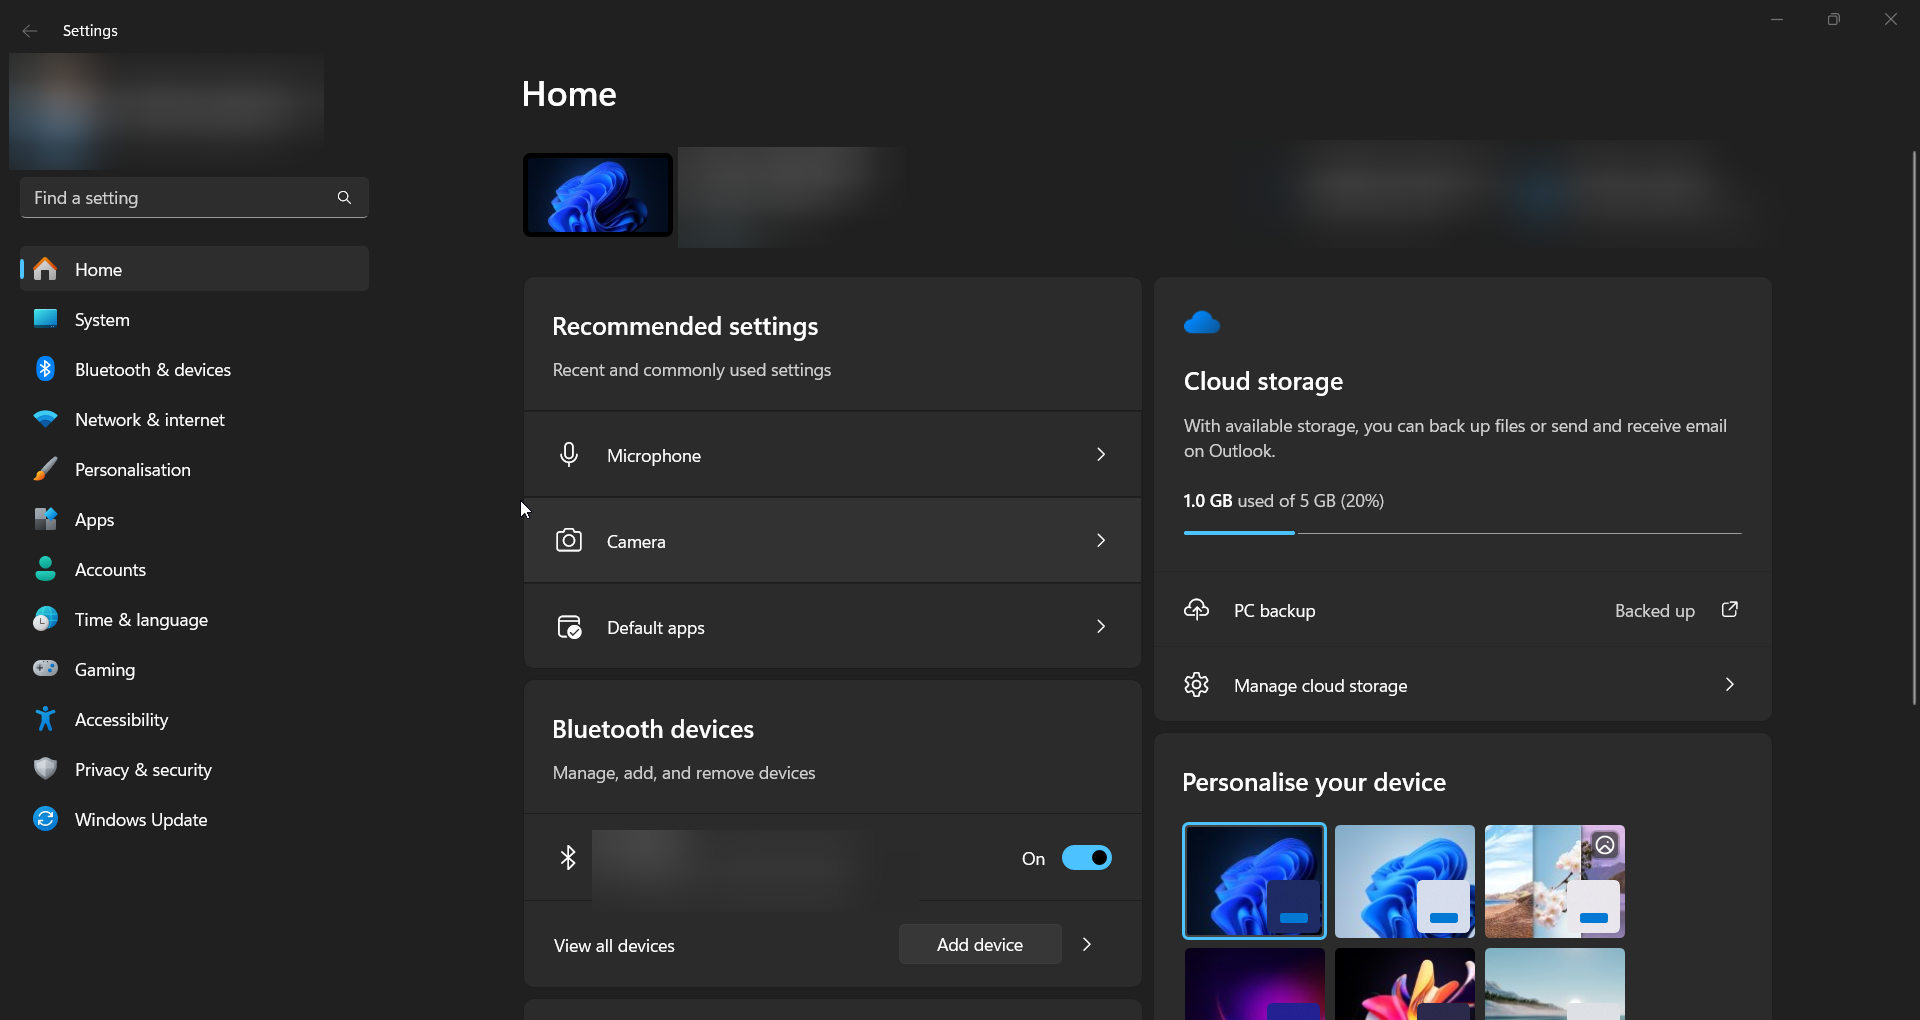
- Navigate to Accessibility from the left pane.
- Scroll down and select Mouse option.
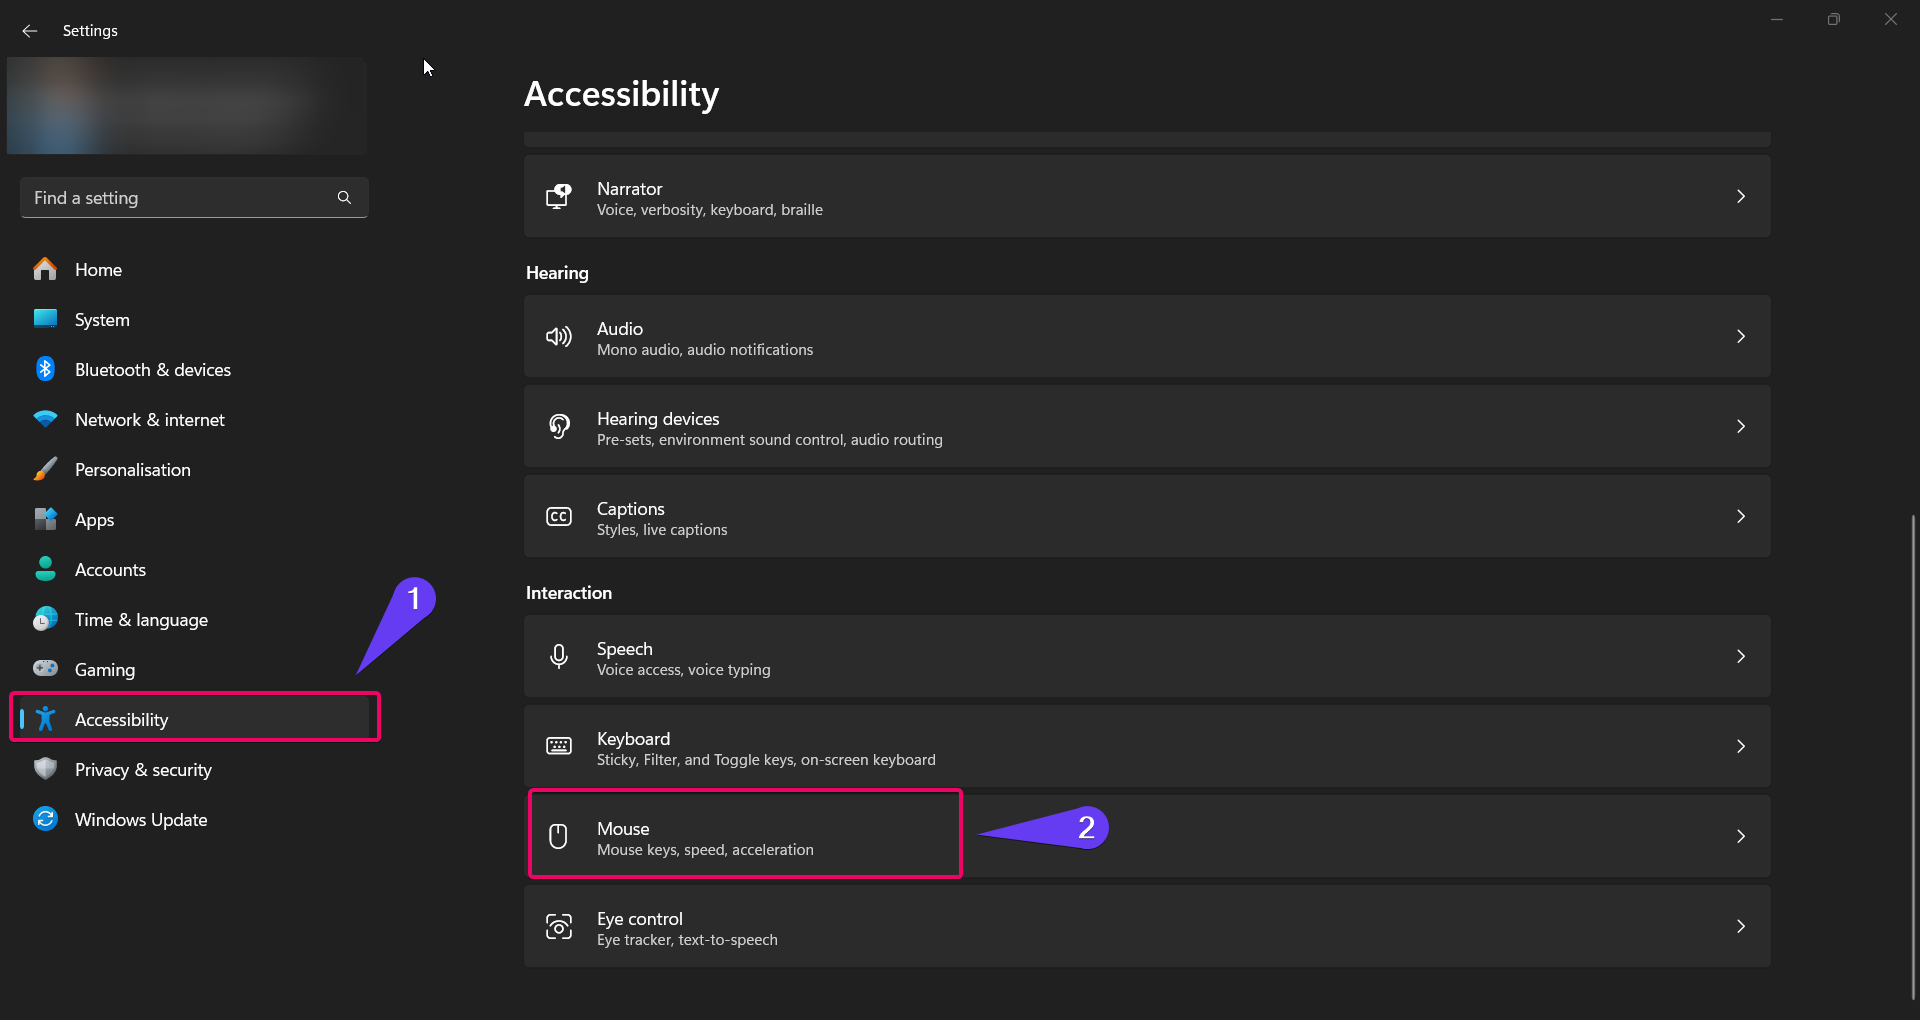
- Click on Additional mouse settings.
- In the Mouse Properties window, switch to the Pointer Options tab.
- Check or uncheck the box for Activate a window by hovering over it with the mouse depending on your preference.

- Click Apply and then OK to save your settings.
This method is ideal for users who prefer the graphical interface of the Settings app.
Method 3: Using Registry Editor
Important: Modifying the registry can cause system issues if not done correctly. Always back up your registry before making any changes.
See Also: Change Time To Activate A Window By Hovering Over With Mouse Pointer In Windows 11
For advanced users, the Registry Editor offers a way to toggle the hover-to-activate feature.
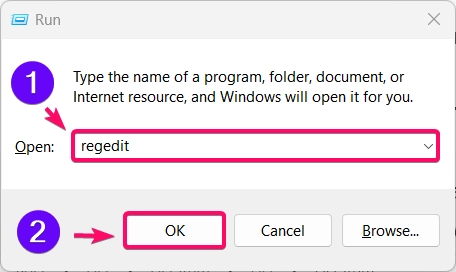
- Press Winkey + R, type
regedit, and press Enter to open the Registry Editor.
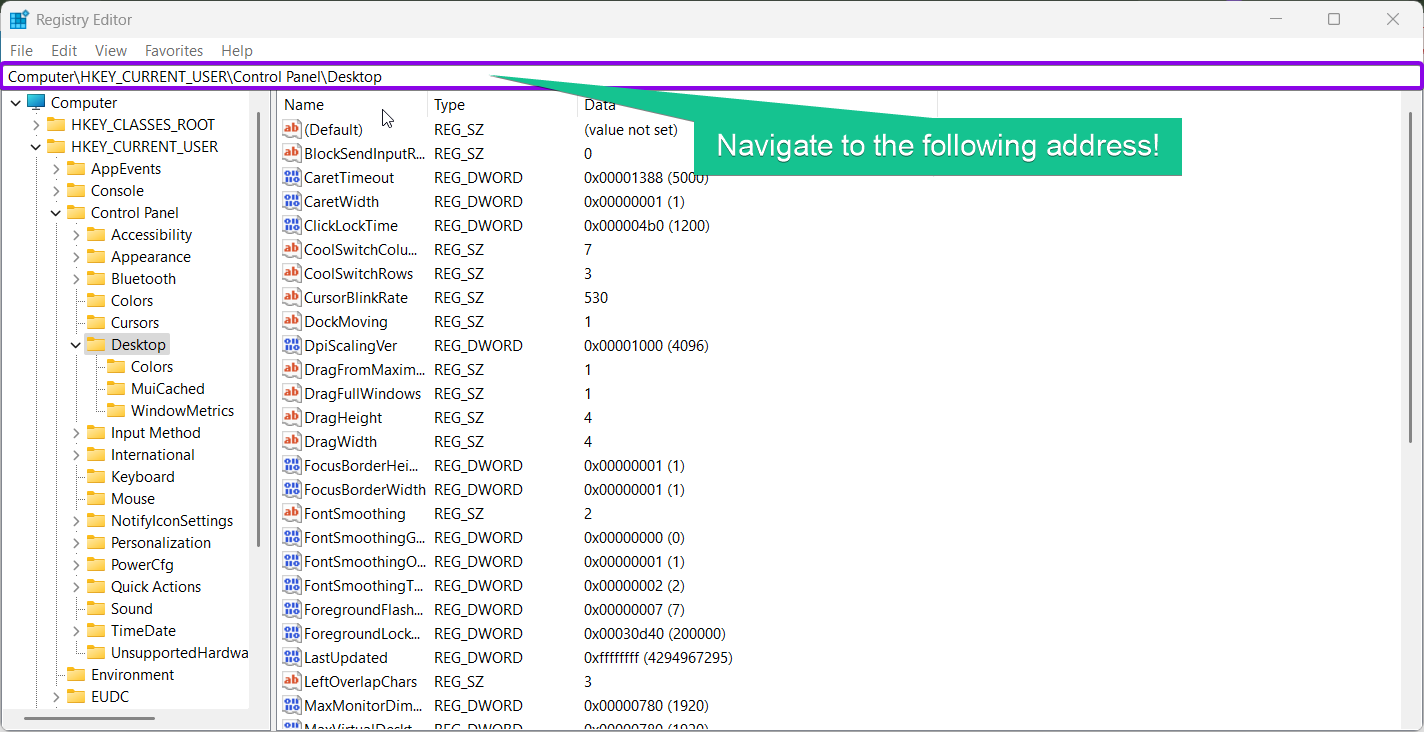
- Navigate to the following path:
HKEY_CURRENT_USER\Control Panel\Desktop
- Look for the UserPreferencesMask value. Double-click it to edit.
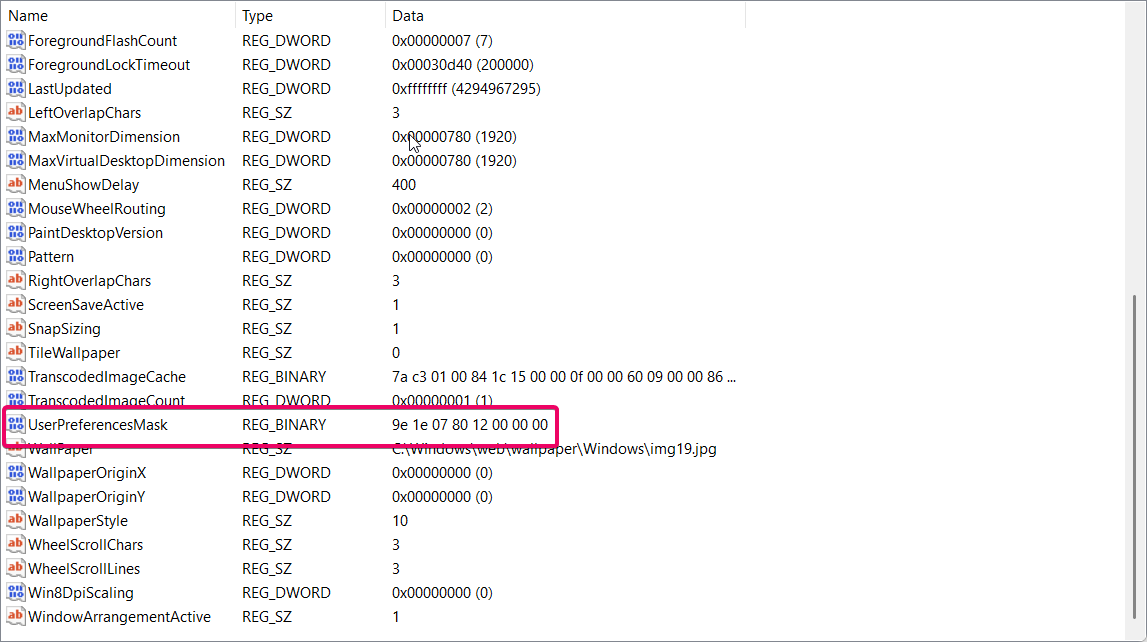
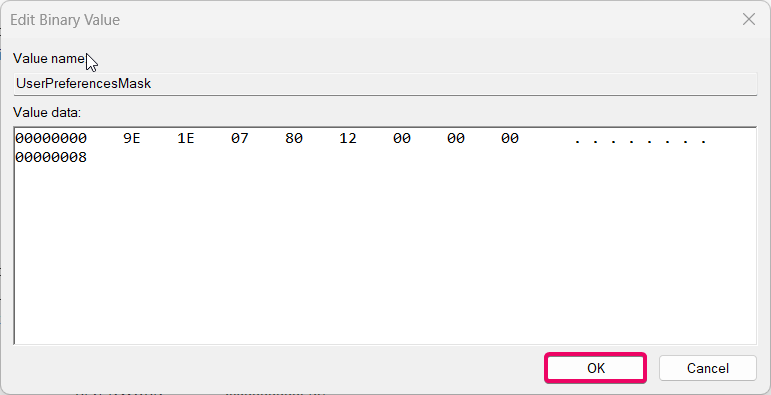
- Modify the second digit of the value to
1to enable the feature or0to disable it. For example: - To enable the feature:
- Change the second digit of the first pair (
E) toF.- Resulting value:
9F 1E 07 80 12 00 00 00
- Resulting value:
- Change the second digit of the first pair (
- To disable the feature:
- Change the second digit of the first pair (
E) toEorDto reflect a disabled setting.- Resulting value:
9D 1E 07 80 12 00 00 00
- Resulting value:
- Change the second digit of the first pair (
- Click OK and restart your computer to apply the changes.
This method provides deeper control over system behavior but should only be used by advanced users.
Method 4: Using PowerShell
For users comfortable with command-line tools, PowerShell provides a quick way to manage this setting.
Check Out: Turn On Or Off Always Underline Access Keys In Windows 11
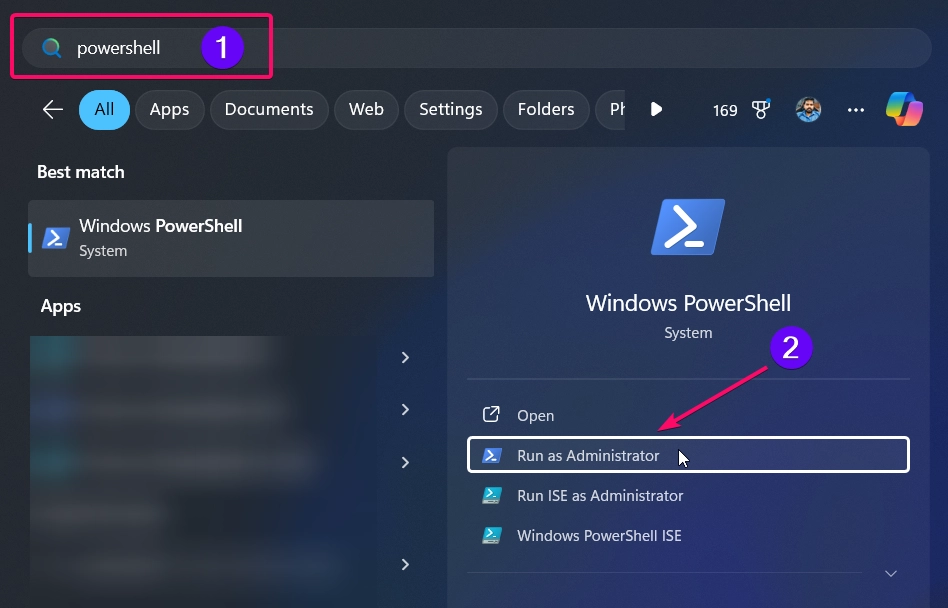
- Open PowerShell as Administrator by right-clicking the Start menu and selecting Windows Terminal (Admin).
- To enable the hover-to-activate feature, type the following command:
New-ItemProperty -Path "HKCU:\Control Panel\Desktop" -Name "UserPreferencesMask" -Value 1

- To disable the feature, type:
Set-ItemProperty -Path "HKCU:\Control Panel\Desktop" -Name "UserPreferencesMask" -Value 0

- Restart your system for the changes to take effect.
This feature is particularly useful for users who need quick access to multiple windows or for those who experience difficulty clicking. It eliminates the need for repetitive mouse clicks, which can help reduce strain during extended use.
Conclusion
Activating a window by hovering over it with the mouse pointer is a handy feature in Windows 11 that can improve accessibility and productivity. Whether you choose to enable or disable it, the methods above offer a variety of ways to customize your experience. From the Settings app and Control Panel to the Registry Editor and PowerShell, there’s an option for every level of user.
Commonly Asked Queries:
Is it safe to modify the registry for this feature?
Yes, it’s safe if you follow the steps carefully. Always back up the registry before making any changes.
Will enabling this feature affect system performance?
No, this feature has a negligible impact on system performance.
Does this feature work in all Windows 11 editions?
Yes, the hover-to-activate feature is available in all editions of Windows 11.
Can I adjust the delay for hovering to activate a window?
No, Windows 11 doesn’t currently offer a built-in setting to adjust the hover delay.
Can I disable this feature for specific applications?
No, the setting applies universally to all windows and applications in Windows 11.
Read More:
- How to Add/Remove Common Program Groups from Start Menu in Windows 11?
- How to Add/Remove Android Apps from Your Phone to Start on Windows 11 PC?
- How to Turn On/Off Airplane Mode in Windows 11?

