How to Change Time to Activate a Window by Hovering Over with Mouse Pointer in Windows 11?
What are the different methods to Change Time to Activate a Window by Hovering Over with Mouse Pointer in Windows 11?
Windows 11 includes a feature that allows users to activate a window by simply hovering the mouse pointer over it. This feature is particularly useful for multitasking and improving productivity. By default, the time it takes to activate a window when you hover over it is set by the system, but you can customize it to suit your preferences. In this writeups, we’ll walk you through multiple methods to change the time required to activate a window by hovering with your mouse pointer.
Read This: Turn On Or Off Activate Window By Hovering Over With Mouse Pointer In Windows 11
Why Change the Hover Time to Activate Windows?
Customizing the hover time can improve your multitasking experience. For example, reducing the hover time can speed up workflows, while increasing it can prevent accidental activation when moving your mouse. Adjusting this setting can help you strike the right balance for your needs.
Method 1: Using the Control Panel
The Control Panel provides a simple way to adjust the hover activation time. Here’s how:
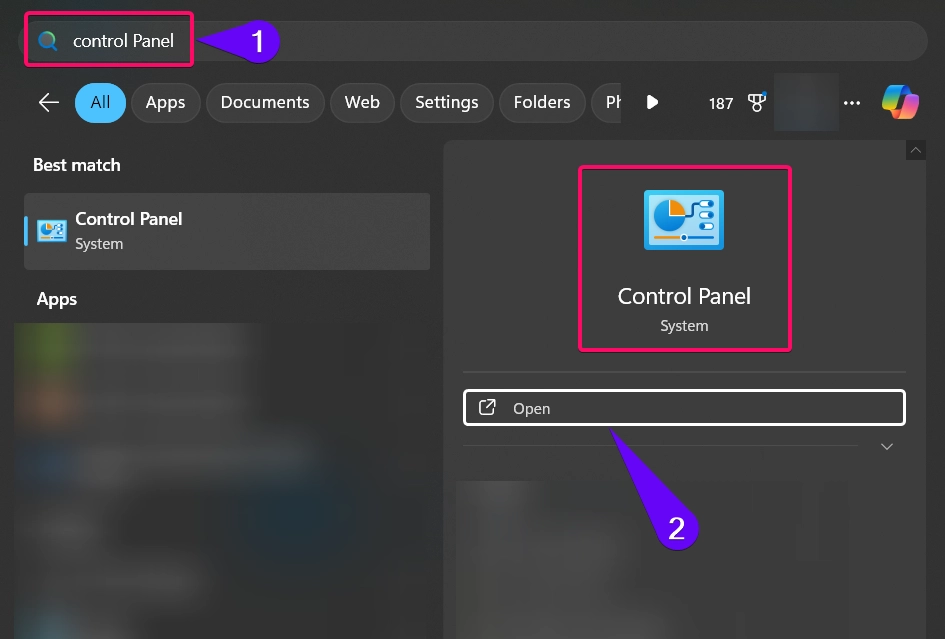
- Open the Control Panel by typing “Control Panel” in the search bar and selecting it.
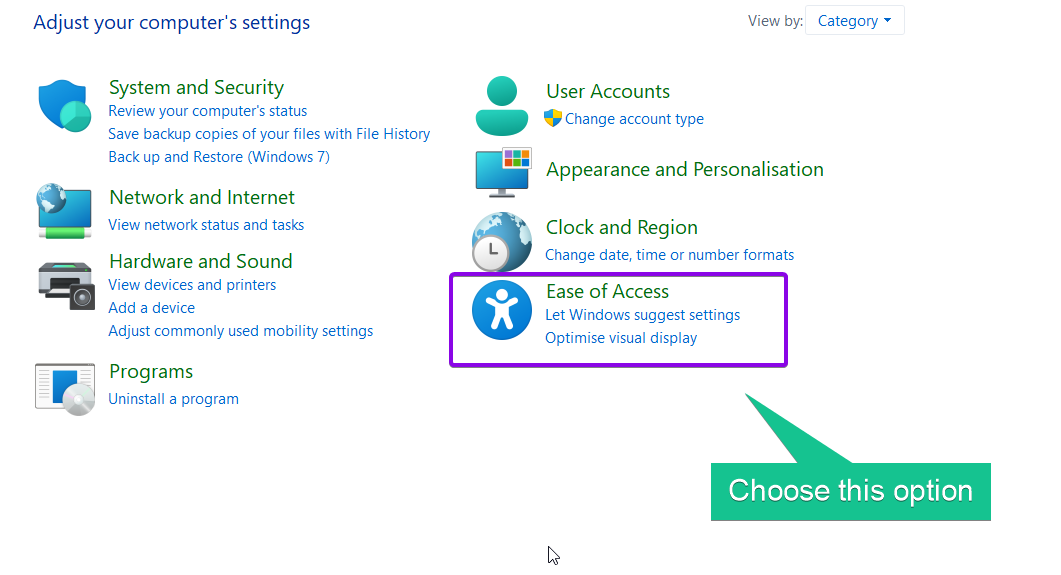
- Navigate to Ease of Access > Ease of Access Center.
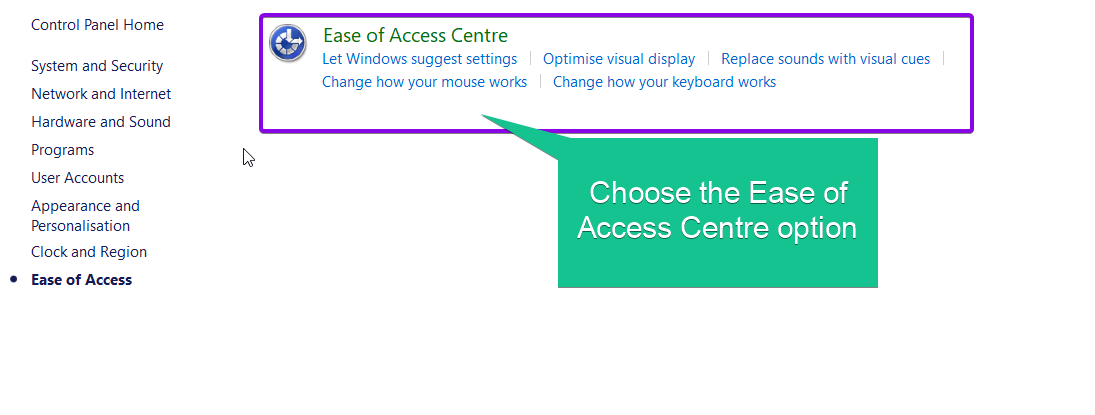
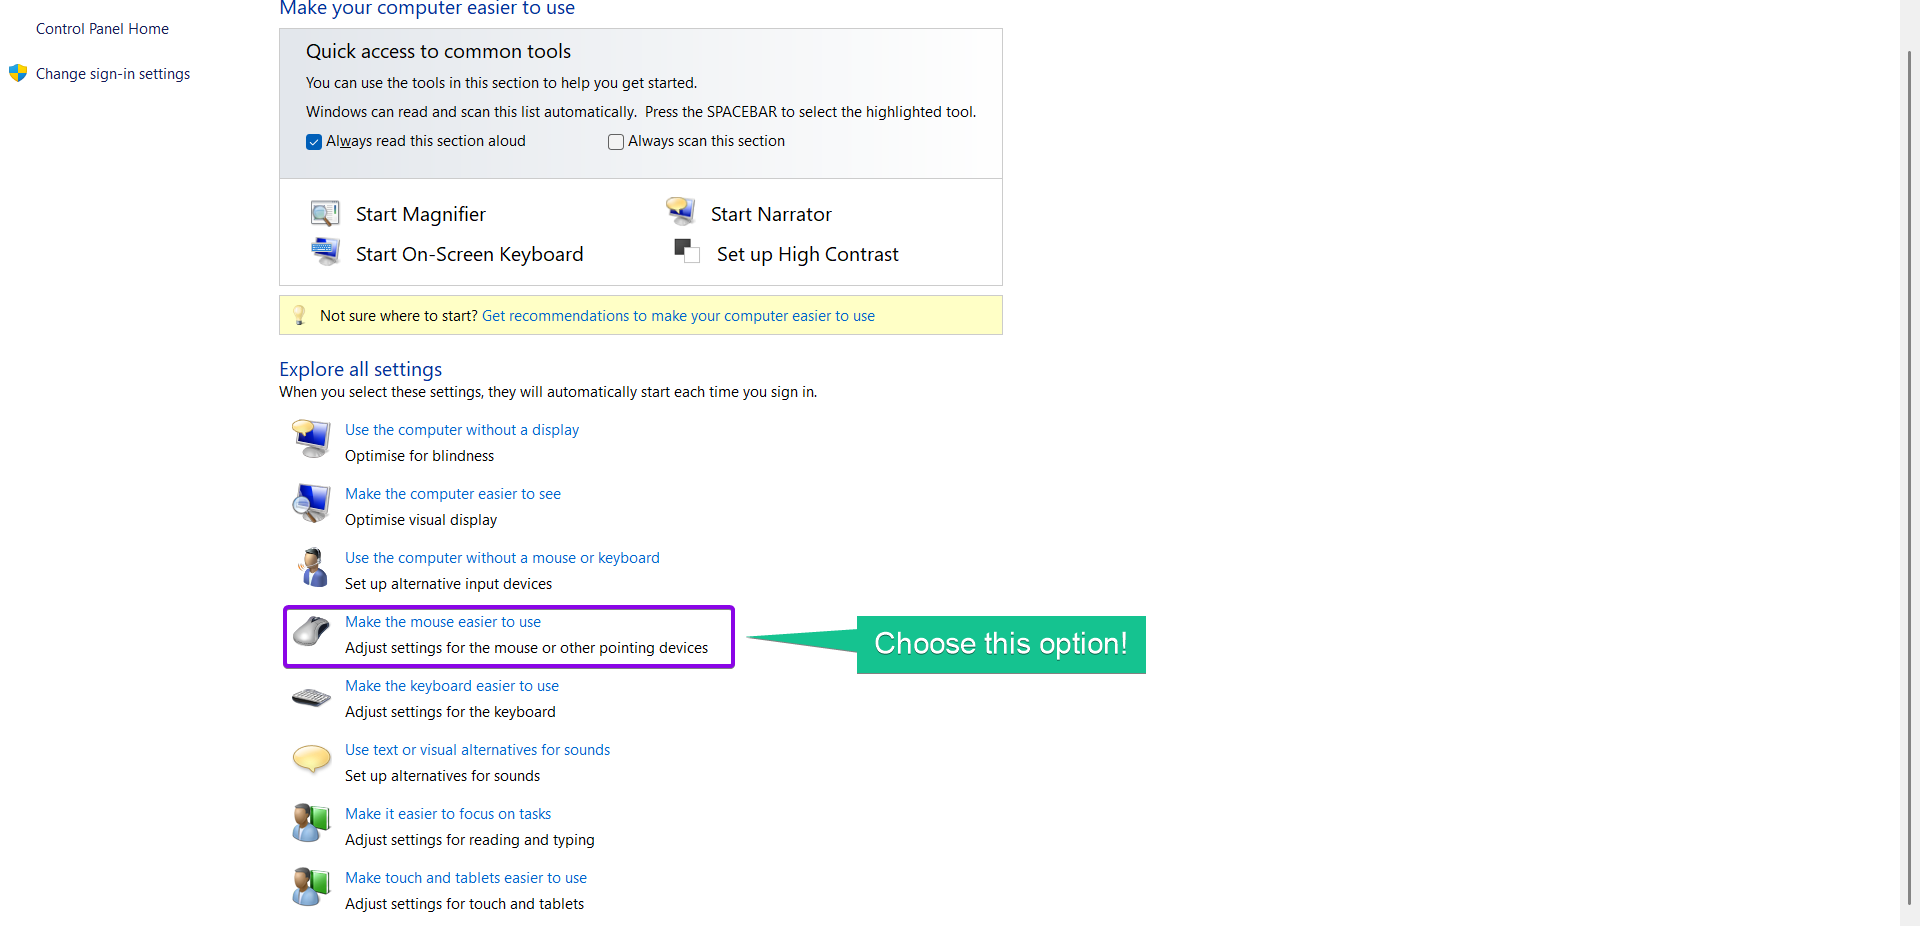
- Click on Make the mouse easier to use.
- Look for the option Activate a window by hovering over it with the mouse and enable it if it’s not already checked.
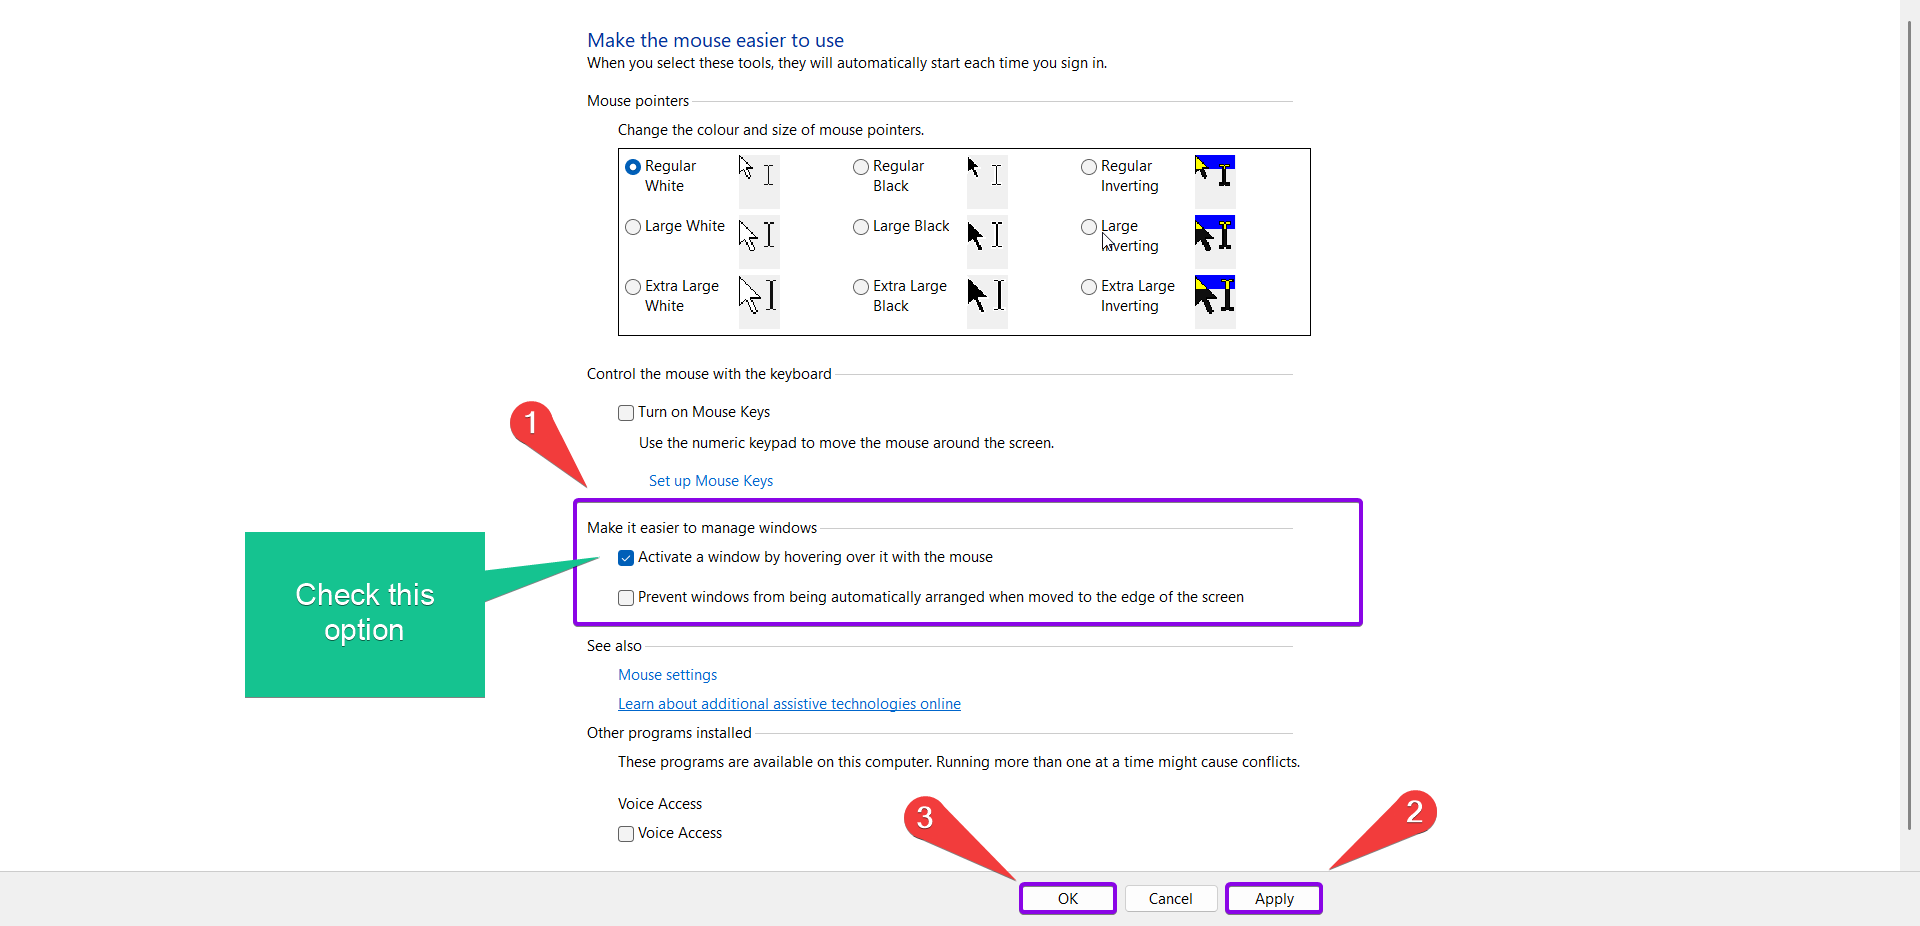
- To adjust the time, click on Set up Mouse Keys or explore additional settings within the Mouse or Accessibility options.
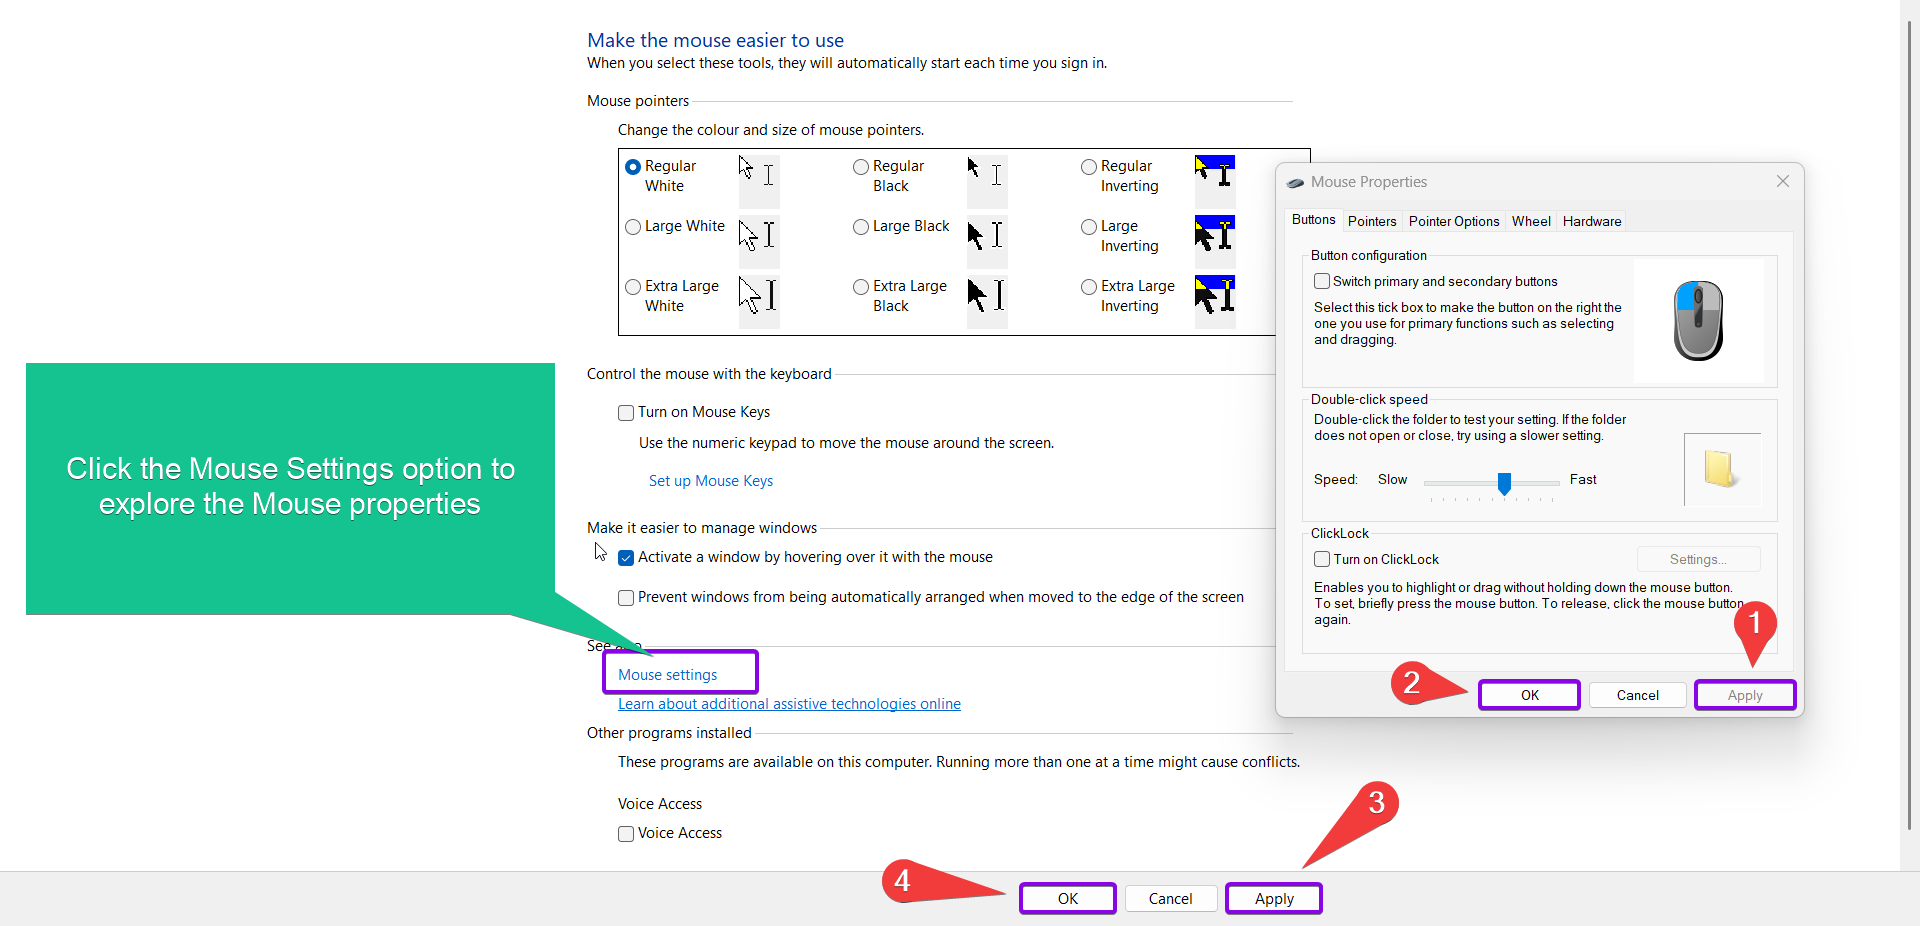
- Save your changes by clicking OK or Apply.
This method works well for users who prefer a graphical interface for making changes.
Method 2: Using the Registry Editor
Note: Editing the registry can cause issues if not done correctly. Always back up your registry before proceeding.
For advanced users, the Registry Editor provides more granular control over the hover time setting:
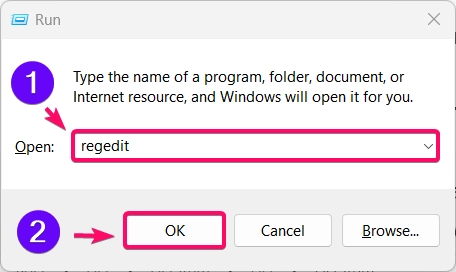
- Press Winkey + R to open the Run dialog, type
regedit, and press Enter.
- Navigate to the following path:
HKEY_CURRENT_USER\Control Panel\Desktop
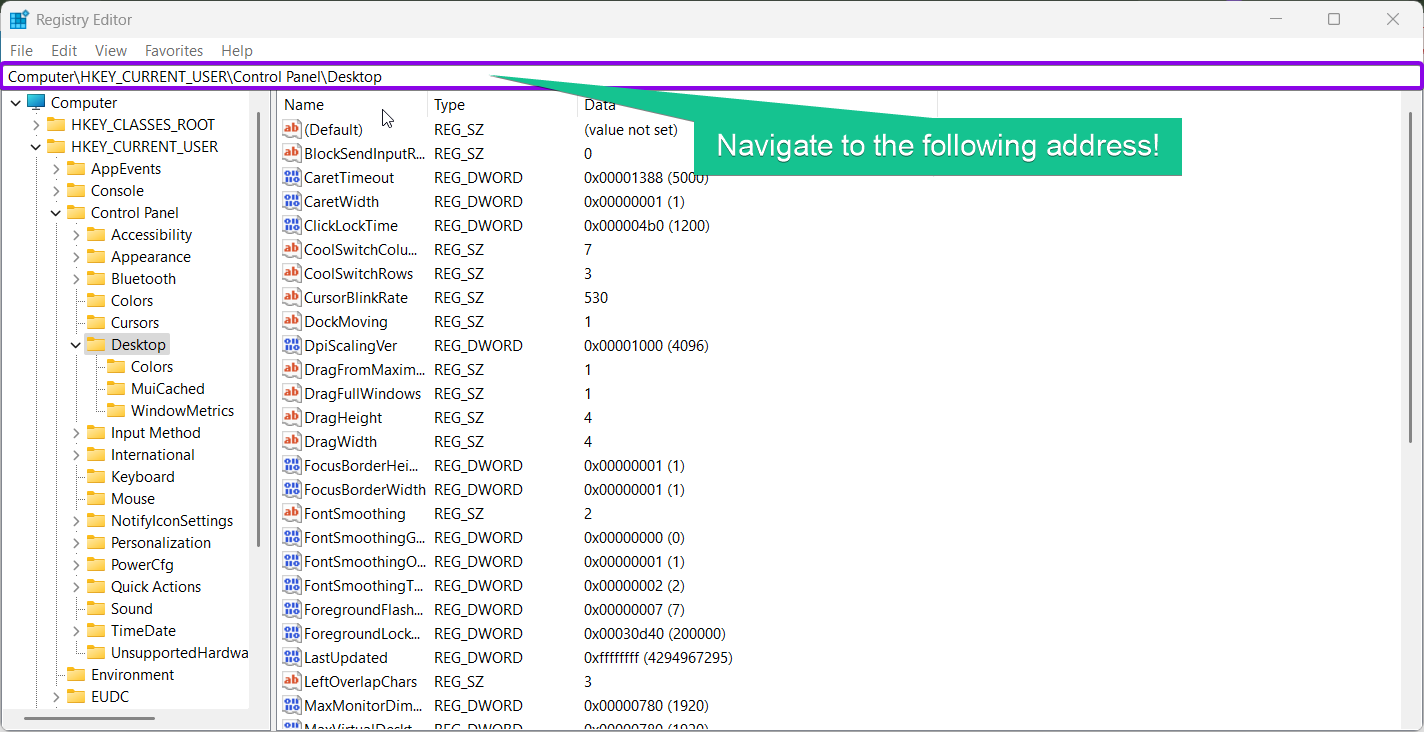
- Locate the key named ActiveWndTrkTimeout. If it doesn’t exist, create a new
DWORD (32-bit)value with that name. - Double-click the ActiveWndTrkTimeout key and set its value to the desired time in milliseconds. For example:
500for half a second1000for one second3000for three seconds
- Click OK and restart your computer to apply the changes.

This method offers precise customization and is ideal for users who need specific timing adjustments.
Method 3: Using PowerShell
For users who prefer command-line tools, PowerShell provides a quick and efficient way to adjust hover time:
- Open PowerShell as Administrator by right-clicking the Start menu and selecting Windows Terminal (Admin).
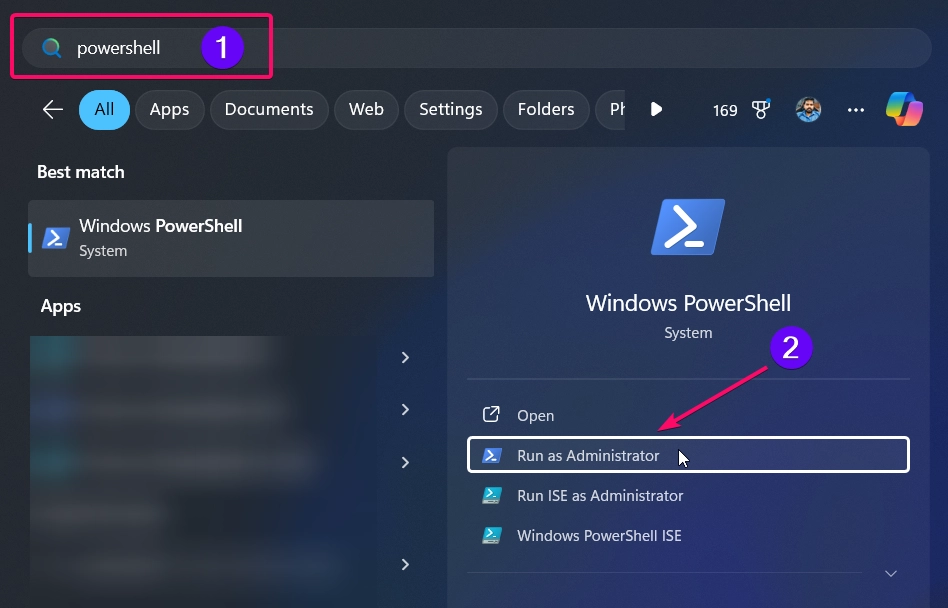
- To set the hover time, use the following command:
Set-ItemProperty -Path "HKCU:\Control Panel\Desktop" -Name "ActiveWndTrkTimeout" -Value <TimeInMilliseconds>

- Replace
<TimeInMilliseconds>with the desired value (e.g., 1000 for one second). - Restart your computer to apply the changes.
PowerShell provides a straightforward way to modify this setting without navigating through multiple menus.
Method 4: Using Third-Party Tools
Several third-party tools are available to help customize advanced Windows features, including hover activation time. These tools offer user-friendly interfaces and additional customization options.
- Winaero Tweaker is a popular choice for adjusting Windows settings. It provides easy access to the hover time setting along with other accessibility and performance tweaks.
Simply install the tool, navigate to the appropriate section, and adjust the hover time as desired.
Conclusion
Customizing the time to activate a window by hovering over it with your mouse pointer in Windows 11 can greatly enhance your multitasking efficiency and user experience. Whether you prefer using the Control Panel, Registry Editor, PowerShell, or third-party tools, there’s a method suited to your skill level and needs. By following the steps mentioned above, you can easily adjust this feature to match your workflow preferences, ensuring a smoother and more personalized Windows 11 experience.
Frequently Asked Questions:
Can I reset the hover time to default?
Yes, you can reset the hover time by deleting the ActiveWndTrkTimeout key in the Registry Editor or setting its value back to 500.
Is it safe to edit the registry to change hover activation time?
Yes, it’s safe if you follow the instructions carefully. Always back up the registry before making changes to prevent issues.
Will changing the hover activation time affect all applications?
Yes, this setting applies system-wide, affecting all windows and applications on your computer.
Can I completely disable hover activation?
Yes, you can disable hover activation by unchecking the Activate a window by hovering over it with the mouse option in the Control Panel.
What is the default hover activation time in Windows 11?
The default hover activation time is approximately 500 milliseconds (half a second).
Read More:
- How to Add/Remove Common Program Groups from Start Menu in Windows 11?
- How to Add/Remove Android Apps from Your Phone to Start on Windows 11 PC?
- How to Turn On/Off Airplane Mode in Windows 11?
