How to Change or Reset Account Lockout Counter After Time in Windows 11?
What are the different methods to Change or Reset Account Lockout Counter After Time in Windows 11?
In Windows 11, the Account Lockout Counter tracks failed login attempts, and when the limit is reached, the account is temporarily locked to protect against unauthorized access. The Account Lockout Counter After time setting determines how long the counter will keep counting unsuccessful attempts before resetting to zero. Adjusting this setting can help balance security and user convenience. This tutorial provides multiple methods to change or reset Account Lockout Counter After time in Windows 11.
Why Adjust the Account Lockout Counter After Time?
The Account Lockout Counter After time setting offers a way to enhance security by limiting failed login attempts within a specific period. If someone repeatedly fails to enter the correct password, the account can be locked temporarily. Resetting this counter ensures users aren’t permanently locked out and can try logging in again after a set time. It’s an important feature, especially for shared or public computers.
Methods to Change or Reset the Account Lockout Counter After Time in Windows 11
Here are several methods to adjust the Account Lockout Counter After time, offering flexibility in how you manage this setting.
Method 1: Using Local Security Policy:
The Local Security Policy tool in Windows 11 provides an easy way to adjust account lockout policies:
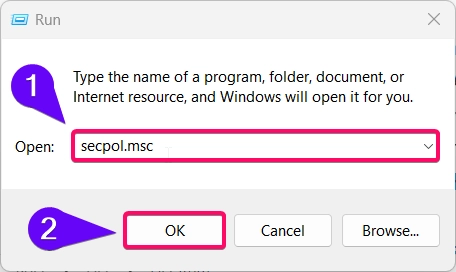
- Press Winkey + R to open the Run dialog, type
secpol.msc, and press Enter to open the Local Security Policy.
- In the left pane, navigate to Account Policies -> Account Lockout Policy.
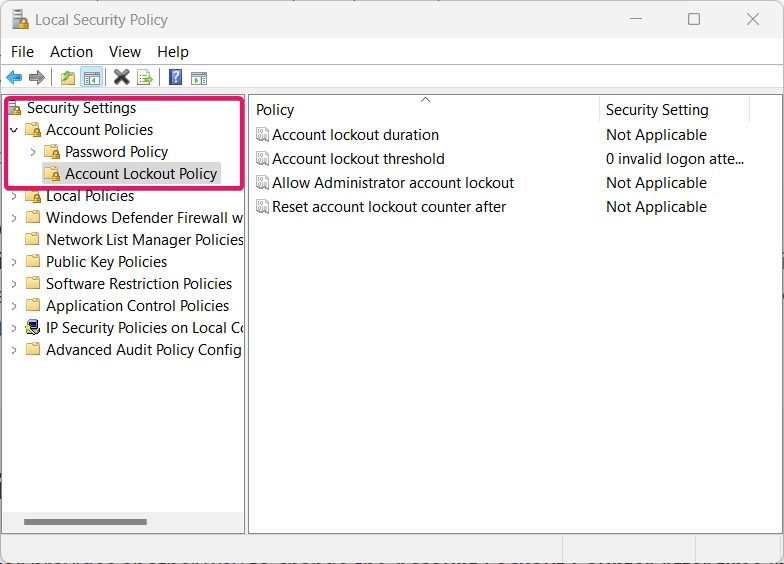
- Double-click on Reset Account lockout counter after.
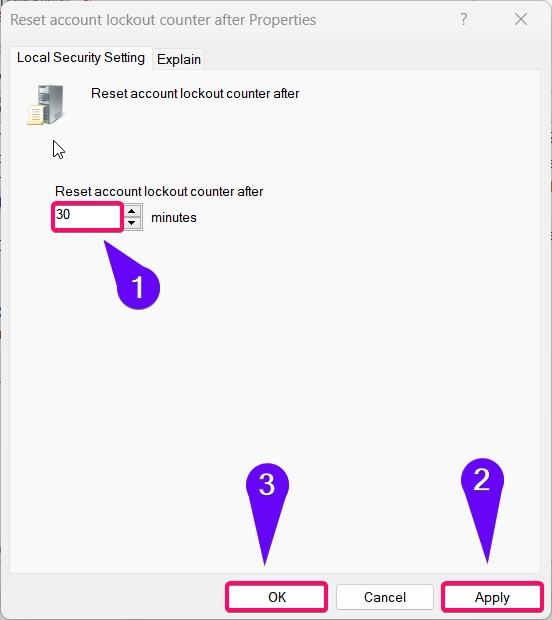
- In the settings window, set the time (in minutes) that you want the counter to wait before resetting.
- Example: Setting the time to 30 minutes will reset the counter after 30 minutes of inactivity.
- Click Apply and then OK to save the changes.
Note: This method is available only in Windows 11 Pro, Enterprise, and Education editions.
Method 2: Using Group Policy Editor
The Group Policy Editor provides another way to change the Account Lockout Counter After time in Windows 11. This tool allows administrators to enforce security policies across a network:
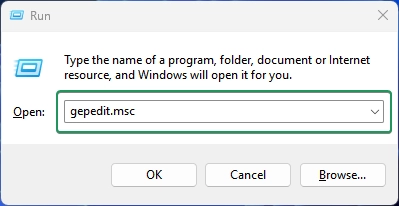
- Open the Run dialog by pressing Winkey + R, type
gpedit.msc, and press Enter to open the Group Policy Editor.
- Navigate to the following path:
Computer Configuration > Windows Settings > Security Settings > Account Policies > Account Lockout Policy
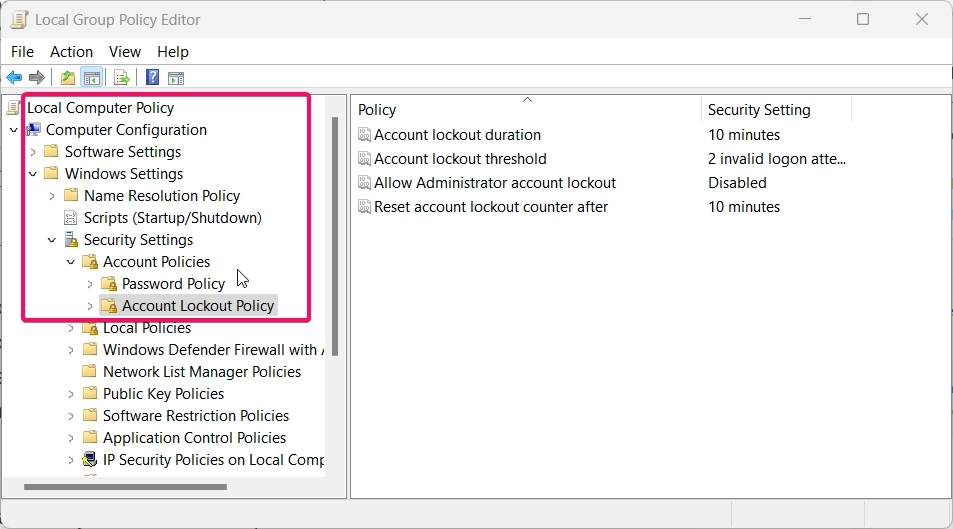
- Double-click on Account lockout counter after in the right pane.
- Set the time (in minutes) that the system will wait before resetting the counter.

- Click Apply and then OK.
Important: The Group Policy Editor is available only in the Pro, Enterprise, and Education editions of Windows 11.
Method 3: Using Command Prompt
If you prefer using the Command Prompt, this method provides a quick way to adjust the Account Lockout Counter After time setting:
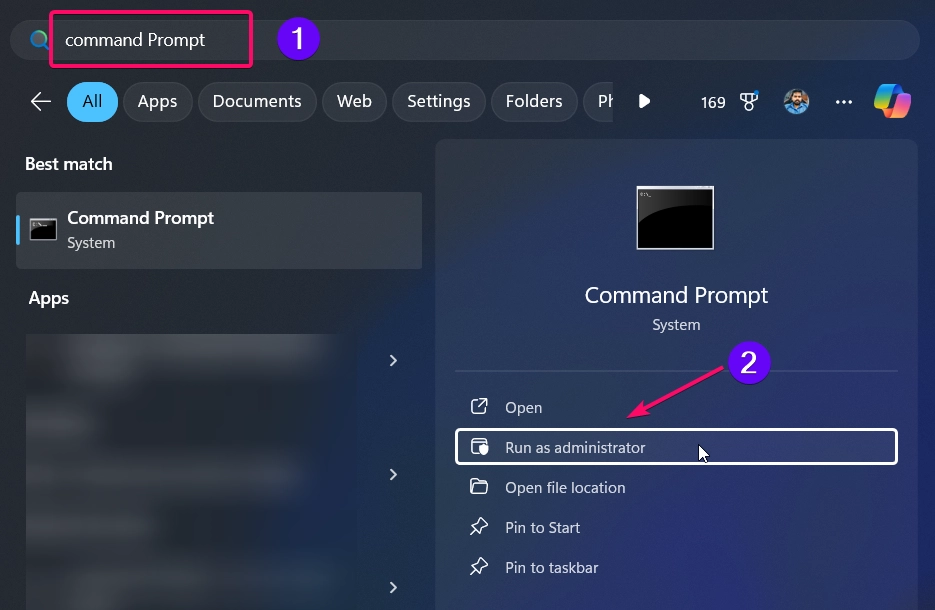
- Open Command Prompt as Administrator by typing “cmd” in the search bar, right-clicking it, and selecting Run as administrator.
- To set the account lockout counter after time, use the following command:
net accounts /lockoutthreshold:X /lockoutduration:Y
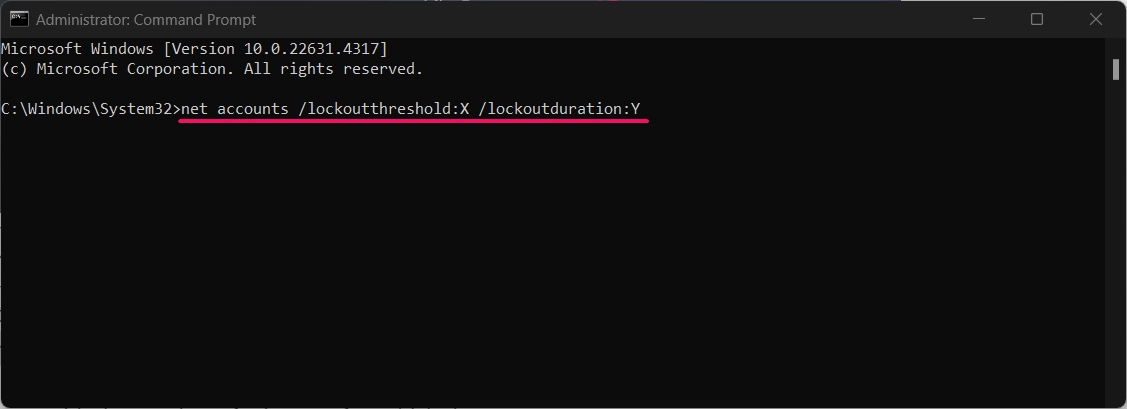
- Replace
Xwith the number of failed login attempts before the account is locked. - Replace
Ywith the number of minutes after which the counter resets.
Example: To set the lockout threshold to 3 attempts and the lockout duration to 30 minutes, you would use:
net accounts /lockoutthreshold:3 /lockoutduration:30
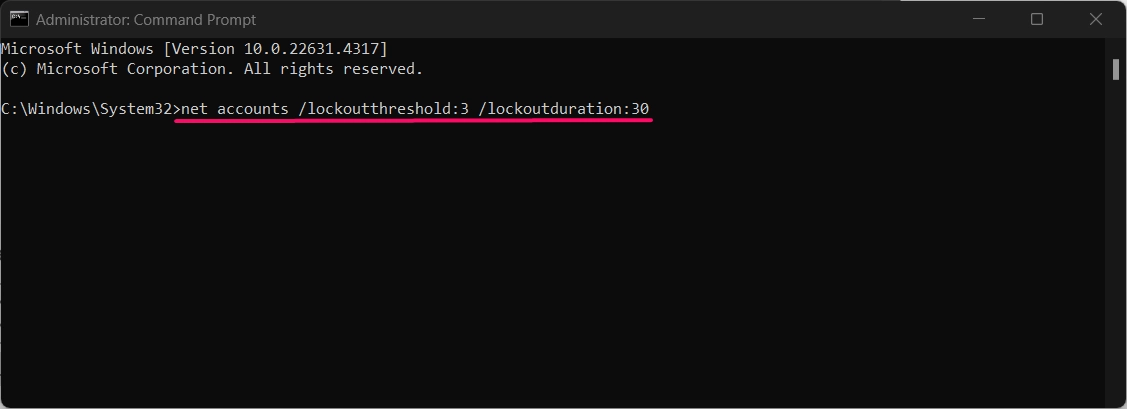
- Press Enter to apply the setting, and close Command Prompt.
Method 4: Using PowerShell
If you prefer using PowerShell, this method allows you to change the Account Lockout Counter After time quickly:
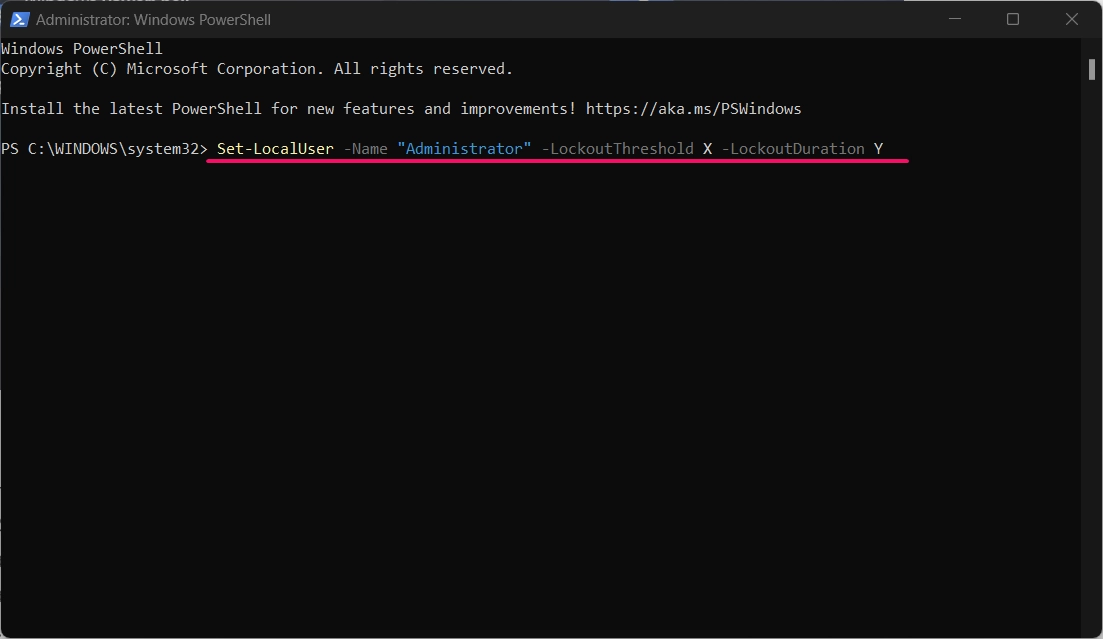
- Open PowerShell as Administrator by right-clicking the Start menu and selecting Windows Terminal (Admin).
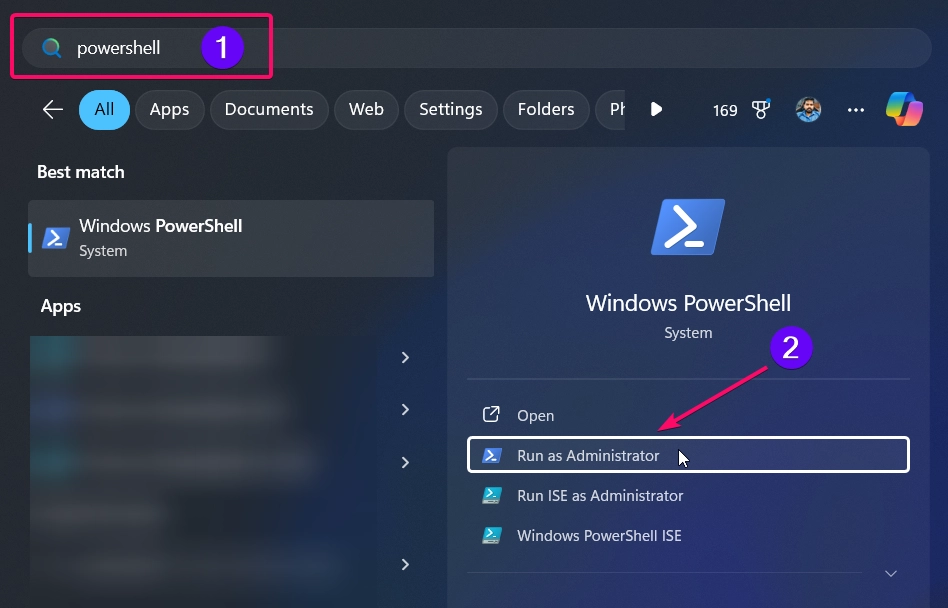
- To set the Account Lockout Counter After time, enter the following command:
Set-LocalUser -Name "Administrator" -LockoutThreshold X -LockoutDuration Y
- Replace
"Administrator"with the account name you want to modify. - Replace
Xwith the threshold number for failed login attempts, andYwith the time in minutes to reset. - Press Enter to apply the changes.
This method provides a quick and straightforward way to adjust lockout policies, especially if you prefer script-based changes.
Important Considerations
When setting the Account Lockout Counter After time, it’s essential to balance security and user accessibility. Setting a shorter duration (like 5-10 minutes) can reduce downtime in case of accidental lockouts, while a longer duration (30+ minutes) can improve security against brute-force attacks.
Conclusion
Changing the Account Lockout Counter After time in Windows 11 is a valuable security measure that allows you to balance convenience and protection against unauthorized access. By following the methods outlined above, you can customize this setting according to your security needs. Whether you use the Local Security Policy, Group Policy Editor, Command Prompt, or PowerShell, each method provides flexibility to control and adjust your system’s lockout behavior.
Frequently Asked Questions:
What happens if I set the Account Lockout Counter After time to 0?
Setting it to 0 will reset the counter immediately after a failed login attempt, allowing unlimited retries without a lockout.
What’s the best duration for Account Lockout Counter After?
A good duration is around 10-30 minutes. This balances security with user convenience by allowing retries after a short period without creating excessive lockout time.
Can I change the Account Lockout Counter After setting in Windows 11 Home?
Windows 11 Home does not support Local Security Policy or Group Policy Editor, but you can use Command Prompt or PowerShell to adjust the setting.
Will changing this setting impact network login attempts?
Yes, the setting also affects login attempts on networked computers, so consider this if the device is shared on a network.
Does the Account Lockout Counter After setting affect all user accounts?
Yes, the policy typically applies to all local user accounts on the computer unless specified otherwise in group policies.
