How to Remove Background of an Image in Paint App in Windows 11?
What are ways to remove background of the input image using the latest version of Paint App in Windows 11 pc?
The Paint app in Windows 11 has evolved significantly, offering new features that make it more than just a simple drawing tool. While it may not be as advanced as professional photo-editing software, it’s possible to remove the background from an image with a few manual steps. This guide will walk you through different methods to remove or isolate backgrounds using the Paint app, perfect for quick edits and personal projects.
Why Remove Backgrounds in Paint?
Removing backgrounds from images allows for more creative freedom in presentations, social media posts, and graphic designs. You can isolate objects, create transparent effects, and blend images without needing complex editing software. Microsoft Paint provides an easy way to achieve basic background removal on Windows 11.
Why Use Paint for Background Removal?
While Paint may not provide perfect background removal, it’s a handy tool for quick edits without the need for additional software. Paint’s simplicity makes it accessible for users who only need basic editing capabilities, particularly on a Windows 11 device.
Method 1: Using the Remove Background Option for Entire Image:
- Open the Paint app by searching for “Paint” in the Windows search bar.
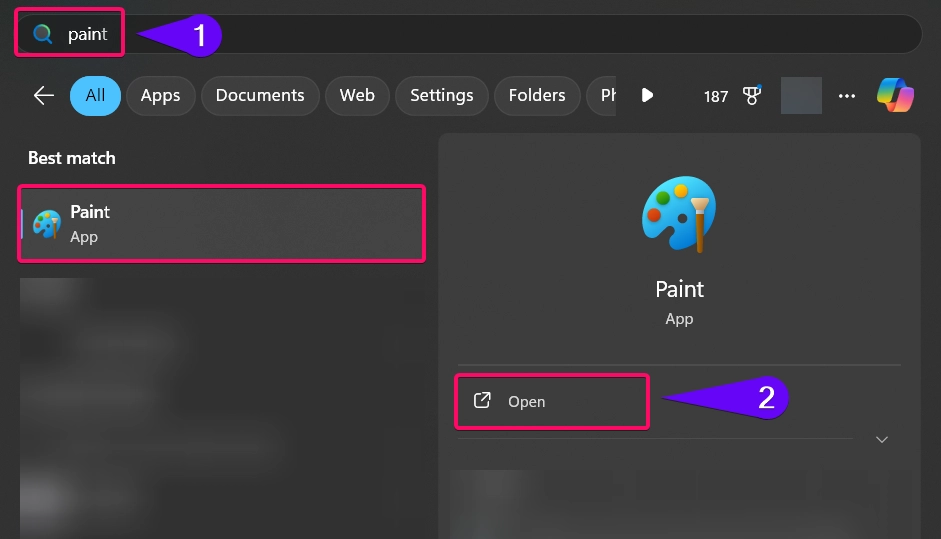
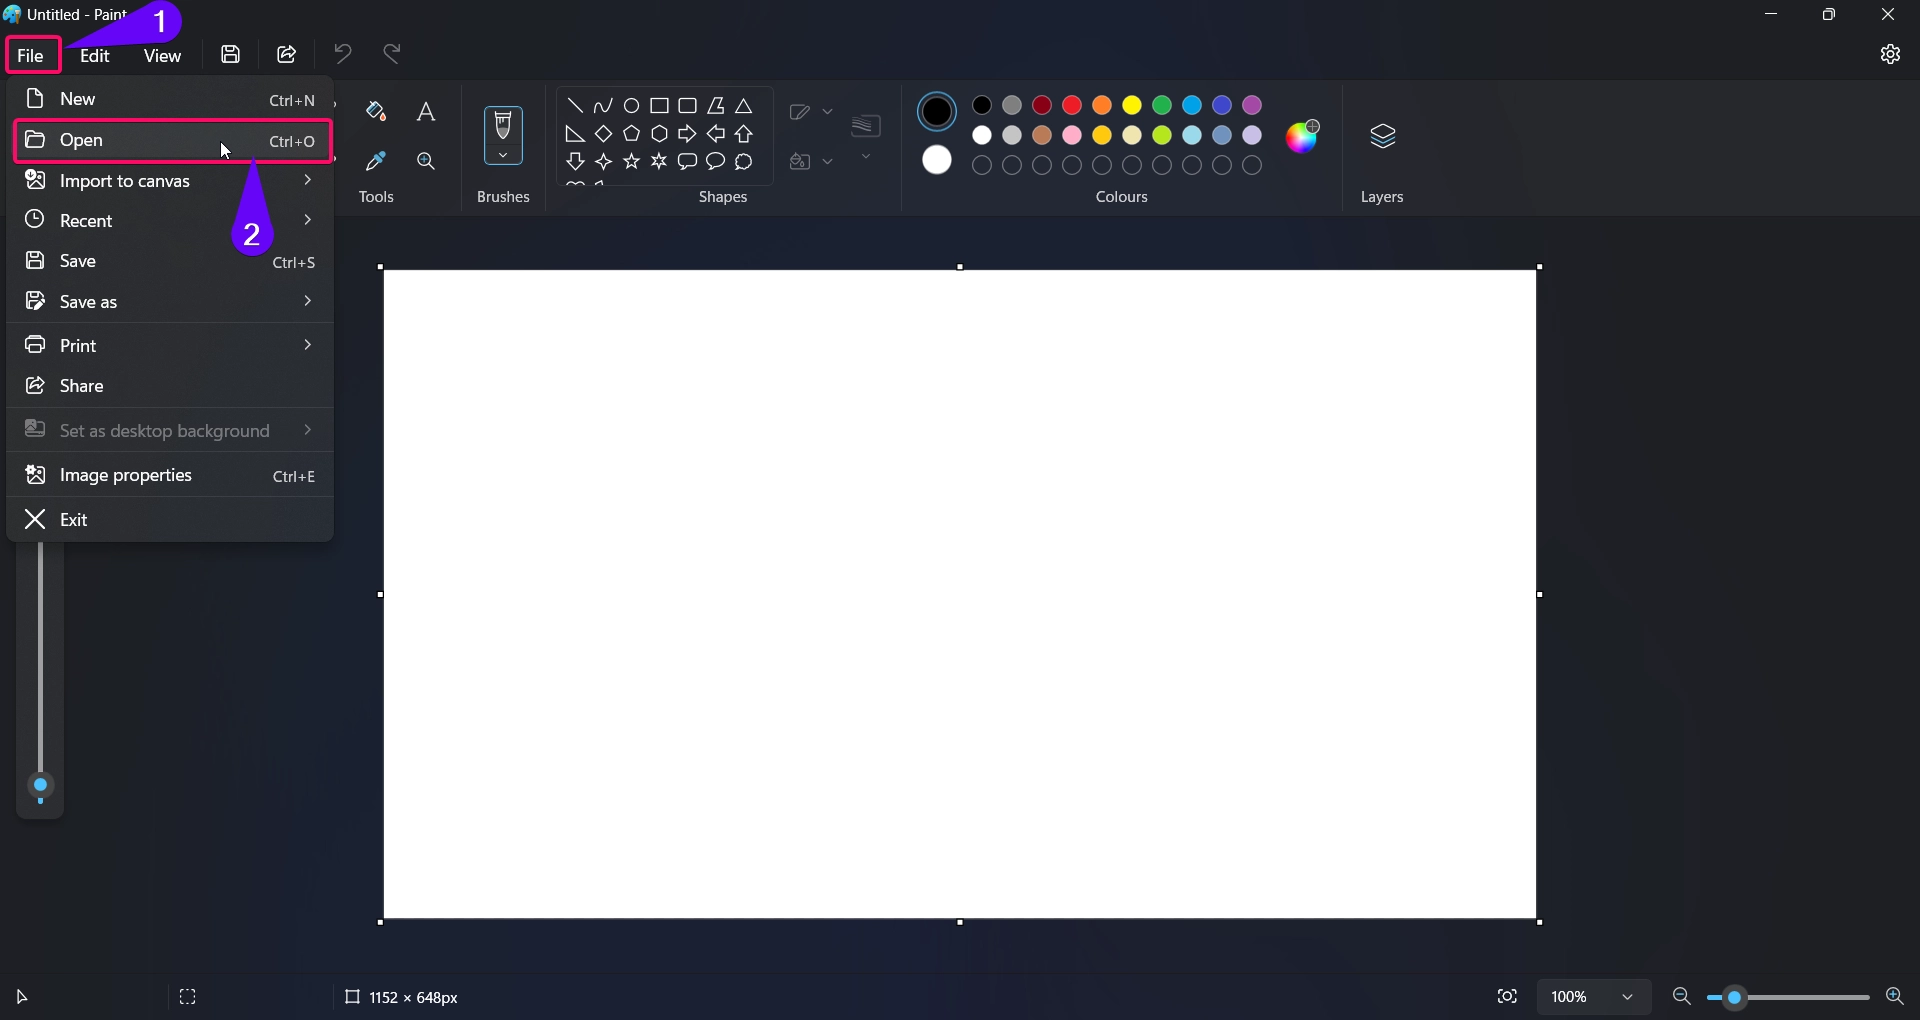
- Import your image by clicking on File > Open and selecting the desired file.
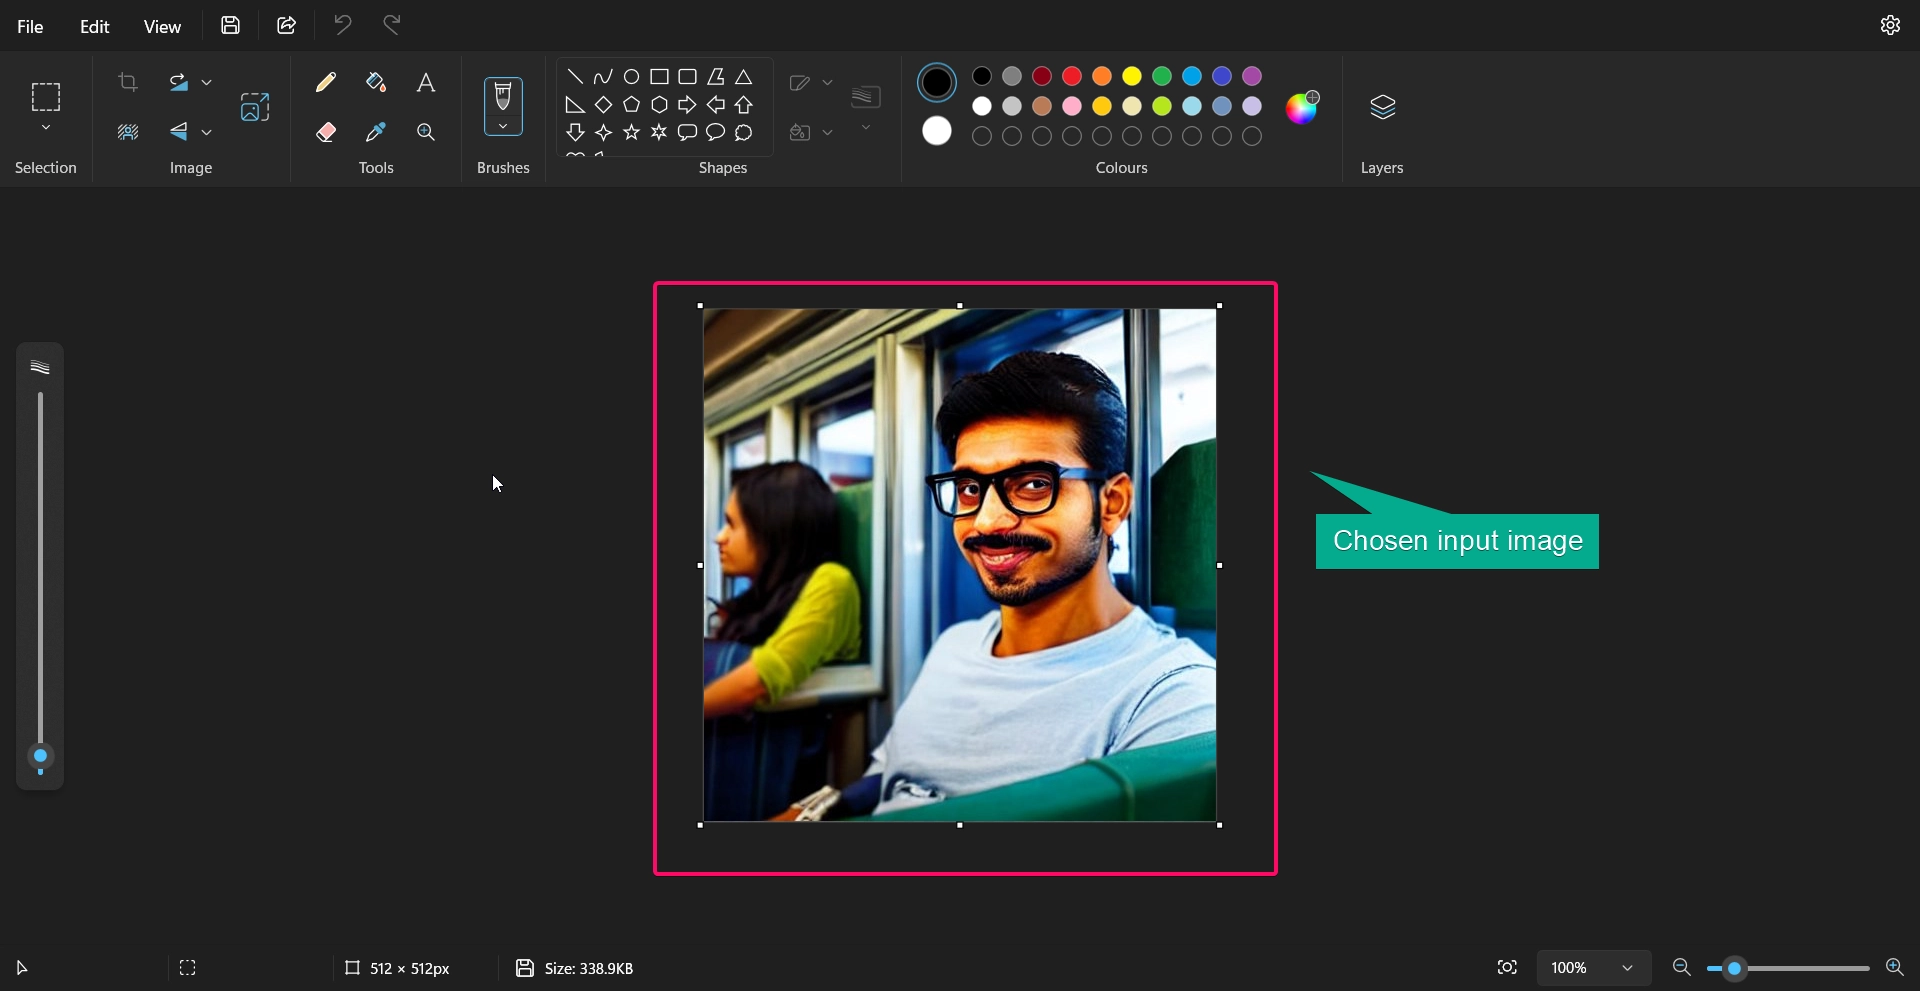
- Once you chose the image, the image will be appear in the paint app’s canvas.
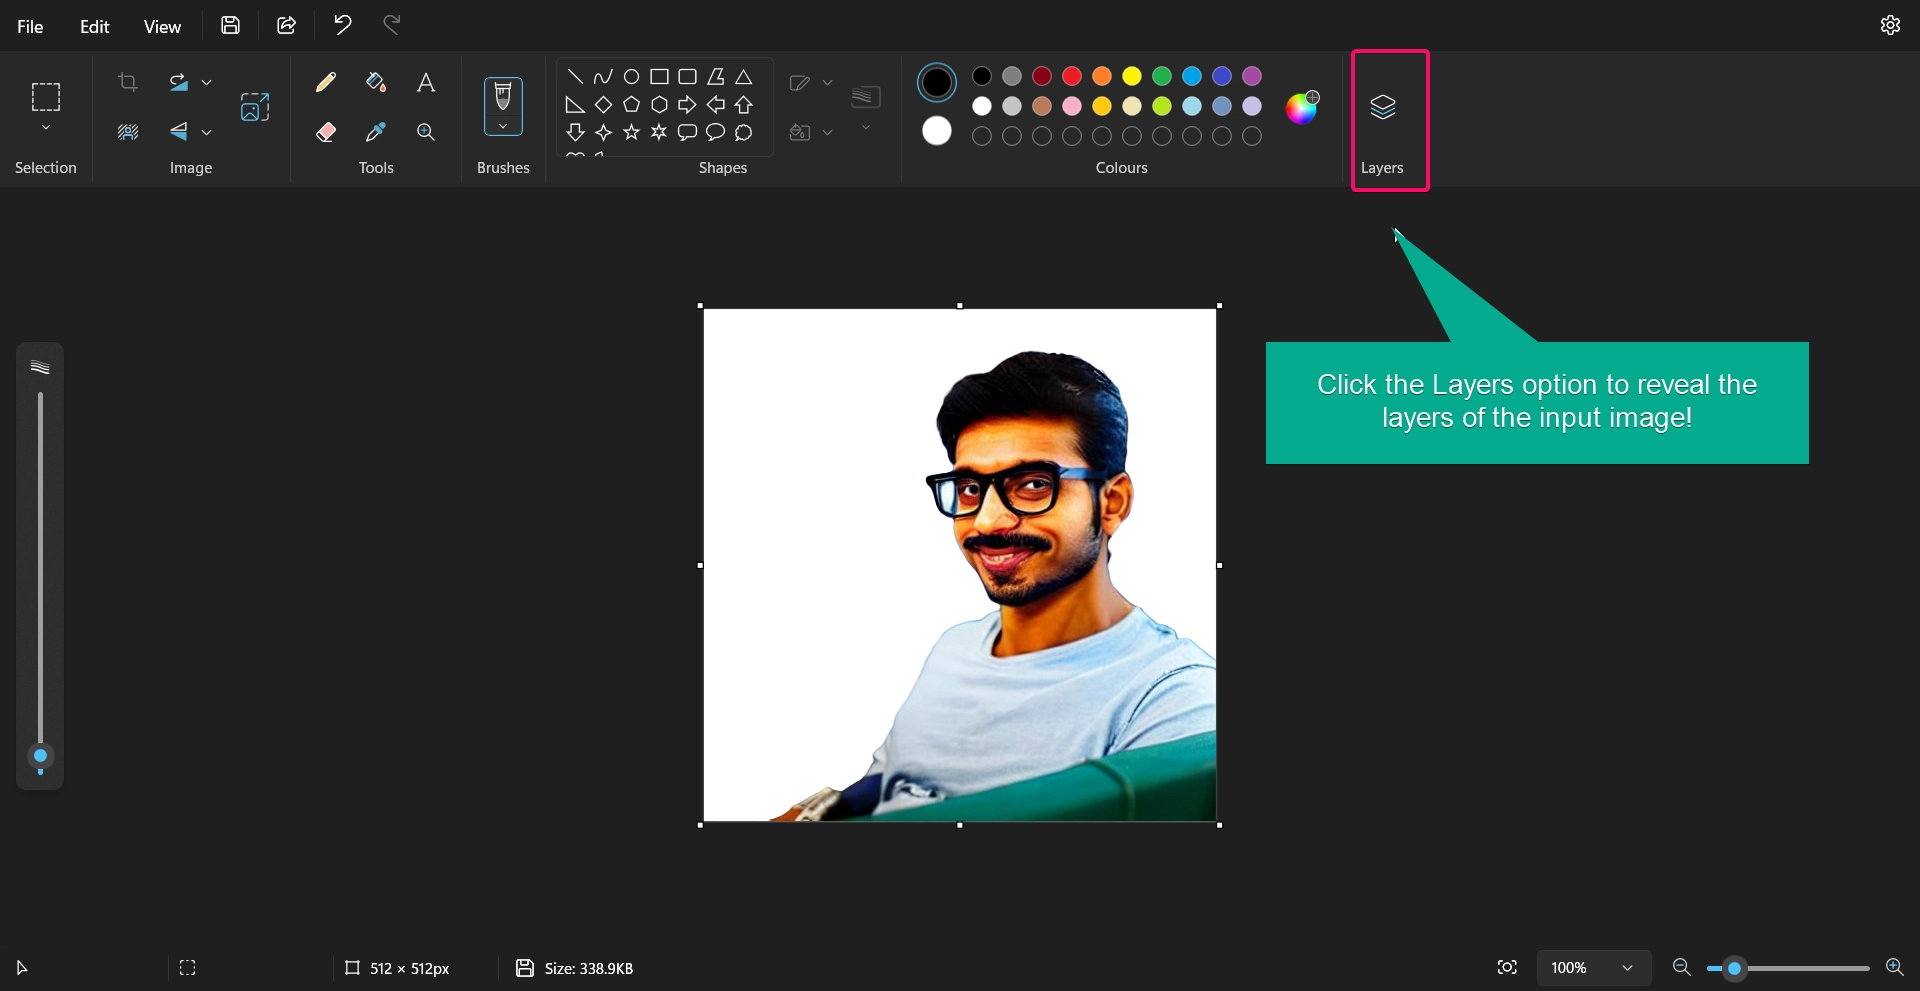
- In the image editing tool bar, near to the selection tool, you can find the option to remove background tool.
- Click the remove background tool to instantly remove the background of the input image without any delay.
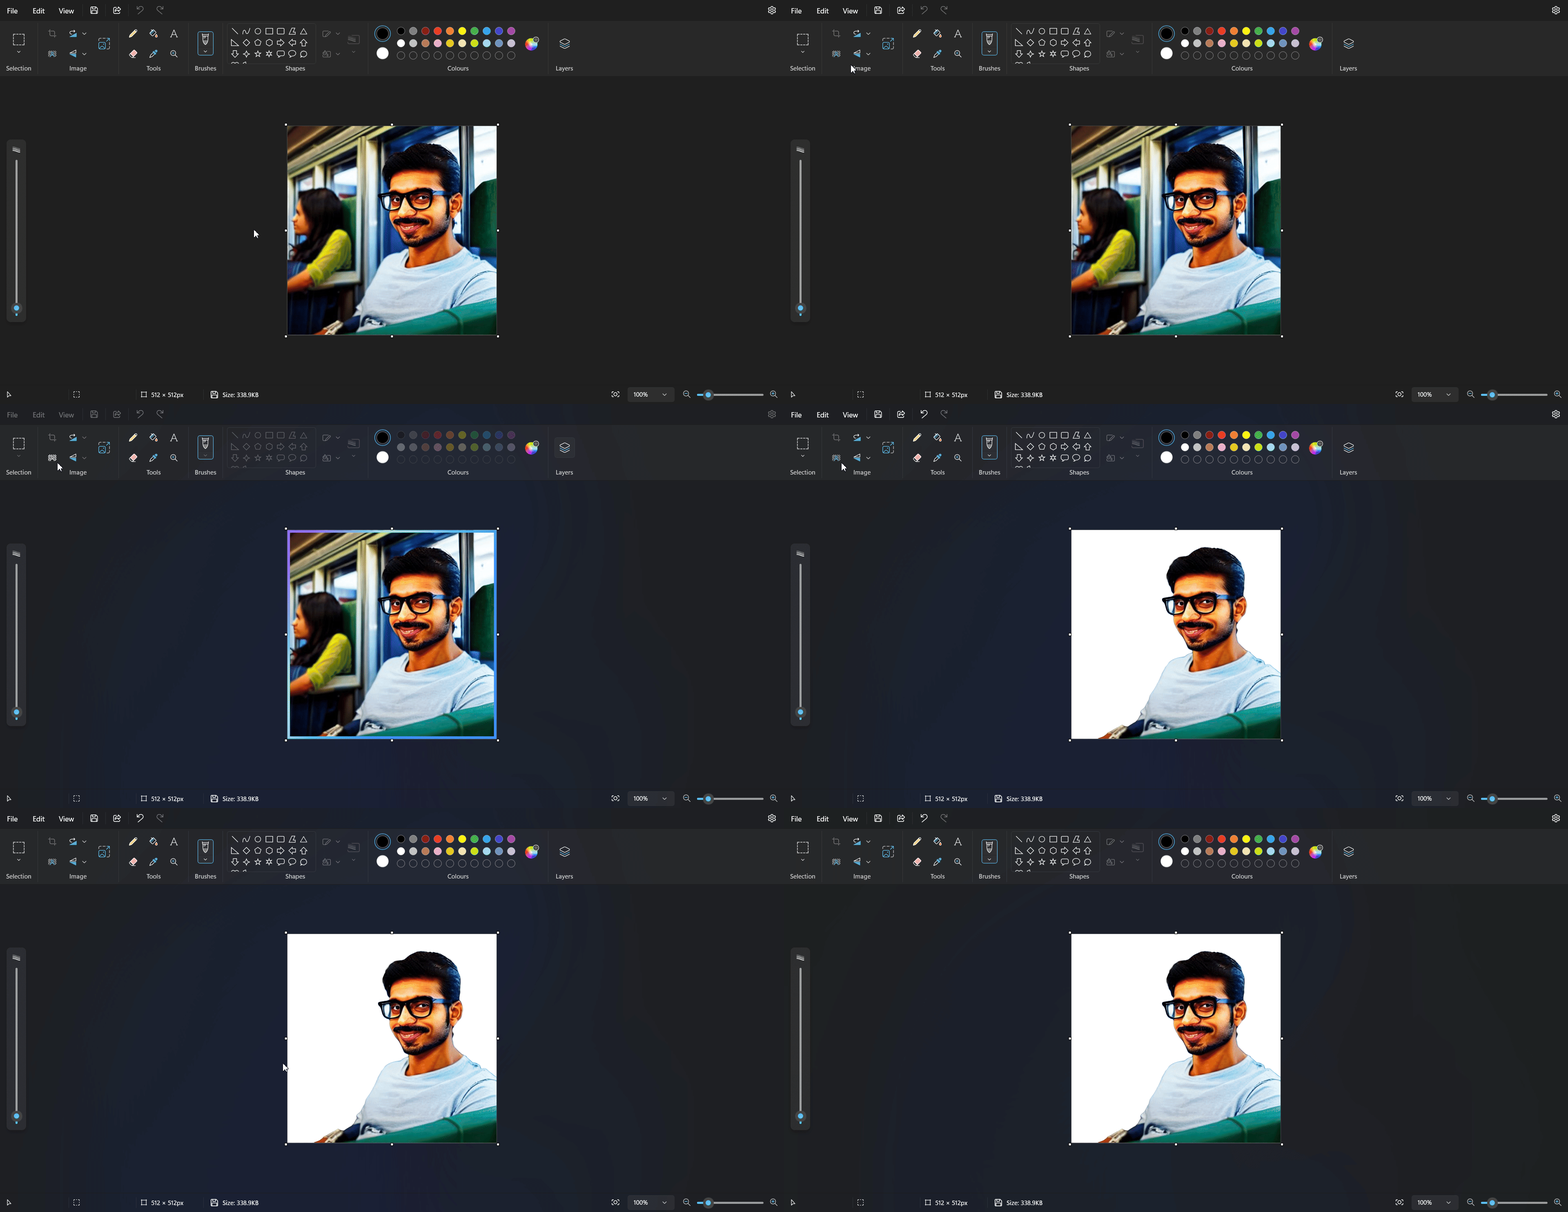
- From the above image, you can able to see the image’s background has been removed instantly.
- You can also change the background color from white to any color using the layers options.
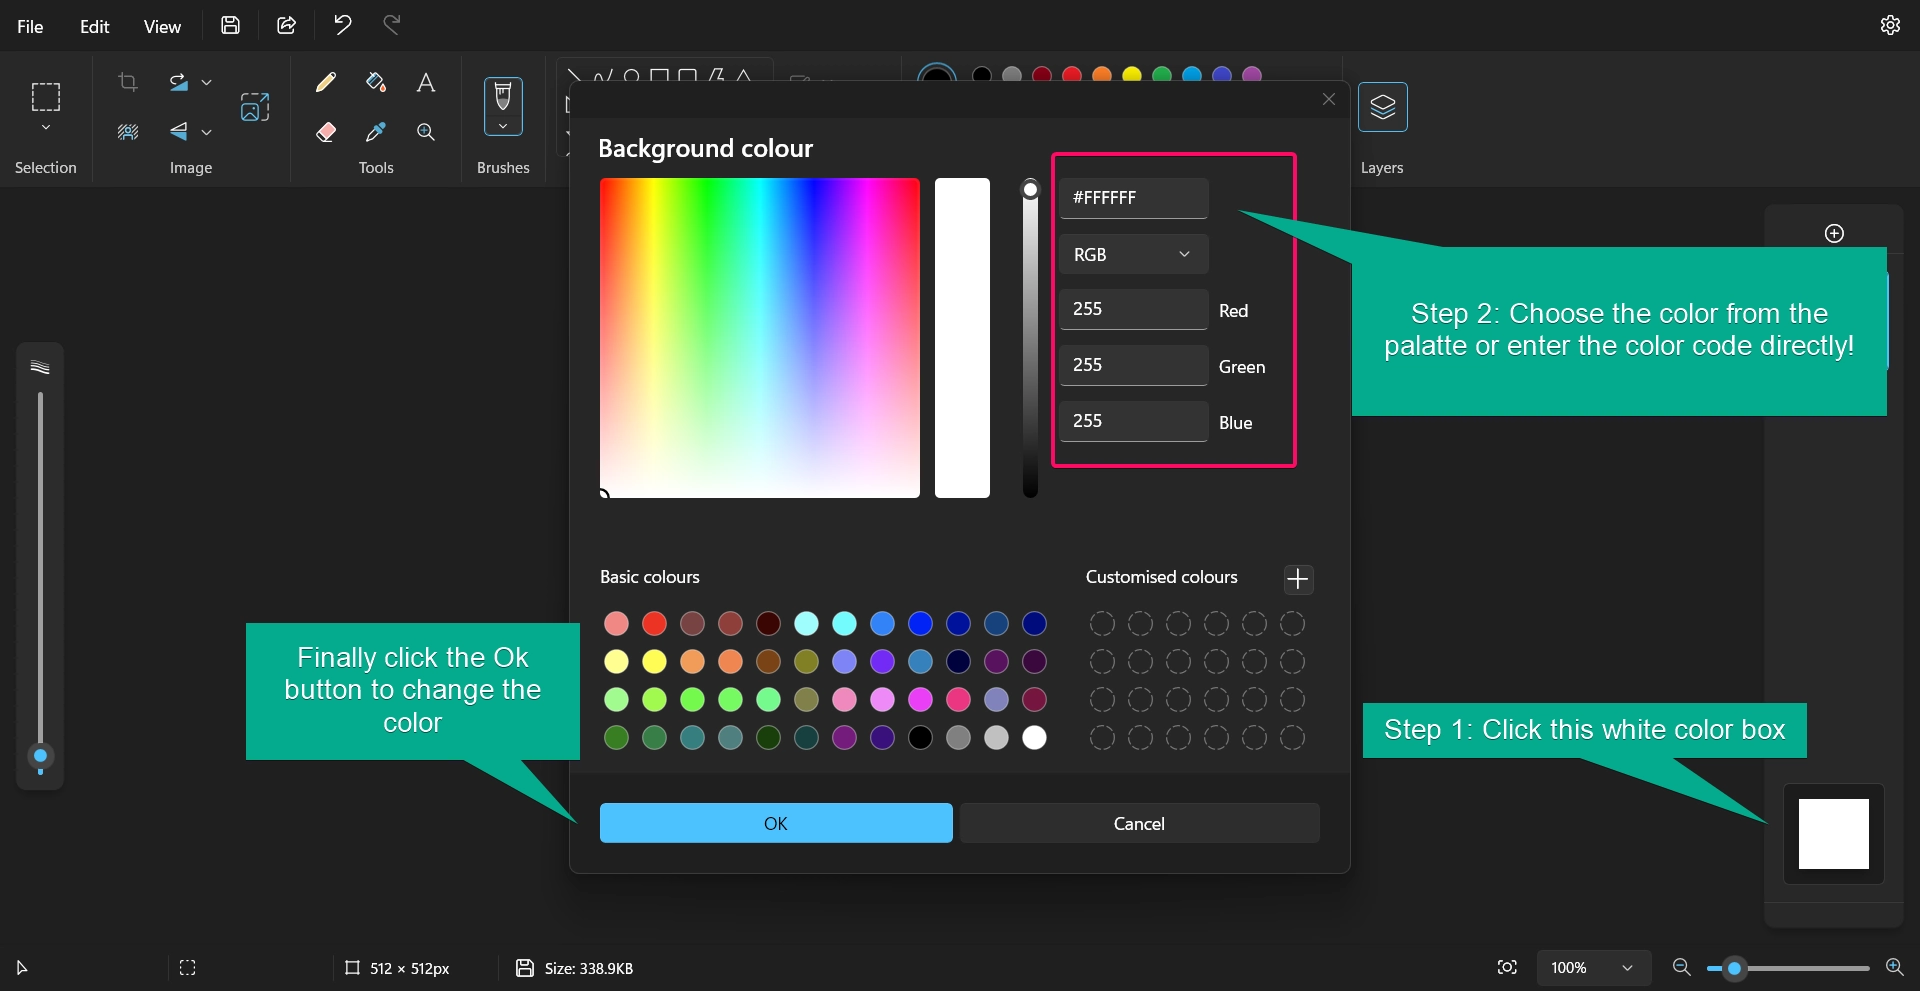
- After choosing the custom color, click the okay button to apply the color changes.
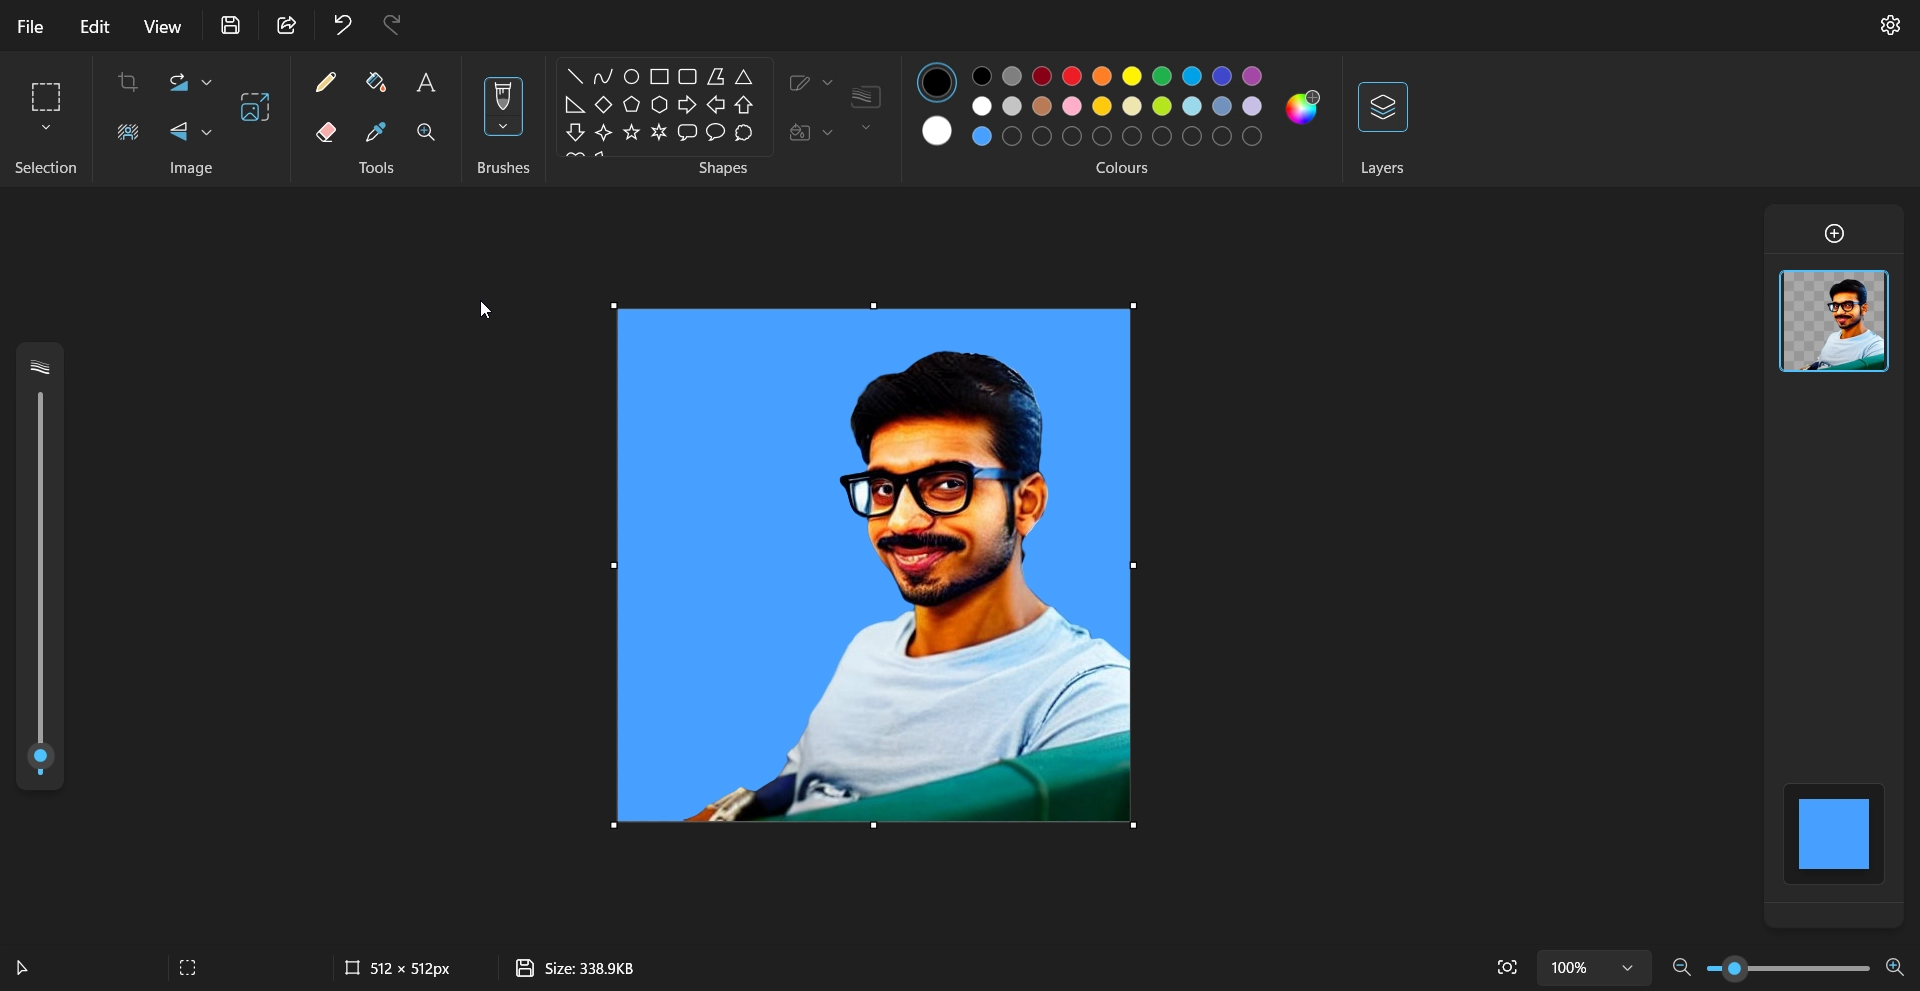
- That’s it, this is how you can remove the entire background of the input image.
Method 2: Using the Remove Background Option for Selected Area of the Image:
- Open the Paint app by searching for “Paint” in the Windows search bar.

- Import your image by clicking on File > Open and selecting the desired file.

- Once you chose the image, the image will be appear in the paint app’s canvas.

- In the image editing tool bar, you can find the image selection tool.
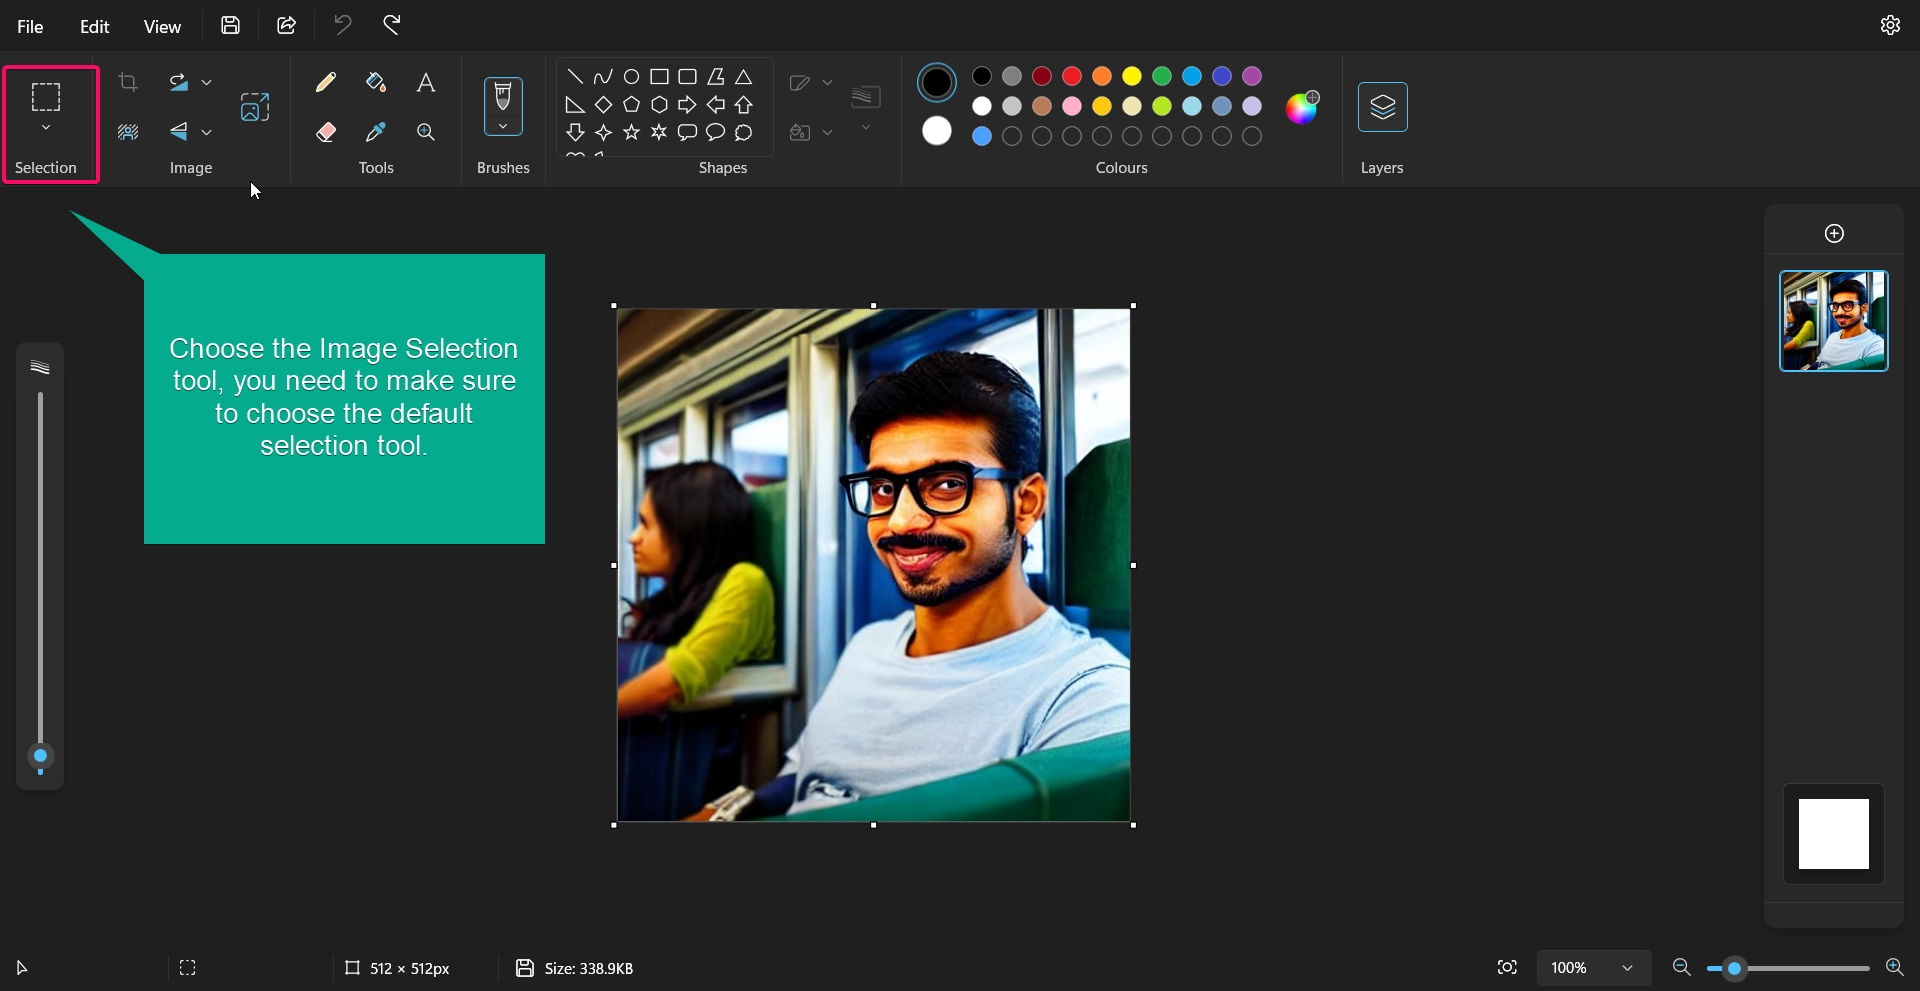
- Make sure to choose the default image selection tool.
- Choose the selection using the selector tool and once you done, click the remove background tool to remove the background of the selected area of the input image as shown in the below image.
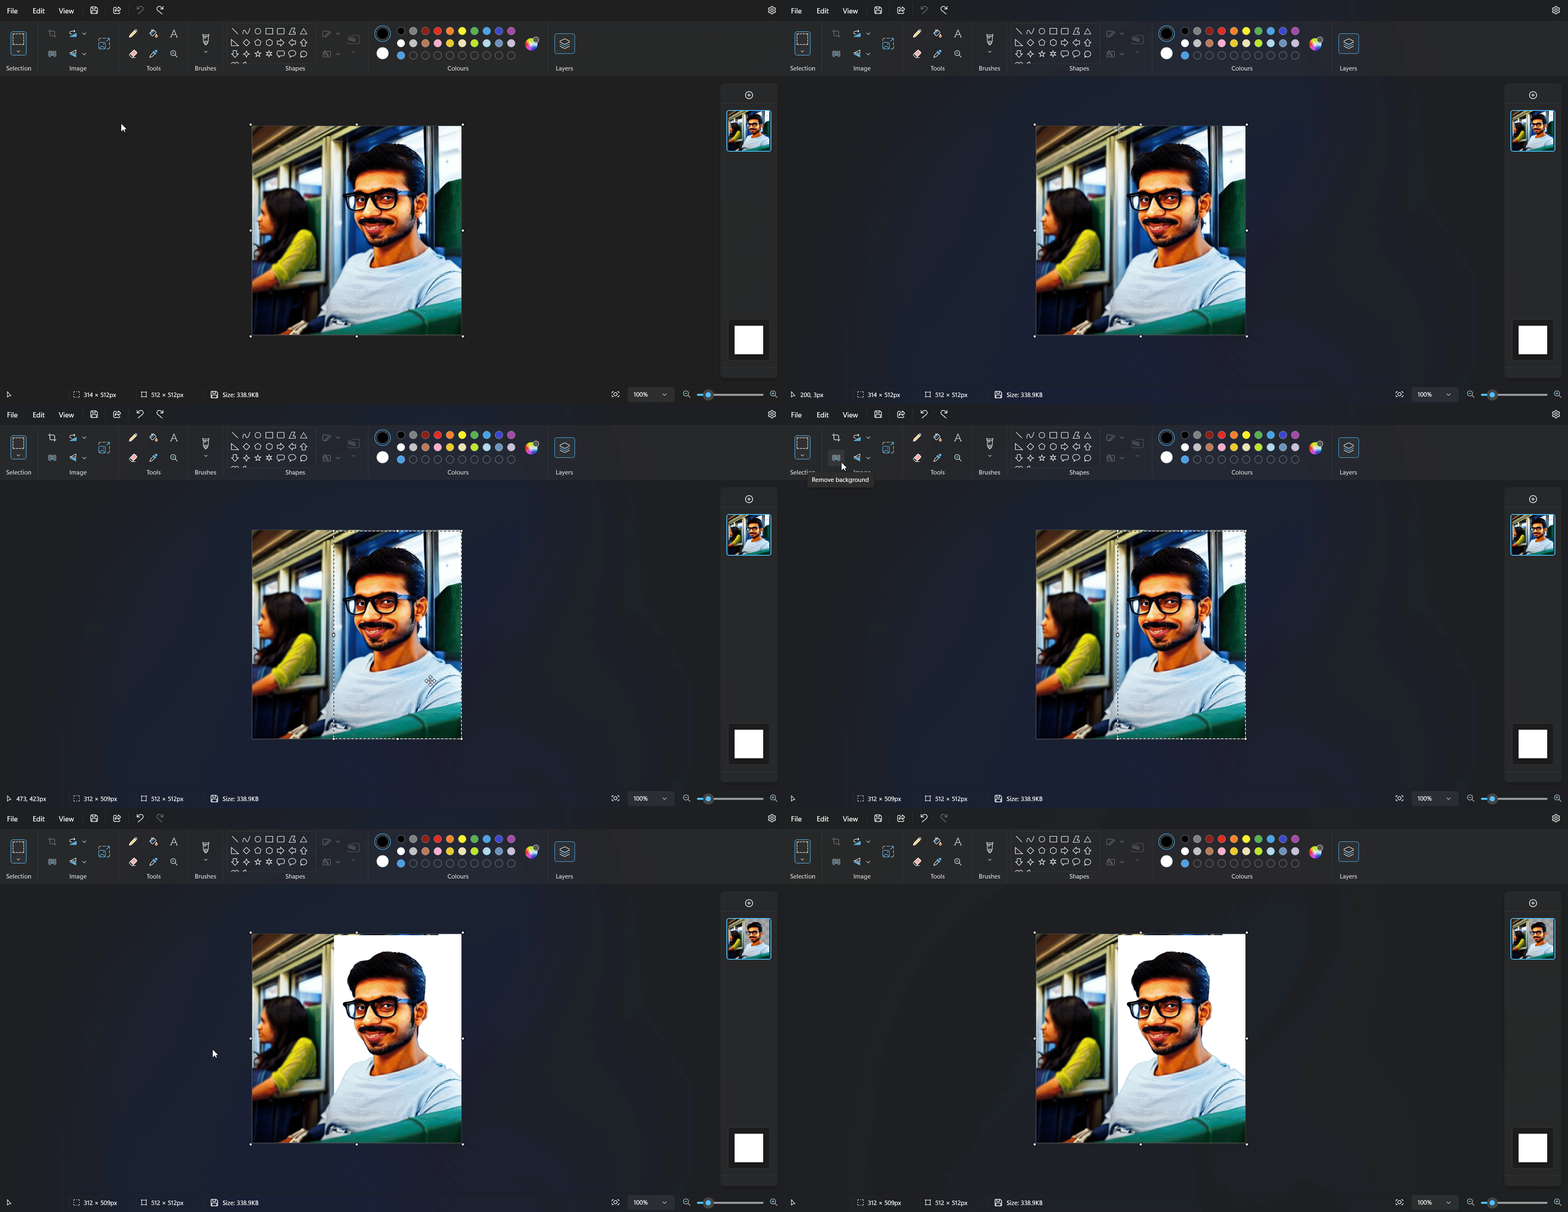
- In this way, you can remove the background of the selected area of the input image.
Method 3: Using Third-Party Tools for More Advanced Background Removal
If Paint’s options are too limited, there are third-party tools that can make background removal much easier:
GIMP and Canva are popular tools that offer more advanced background removal features. Many online tools, such as Remove.bg, automatically remove backgrounds, providing quick and easy solutions if you need more accuracy.
Conclusion:
Removing backgrounds in the Paint app in Windows 11 is achievable with a few easy methods. From using the Selection Tool and Eraser Tool in Paint to the Magic Select feature in Paint 3D, this guide provides multiple options to suit your background removal needs. If your project requires higher precision, consider third-party tools for a more polished result.
Interesting Questions Asked by Users:
Can I make the background transparent in Paint?
Unfortunately, the classic Paint app does not support transparency, but Paint 3D allows you to save images with transparent backgrounds.
Can I combine Paint and other software for better results?
Yes, you can start by removing the main parts of the background in Paint, then use a more advanced tool to refine the edges.
Which method works best for complex backgrounds?
For complex backgrounds, use the Magic Select tool in Paint 3D or consider using a third-party tool like Remove.bg for automatic background removal.
Is there an automatic background removal tool in Paint?
No, the classic Paint app doesn’t offer automatic background removal. You’ll need to use Paint 3D or a third-party app for that.
Why doesn’t my Paint app have Magic Select?
Magic Select is a feature in Paint 3D, not the classic Paint app. Install Paint 3D from the Microsoft Store if you don’t have it.