How to Enable/Disable Administrator Protection for Admin Approval Mode in Windows 11?
Different Methods to Enable/Disable Administrator Protection for Admin Approval Mode in Windows 11 PC!
Windows 11 includes several security features, one of which is Administrator Protection for Admin Approval Mode. This feature enhances system security by requiring administrator approval for tasks that need elevated permissions, even when an administrator account is in use. This tutorial explains how to enable or disable Administrator Protection for Admin Approval Mode using multiple methods, ensuring you can customize your device security as needed.
Recommended: Enable/disable Uac For Built-in Administrator In Windows 11
Admin Approval Mode is a feature in Windows 11 that prompts administrators to approve actions requiring elevated permissions. With Administrator Protection, even administrators using their accounts are required to confirm sensitive actions, preventing unauthorized or accidental changes. Enabling or disabling this feature can balance security and convenience based on your needs.
Administrator Protection enabled (Windows Security) and disabled (UAC): Example Image Preview:
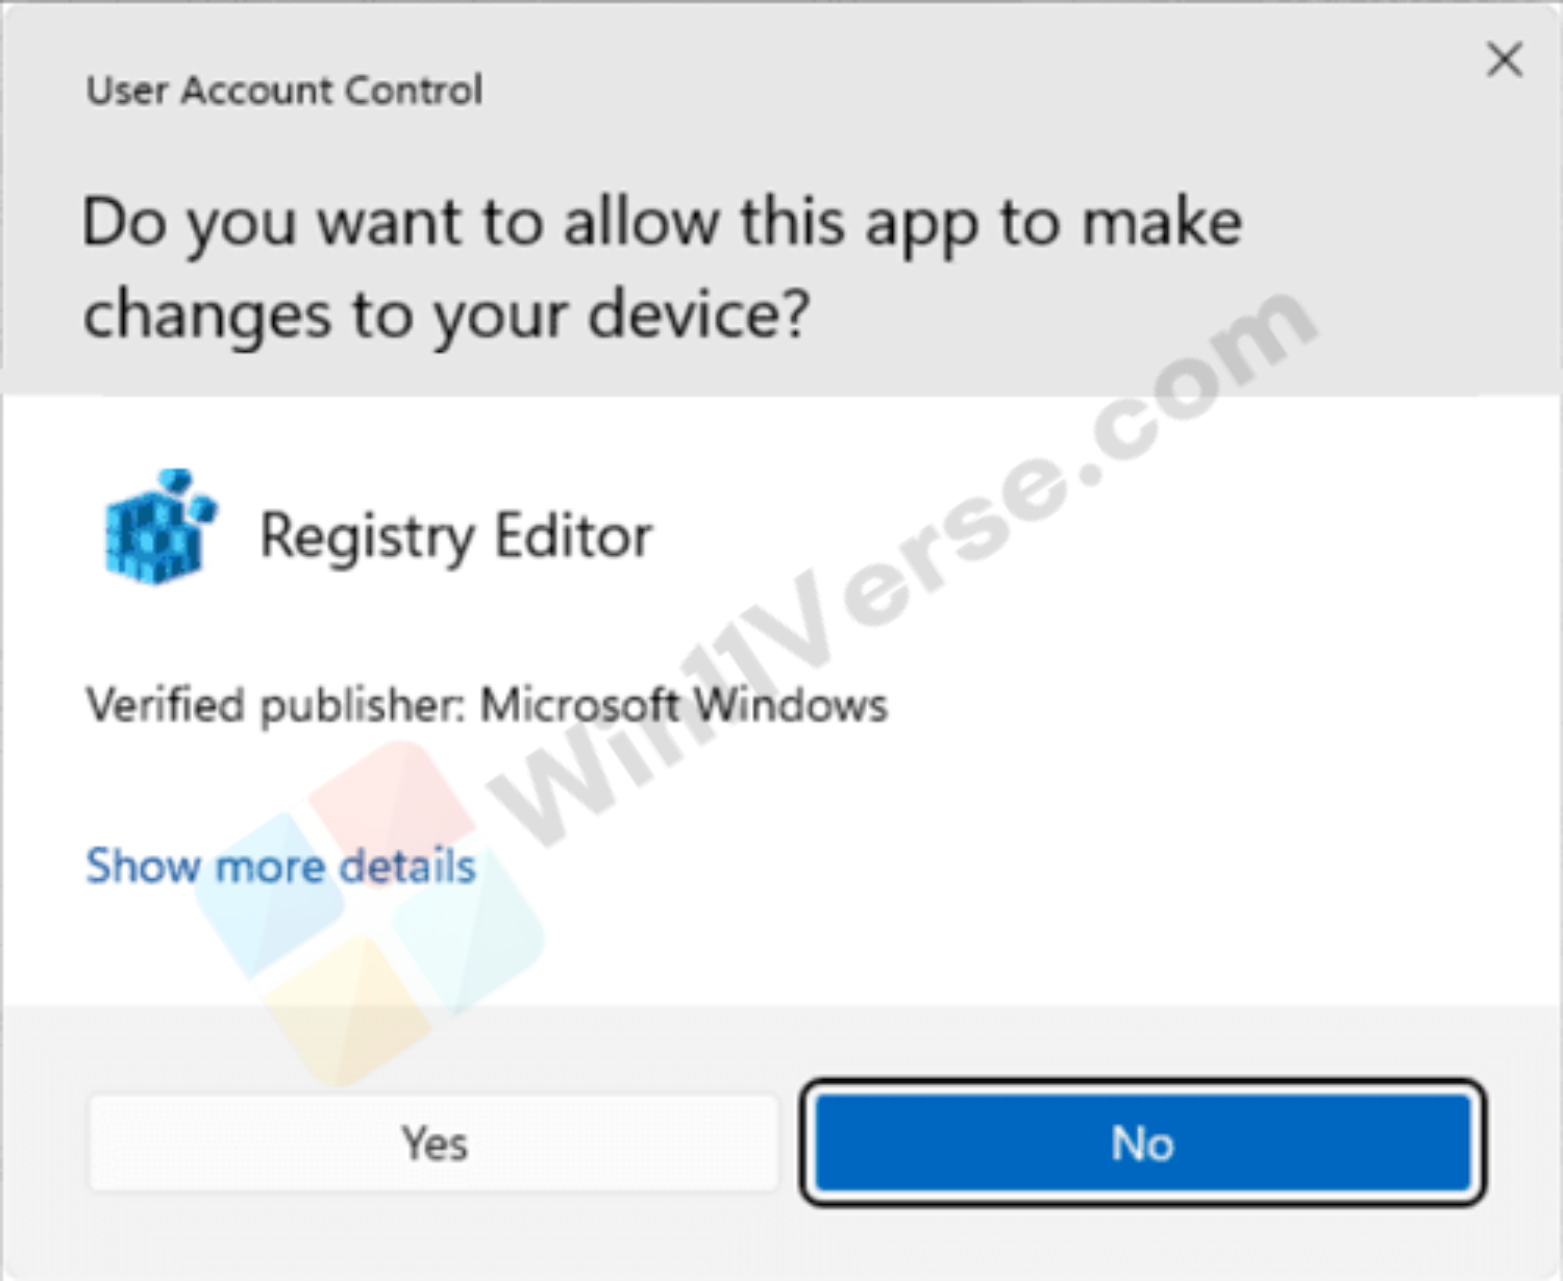
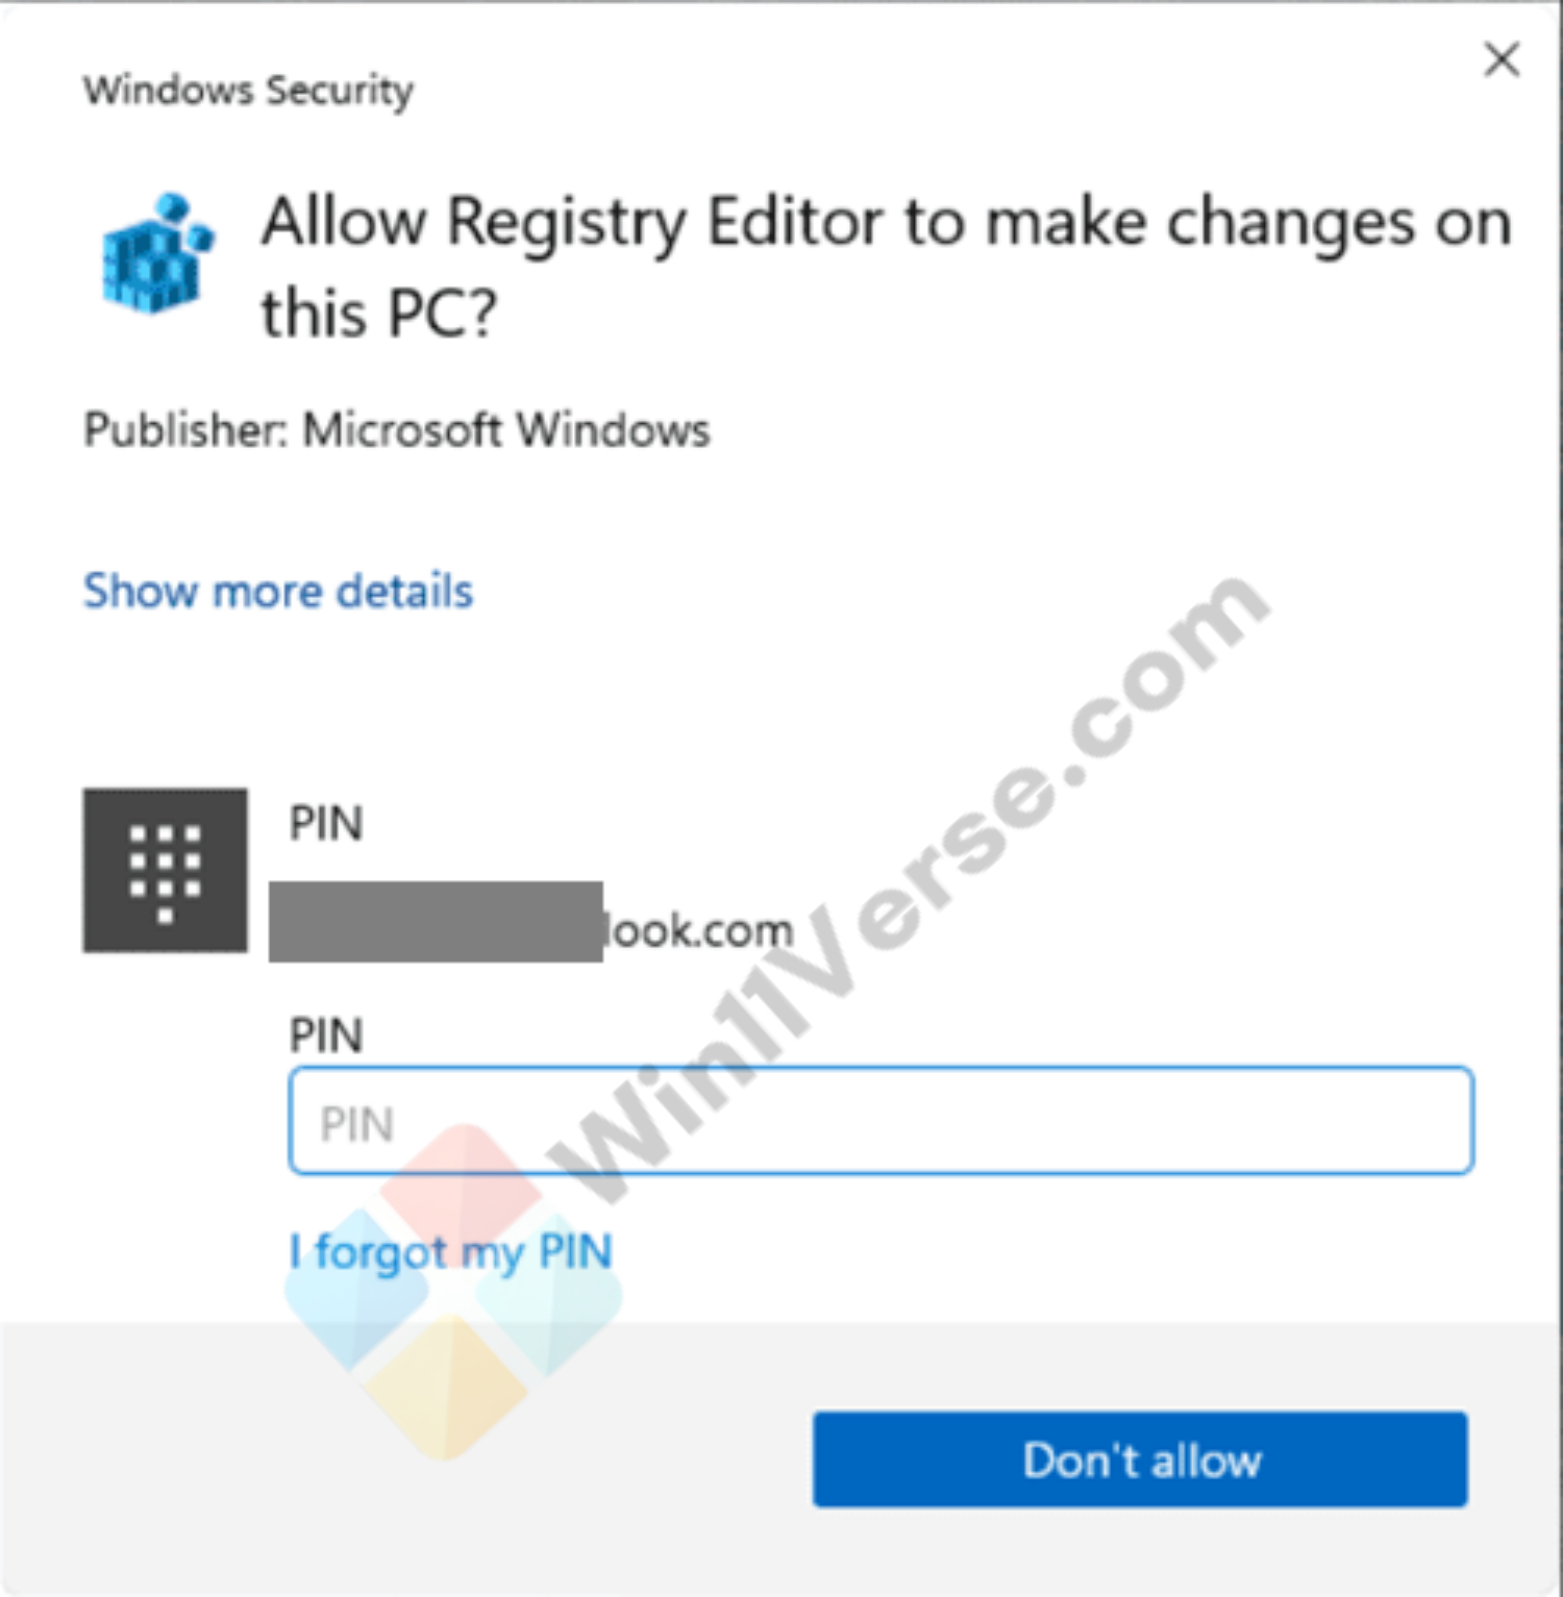
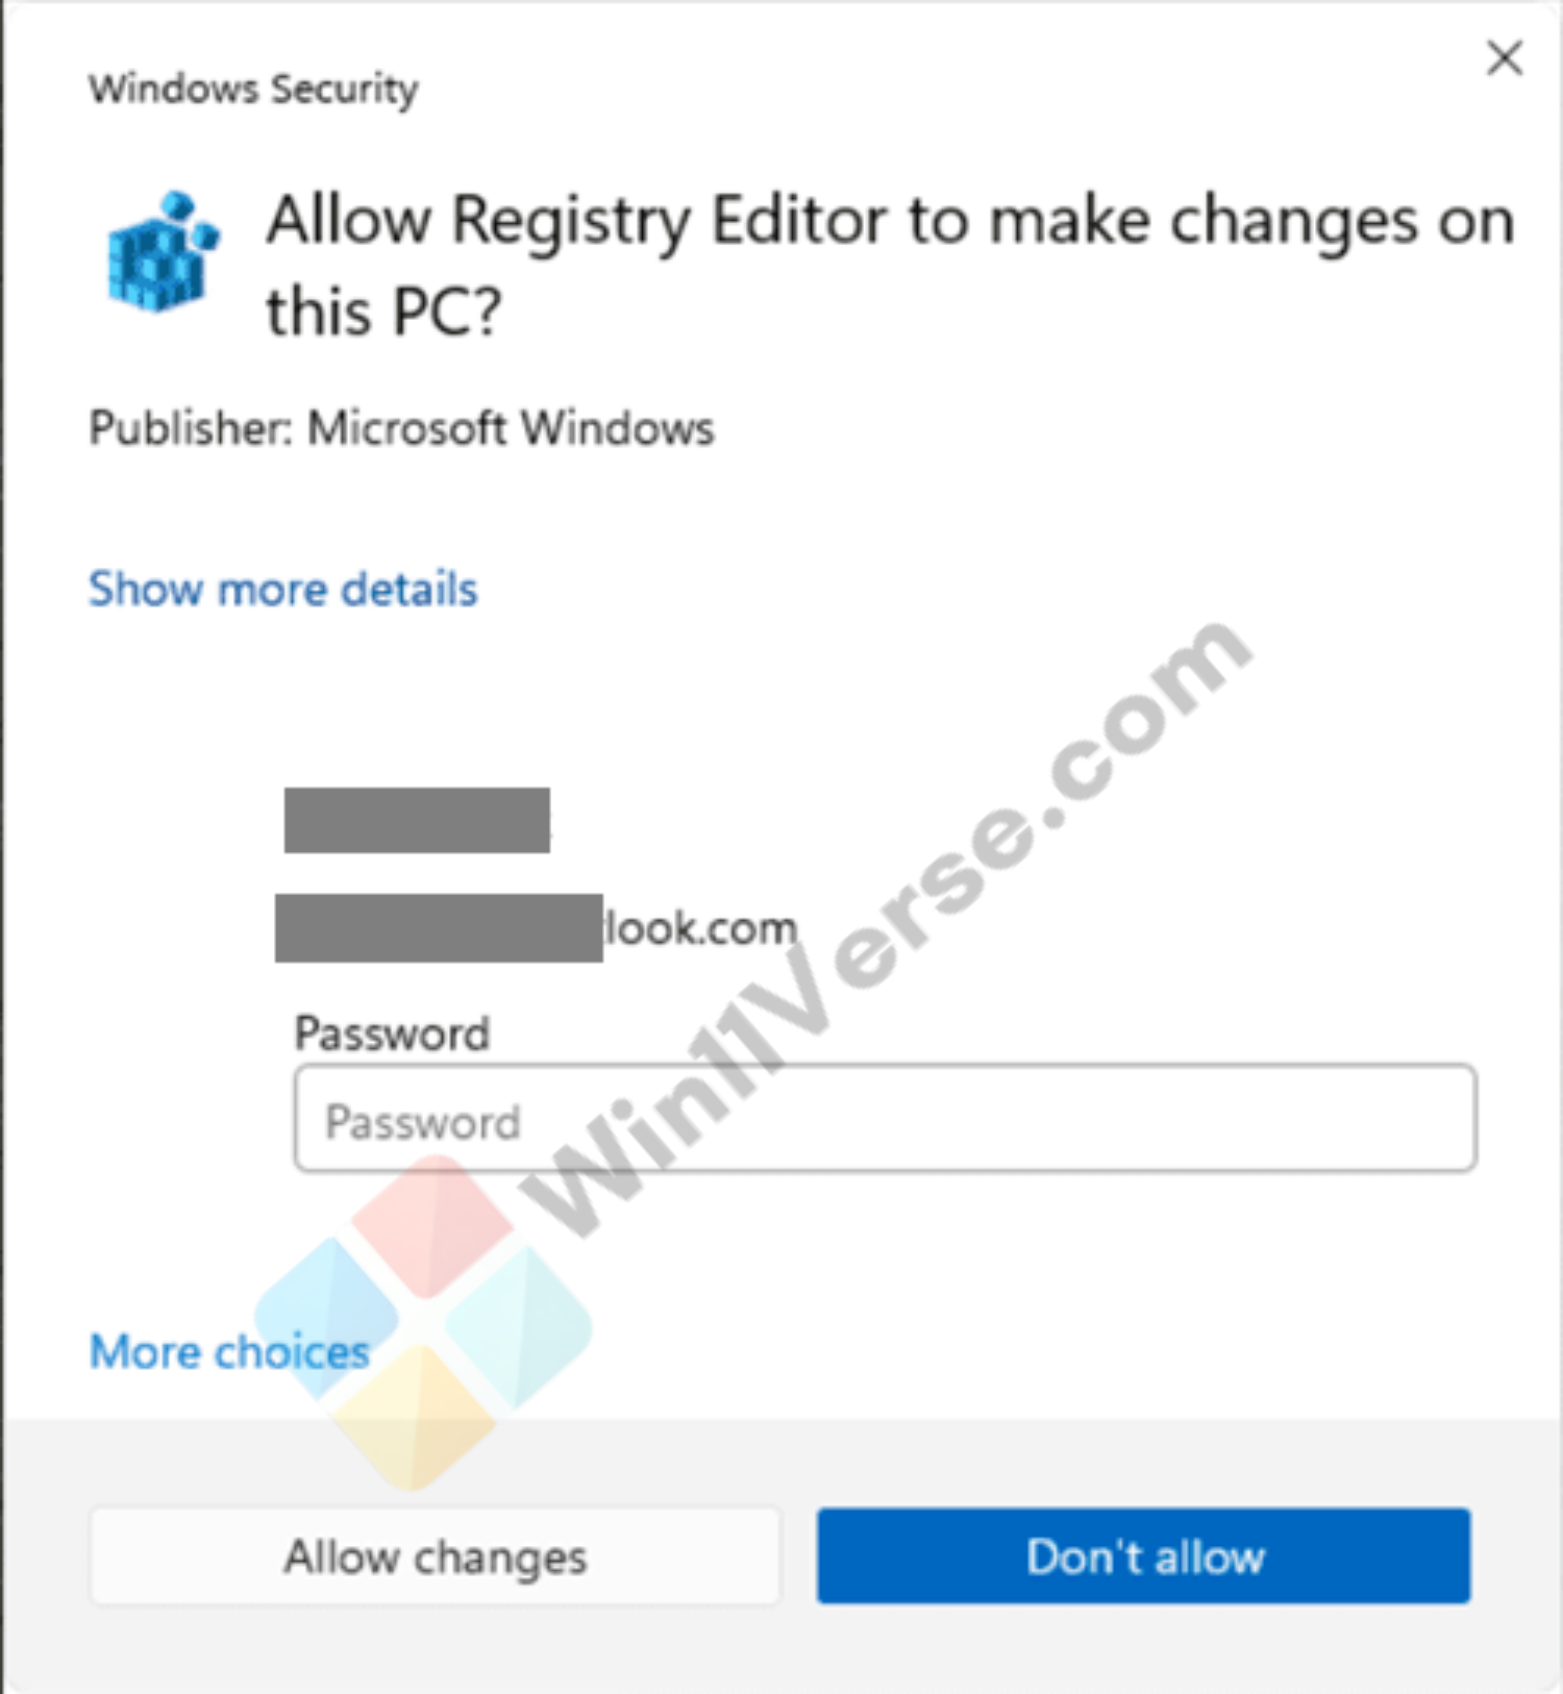
Here are the different methods to enable or disable Administrator Protection for Admin Approval Mode in Windows 11.
Method 1: Using Local Security Policy
The Local Security Policy tool provides an easy way to enable or disable Administrator Protection:
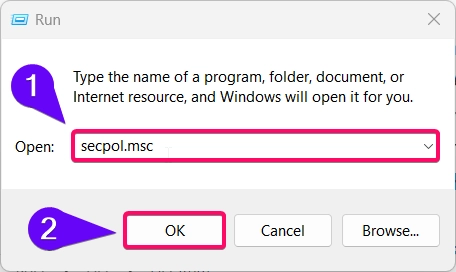
- Open the Run dialog by pressing Winkey + R, type
secpol.msc, and press Enter.
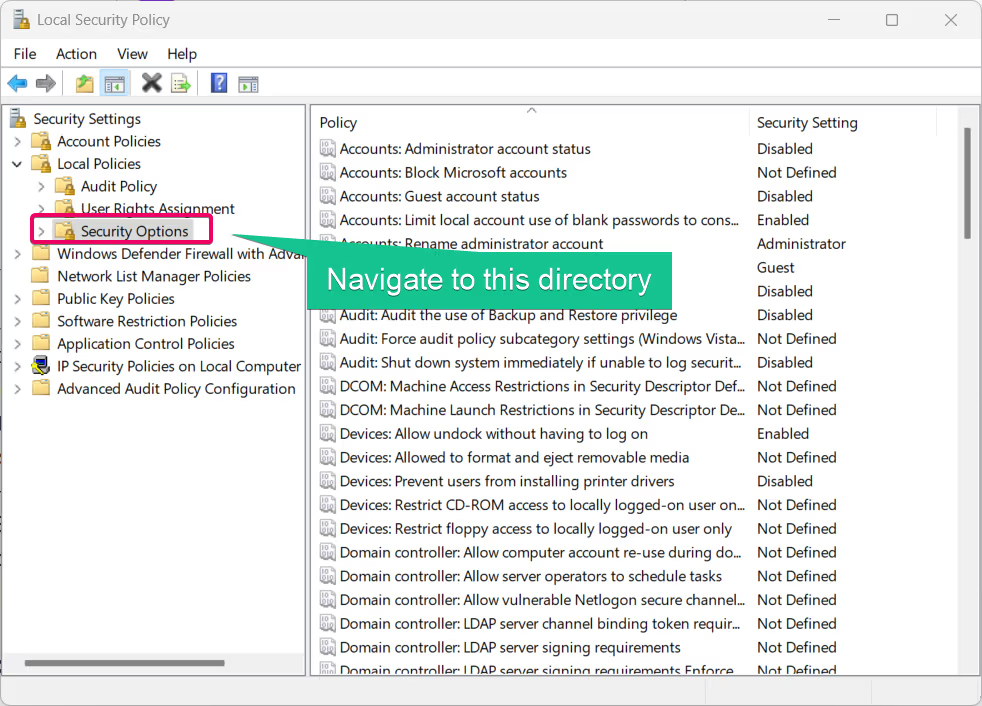
- Navigate to Local Policies > Security Options in the left pane.
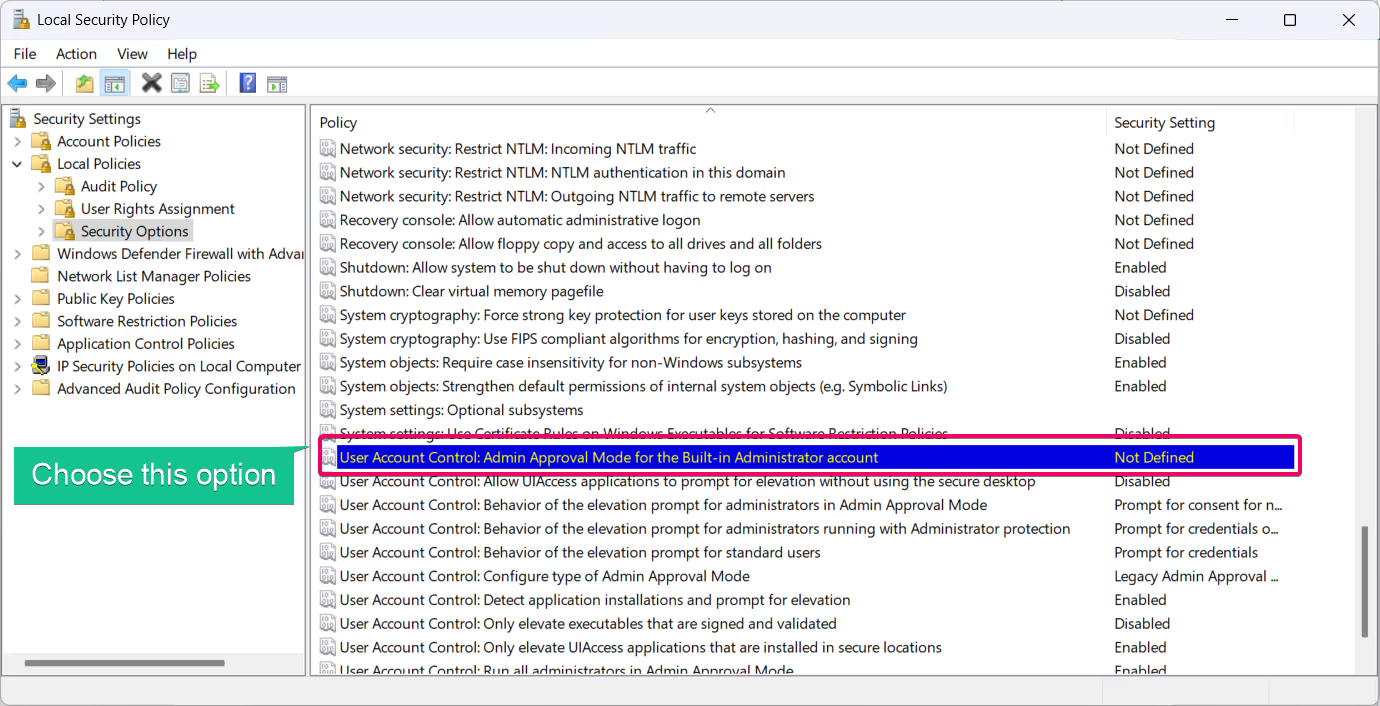
- Locate the policy User Account Control: Admin Approval Mode for the Built-in Administrator account in the right pane.
- Double-click the policy to open its properties.
- Select Enabled to turn on Administrator Protection or Disabled to turn it off.
- Click Apply and then OK to save your changes.
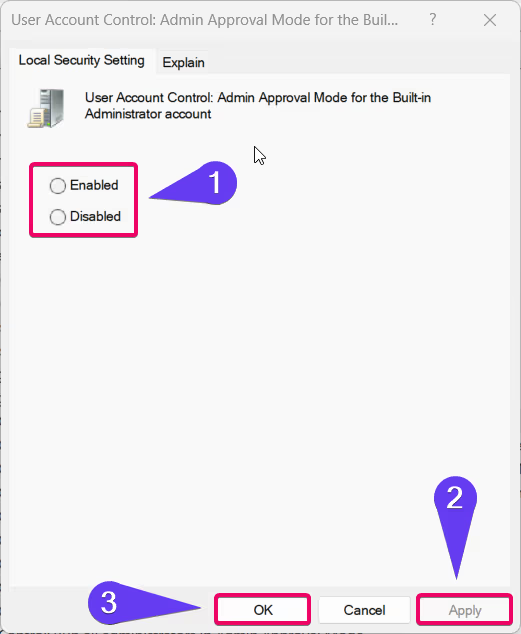
- Restart your computer for the changes to take effect.
Note: The Local Security Policy tool is only available in Windows 11 Pro, Enterprise, and Education editions.
Read This: Enable/disable Built-in Administrator Account Lockout In Windows 11
Method 2: Using Group Policy Editor
The Group Policy Editor is another powerful tool for managing Administrator Protection settings:
- Press Winkey + R, type
gpedit.msc, and press Enter to open the Group Policy Editor.

- Navigate to the following path:
Computer Configuration > Windows Settings > Security Settings > Local Policies > Security Options
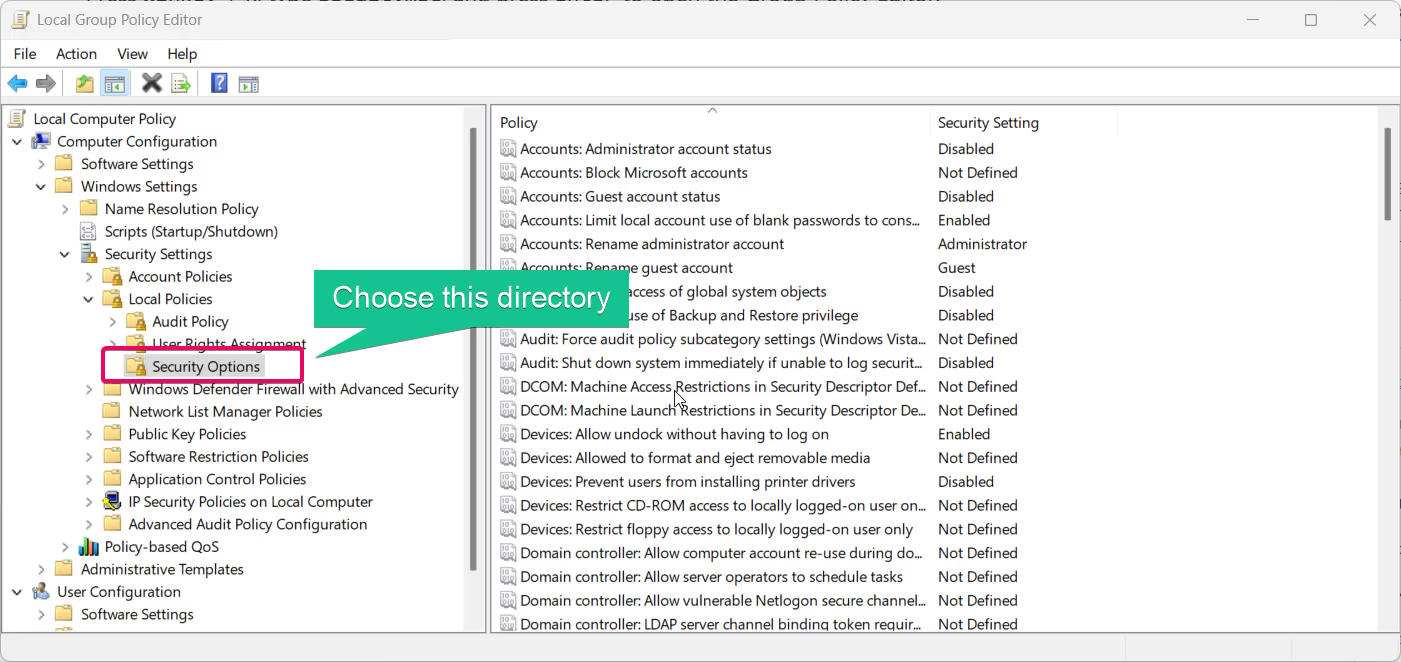
- Find the policy User Account Control: Admin Approval Mode for the Built-in Administrator account.
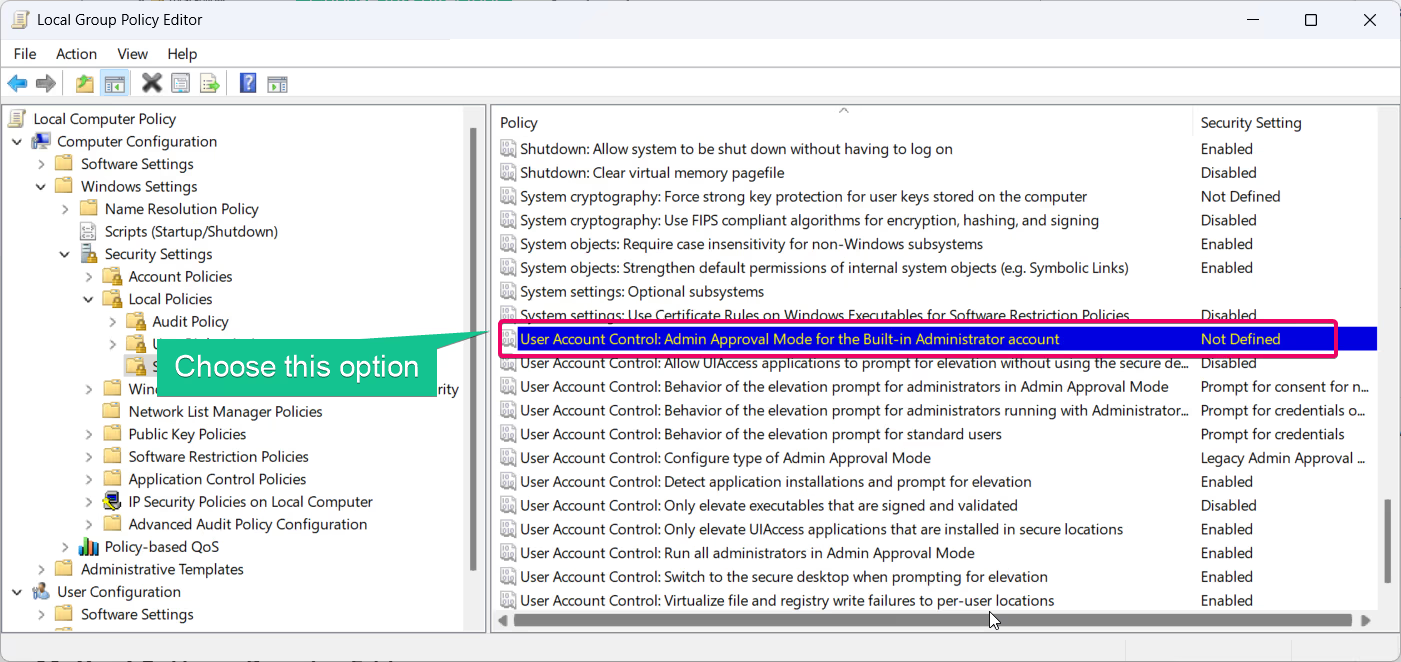
- Double-click the policy, and choose Enabled to turn on protection or Disabled to turn it off.
- Click Apply and then OK.
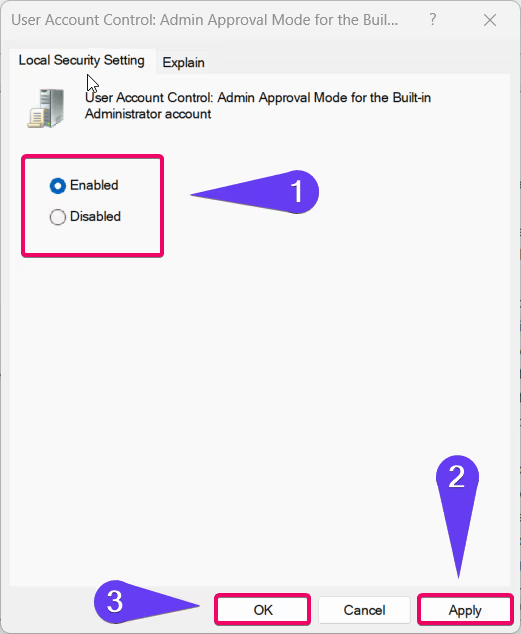
- Restart your device for the changes to take effect.
Method 3: Using Registry Editor
Important: Editing the Windows registry can lead to system instability if done incorrectly. Always back up your registry before making changes.
Related: Enable/disable The Built-in Administrator Account In Windows 11
If you’re comfortable with advanced methods, you can enable or disable Administrator Protection using the Registry Editor:
- Press Winkey + R, type
regedit, and press Enter to open the Registry Editor.
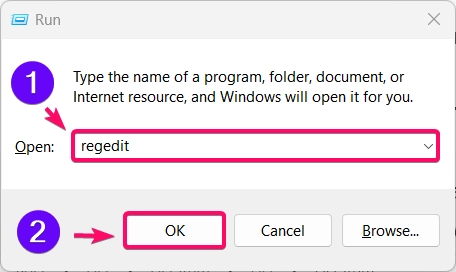
- Navigate to the following key:
HKEY_LOCAL_MACHINE\SOFTWARE\Microsoft\Windows\CurrentVersion\Policies\System
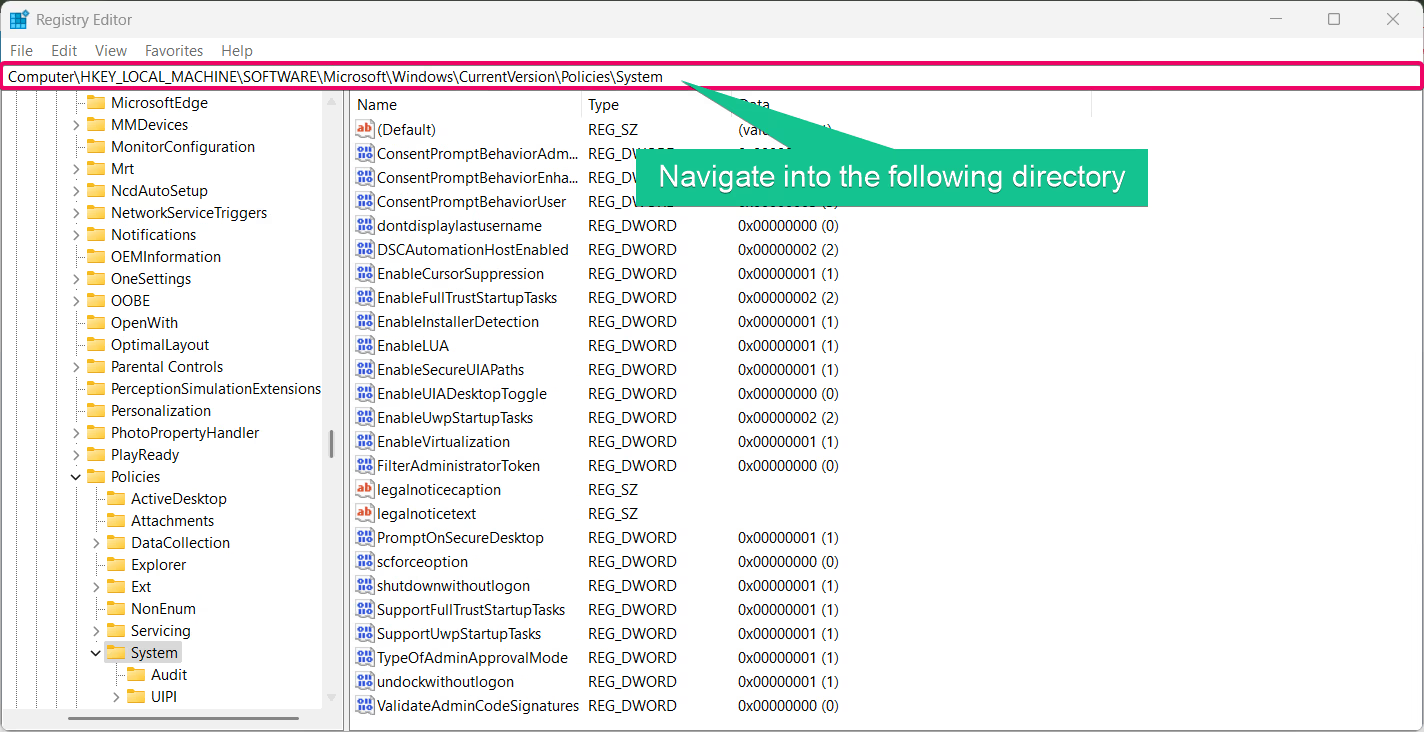
- Locate the value FilterAdministratorToken. If it doesn’t exist, create it:
- Right-click on the right pane, select New > DWORD (32-bit) Value, and name it FilterAdministratorToken.
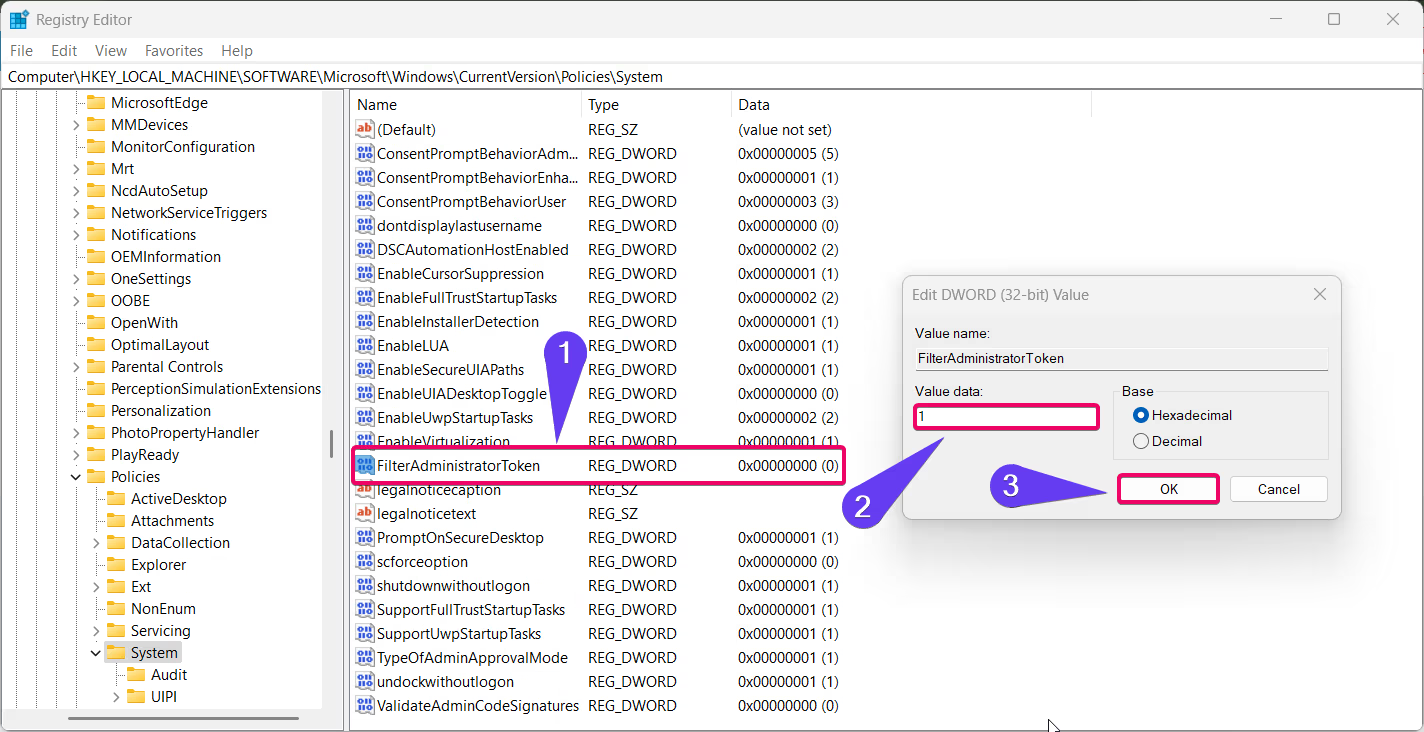
- Set the value of FilterAdministratorToken to:
1to enable Administrator Protection.0to disable it.
- Close the Registry Editor and restart your computer to apply the changes.
Method 4: Using Command Prompt
For users familiar with command-line tools, Command Prompt provides a quick way to toggle Administrator Protection:
Related: Enable/disable Administrator Protection For Admin Approval Mode In Windows 11
- Open Command Prompt as Administrator by searching for “cmd” in the Start menu, right-clicking it, and selecting Run as administrator.
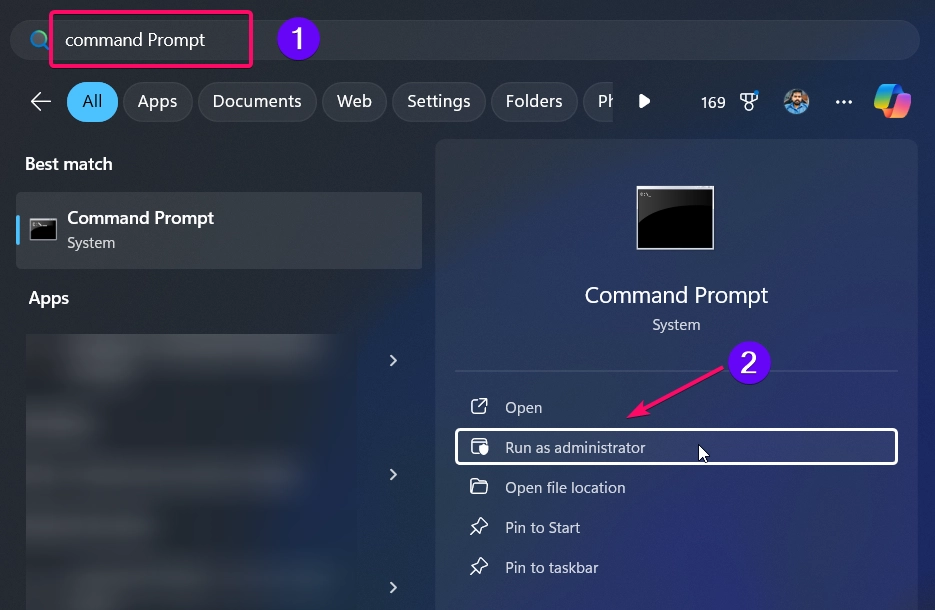
- To enable Administrator Protection, type:
reg add "HKLM\SOFTWARE\Microsoft\Windows\CurrentVersion\Policies\System" /v FilterAdministratorToken /t REG_DWORD /d 1 /f

- To disable Administrator Protection, type:
reg add "HKLM\SOFTWARE\Microsoft\Windows\CurrentVersion\Policies\System" /v FilterAdministratorToken /t REG_DWORD /d 0 /f

- Press Enter, then restart your system to apply the changes.
Method 5: Using PowerShell
If you prefer using PowerShell, follow these steps:
- Open PowerShell as Administrator by right-clicking the Start button and selecting Windows Terminal (Admin).
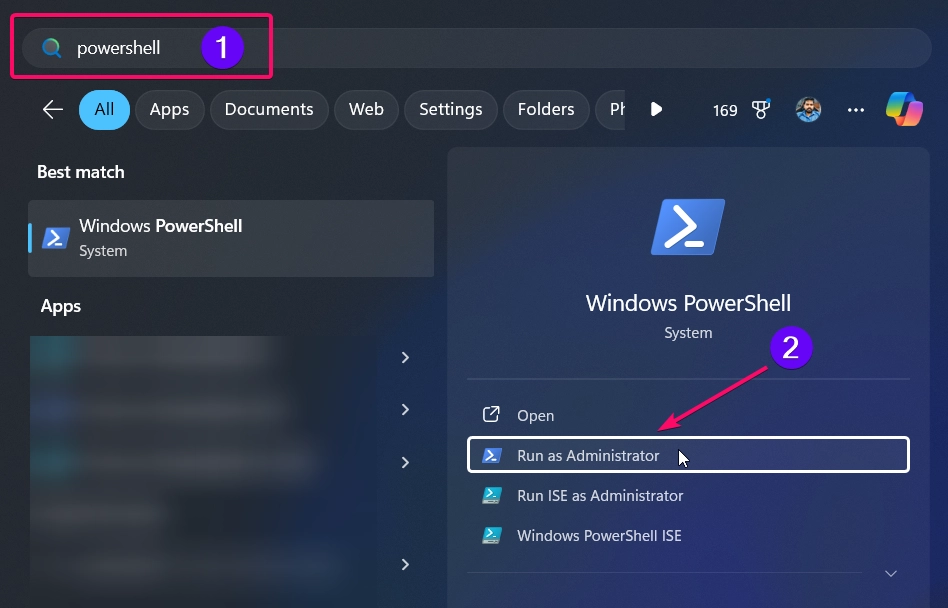
- To enable Administrator Protection, enter:
Set-ItemProperty -Path "HKLM:\SOFTWARE\Microsoft\Windows\CurrentVersion\Policies\System" -Name "FilterAdministratorToken" -Value 1

- To disable Administrator Protection, enter:
Set-ItemProperty -Path "HKLM:\SOFTWARE\Microsoft\Windows\CurrentVersion\Policies\System" -Name "FilterAdministratorToken" -Value 0

- Restart your computer for the changes to take effect.
Enabling Administrator Protection adds an additional layer of security, ensuring all actions requiring elevated permissions are verified, even by administrators. Disabling it can improve convenience but may expose your system to unauthorized changes or accidental modifications. Evaluate your security needs before making changes.
Conclusion
Administrator Protection for Admin Approval Mode is a crucial security feature in Windows 11. By following the methods above, you can easily enable or disable this feature based on your requirements. Whether you use Local Security Policy, Group Policy Editor, Registry Editor, or command-line tools like Command Prompt and PowerShell, you now have the knowledge to customize your system’s security effectively.
Read More:
- How to Add/Remove Common Program Groups from Start Menu in Windows 11?
- How to Add/Remove Android Apps from Your Phone to Start on Windows 11 PC?
- How to Turn On/Off Airplane Mode in Windows 11?
