How to Enable/Disable UAC for Built-in Administrator in Windows 11?
4+ Unique ways to Enable/Disable UAC for Built-in Administrator in Windows 11 PC!
The User Account Control (UAC) is a vital security feature in Windows 11 that prevents unauthorized changes to the system by prompting for administrative consent. However, for the built-in Administrator account, UAC is often disabled by default to allow unrestricted access. If you need to enable or disable UAC for the built-in Administrator account, this tutorial provides multiple methods with detailed steps.
Check Out: Enable/disable Administrator Protection For Admin Approval Mode In Windows 11
Enabling UAC for the built-in Administrator enhances system security by requiring confirmation for elevated tasks. Disabling it, on the other hand, may simplify administrative tasks but increases the risk of unauthorized changes. Understanding when to enable or disable UAC is crucial for balancing security and functionality.
Method 1: Using Local Security Policy
This method is ideal for users with access to the Local Security Policy tool, available in Windows 11 Pro, Enterprise, and Education editions.
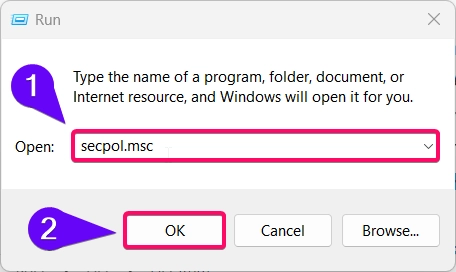
- Press Winkey + R, type
secpol.msc, and press Enter to open the Local Security Policy tool.
- Navigate to the following path:
- Security Settings > Local Policies > Security Options
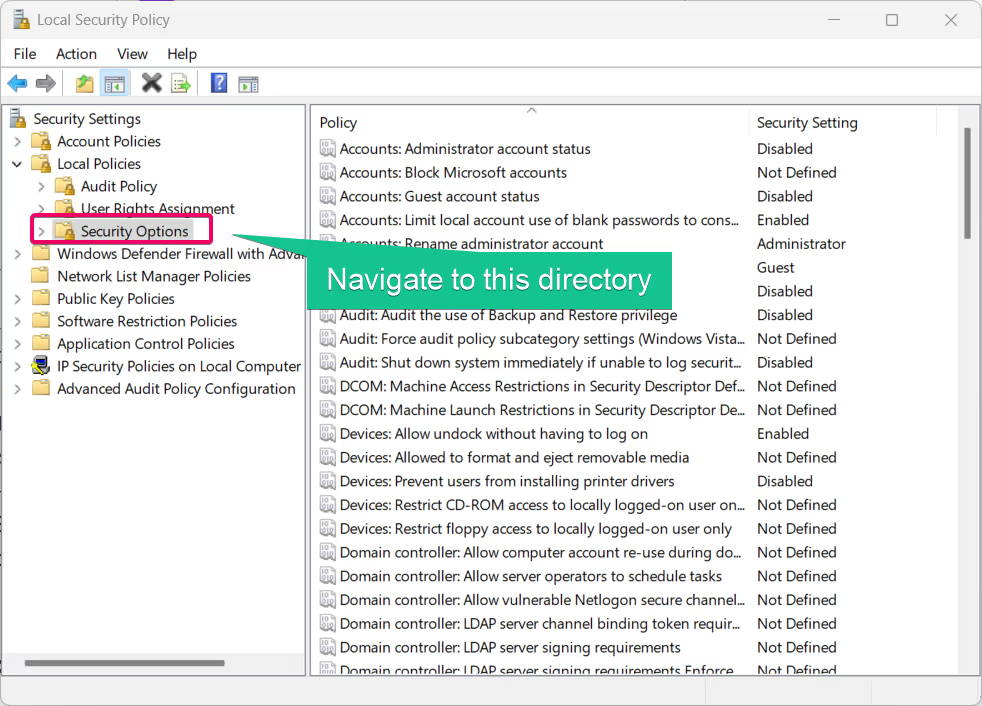
- Locate the policy titled “User Account Control: Admin Approval Mode for the Built-in Administrator account.”
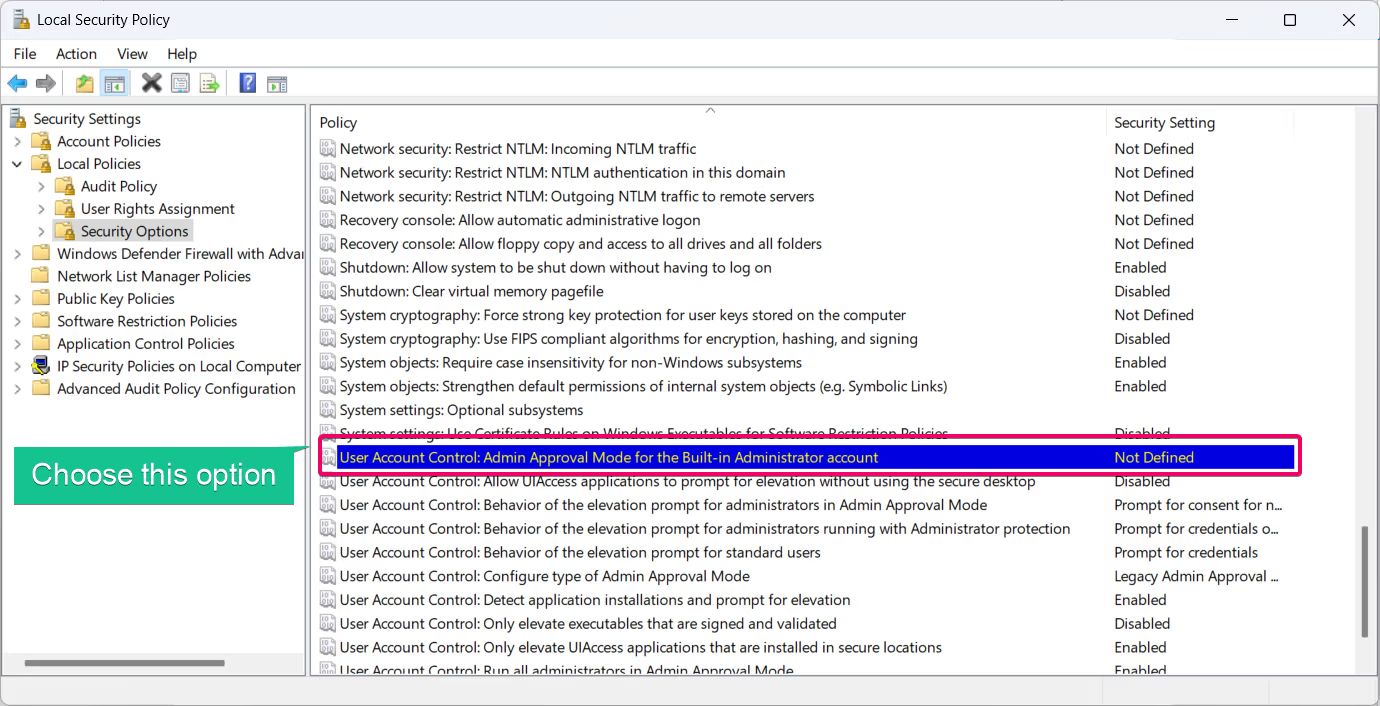
- Double-click on the policy to open its settings.
- Select Enabled to turn on UAC for the built-in Administrator or Disabled to turn it off.
- Click Apply and then OK to save the changes.
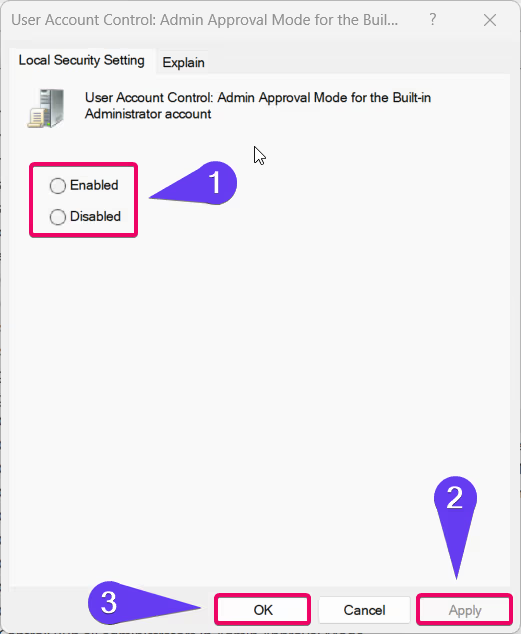
- Restart your computer to apply the new UAC settings.
Method 2: Using Group Policy Editor
For users comfortable with the Group Policy Editor, this method offers a centralized way to manage UAC settings.
- Press Winkey + R, type
gpedit.msc, and press Enter to open the Group Policy Editor.

- Navigate to the following path:
- Computer Configuration > Windows Settings > Security Settings > Local Policies > Security Options
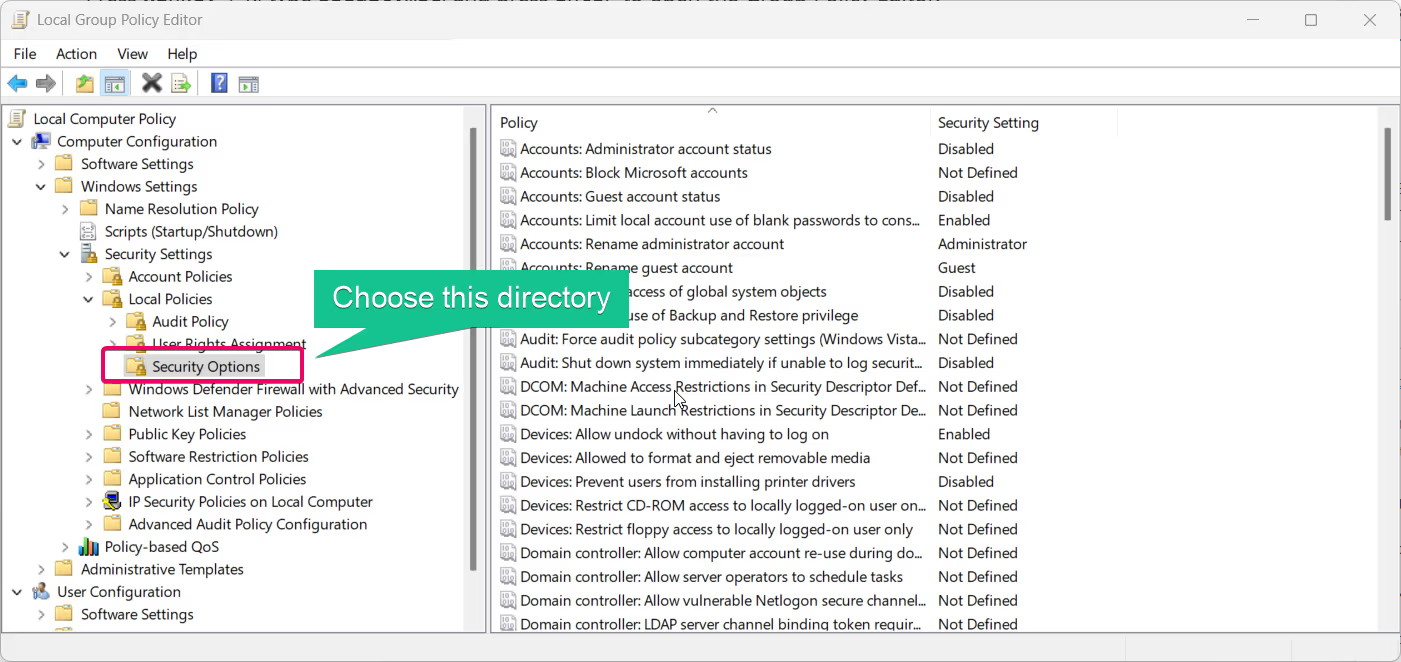
- Locate and double-click the policy “User Account Control: Admin Approval Mode for the Built-in Administrator account.”
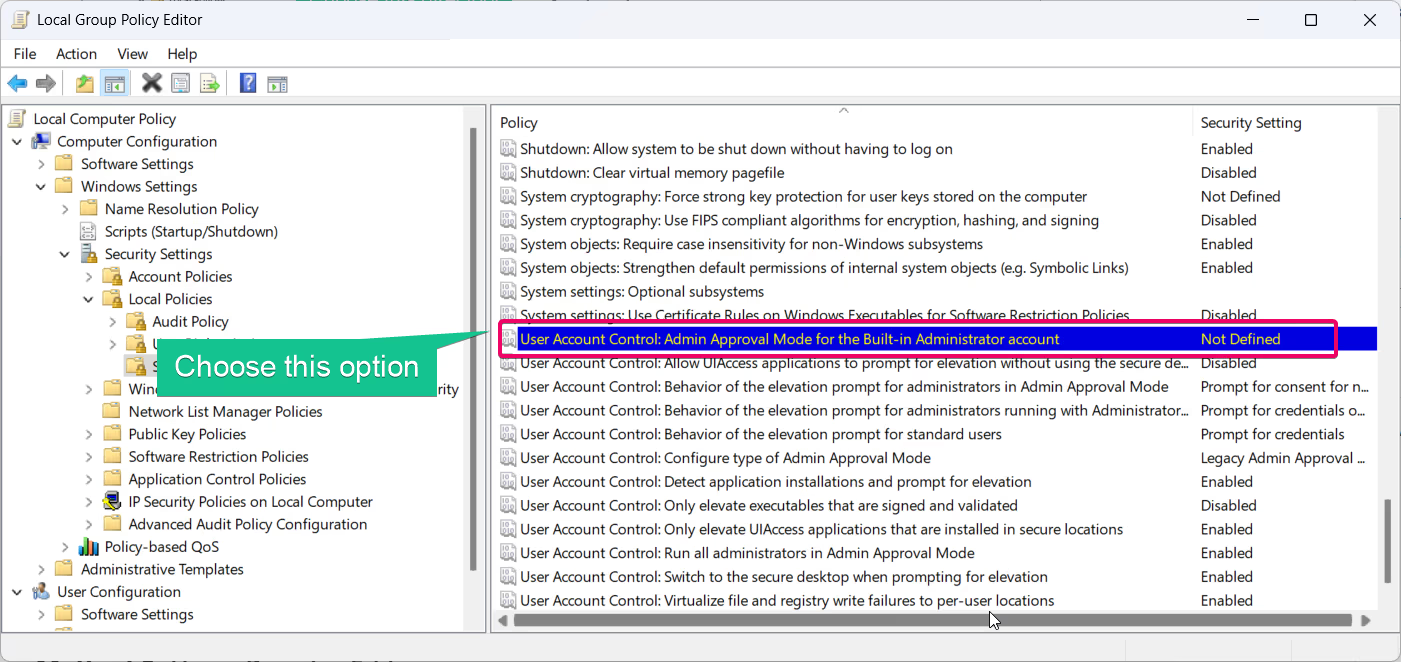
- Choose Enabled to activate UAC or Disabled to deactivate it for the built-in Administrator account.
- Click Apply and OK to confirm your changes.
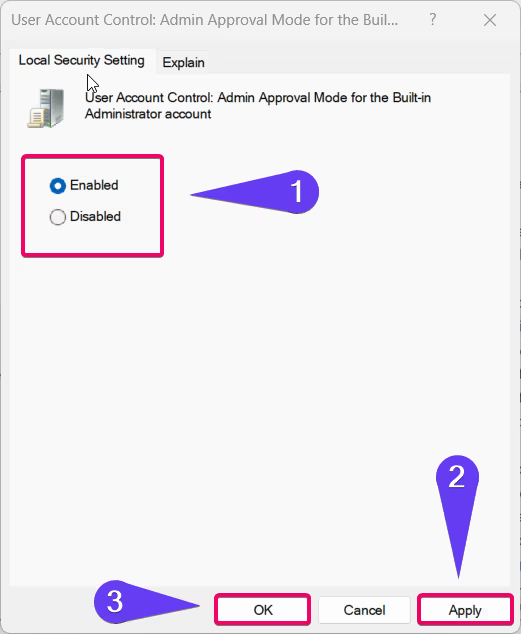
- Restart your system to ensure the settings take effect.
Method 3: Using Registry Editor
If you don’t have access to Local Security Policy or Group Policy Editor, you can use the Registry Editor to enable or disable UAC for the built-in Administrator.
Important: Back up the registry before making any changes to avoid potential system issues.
- Press Winkey + R, type
regedit, and press Enter to open the Registry Editor.
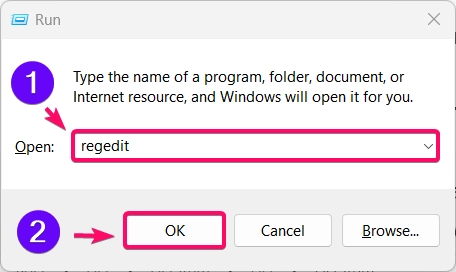
- Navigate to the following path:
HKEY_LOCAL_MACHINE\SOFTWARE\Microsoft\Windows\CurrentVersion\Policies\System
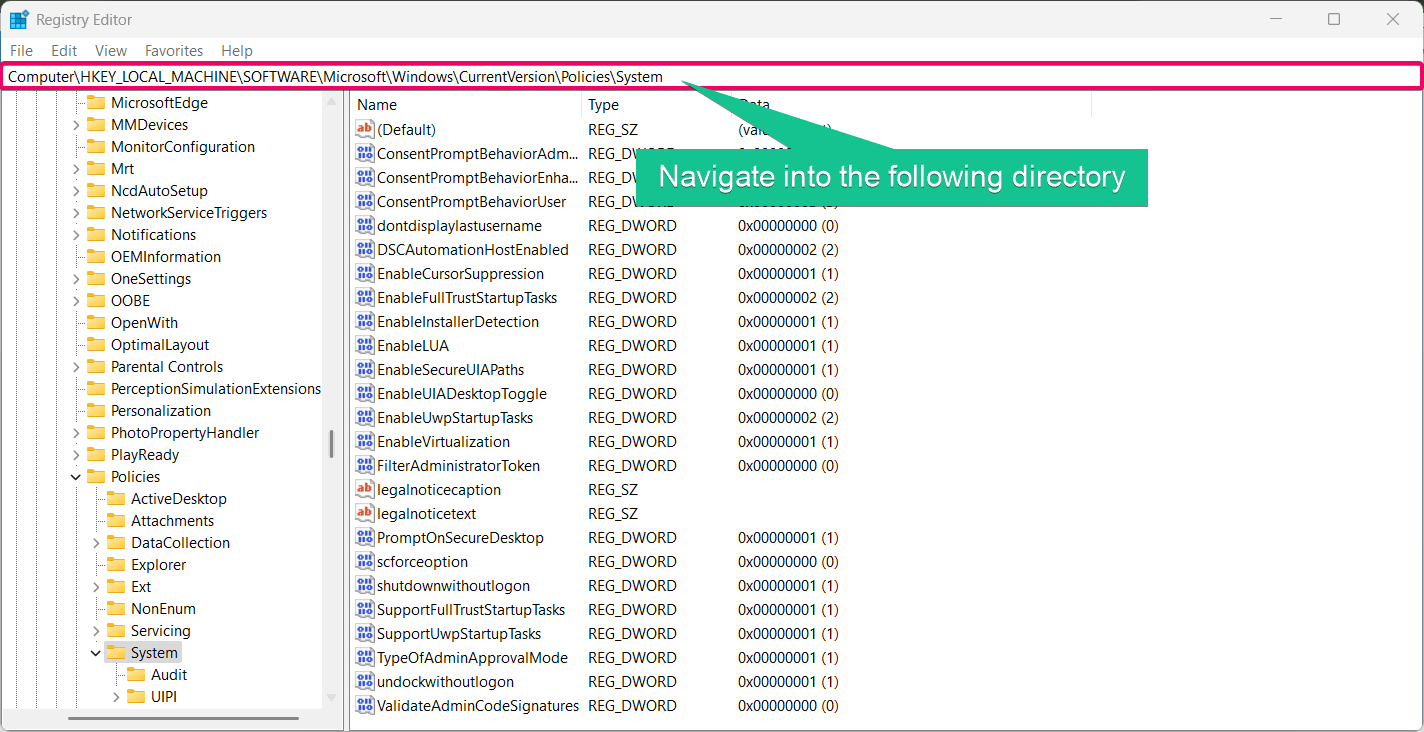
- Locate the value FilterAdministratorToken. If it doesn’t exist, create it by right-clicking in the right pane and selecting New > DWORD (32-bit) Value.
- Set the value of FilterAdministratorToken to:
1to enable UAC.0to disable UAC.
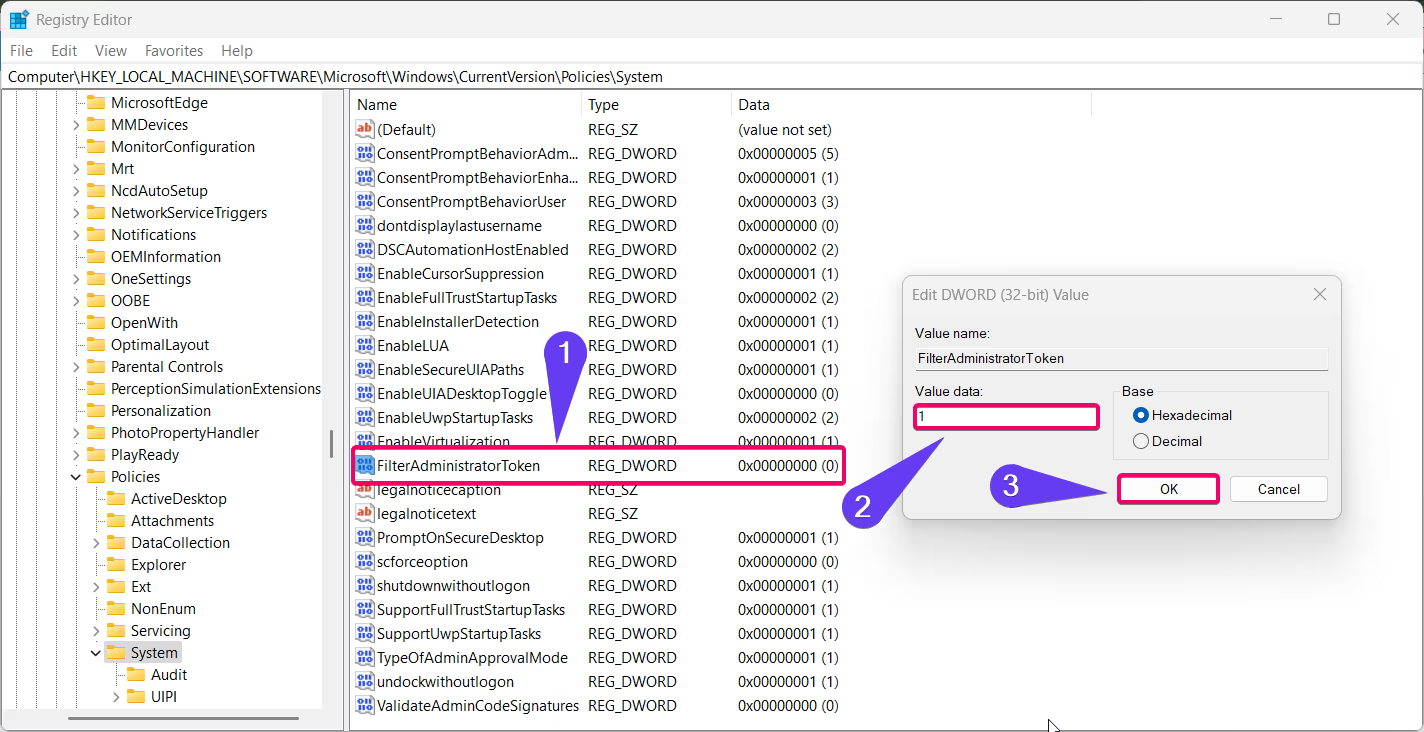
- Close the Registry Editor and restart your computer.
Method 4: Using PowerShell
For users familiar with PowerShell, this method allows you to modify UAC settings via commands.
Recommended: Enable/disable Built-in Administrator Account Lockout In Windows 11
- Open PowerShell as Administrator by right-clicking the Start menu and selecting Windows Terminal (Admin).
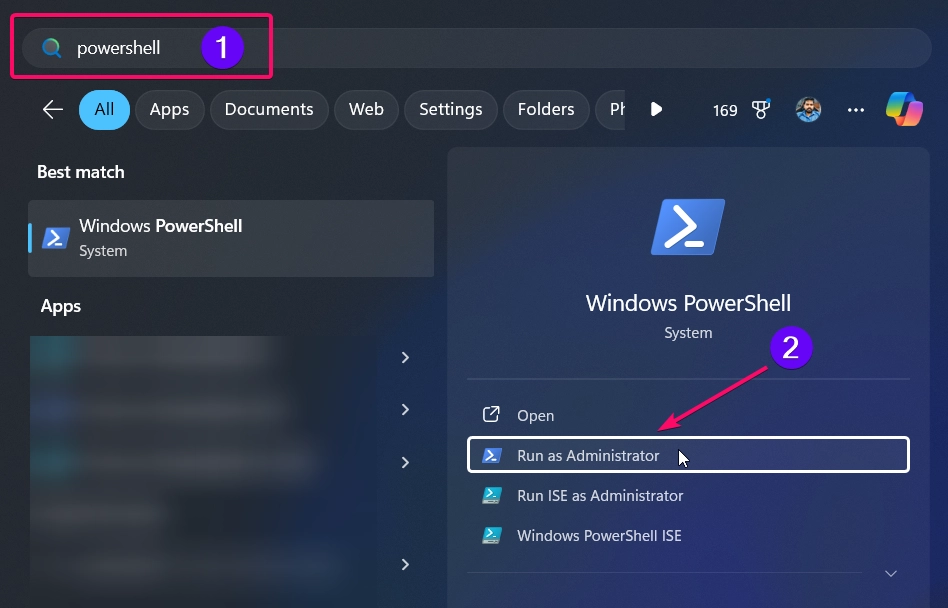
- To enable UAC for the built-in Administrator, run the following command:
Set-ItemProperty -Path "HKLM:\SOFTWARE\Microsoft\Windows\CurrentVersion\Policies\System" -Name "FilterAdministratorToken" -Value 1

- To disable UAC for the built-in Administrator, run:
Set-ItemProperty -Path "HKLM:\SOFTWARE\Microsoft\Windows\CurrentVersion\Policies\System" -Name "FilterAdministratorToken" -Value 0

- Restart your computer to apply the changes.
Method 5: Using Command Prompt
Command Prompt is another quick method to manage UAC settings for the built-in Administrator account.
- Open Command Prompt as Administrator by typing “cmd” in the Start menu, right-clicking it, and selecting Run as Administrator.
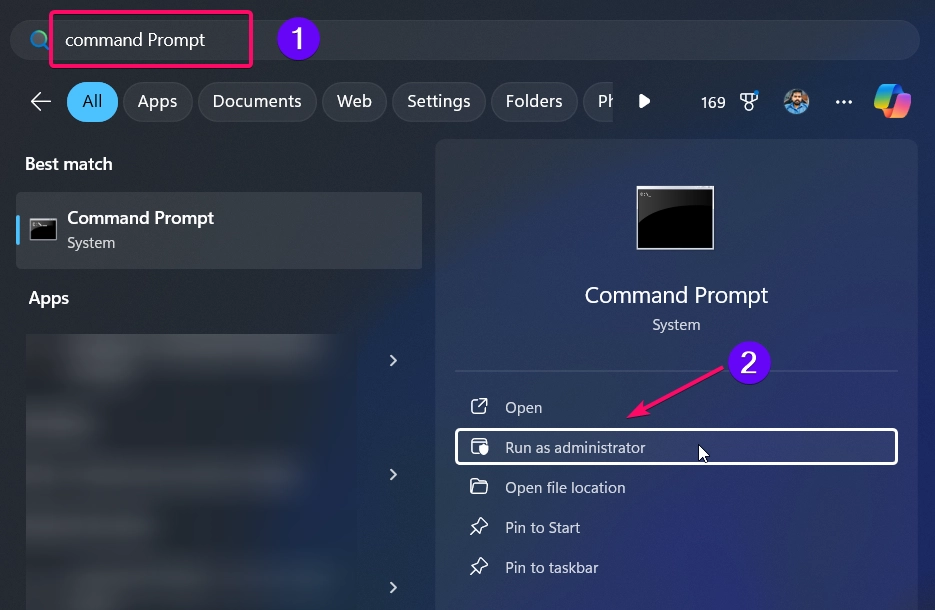
- To enable UAC, type the following command:
reg add "HKLM\SOFTWARE\Microsoft\Windows\CurrentVersion\Policies\System" /v FilterAdministratorToken /t REG_DWORD /d 1 /f

- To disable UAC, use this command:
reg add "HKLM\SOFTWARE\Microsoft\Windows\CurrentVersion\Policies\System" /v FilterAdministratorToken /t REG_DWORD /d 0 /f

- Restart your system for the changes to take effect.
- Enable UAC: Enhances security by preventing unauthorized changes and protecting sensitive system settings.
- Disable UAC: Simplifies administrative tasks by removing the need for frequent UAC prompts but reduces security.
Conclusion
Managing User Account Control (UAC) for the built-in Administrator in Windows 11 is essential for balancing security and convenience. Whether you choose to enable or disable UAC, the methods outlined above provide flexibility based on your requirements. From Local Security Policy to PowerShell, you can use the approach that best suits your expertise and system configuration.
FAQ:
What is the built-in Administrator account in Windows 11?
It’s a default account with unrestricted access to system settings and files, typically used for administrative purposes.
Why is UAC disabled for the built-in Administrator by default?
Disabling UAC allows for seamless administrative tasks but can increase security risks. It’s designed for advanced users who understand the implications.
Can I enable UAC for standard user accounts?
Yes, UAC is enabled by default for standard user accounts, and you can customize its settings via the Control Panel or Group Policy.
What happens if I disable UAC?
Disabling UAC removes prompts for administrative tasks, which can make your system more vulnerable to unauthorized changes or malware.
See Also: Enable/disable Administrator Protection For Admin Approval Mode In Windows 11
Is it safe to edit the registry to manage UAC settings?
Yes, as long as you follow the steps carefully and back up the registry beforehand.
Read More:
- How to Add/Remove Common Program Groups from Start Menu in Windows 11?
- How to Add/Remove Android Apps from Your Phone to Start on Windows 11 PC?
- How to Turn On/Off Airplane Mode in Windows 11?
