How to Enable/Disable the Built-in Administrator Account in Windows 11?
5 Unique Ways to Enable/Disable the Built-in Administrator Account in Windows 11 PC!
Windows 11 includes a built-in Administrator account designed for system-level management and troubleshooting. This account is disabled by default to ensure security but can be enabled when necessary for advanced tasks. This tutorial will show you how to enable or disable the built-in Administrator account, covering multiple methods for flexibility and ease of use.
Check Out: Enable/disable Administrator Protection For Admin Approval Mode In Windows 11
Enabling the built-in Administrator account is useful for troubleshooting system issues, accessing restricted files, or performing administrative tasks. However, leaving it enabled when not needed can pose a security risk as it grants unrestricted access to the system.
Method 1: Using Command Prompt
The Command Prompt is a simple and effective way to enable or disable the built-in Administrator account.
- Open Command Prompt as Administrator:
- Search for “Command Prompt” in the Start menu.
- Right-click it and select Run as Administrator.
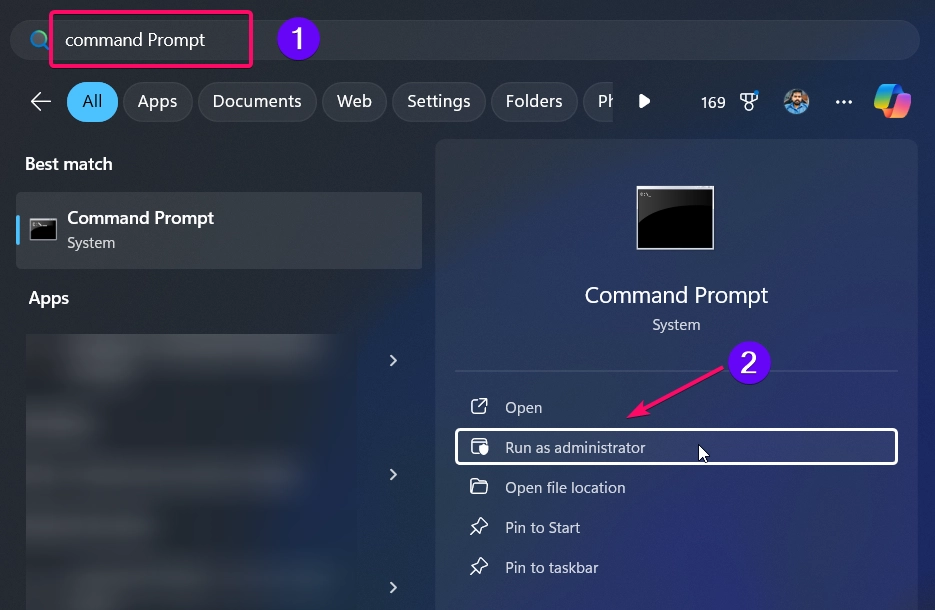
- To enable the Administrator account, type:
net user Administrator /active:yes

- Press Enter to execute the command.
- To disable the Administrator account, type:
net user Administrator /active:no

- Press Enter to confirm.
- Close the Command Prompt.
This method allows you to quickly toggle the account’s status with minimal effort.
Method 2: Using PowerShell
For users comfortable with command-line tools, PowerShell offers another efficient method.
- Open PowerShell as Administrator:
- Right-click the Start button and select Windows Terminal (Admin).
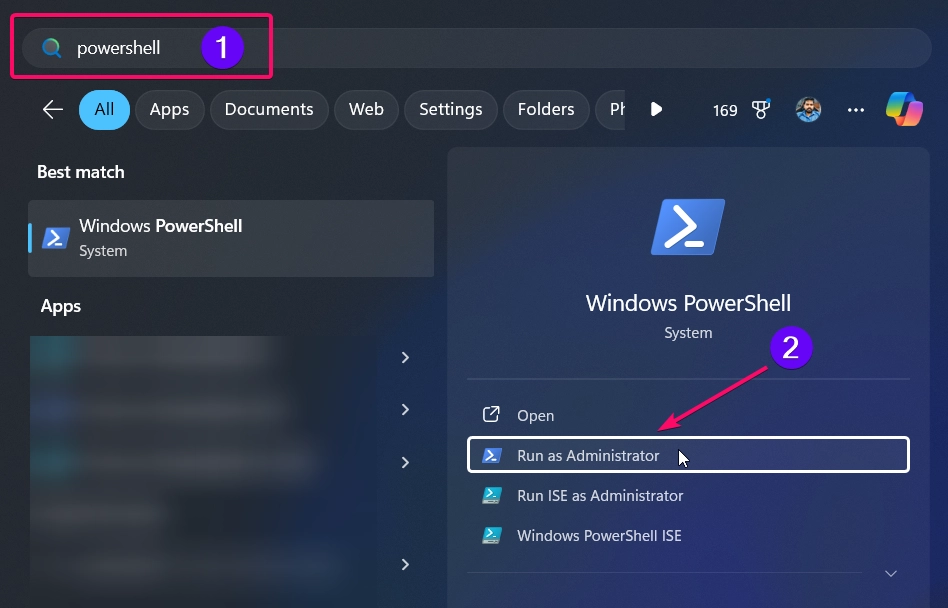
- To enable the Administrator account, enter the following command:
Enable-LocalUser -Name "Administrator"

- To disable the Administrator account, use this command:
Disable-LocalUser -Name "Administrator"

- Close PowerShell.
PowerShell provides a quick and reliable way to enable or disable the account.
Method 3: Using the Registry Editor
Warning: Editing the registry can be risky. Back up your registry before making changes.
- Press Winkey + R, type
regedit, and press Enter to open the Registry Editor.
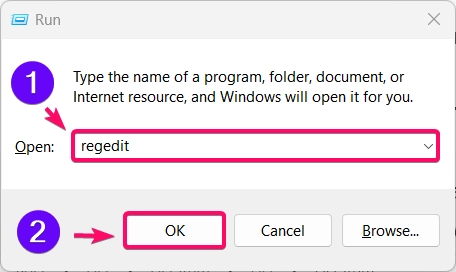
- Navigate to the following path:
- HKEY_LOCAL_MACHINE\SOFTWARE\Microsoft\Windows NT\CurrentVersion\Winlogon
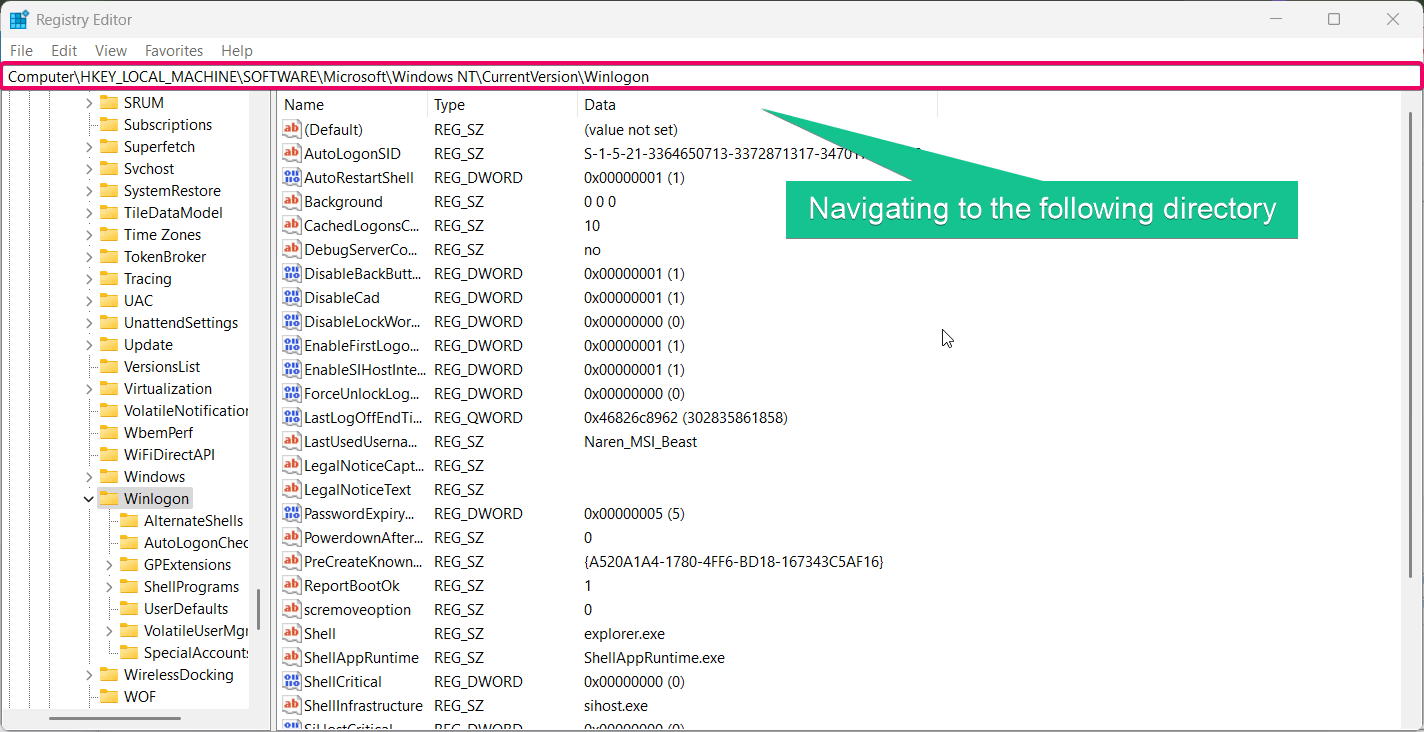
- Locate the key SpecialAccounts. If it doesn’t exist, create it:
- Right-click Winlogon, select New > Key, and name it SpecialAccounts.
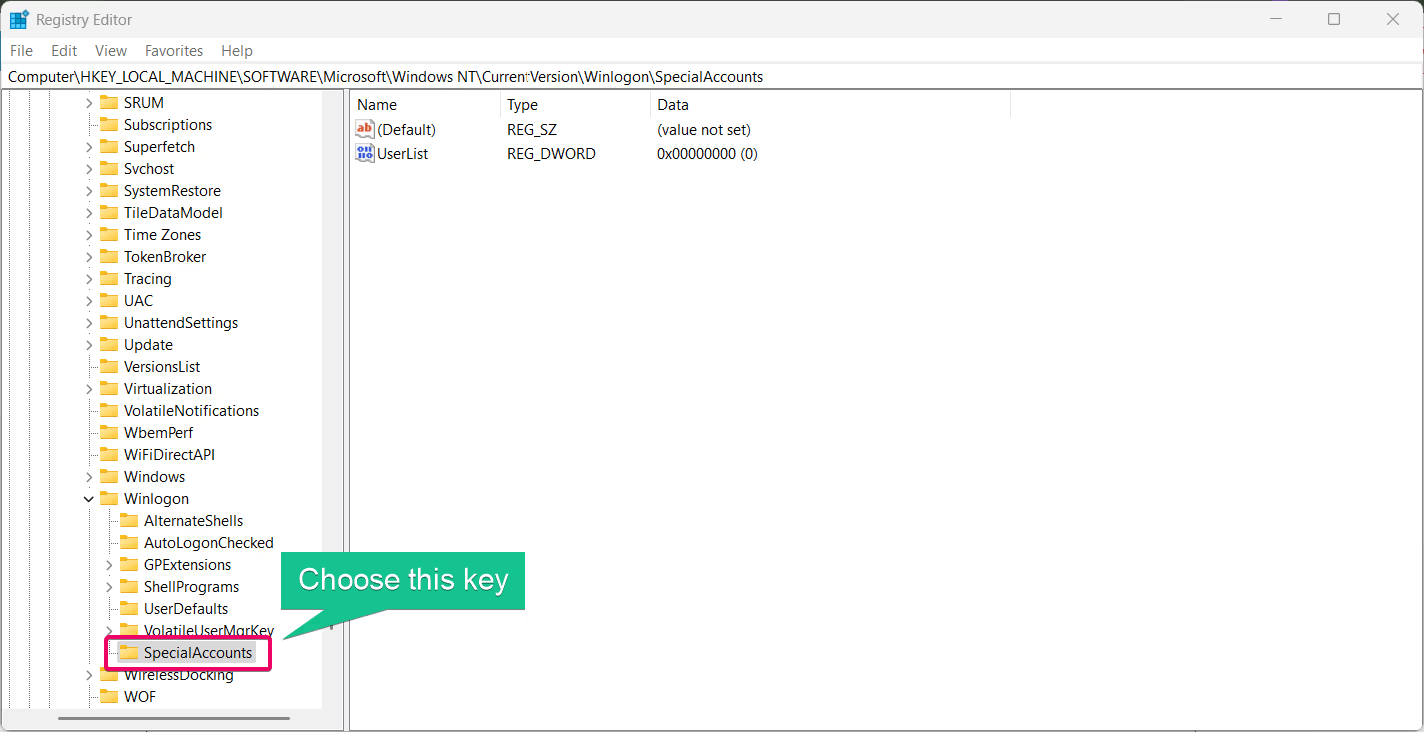
- Under SpecialAccounts, create another key named UserList.
- Inside UserList, create a new
DWORD (32-bit)Value and name it Administrator. - To enable the account, set the value to
1. To disable it, set the value to0.
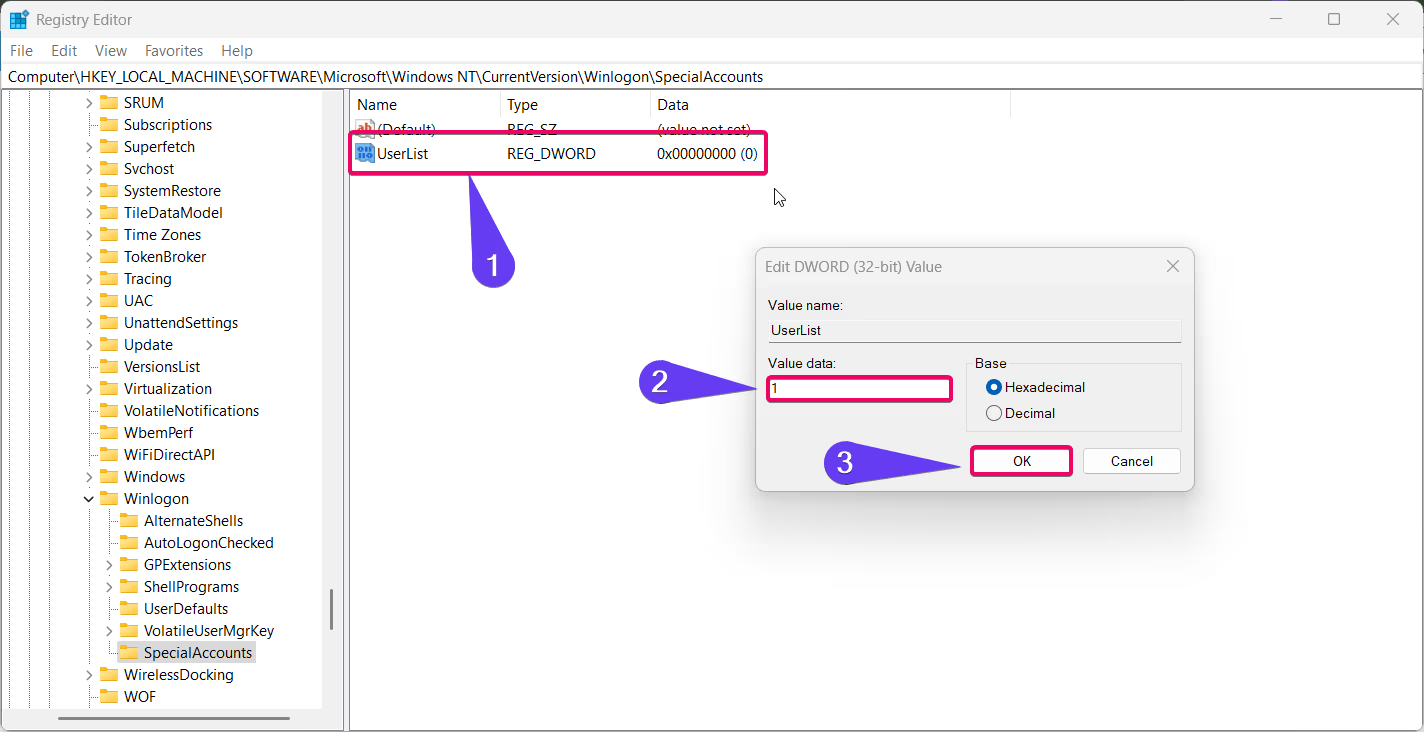
- Close the Registry Editor and restart your computer.
This advanced method is suitable for users who need deep control over system settings.
Method 4: Using Group Policy Editor
Note: The Group Policy Editor is available only on Windows 11 Pro, Enterprise, and Education editions.
See Also: Enable/disable Uac For Built-in Administrator In Windows 11
- Open the Run dialog by pressing Winkey + R, type
gpedit.msc, and press Enter.
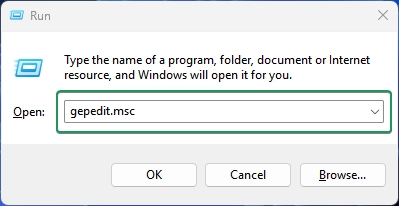
- Navigate to the following path:
- Computer Configuration > Windows Settings > Security Settings > Local Policies > Security Options
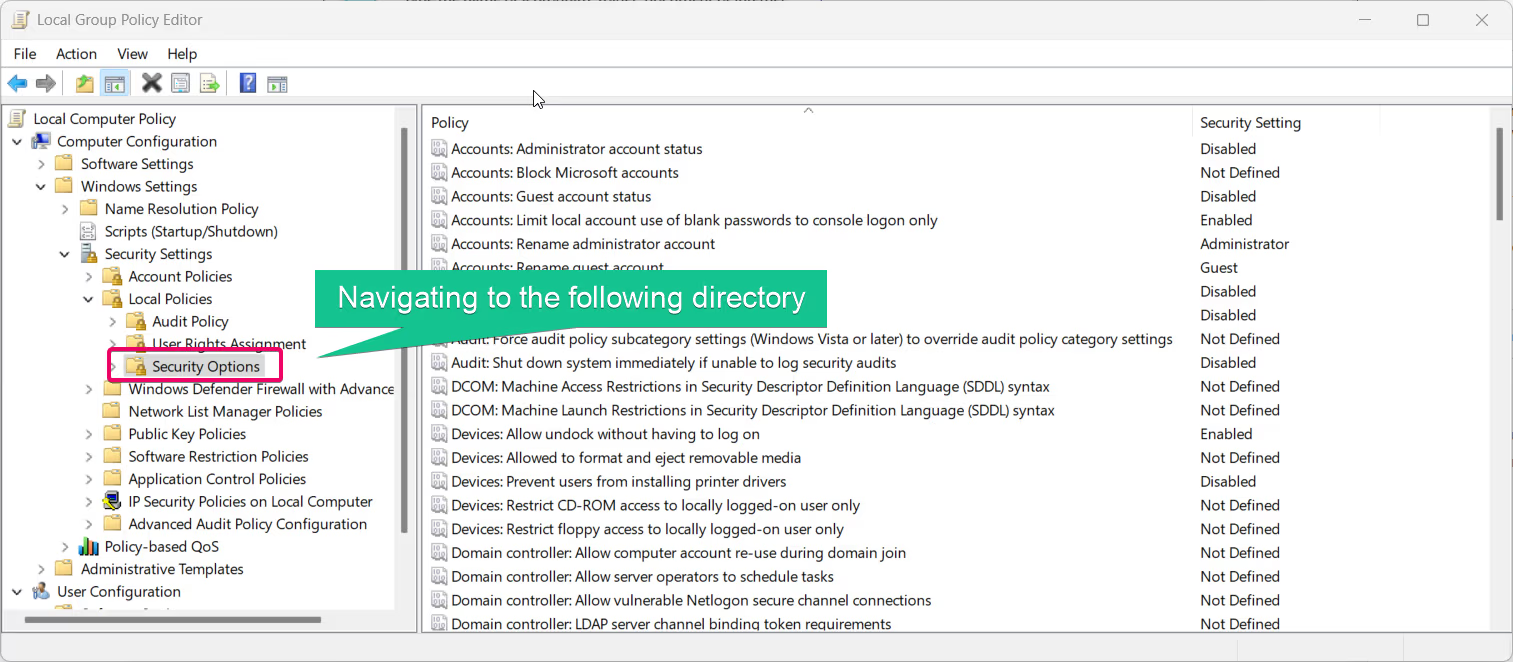
- Double-click on Accounts: Administrator account status.
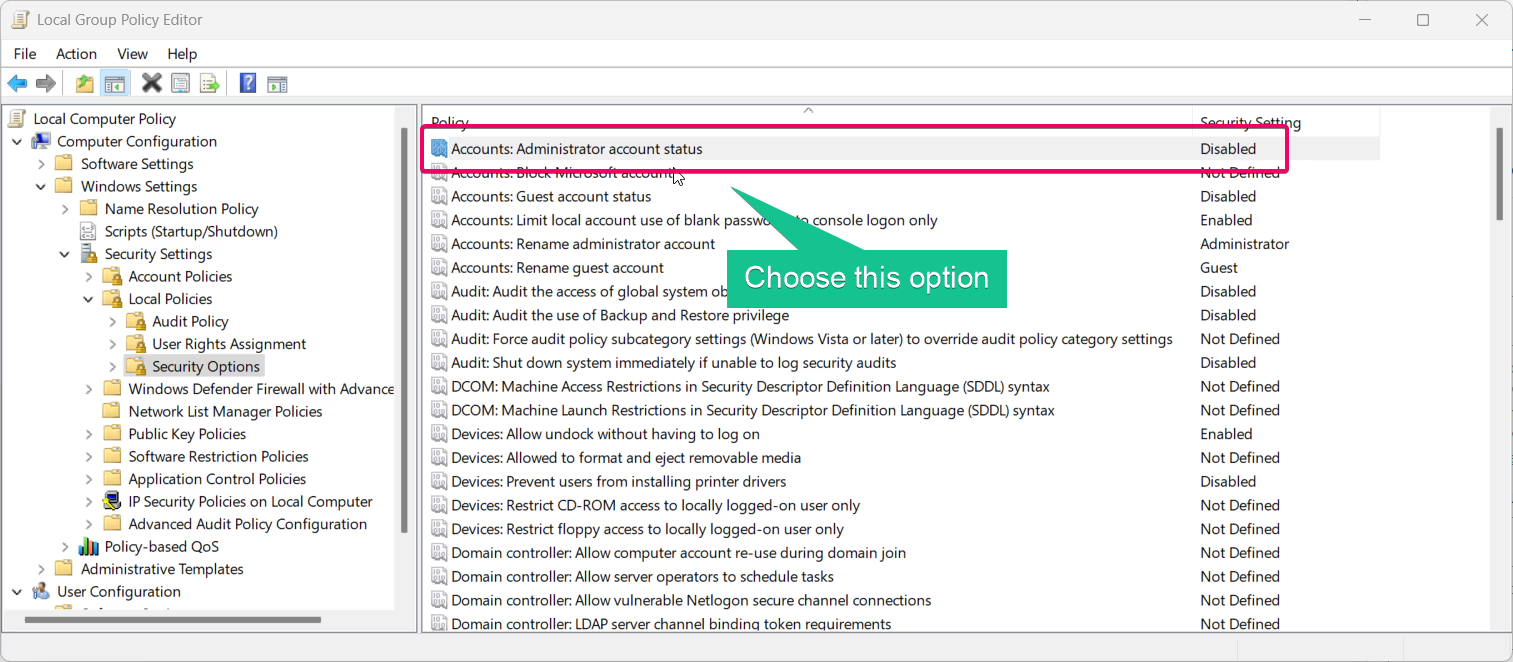
- To enable the account, select Enabled. To disable it, select Disabled.
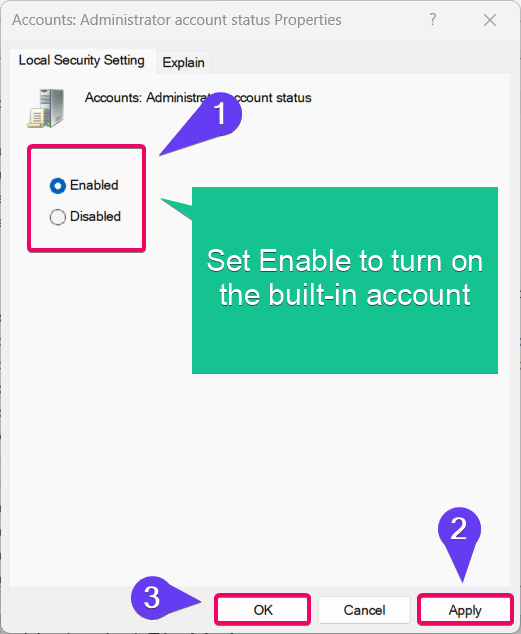
- Click Apply and then OK to save the changes.
This method is ideal for system administrators managing multiple devices or settings.
Method 5: Using Local Users and Groups
Note: This method is only available in Windows 11 Pro, Enterprise, and Education editions.
- Press Winkey + R to open the Run dialog box, type
lusrmgr.msc, and press Enter.
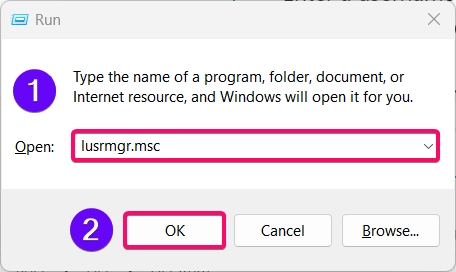
- In the Local Users and Groups window, select Users on the left-hand pane.
- Locate the Administrator account in the list.
- Right-click on the account and select Properties.
- To enable the account, uncheck the box labeled Account is disabled.
- To disable the account, check the Account is disabled box.
- Click Apply and then OK to save the changes.
This method offers a user-friendly interface to manage the built-in Administrator account.
Conclusion
Enabling or disabling the built-in Administrator account in Windows 11 can be critical for advanced troubleshooting and administrative tasks. The methods above provide various ways to manage the account, whether through the Command Prompt, PowerShell, Local Users and Groups, Group Policy Editor, or Registry Editor. For security purposes, always disable the account when it is no longer needed.
Read This: Enable/disable Built-in Administrator Account Lockout In Windows 11
Commonly Asked Queries:
Can I rename the built-in Administrator account?
Yes, you can rename the account via Local Users and Groups or Group Policy Editor for added security.
Does the built-in Administrator account have limitations?
The built-in Administrator account has unrestricted access to the system, so it should be used cautiously.
Can I set a password for the built-in Administrator account?
Yes, you can set a password using the net user Administrator * command in Command Prompt or through Local Users and Groups.
Why is the built-in Administrator account disabled by default?
The account is disabled by default to prevent unauthorized access and improve system security.
Check Out: Enable/disable Administrator Protection For Admin Approval Mode In Windows 11
Is it safe to enable the built-in Administrator account?
It is safe to enable the account temporarily for administrative tasks. However, ensure you disable it afterward to reduce security risks.
Read More:
- How to Add/Remove Common Program Groups from Start Menu in Windows 11?
- How to Add/Remove Android Apps from Your Phone to Start on Windows 11 PC?
- How to Turn On/Off Airplane Mode in Windows 11?
