How to Enable or Disable Send Activity History to Microsoft in Windows 11?
What are the different methods to Enable or Disable Send Activity History to Microsoft in Windows 11?
Windows 11 includes a feature called Activity History, which tracks the tasks you perform on your device, such as app usage, websites visited, and documents opened. When enabled, this data can be sent to Microsoft to help enhance your experience across devices. However, users who are privacy-conscious may prefer to disable this feature. This write up will show you how to enable or disable the “Send Activity History to Microsoft” option in Windows 11 using different methods.
See Also: Enable Or Disable Adaptive Color In Windows 11
Activity History logs the activities performed on your Windows 11 device. If you enable the Send Activity History to Microsoft option, this data is synced with your Microsoft account, allowing you to resume tasks across multiple devices. While this can enhance productivity, it also involves sharing data with Microsoft, which some users may find concerning.
Method 1: Using the Settings App
The easiest way to enable or disable the Send Activity History to Microsoft option is through the Settings app. Follow these steps:
- Open Settings by pressing Winkey + I on your keyboard.
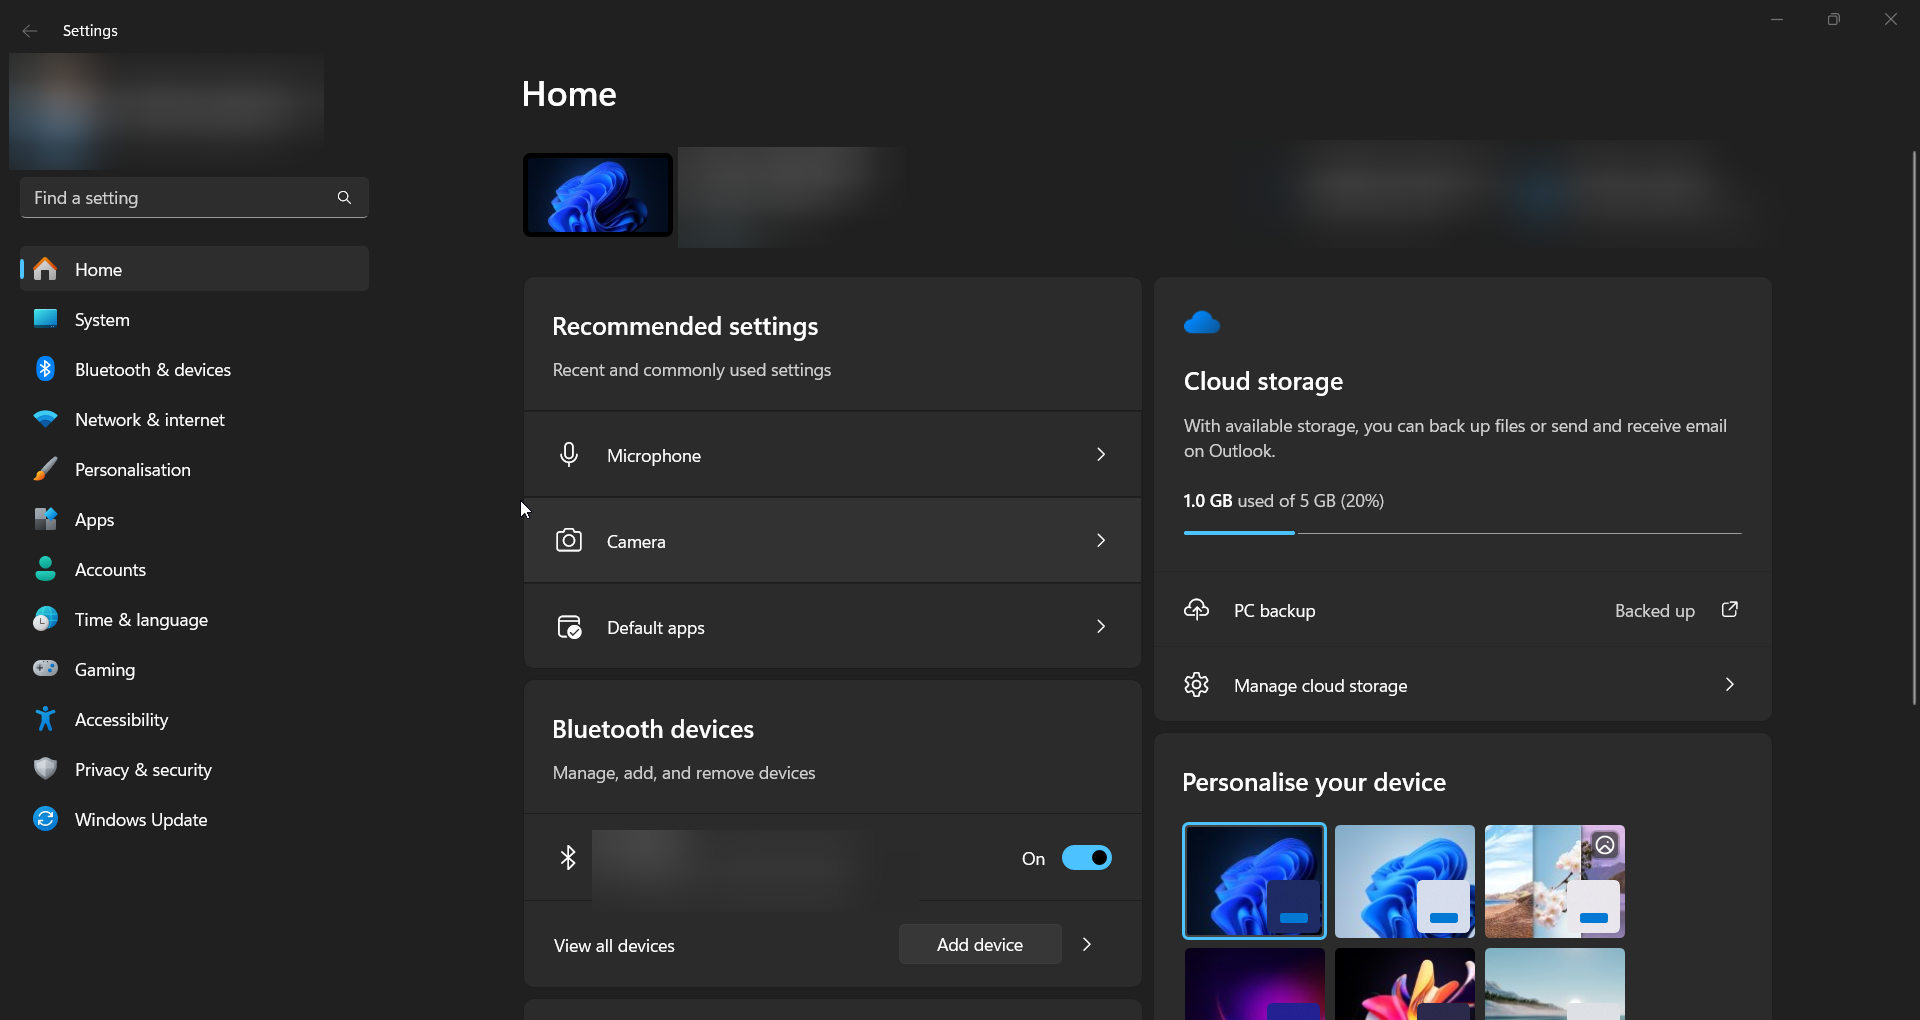
- Go to Privacy & Security in the left-hand menu.
- Select Activity history under the Windows permissions section.
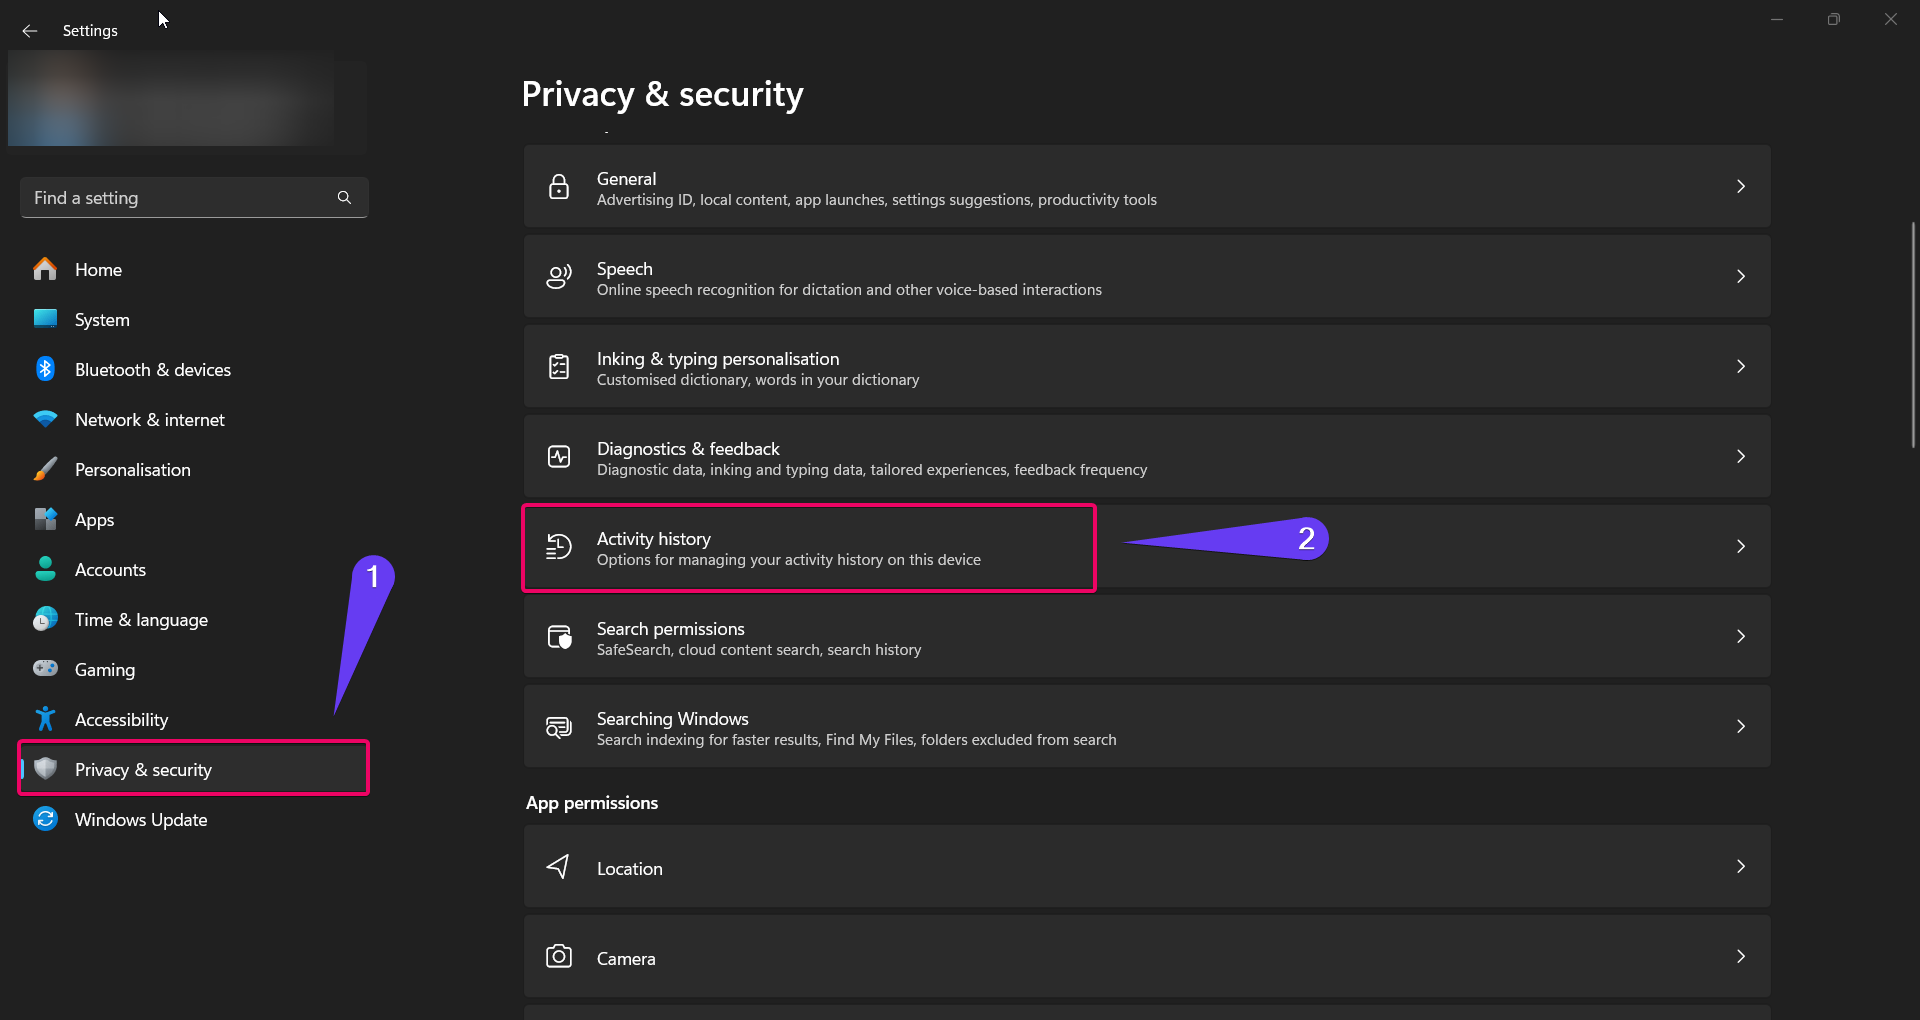
The option to send activity history to Microsoft has been removed from Windows 11 23H2 and 22H2 as of January 23, 2024
- Look for the option Send my activity history to Microsoft.
- Check the box to enable or uncheck it to disable sending activity history to Microsoft.
The change will take effect immediately, and you can revisit this section to adjust the setting whenever needed.
Method 2: Using Group Policy Editor
Note: The Group Policy Editor is only available on Windows 11 Pro, Enterprise, and Education editions.
If you are using Windows 11 Pro or higher, you can control this feature using the Group Policy Editor:
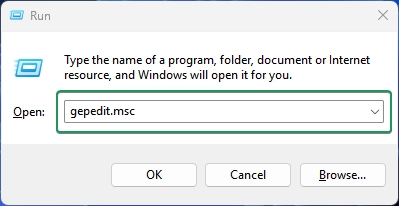
- Press Winkey + R to open the Run dialog, type
gpedit.msc, and hit Enter.
- Navigate to the following path:
Computer Configuration > Administrative Templates > System > OS Policies
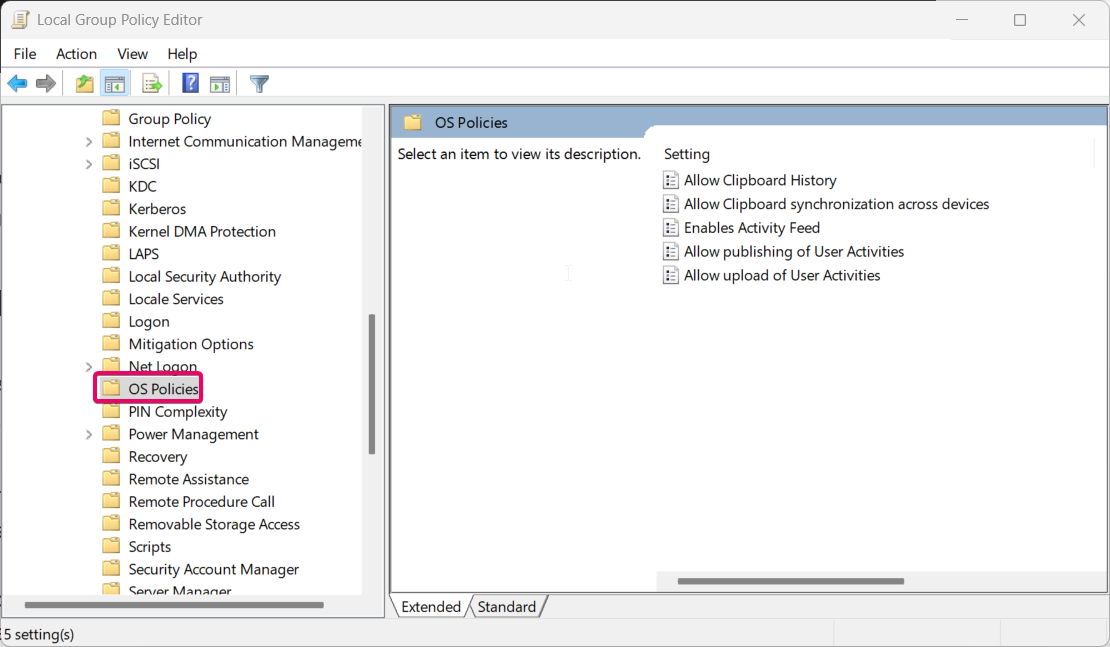
- Locate the policy named Allow publishing of user activities in the right pane.
- Double-click the policy to open its properties.
- Choose Enabled to allow activity history to be sent to Microsoft or Disabled to prevent it.
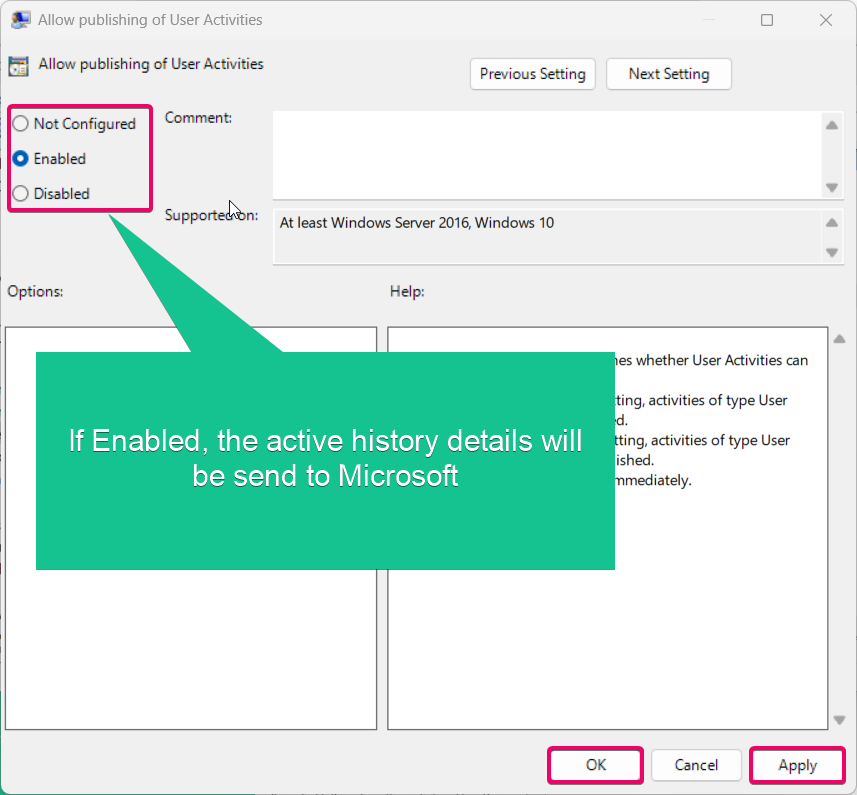
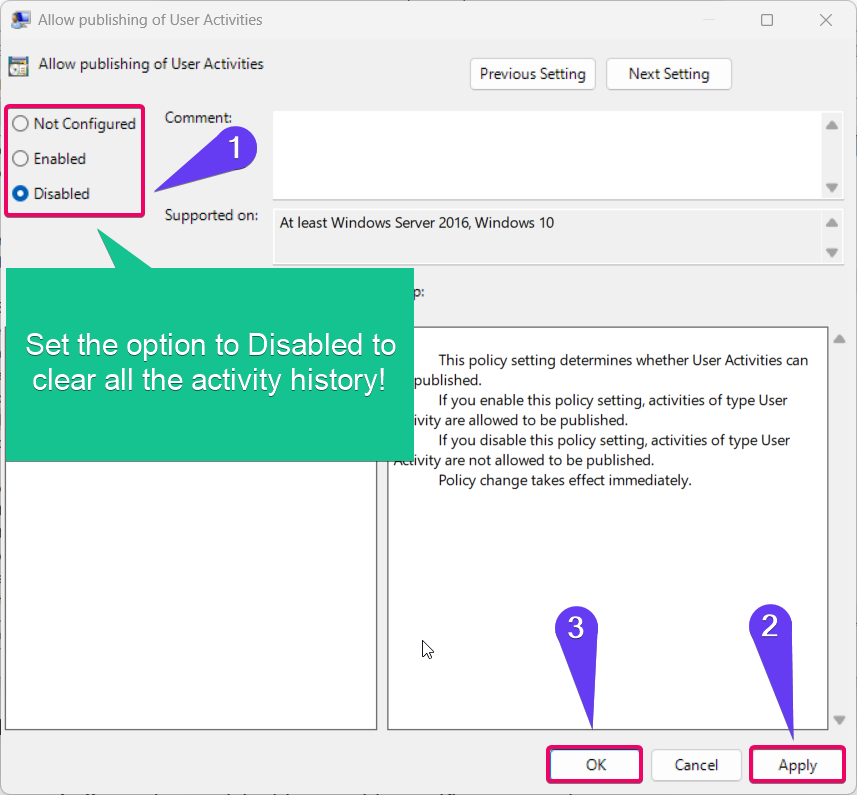
- Click Apply and then OK to save the changes.
Restart your computer for the changes to take effect.
Method 3: Using Registry Editor
Important: Modifying the registry can cause system issues if not done correctly. Always back up your registry before making any changes.
Read This: Enable Or Disable Store Activity History On Device In Windows 11
For users comfortable with advanced options, the Registry Editor provides a way to enable or disable sending activity history:
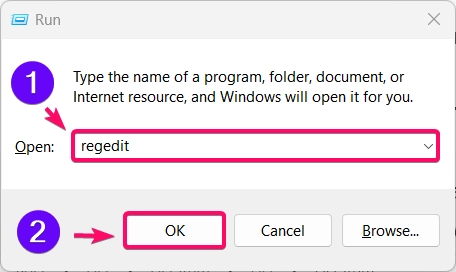
- Press Winkey + R, type
regedit, and press Enter.
- Navigate to the following key:
HKEY_LOCAL_MACHINE\SOFTWARE\Policies\Microsoft\Windows\System
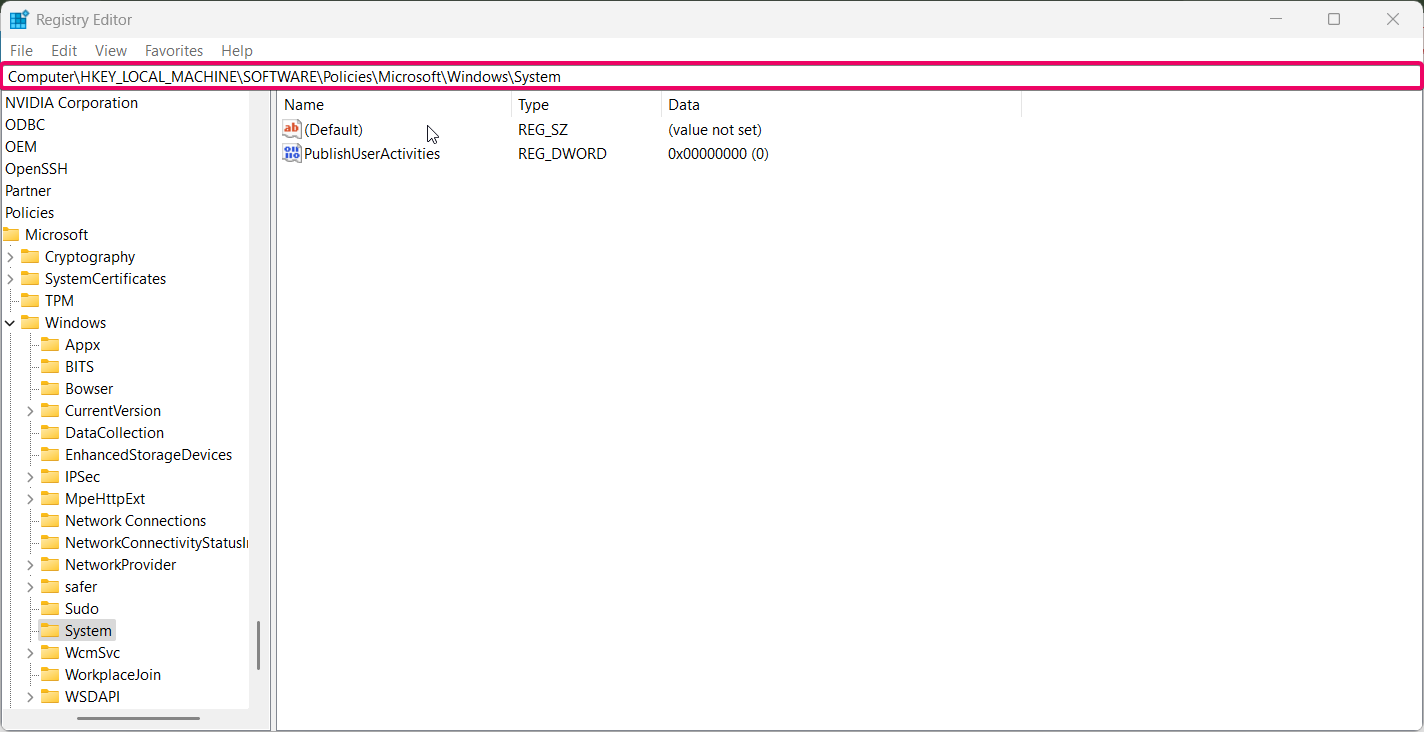
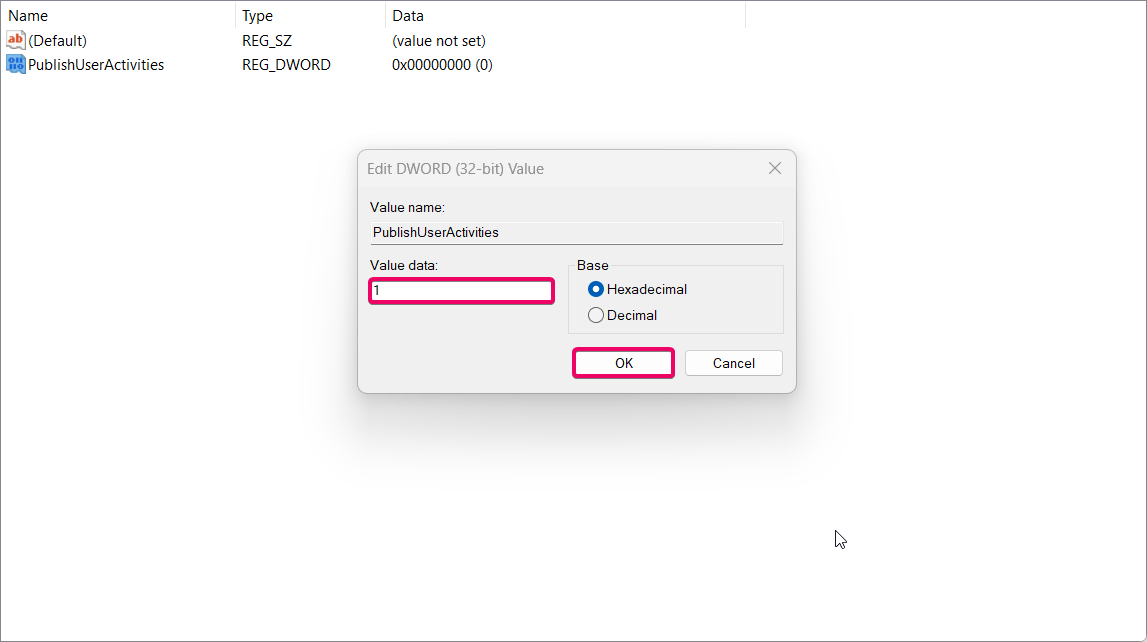
- Look for the entry named PublishUserActivities. If it doesn’t exist, create a new
DWORD (32-bit) Valuewith this name. - Set the value to:
1to enable sending activity history to Microsoft.0to disable it by not sending the activity history to microsoft.
- Restart your device to apply the changes.
This method gives you direct control over the settings and can be useful for IT administrators.
Method 4: Using PowerShell
For those who prefer command-line tools, PowerShell can also be used to control activity history settings:
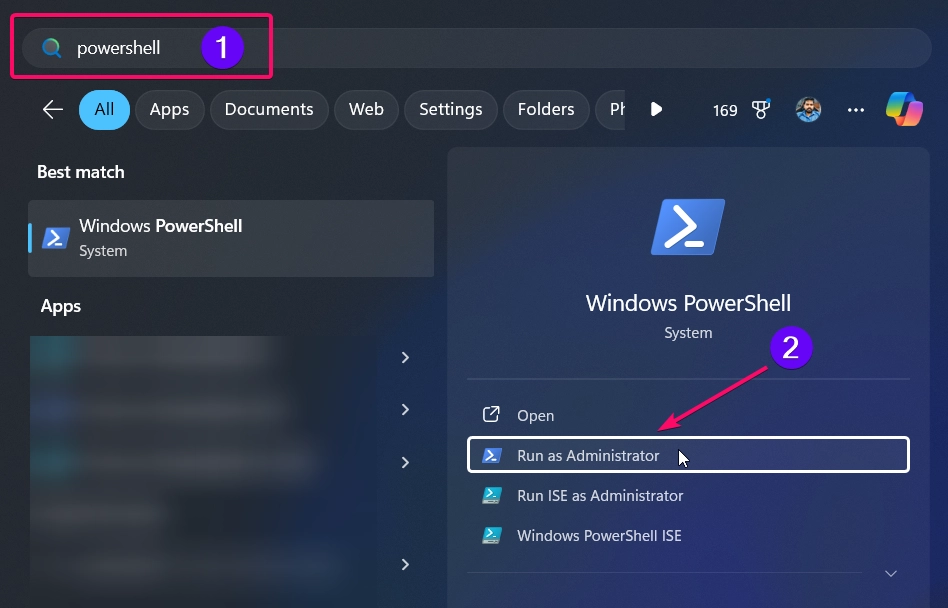
- Open PowerShell as Administrator by right-clicking the Start menu and selecting Windows Terminal (Admin).
- To enable sending activity history, enter the following command:
Set-ItemProperty -Path "HKLM:\SOFTWARE\Policies\Microsoft\Windows\System" -Name "PublishUserActivities" -Value 1

- To disable sending activity history, enter:
Set-ItemProperty -Path "HKLM:\SOFTWARE\Policies\Microsoft\Windows\System" -Name "PublishUserActivities" -Value 0

- Restart your system to apply the changes.
This method is quick and ideal for advanced users or IT professionals who need to manage multiple systems.
Recommended: Clear Activity History In Windows 11
Enabling the Send Activity History to Microsoft feature can improve your productivity by synchronizing tasks across devices. However, if you’re concerned about privacy, disabling this feature ensures that your activity history remains local to your device.
Conclusion
Controlling whether or not your Activity History is sent to Microsoft is an essential part of managing your Windows 11 privacy settings. The methods above offer flexibility, whether you prefer using the Settings app, Group Policy Editor, Registry Editor, or PowerShell. By following these steps, you can easily enable or disable this feature based on your preferences.
Commonly Asked Queries:
Will disabling this feature affect my device’s performance?
No, disabling this feature does not impact system performance. It only prevents your activity data from being sent to Microsoft.
How can I ensure my data remains private?
Disable the “Send Activity History to Microsoft” option and clear your activity history periodically from the Settings app.
Is this setting available in all editions of Windows 11?
The setting is available in all editions, but some advanced controls like Group Policy Editor are exclusive to Windows 11 Pro and higher.
Can I clear my activity history if I’ve already sent it to Microsoft?
Yes, you can clear your activity history from the Activity history section in the Settings app.
What happens if I disable “Send Activity History to Microsoft”?
Your activity history will no longer sync with your Microsoft account, and tasks cannot be resumed across multiple devices.
Read More:
- How to Add/Remove Common Program Groups from Start Menu in Windows 11?
- How to Add/Remove Android Apps from Your Phone to Start on Windows 11 PC?
- How to Turn On/Off Airplane Mode in Windows 11?
